Do you want to grow your social media following and make it easy for visitors to connect with you online? The Social Follow element in Thrive Architect allows you to quickly add stylish and customizable social media buttons to your website, helping you increase your online presence.
In this article, we’ll show you how you can add and customize a Social Follow element using Thrive Architect.
- Adding the Social Follow Element on Page
- Using the Main Options of the Social Follow Element
- Using the Other Settings of the Social Follow Element
Adding the Social Follow Element on Page
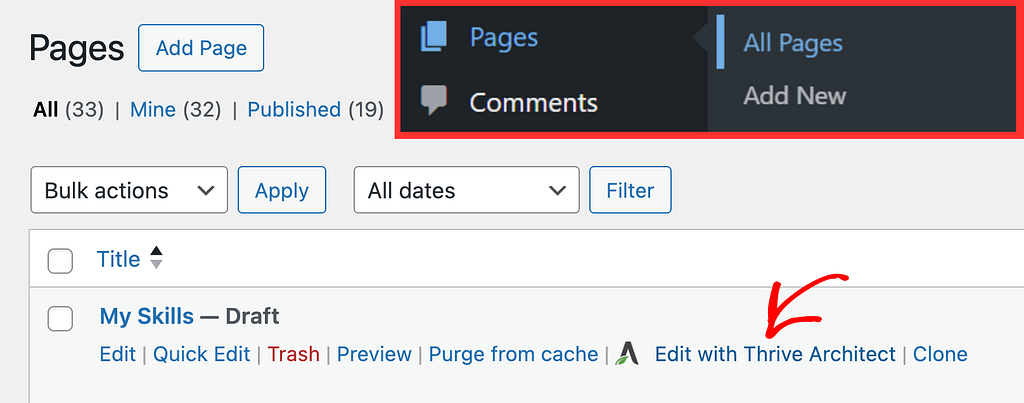
To add the Social Follow element to a page, begin by opening the page in the Thrive Architect editor. To do so, open your WordPress admin area, Pages >> All Pages, hover on the page you want to edit and click Edit with Thrive Architect.
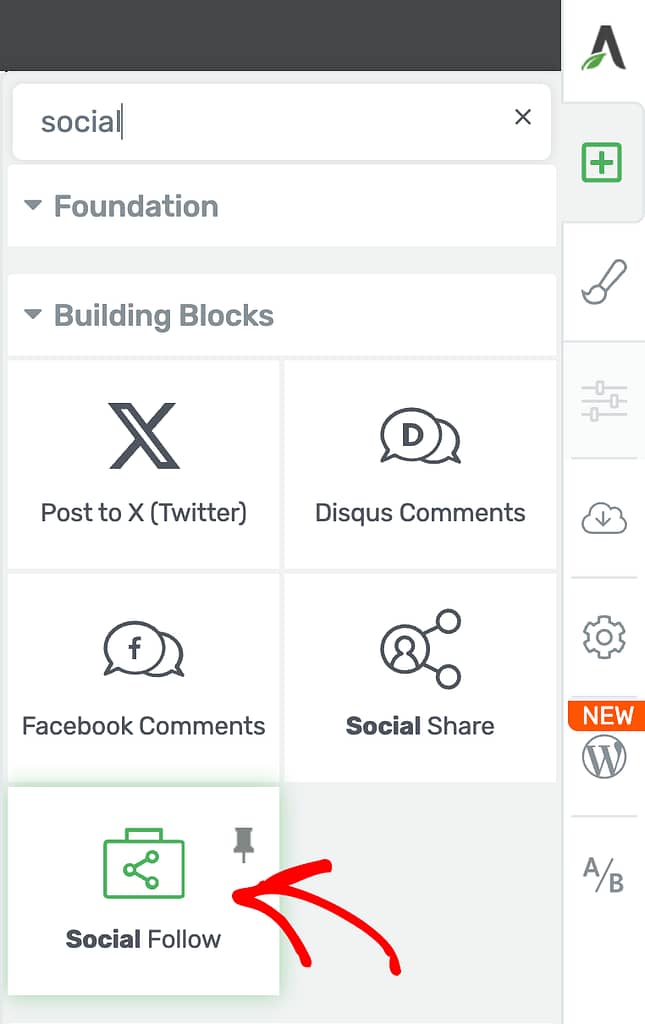
When the page is opened in the Thrive Architect editor, go to the right panel and click the plus (+) icon.
Clicking on the plus icon will open up the list of Thrive Architect elements to choose from. From this list, drag and drop the Social Follow element on the page.
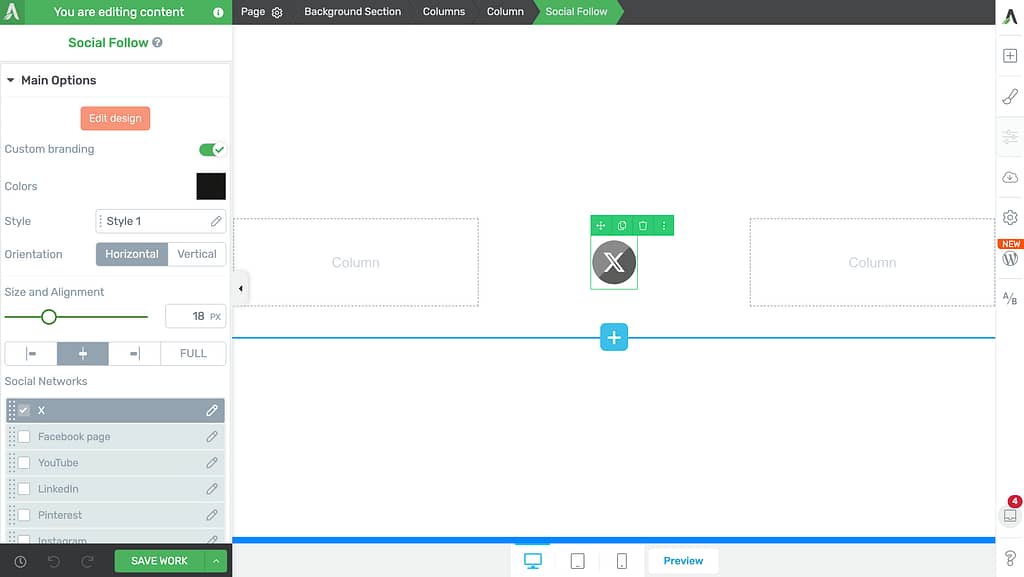
When you drag and drop the element on the page, you’ll see it added in the place you placed it on, and its settings open in the left column.
Using the Main Options of the Social Follow Element
The Main Options of the Social Follow element allow you to customize the main look and feel of it. They enable you to do the following.
- Editing the Design
- Enabling Custom Branding
- Setting a Style
- Selecting the Orientation
- Managing the Size and Alignment
- Working with Social Networks in the Social Follow Element
Editing the Design
The Edit design option for the Social Follow element lets you edit the social follow buttons inside the element. To edit the design, click on the Edit Design button.
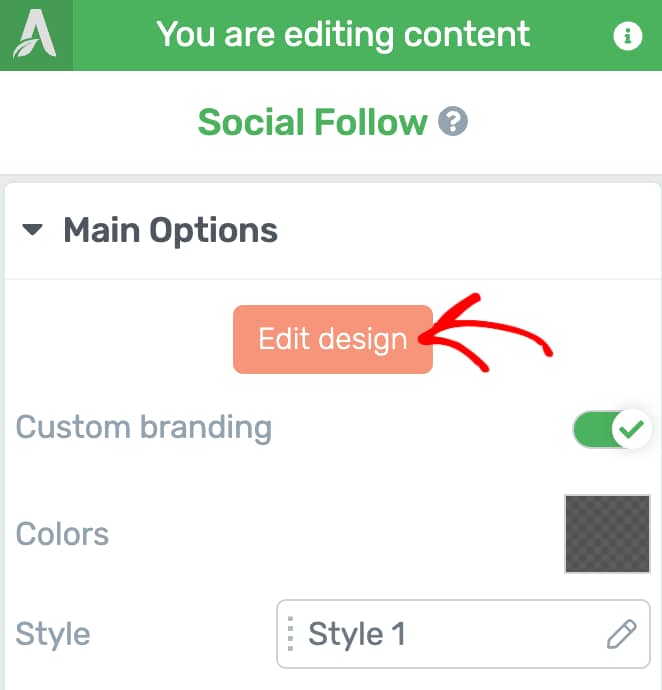
When you click the Edit Design button, the Social Follow element will be opened in the Edit Mode, where you can click on each element and edit it using its settings in the left column.

Apart from the Main Options and other settings that you can manage for the Social Follow Buttons, the Edit Mode also gives you the following settings.
- Group Styling
- Managing Social Follow Button States
Group Styling
The Social Follow element Edit Mode enables group styling so you can style all the buttons uniformly.
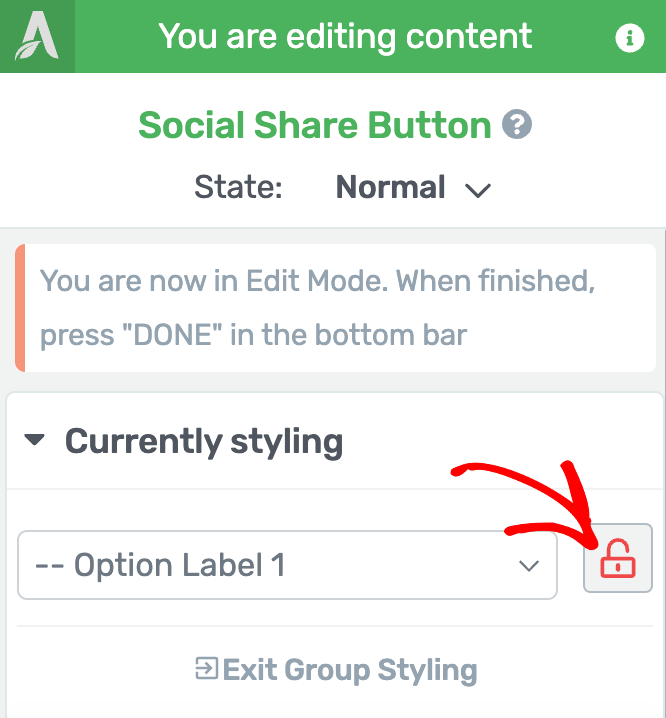
This can be seen in the left column within the Currently styling section.
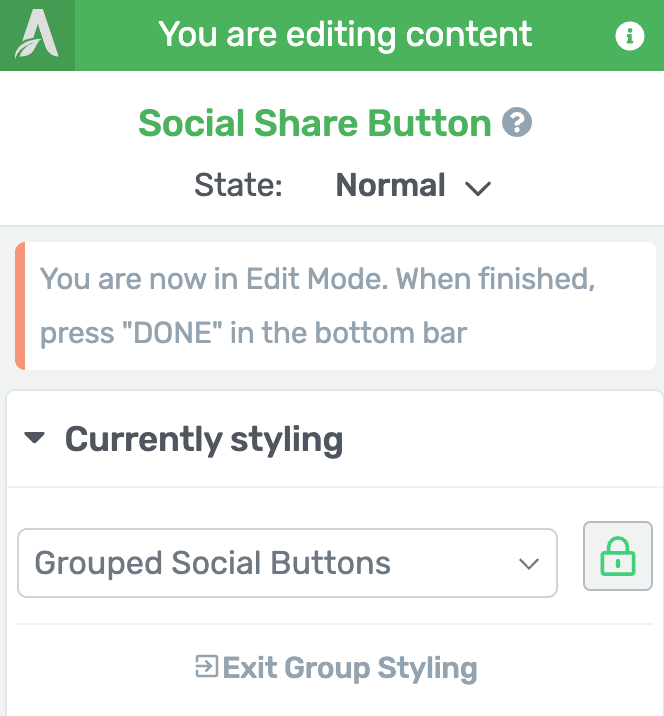
The Currently styling section shows a dropdown where you can select the element group you want to edit. In this case, it’ll only be the Grouped Social Buttons which means anything you change in the Main Options or the other settings will be applied to all the social buttons in the element.
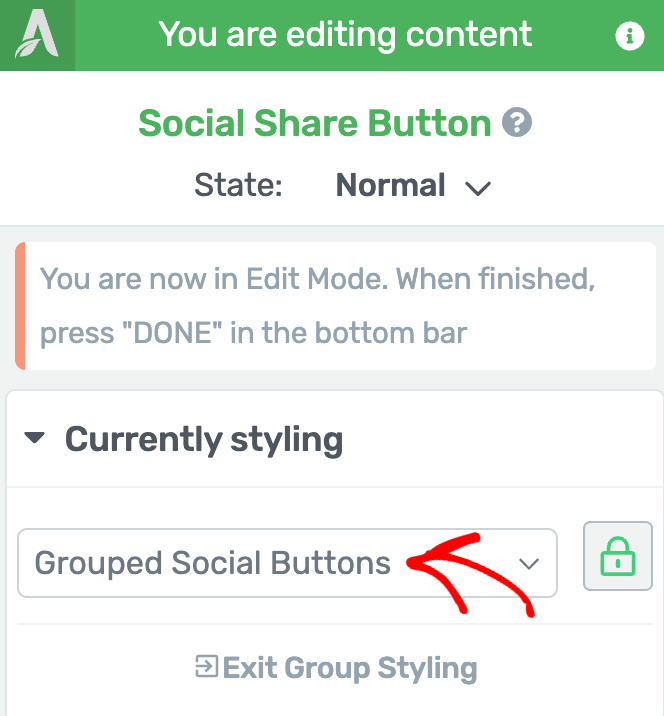
If you want to edit individual buttons and not in a group, click on the lock icon beside the dropdown.
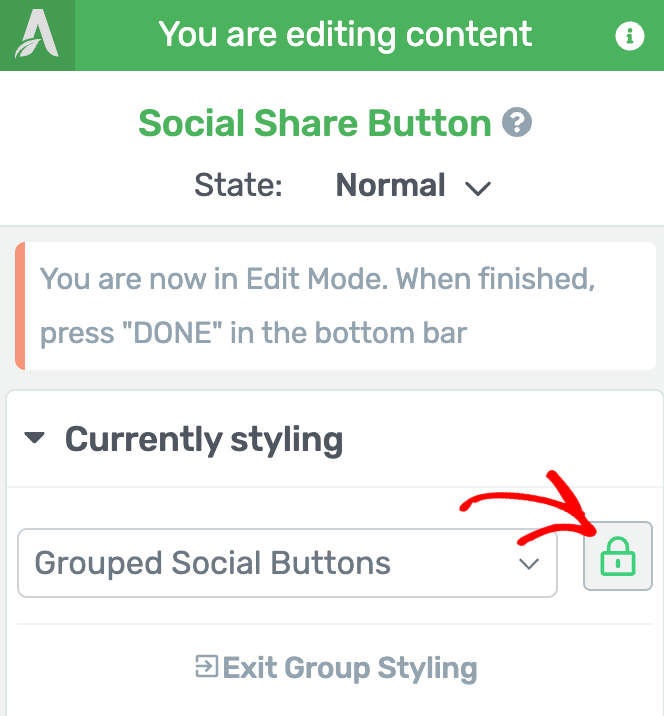
When you click the lock icon, it will unlink the currently selected element from the group so you can edit an individual element within the Social Follow element.
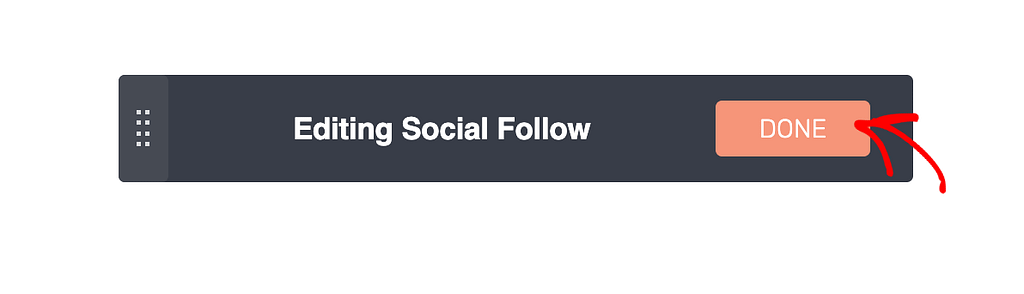
After you finish editing the social follow buttons, click the Done button to save and exit the Edit Mode.
Managing Social Follow Button States
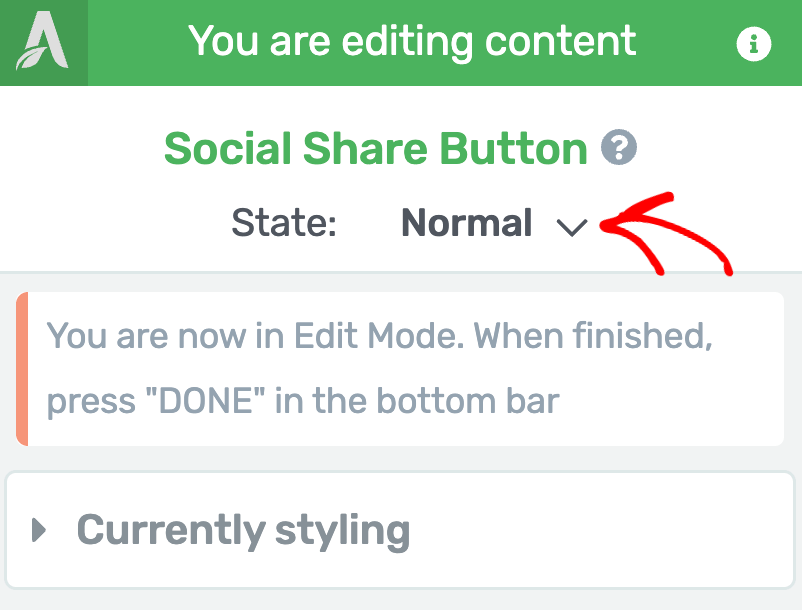
Like many other Thrive Architect elements, the Social Follow element comes with two states – Normal, for when it is seen on the page, and Hover, for when a user hovers over it.
You can customize to change the look and feel of the Social Follow buttons in both these states.
To change the state, in the Edit Mode, click on the Social Follow buttons to open its editing options in the left column.
In the left column, change the State of the Social Follow button by clicking the down arrow besides Normal.
When you click to change the state, you’ll see two states that you can select from and edit the social follow buttons accordingly.
To edit the styling that’ll show up when the user hovers on it, select the Hover state here.
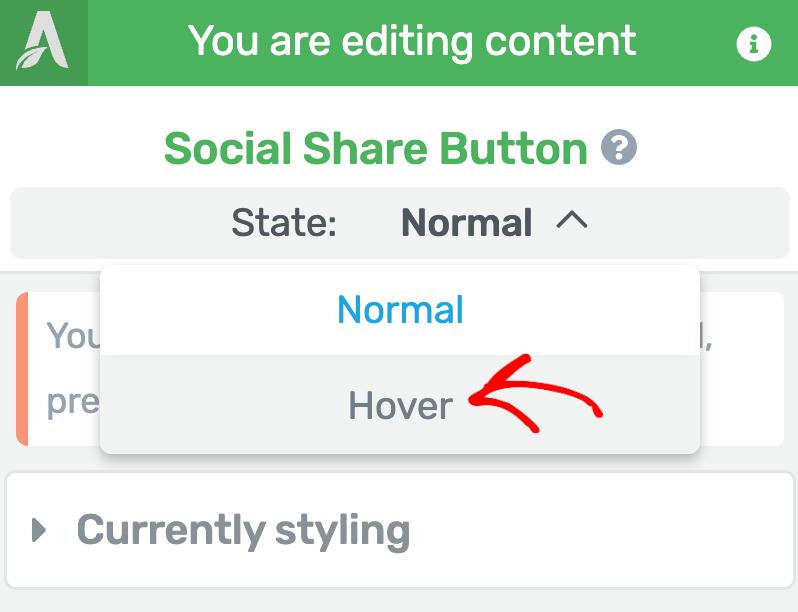
When you select the Hover state of the social follow button, you’ll see the available settings for this state in the left column.

To understand hover state effects in Thrive Architect, refer to our document here.
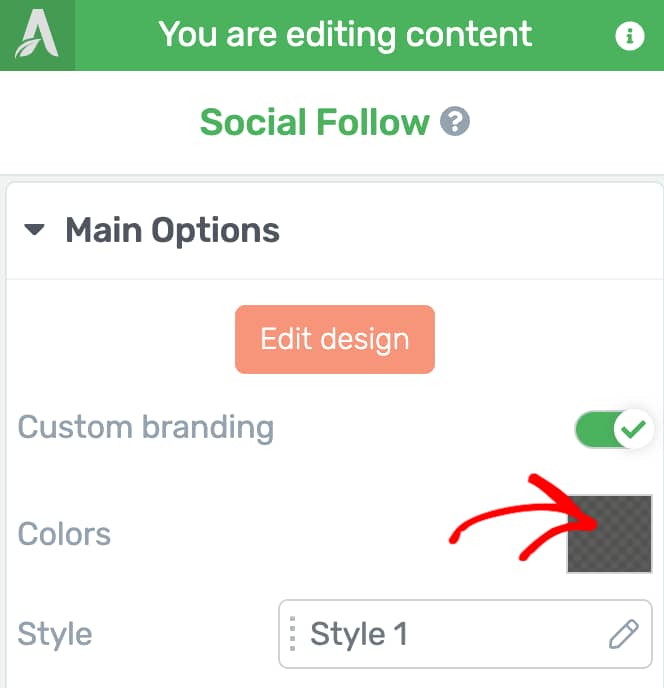
Enabling Custom Branding
The custom branding setting for the social follow element is enabled by default. This will help you select colors you want to apply to the social buttons added on the page.
When enabled, select the color using the color block below it.
Disabling custom branding will remove the color selection block from below and the social follow buttons will inherit the colors from the social networks they represent.
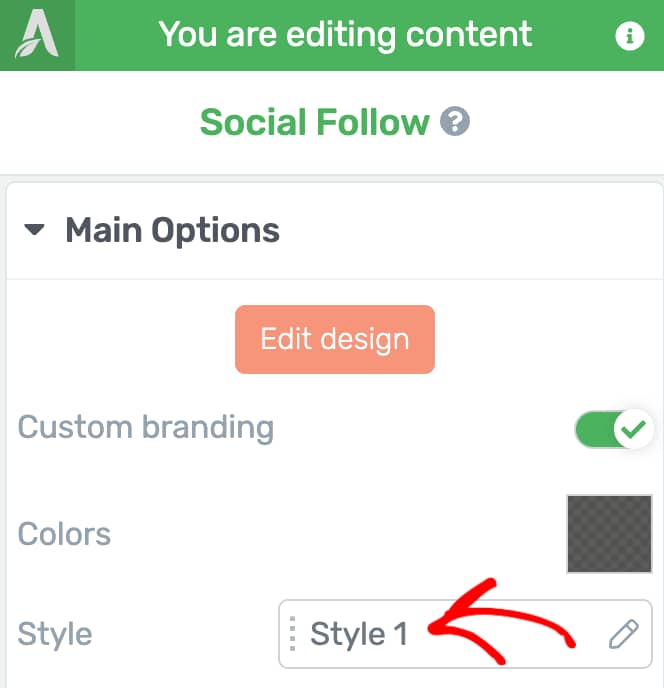
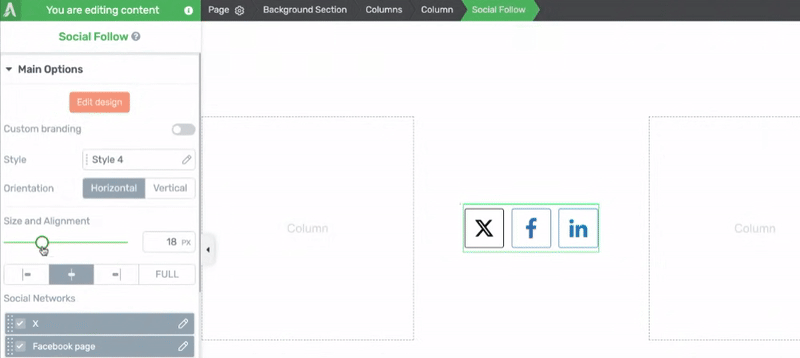
Setting a Style
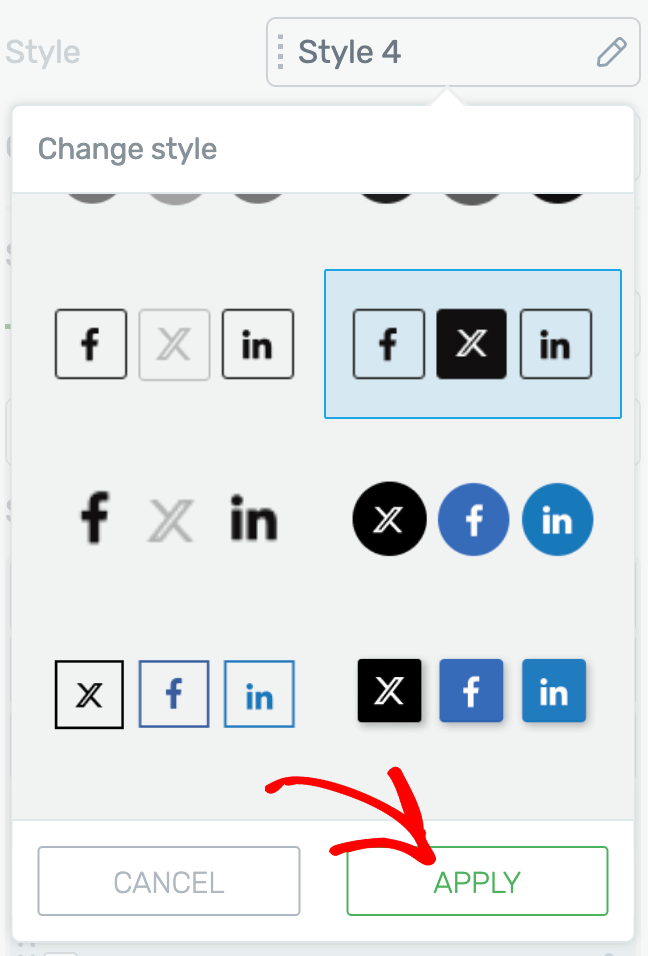
Thrive Architect lets you select a style you want to apply to the Social Follow element. To select a style, click on the dropdown beside the Style setting.
When you click on the dropdown, you’ll see a number of styles that you can choose from. Here, select the style you want to use and click the Apply button.
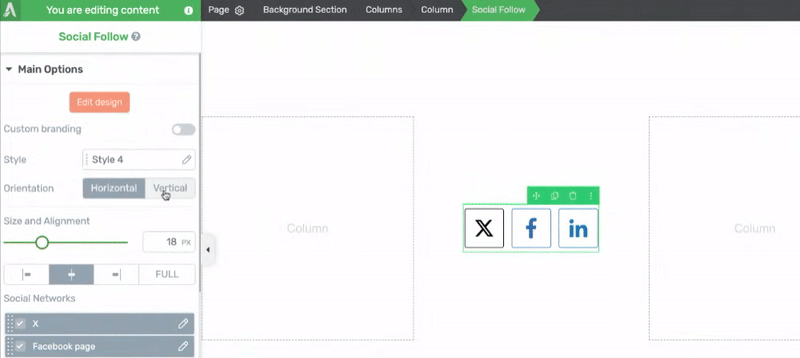
Selecting the Orientation
The orientation setting of the social follow element lets you decide whether you want this element to be displayed horizontally or vertically.
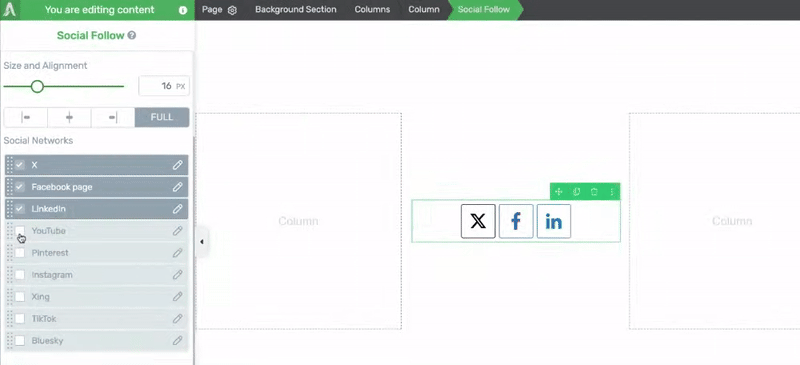
Managing the Size and Alignment
The Size and Alignment setting lets you manage the size and the alignment of the Social Follow element within the container element it is placed in.
To manage the Social Follow element’s size, use the slider or the field beside it, and use the alignment options to set the alignment to left, right, center, or full.
Working with Social Networks in the Social Follow Element
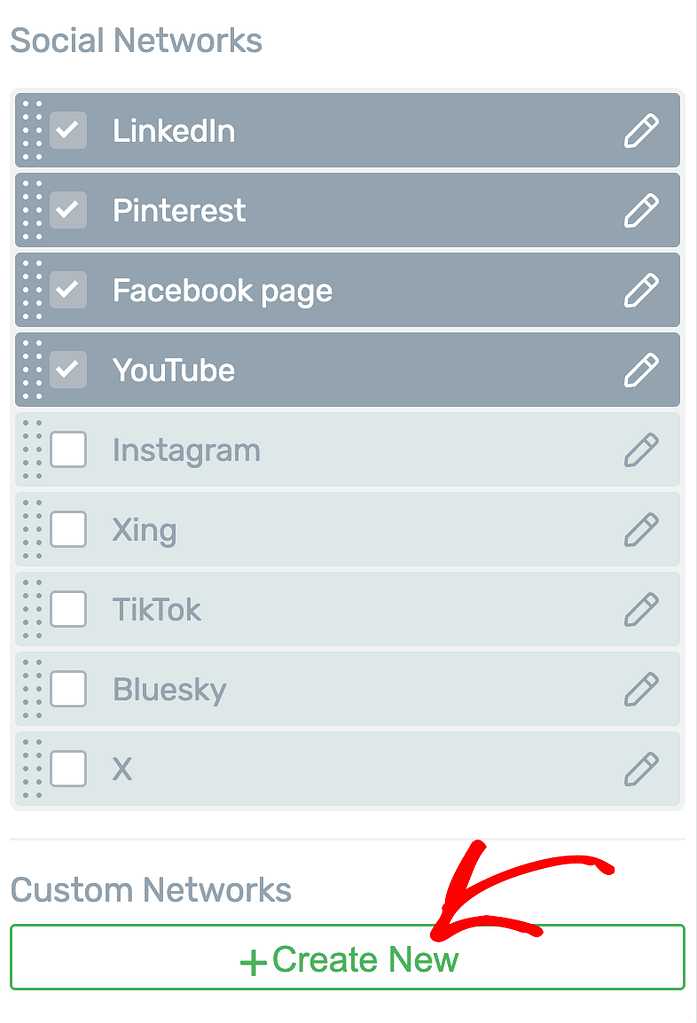
When you add a Social Follow element on the page, you’ll see a dedicated section where you can manage the Social Networks you want to add or skip in it.
The Social Network section lets you.
- Add/Remove Social Networks
- Reorder Social Networks
- Edit Social Networks
- Create a Custom Social Network
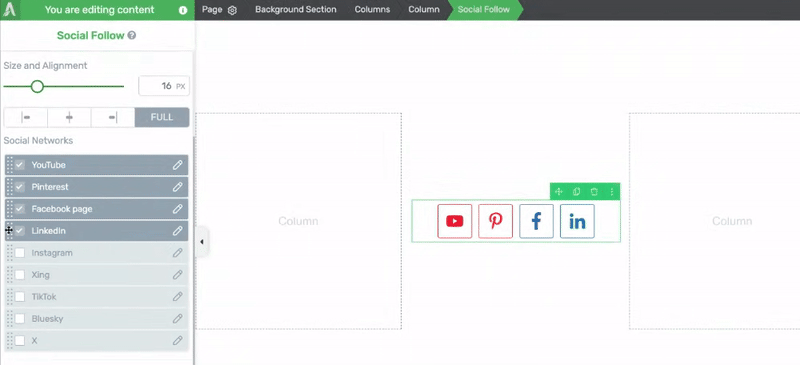
Add/Remove Social Networks
The Social Networks setting has a list of social networks that you can choose to add or exempt from the social follow element added on the page.
This can easily be done by selecting or deselecting the social networks.
Reorder Social Networks
The Social Follow element allows you to reorder the social networks displayed in it. To do so, click and hold on the dots and drag and drop the social network tab where you want to see it.
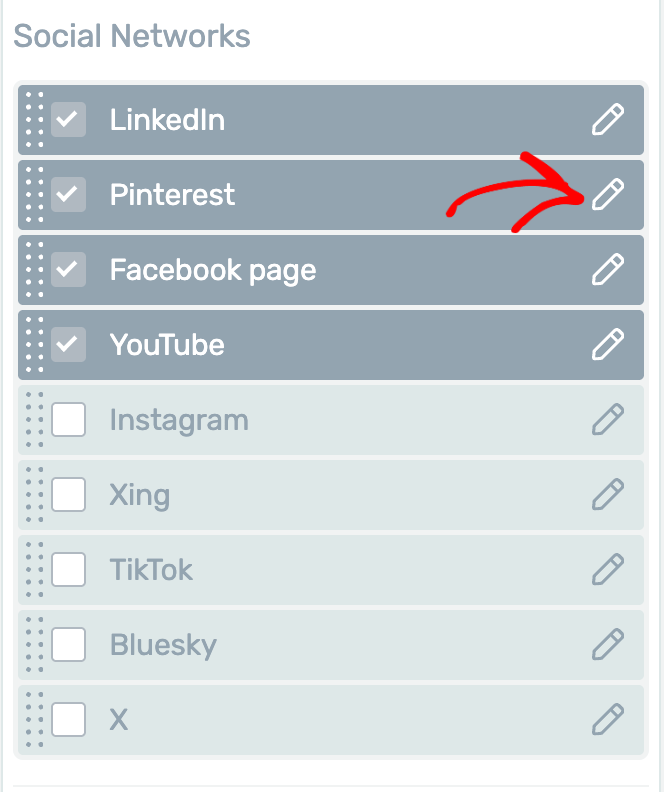
Edit Social Networks
The Social Follow element also lets you edit the Social Networks you’ve added to them. To do so, click on the pen icon on the tab.
When you click to edit the social network, you’ll see a dropbox where you can select the icon you want to use, and the social link you want to add.
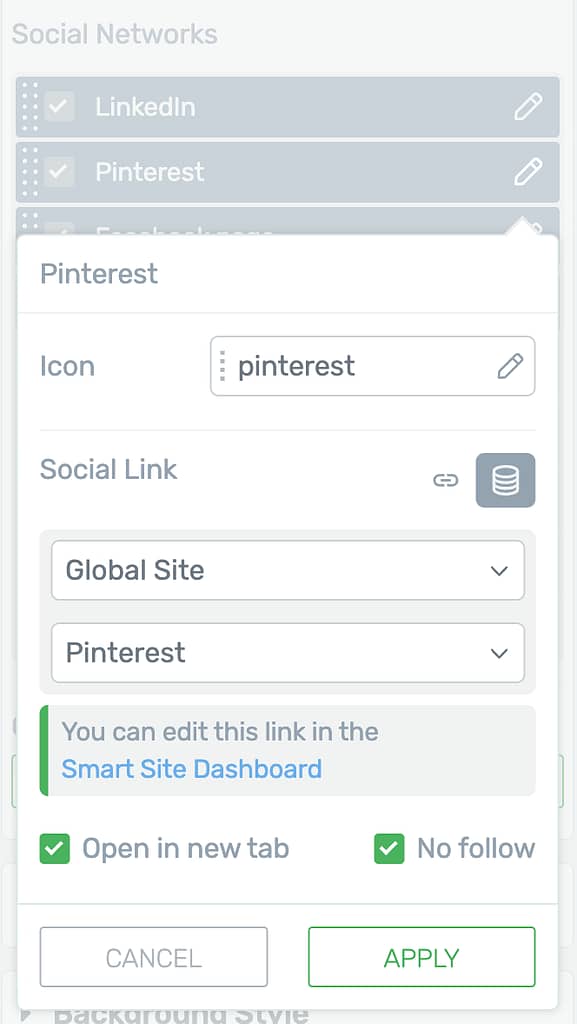
For existing Social Networks the social link is set to dynamic and the source is selected as Global Site. The Global site area in Thrive Themes lets you add your company information and all the social network links you want to use later. You can learn more about this in our article here.
While adding a Social Link, if you choose “Static link,” you’ll need to type in the social media link yourself in the URL box. In this window, you can also change the “Social Name” and pick if the link opens in a new tab or is marked as no-follow.
Similarly, if you choose the second option, “Dynamic link,” you can connect the icon to the social link you already set up in the “Smart Site Dashboard.” You can also open the Dashboard right from the pop-up.
While using the Dynamic social link you can select the source as Author. This is useful if your site has several authors. When a different author publishes a post, the social icons will show the links from that author’s profile.
After you finish editing the social network, click the Apply button.
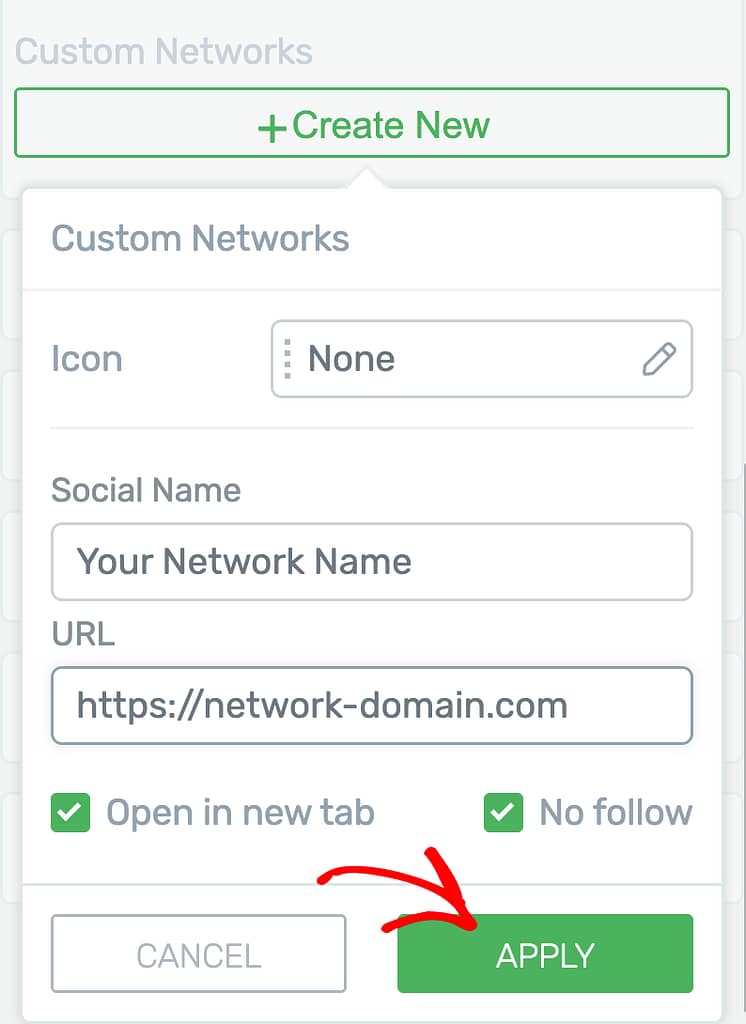
Create a Custom Social Network
While the Social Follow element in Thrive Architect lets you fetch social networks like X, Facebook, LinkedIn, Pinterest, YouTube, Instagram, Xing, TikTok, and Bluesky, you can choose to add a custom social network too.
To add a custom social network, click the Create New button.
After clicking to create new, you’ll see a dropbox where you select the icon you want to apply to this new network, enter the name and URL, and click the Apply button.
Using the Other Settings of the Social Follow Element
Just like the other Thrive Architect elements, the Social Follow element comes with additional options where you can manage the layout and positioning, borders and corners, background styling, etc.
To learn more about these options, read the documents listed below.
- Using Layout and Position Options in Thrive Architect
- Using the Background Style Option in Thrive Architect
- Using Borders and Corners Settings in Thrive Architect
- Using Scroll Behavior in Thrive Architect
- Using the Responsive Option in Thrive Architect
We’ve just seen how you can add and customize a Social Follow element on a page using Thrive Architect. Want to take a visual tour of the process? You can watch the video below.
Next, do you want users to share the content from your website? Read our document that’ll help you use the Social Share element in Thrive Architect.