The Smart Landing Pages in Thrive Architect were created to give you an even easier way of customizing landing page templates.
The difference between the normal (now called Legacy) Landing Page templates and the Smart Landing Page templates is that the latter ones have smart features, such as “Smart Color Management”, “Global Styling” and “Global Fields”.
Because of all the smart features, that are included in the Smart Landing Pages, not only can you customize the landing page templates easier, but faster as well.
Here is how you can create Smart Landing Pages:
1. Apply the Smart Landing Page template
The first thing you will have to do is to add a Smart Landing Page template to your page when you are editing it with Thrive Architect.
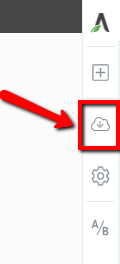
In order to do that, click on the “Change Template” option (second option) from the right sidebar:
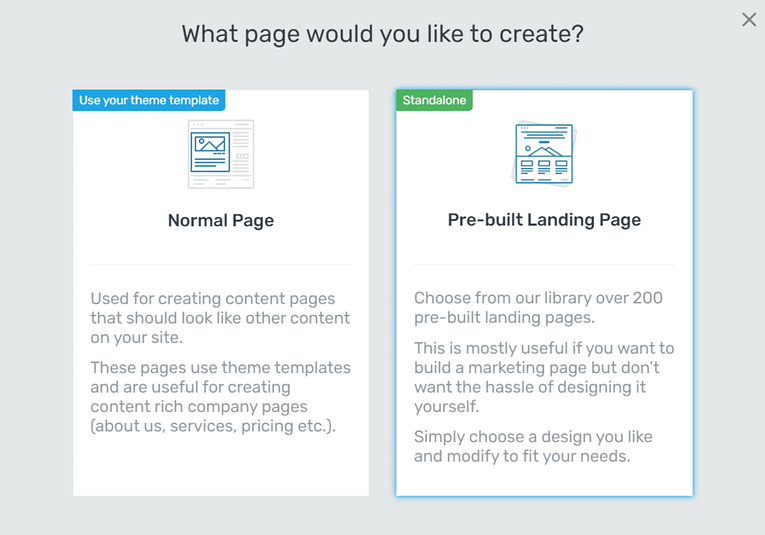
In the pop-up that opens, select “Pre-built Landing Page”:
This will open the pop-up window with a library of templates that you can choose from. You will see the “Smart Landing Pages” section in the “Default Templates” tab:
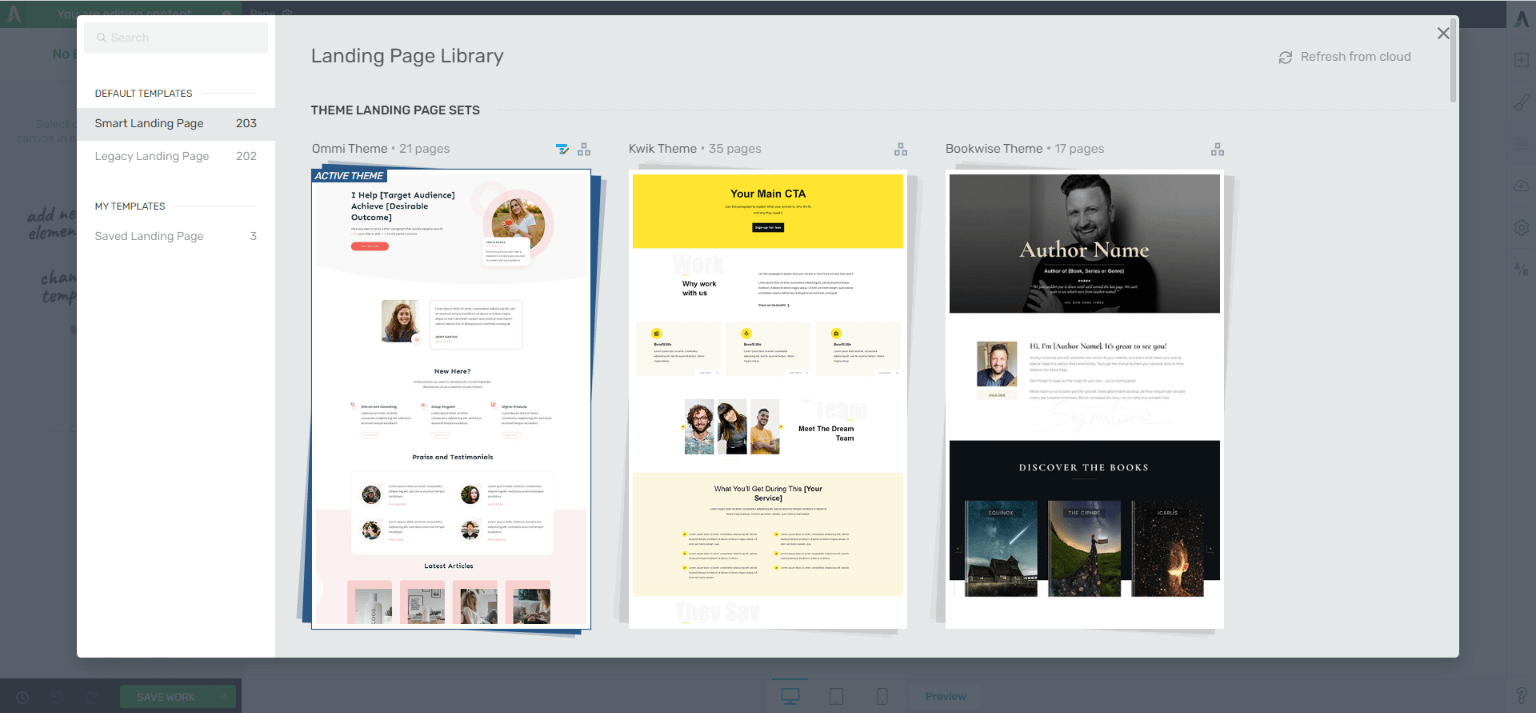
You can click on any of the Smart Landing Page sets to expand them and see the templates included in the respective sets.
Once you have found the Smart Landing Page template that you want to use on your page, click on it to select it:
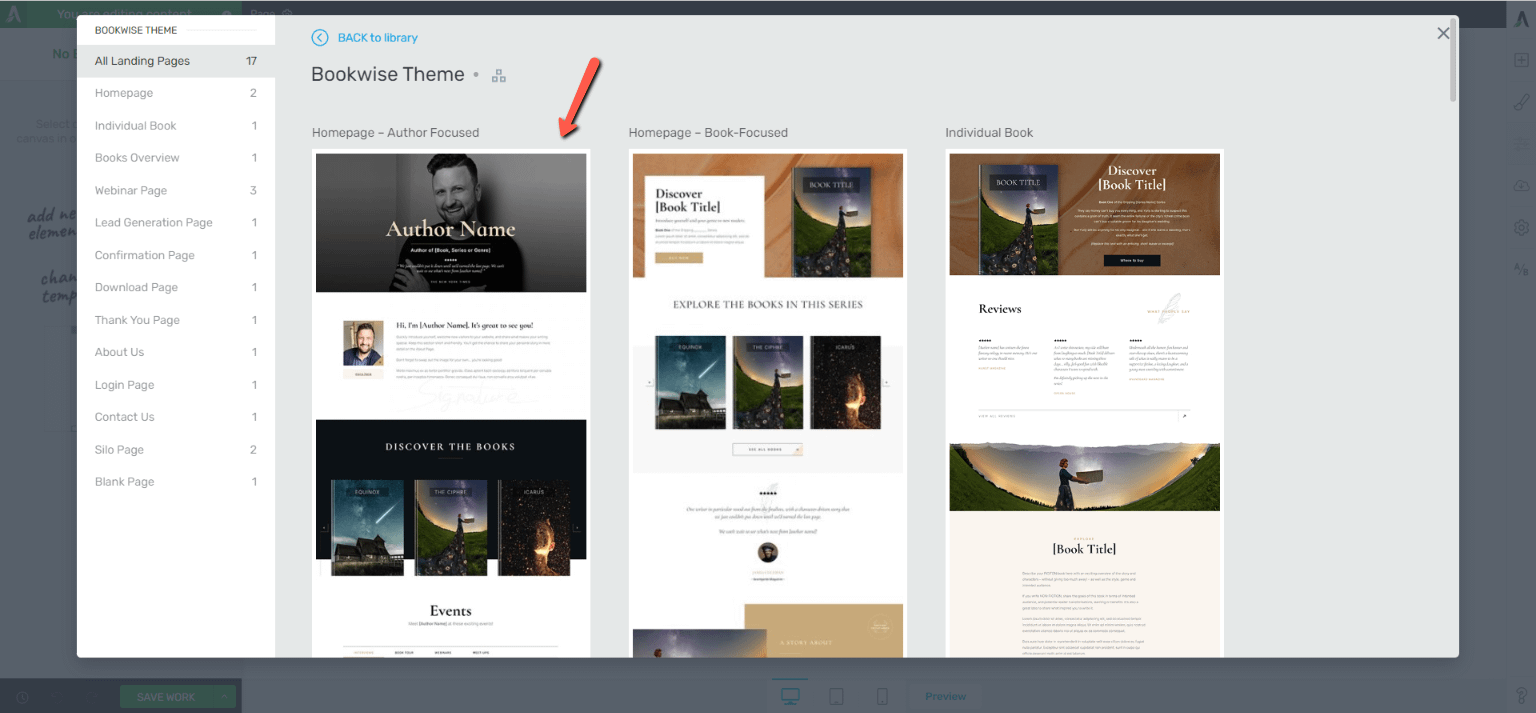
The template will be applied to your page.
Note: If you want to change the template you have chosen and select another one instead, you can click on the “Change Template” option again from the right sidebar. Then follow the same steps as described above for selecting a Smart Landing Page template.
2. Use the smart features
After the Smart Landing Page template has been applied to your page, you can start customizing it using the smart features.
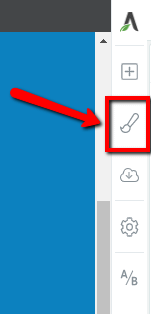
You will see that a new option, the “Central Style Panel”, has appeared in the right sidebar. This option is only available for Smart Landing Pages and it contains most of the smart features that you can use for customizing your template.
Click on the “Central Style Panel” (brush icon) from the right sidebar to access it:
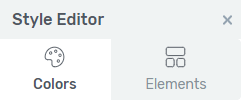
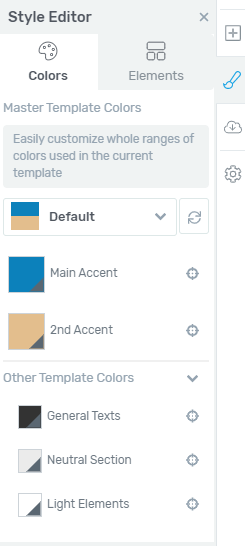
Once you have accessed the “Central Style Panel”, you will see that this opens the Style Editor with two sections/tabs: the “Colors” and the “Elements”:
Smart Color Management
The first section in the “Central Style Panel” is the “Colors” section. This contains the options related to the Smart Color Management of your page. Here, you have the possibility to customize whole ranges of colors used in the template quickly and easily.
The “Colors” section is divided into two sections: the “Master Template Colors” and the “Other Template Colors”:
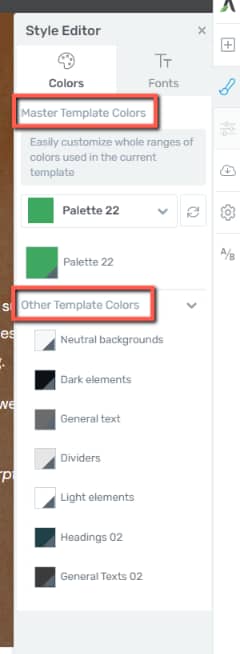
Master Template Colors:
The “Master Template Colors” are the main colors that are used in the Smart Landing Page template. You can see where each of these colors is located on the template if you click on the “Locate” option (compass icon) next to the colors:
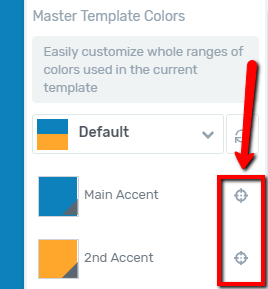
The more times you click on the “Locate” option, the more places will be indicated to you, where the respective color is used on the page.
Once you have located and seen every part where the “Master Template Colors” are used on the page, you can customize them. Simply click on the box with the color you want to customize:
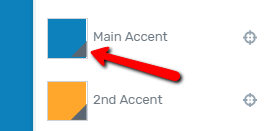
A window will open with the color picker right next to the color:
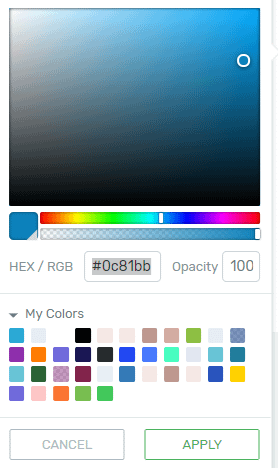
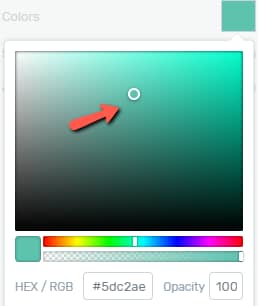
With the help of this color picker, you can change the color as well as its opacity. There are three ways in which you can change the color:
-
You can click on the preferred color inside the color picker,
-
drag the slider with the color palette which is under the color picker,
-
or paste in the color’s code in the “HEX/RGB” field.
If you want to change the opacity of a color, then either drag the slider for opacity (under the slider with the color palette) or type in the percentage number you want for the opacity in the “Opacity” field.
The moment you start using the color picker, you will also see the changes everywhere on the page, where that specific “Master Template Color” is being used.
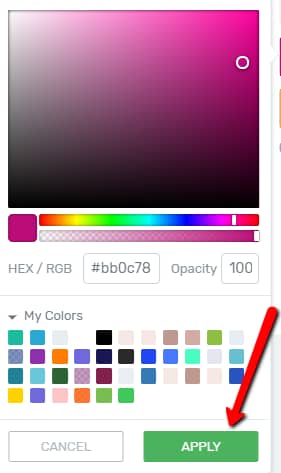
After you have found the color/opacity you want to use simply click on the “Apply” button from the window with the color picker and the new color/opacity will be applied to every element on the page that has the “Master Template Color”:
Linked/Related Colors
Whenever you change a “Master Template Color”, every other color that is linked/related to it (darker or lighter shades of the same “Main Accent” or “2nd Accent” color, different variations of it on the page), will also change accordingly.
This is part of the Smart Color Management of these kinds of landing pages.
Note: If there is an element that has a “Master Template Color” (or related colors to it) and you want to change the color only for that element, so you want to customize it separately, then, you will have to unlink the element from the “Template Color” first.
You can do this by simply clicking on the respective element and using the color options it has in the left sidebar. Usually, the color options for elements are either in the “Main Options” or set as a “Background Style”.
You will notice that the color box from the left sidebar has two different options you can choose from: “Edit template color” and “Unlink from template color”:
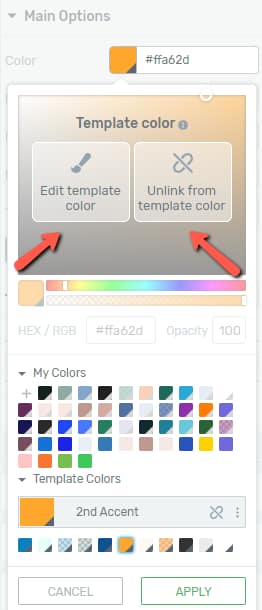
The “Edit template color” option will take you back to the “Style Editor” to further edit the color, as described above.
However, if you want to change the color of just a single element, you’ll have to click on the second option, “Unlink from template color” and then use the color picker to select the new color. Once selected, click on “Apply” to save the change:
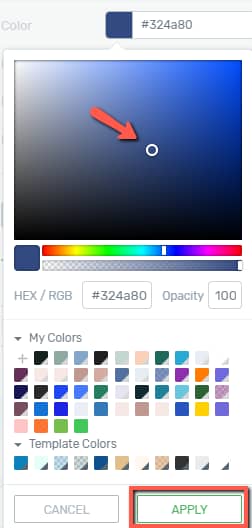
After doing this, the element will be unlinked from the “Template Colors” and you can modify its color without affecting the other elements of the same type that have the “Template Color” that this element was also linked to.
Color Palettes
In case you want to change the Master Template Colors, but you are not sure which color combinations would be the most suitable, what colors would go together, you can use the “Color Palettes” option to choose from a selection of pre-made color palettes.
In order to use these “Color Palettes” click on the first section from the “Master Template Colors”:
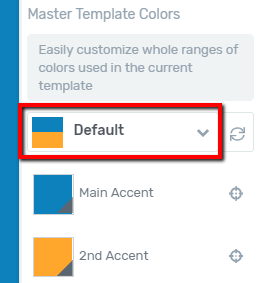
This will open a drop-down with the “Color Palettes” you can choose from:
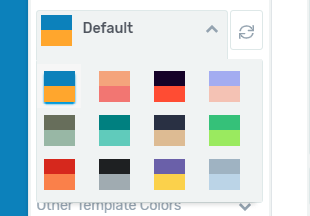
To select one of these, simply click on the box with the combination you like. You will instantly see the color changes on the page.
You can try each combination if you want, to see which one you like best. Once you have found the combination you find most suitable, just leave it selected and continue with customizing the Smart Landing Page.
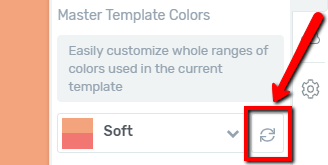
In case you change your mind and you want to reset the “Color Palette” to the original one, you can use the “Reset Active Palette” option next to the “Color Palette” drop-down:
Other Template Colors
Here you can manage the other colors, besides the main ones, that are used in the Smart Landing Page template:
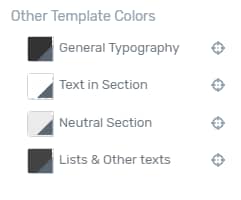
You can manage these colors the same way as you managed the “Master Template Colors”:
-
If you want to see where the colors are on the page, just click on the “Locate” option (compass icon) as many times as needed to see every place where the specific color is used.
-
In order to change the color or its opacity, click on the box with the color you want to customize. This will open the color picker and you can use it to customize the color, just as described above.
After you apply changes to one of the “Other Template Colors”, the changes will be applied on every element that has the respective color from the Smart Landing Page.
Template Colors applied to other elements
If you use a Smart Landing Page template, the colors present in the template will also be available for other elements you add to the page. You can find these among the Color Options, in the left sidebar, when you open the color picker for the newly added element:
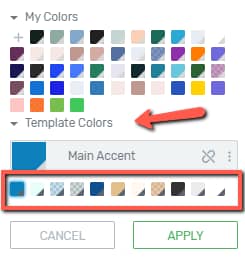
Just as in the case of editing the color of an already existing element, the color box popup will have two options you can choose from: “Edit template color” and “Unlink from template color”:
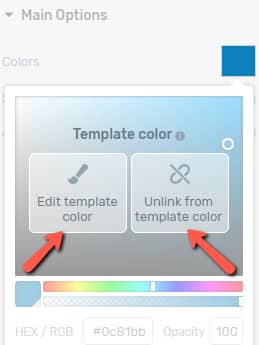
Selecting the first option, “Edit template color”, will take you back to the “Style Editor” panel, allowing you to further edit the color of the template:
And if you want to use the second option, “Unlink from template color”, you can use the color picker to set the color for your newly added element:
Once done click on “Apply” and save your changes:

Note: Please keep in mind that there are certain elements such as the “Background Section” and “Content Box” that will not have the “Template Colors” in the “Main Options” from the left sidebar.
For these elements, you will have to open the “Background Style” options, in order to be able to find the “Template Colors” and apply them. In the “Background Style” options, you will see a color layer:
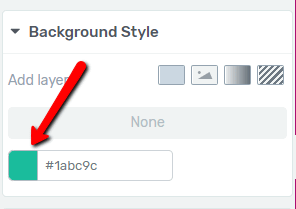
If you click on the box with the color from here, the color picker will open containing the “Template Colors” as well.
Thus, if you want to apply a “Template Color” to the newly added elements on your Smart Landing Page, and you cannot find the “Template Colors” in the “Main Options”, then look for them in the “Background Style” options.
All of the Smart Color Settings work, not only for the elements that are already on the page but also, for the newly added elements as well. You can use the “Template Colors” to attach/link the new elements to the colors from the “Central Style Panel”.
For example, when you add a new element to the page, you can apply one of the “Template Colors” to it from the color picker, as shown in the image above.
This way, the element will be linked to the “Template Colors”. So, whenever you change the specific “Template Color” in the “Central Style Panel”, the color of the new element will change as well.
Global Styling
The second section in the “Central Style Panel” is the “Elements” section. This contains the elements of the Smart Landing Page template that can be styled together.
The elements available here can vary from template to template. This is because the types of elements that will be available here depend on how the Smart Landing Page template was built.
In the case of this example, the “Buttons” and the “Background Sections” are available:
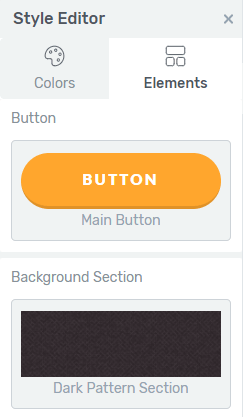
There are two ways in which you can use this section:
-
You can either locate the elements and edit/style every element of the same type from the page, at the same time.
-
Or you can add new elements that will be linked here.
Style already existing elements
If you click on either one of the elements, the respective elements will be located and you can start customizing it, using the options from the left sidebar.
Note: There are cases when the element is incorporated in another element, so the options of the other element are opened first. For instance, if you clicked on the “Button” element that is placed inside a “Lead Generation” element, then, the options of the “Lead Generation” element will be opened first in the left sidebar.
In this case, you will have to use the “Edit Form Elements” option first, to get to the options of the “Button” element.
Once you change something on an element, the changes will be applied to every element of the same type that can be found on the page. This is because Global Styling is applied to the elements that you can find in the “Central Style Panel”.
For example, if you open the “Button” element from the “Central Style Panel” and change the color of the first button (that opened) on the Smart Landing Page template, then, the color of the other buttons that can be found on the page will change accordingly too.
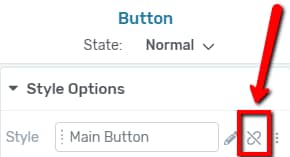
In case you want to style an element separately, without affecting the other elements that have the same style; you will have to unlink the respective element from the “Global Style” first. You can do this, using the unlink option, from the “Style Options” section, in the left sidebar:
Add new elements using the Central Style Panel
With the help of the “Elements” section from the “Central Style Panel” you can also add new elements to the page. Since these elements will be the same type as the ones in the “Central Style Panel”, they will also have “Group Styling” added to them, so they will be connected with the rest of the elements from here.
In order to add an element from the “Central Style Panel” you first have to open the “Elements” section to see what kind of elements you can add from here:

Once you have selected the element you want to add, you can drag & drop it to the desired location on the page.
The element that you add this way will have the same style as the other elements of this type that are already on the page. Since these are connected by “Group Styling”, you will be able to style them at the same time, just as explained above.
Global Fields
Another smart feature that is available for the Smart Landing Page templates is the automatic incorporation of “Global Fields” into the page.
What does this mean? If you have previously filled in/set the default “Global Fields” for your website, then, the moment you load a Smart Landing Page template that contains “Global Fields”, the information you have set will be displayed automatically on your page.
In case you have not completed the “Global Fields” that are displayed on the template yet, then you will see a notification message, similar to this:

This message will contain a link that takes you to the “Global Fields” dashboard from where you can easily set the information needed. If you require details on how to set “Global Fields”, then please check out this article.
Note: In case you have set your Global Fields to be displayed in other languages, then that is how they will be displayed on the Smart Landing Page template as well.
Logo
Last but not least, if you have uploaded your logo to your website using the “Logo” element, then, if you use a Smart Landing Page template with a logo; the logo you have set will automatically be shown on your Smart Landing Page as well.
You will not have to upload it again. This is also part of the smart features that are built into the Smart Landing Pages.
With the help of all these smart features, you can very quickly and easily customize a Smart Landing Page template to fit your needs. This way, you can create pages in a lot less time than before.
Hopefully, this article was useful for you. If so, please give it a smile below 🙂