1. Home
  2. Knowledge Base
  3. Thrive Architect
  4. Thrive Architect Elements
  5. Using the Lead Generation Element of Thrive Architect

Using the Lead Generation Element of Thrive Architect

The main purpose of the “Lead Generation” element is to provide a means through which website visitors can sign up to your newsletter/webinar, or sign up to become users on your WordPress website.

In order to achieve this, you will need to add a “Lead Generation” element on your website and connect it to one of the mailing/marketing services that you are using, through an API connection.

Important!

Please remember that for the “Lead Generation” element to properly work, it is crucial that you have successfully set up an API/HTML connection.

Add the Element to the Post/Page

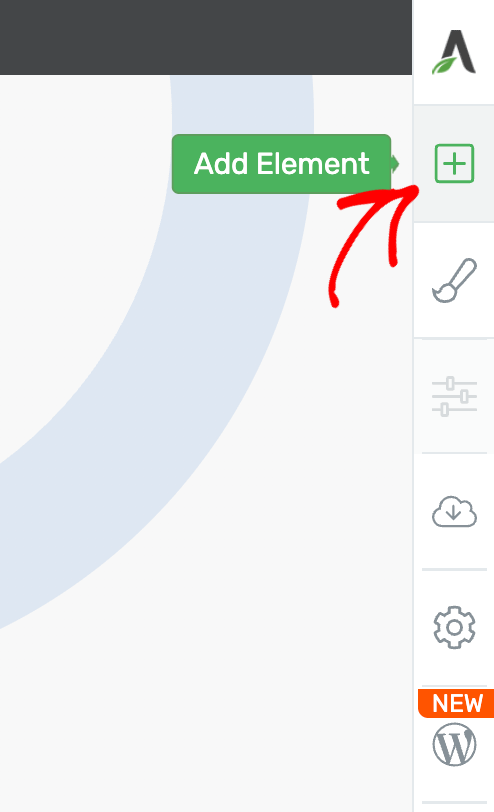
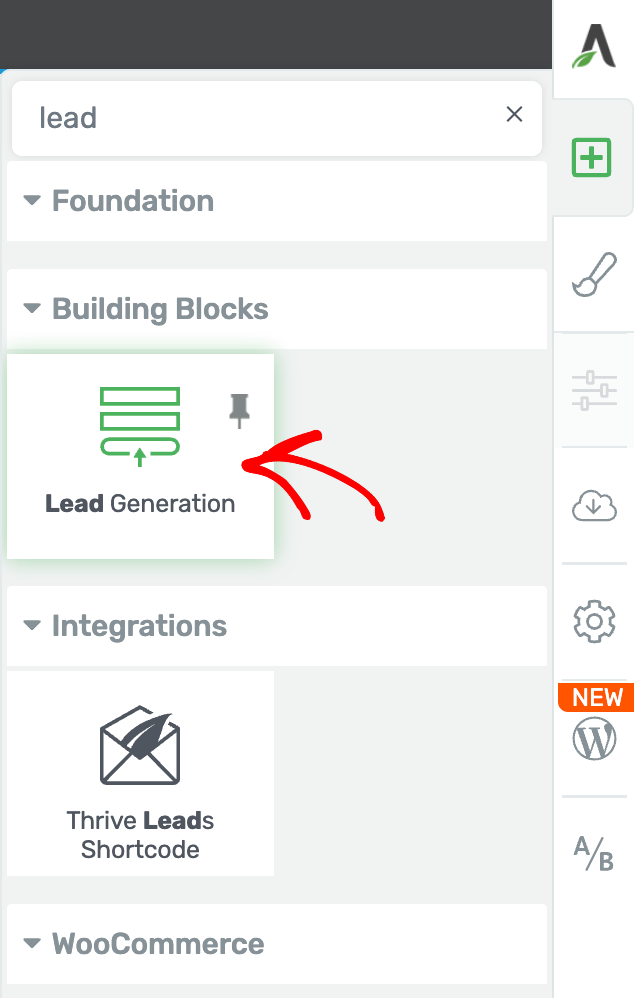
First, you have to click on the plus sign from the right sidebar to open the list of elements. Look for the “Lead Generation” element. When you find it, drag & drop it to the desired place on your page:

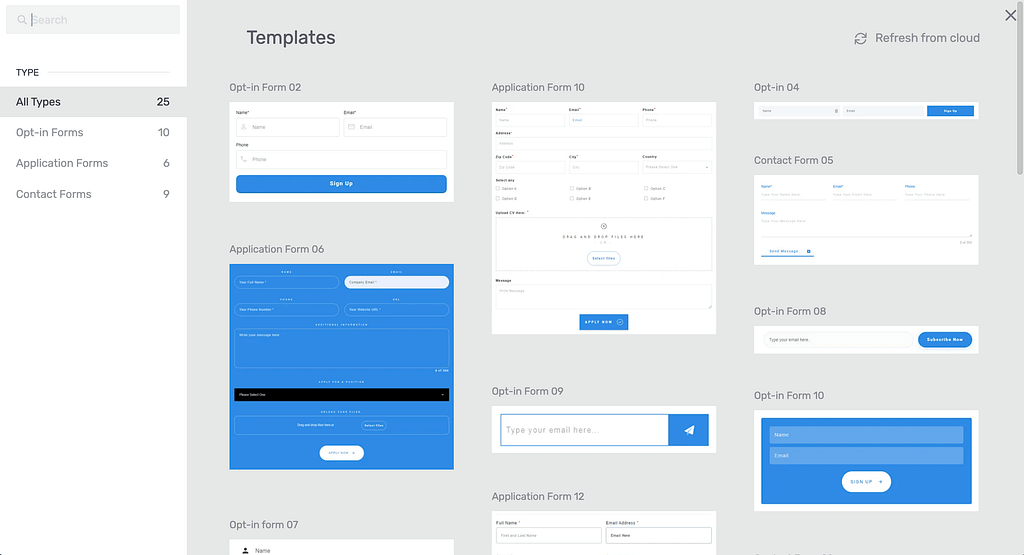
Then, a lightbox will open, where you will have to choose a suitable template for the element. You can use the filtering options from the left side of the pop-up, in order to only show certain types of forms:

In order to choose a template, simply click on the one you want to use.

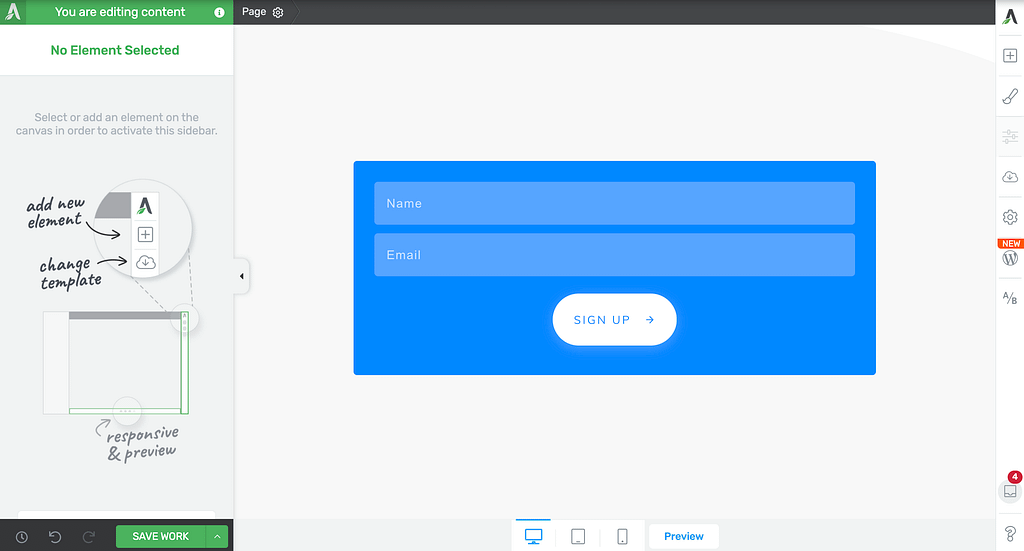
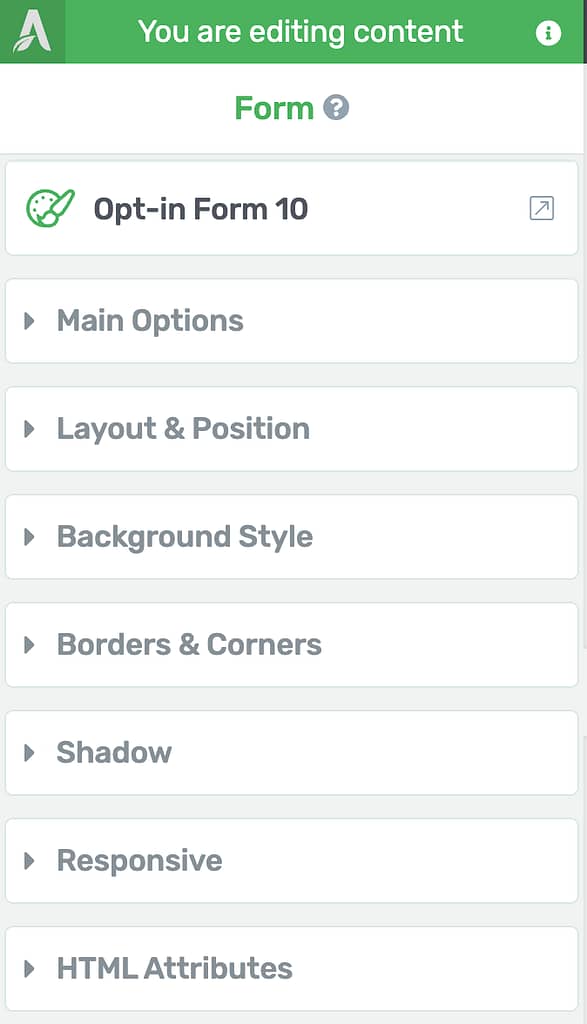
You will see that the “Lead Generation” element is a simple form that you can configure to suit your needs, from the options available in the left sidebar.

Choose the Template

Once you add the “Lead Generation” element to your content, you can change its template at any time. For that, click on the field next to the “Template” option:

This will open the same pop-up that opened when you first added the element. Simply click on the template that you want to replace the initial one with:

Note: If you want to replace the template, make sure you do this before adding any content or customize the existing content of the “Lead Generation” element. This is because, when changing the template, all the initial content and modifications will be lost.

Use the Edit Form Elements Option

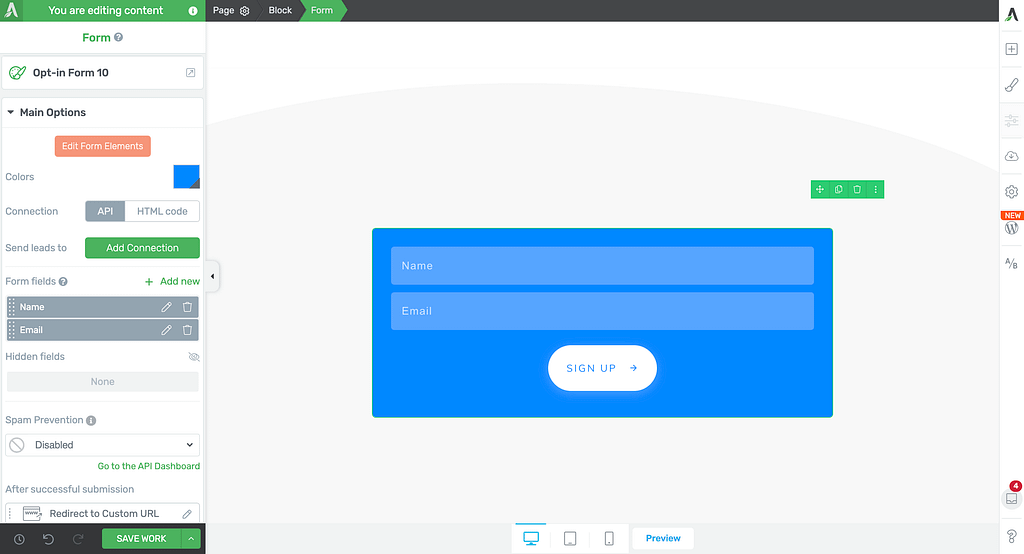
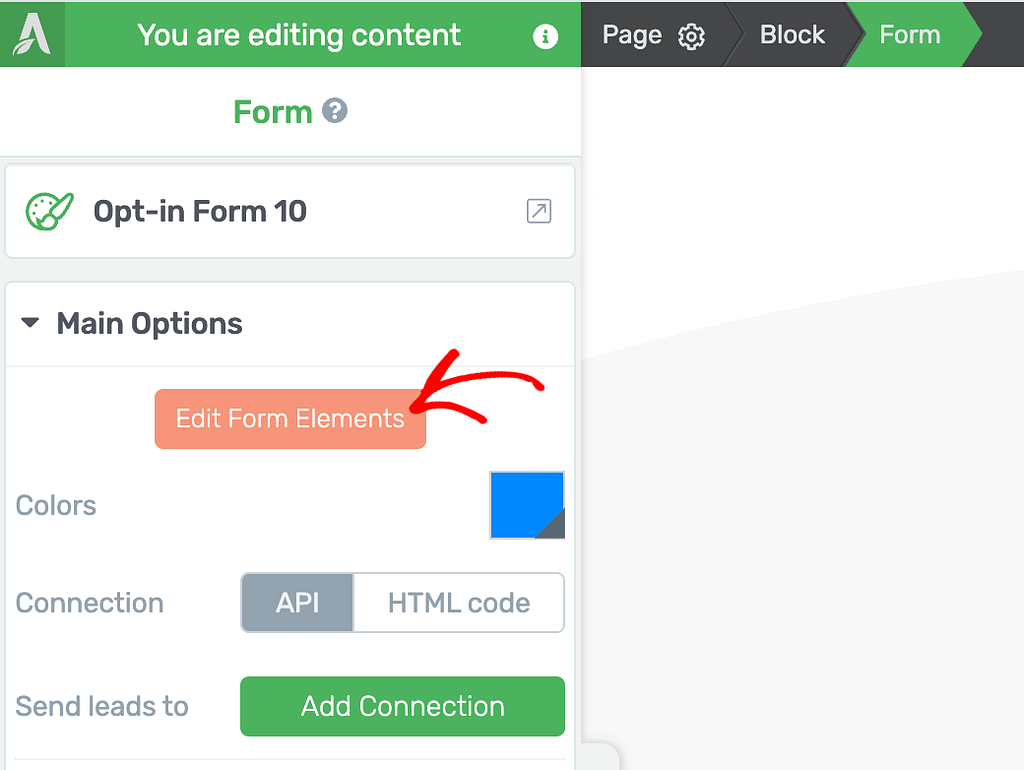
This is the first option of the “Main Options” that appears in the left sidebar.

After you have set up the element, you can use this “Edit Form Elements” option to edit the design of various parts of the “Lead Generation” element (such as the fields or the sign-up button).

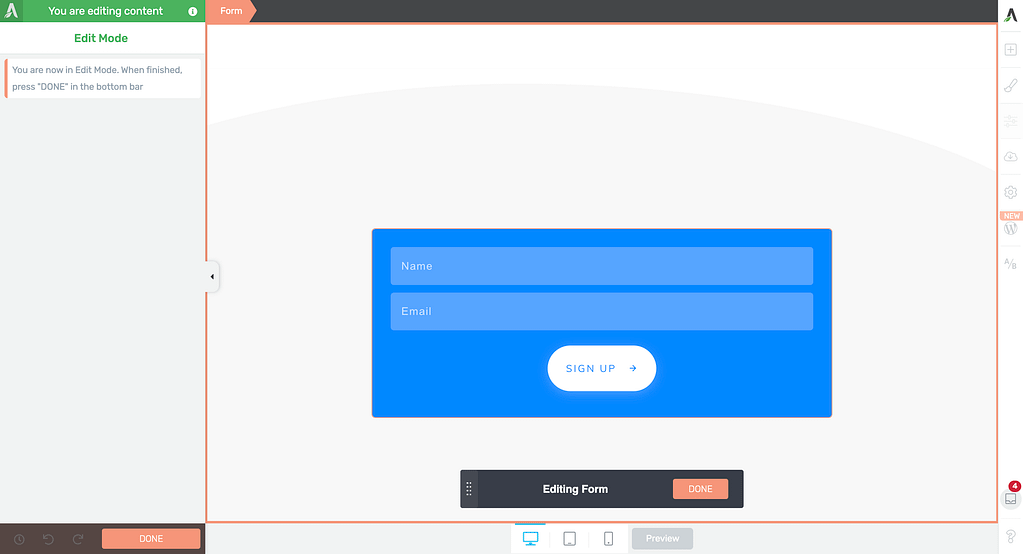
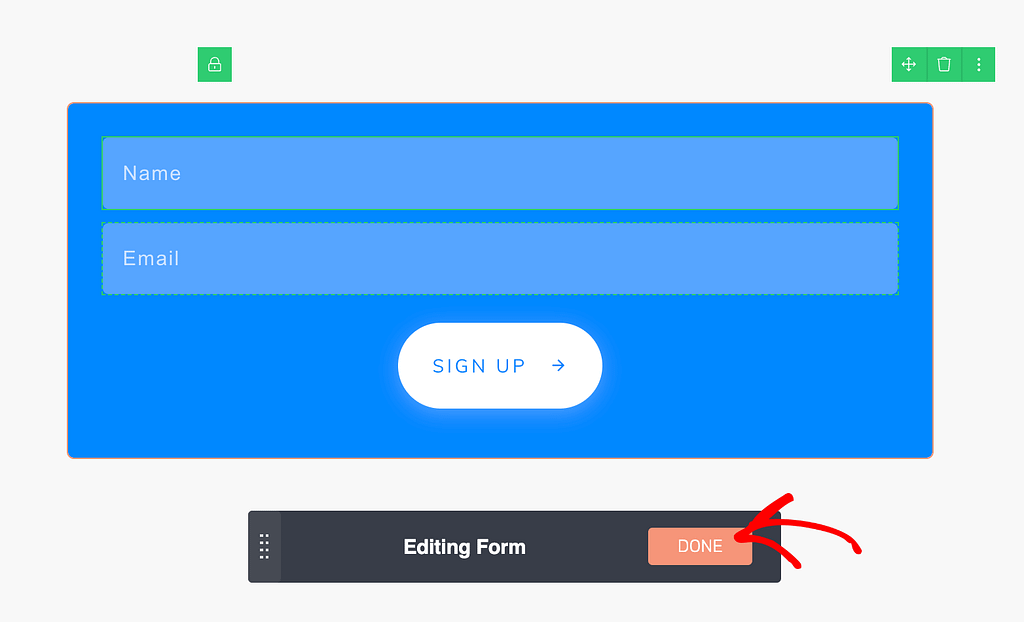
Click on the “Edit Form Elements” button to open the editing mode of the “Lead Generation” element:

Note: Please bear in mind that while editing the elements of the form, you will not be able to edit other elements on the page.

You can edit the form elements, meaning the different parts of the “Lead Generation” element, by clicking on each of them separately and then using their sidebar options.

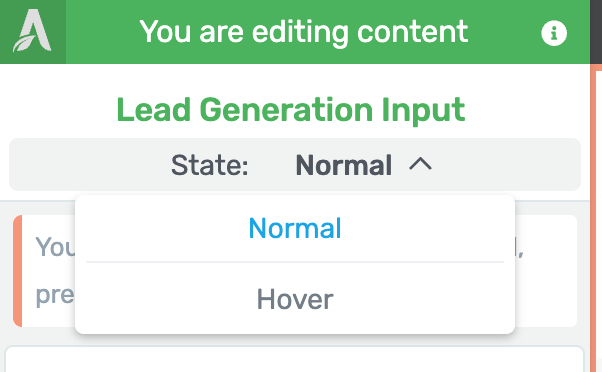
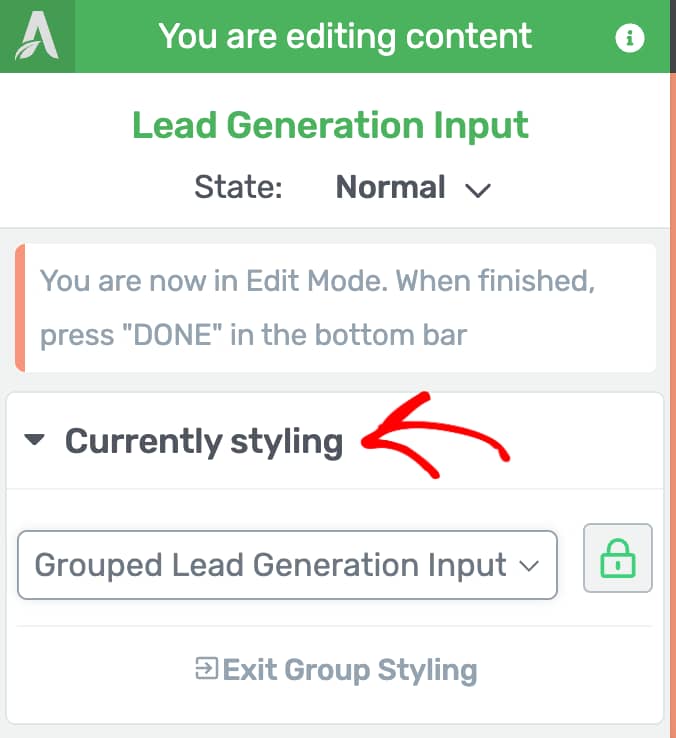
For example, the fields inside the element are called “Lead Generation Input”. If you click on one of them, you will see the options of the “Lead Generation Input” appear in the sidebar:

You can use these options to customize the field and when you are done, you can go on with clicking on another form element that you want to customize.

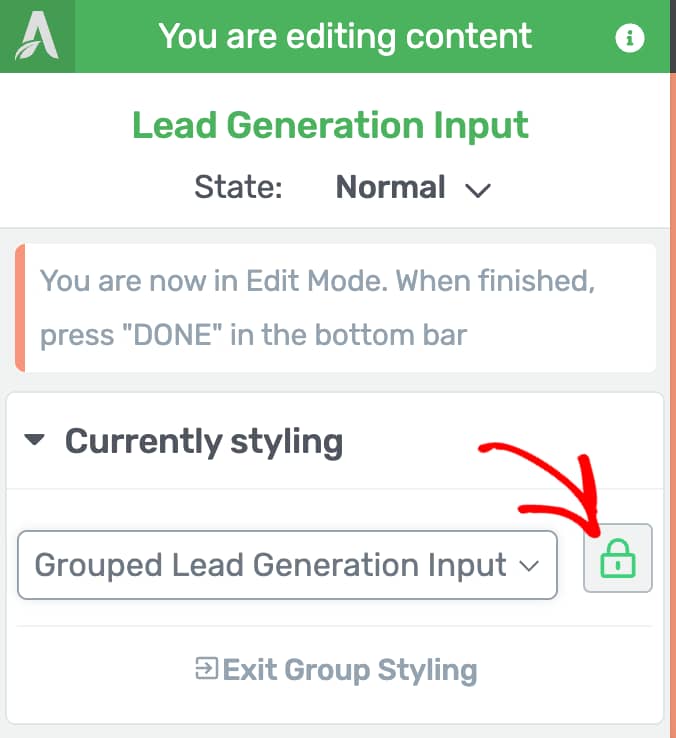
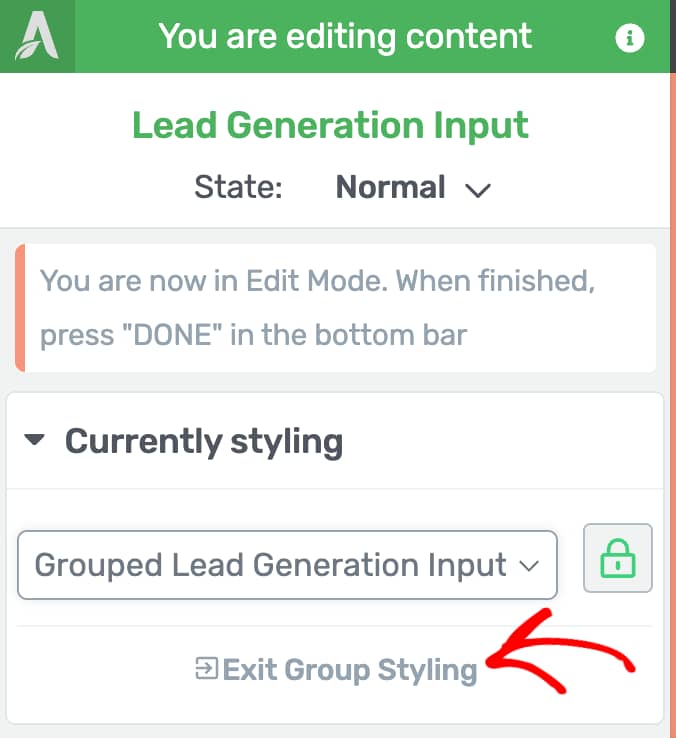
Learn more about the “Group Styling” feature here.

You also have the possibility to drag & drop the components inside the “Lead Generation” element, to change their position. For instance, you can drag the “Name” field next to the “Email field”.

When you have finished editing the elements, you will need to click on the “Done” button from the lower middle part of the page to exit the editing mode of the element:

Use the Main Options

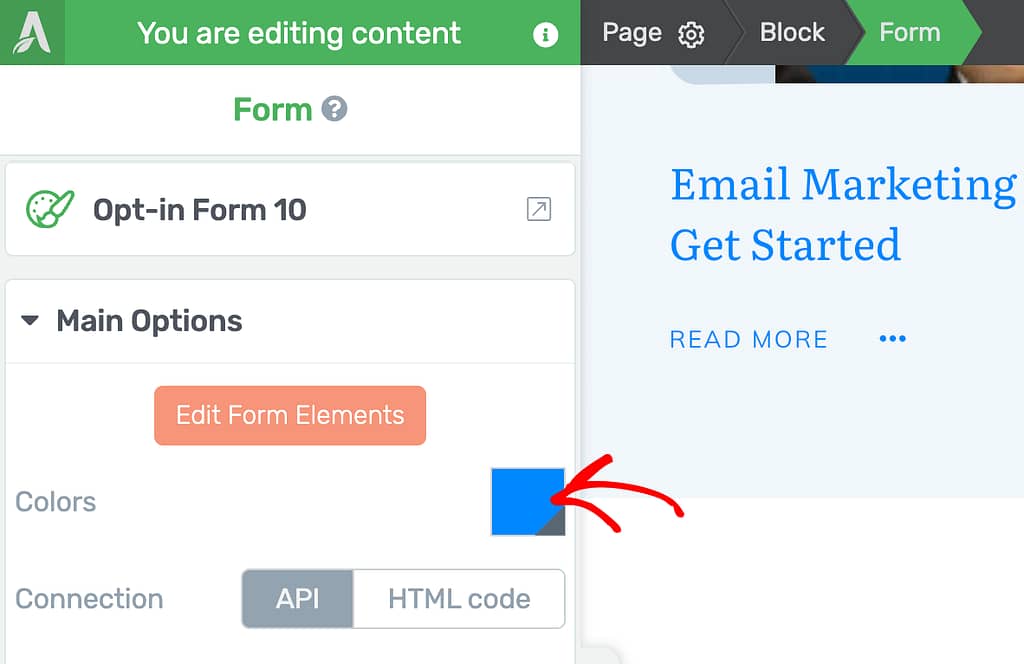
You can use the “Colors” option if you want to change the color of the element. If you’re using a landing page, or Thrive Theme Builder, the color will be inherited either from the Thrive Theme Builder template or from the Landing Page, depending on the way you’ve constructed the page.

You can easily change this color, by clicking on the color box:

This will open a color picker pop-up, from where you can change the color using the color picker or a HEX/RGB code:

You can also choose one of the already existing colors from the “My Colors” and “Theme Colors” sections.

After you are done, don’t forget to click on the “Apply” button to make sure all your changes have been saved.

API Connection

As mentioned above, for the “Lead Generation” to work properly, you will need to connect it to a service. This may be an email delivery service, a marketing tool, or even WordPress, depending on the goal you want to achieve with this element.

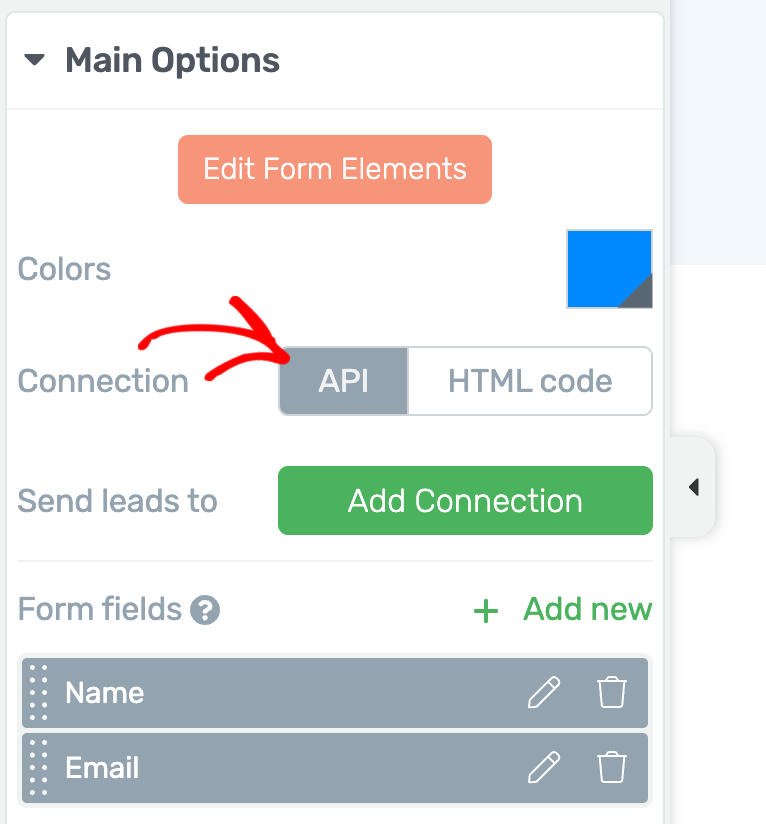
You will see that by default, the “API” option is selected in the “Connection” section of the “Main Options” in the left sidebar:

This is the option that needs to be selected in order to connect the “Lead Generation” element to a service.

Send leads to

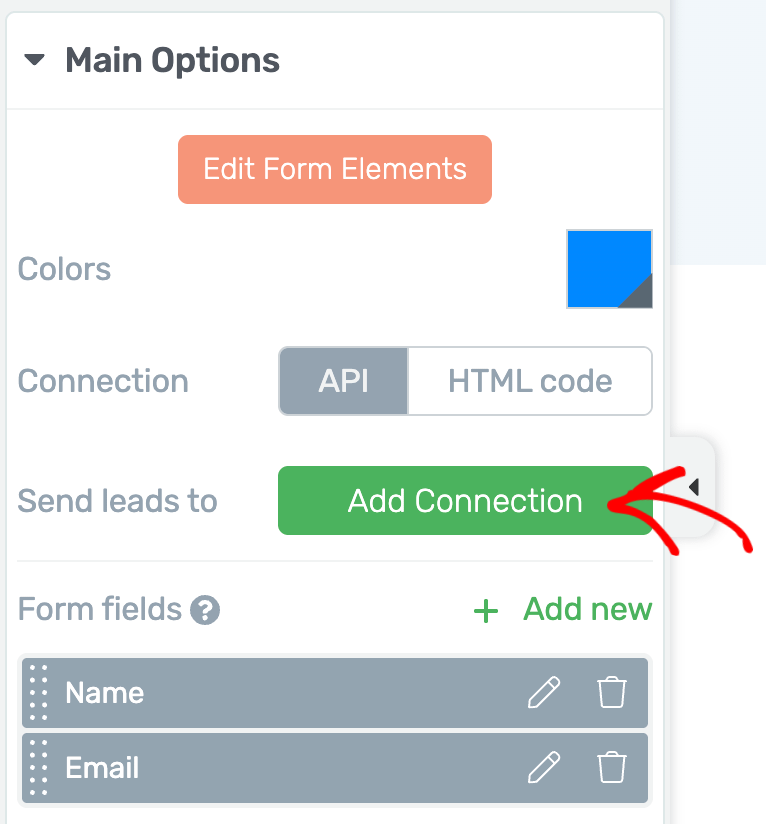
Below the “Connection” section you will see the “Send leads to” section. Click on the “Add Connection” button from here:

This will open a window with two options. If you have not set up any API connections for your website yet, then click on the “Go to the API Dashboard” text, to set up the API connection you want to connect the “Lead Generation” element with:

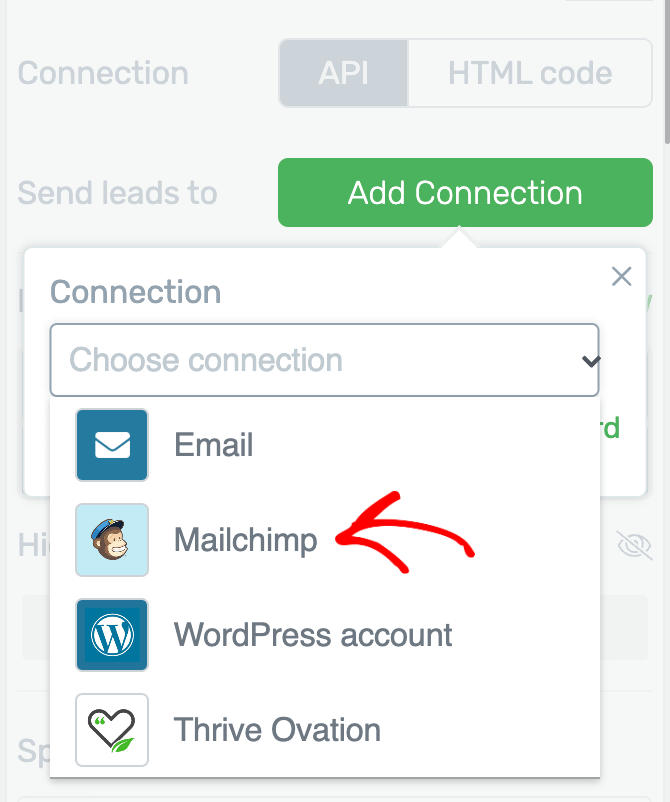
If you have already set up the API connection you want to use, click on the “Choose connection” section to open its drop-down:

In the drop-down, you will see a list of the connections that are available. This list is based on the connections that you have already set up in the Thrive Dashboard of your WordPress website:

Look for the API connection you want to use from the drop-down and when you have found it, click on it to go on.

Note: Here, besides connecting the “Lead Generation” element to a service through an API connection, you also have the possibility to add an “Email Connection” to the element.

With this “Email Connection,” you can receive direct email notifications, whenever someone will sign up/complete the form that you create with the “Lead Generation” element. You can find a step-by-step tutorial about how to set up an “Email Connection” here.

Set Connection Details

Please keep in mind, that this step can vary, depending on the service that you are using.

In this article, we will take MailChimp as an example. This is how the window will look like after you choose the MailChimp connection:

Since this service provider lets you create separate mailing lists (to divide users into certain categories), you can choose which mailing list to use, by clicking on the field under the “Choose your mailing list” option:

Note: Make sure you use the “Refresh List” button each time you’ve added a new list since your initial API integration setup, in order for the new list to appear in this field.

The same thing goes for groups too. Groups inside mailing lists are meant to divide the users even more. Thus, if you have previously set up groups in your mailing lists, in the “Choose your grouping” section you have the option of choosing a group for your “Lead Generation” element:

Furthermore, you can also choose whether you want your element to contain a “Single optin” or a “Double optin”:

If you choose the “Single optin”, then, the users will be automatically added to your mailing list, right after they sign up; whereas, if you choose the “Double optin”, your users will have to confirm their email address before being added to your list.

You can find more information on the difference between the single and double optin here.

In the “Tags” section from the same window you can enter tags for this “Lead Generation” element:

This “Tag” section is visible only for tag-based email service providers and it is used for better segmentation of the visitors who sign up on your website.

The tags that you add here will be displayed on the list you have on the email service provider’s platform (in our case MailChimp), along with the information about the new contact.

Note: you can add more than just one connection if needed, by following the same steps as detailed above.

Click again on “Add Connection”:

From the available list, select the connection you want. In this example, we will be adding a “WordPress account”, which will allow the user to sign in on the site with his WordPress account:

This will prompt another list, from where you’ll also be able to set the role that you will assign to the visitor when he or she signs up:

Depending on what you choose, the visitor will have different types of access to your site.

After the role has been set, click on “Apply” and your new connection is ready:

You can read more about how to set a WordPress account integration in this dedicated article.

Set Form Fields

After you have connected the “Lead Generation” element to an API connection, you can set up the fields that will appear in it.

You can do this using the options from the “Form Fields” section:

By default, the “Name” and the “Email” field are already added to the element.

Please note that if you’re setting up an API connection with a service that requires an email for it to properly work, an email field will automatically be added to the form (if you haven’t already added one) and removing it will not be possible.

Otherwise, for forms that are not using an API connection, the “Email” field is removable.

Here’s an example of a situation where you can set up a form without an “Email” field.

Edit field

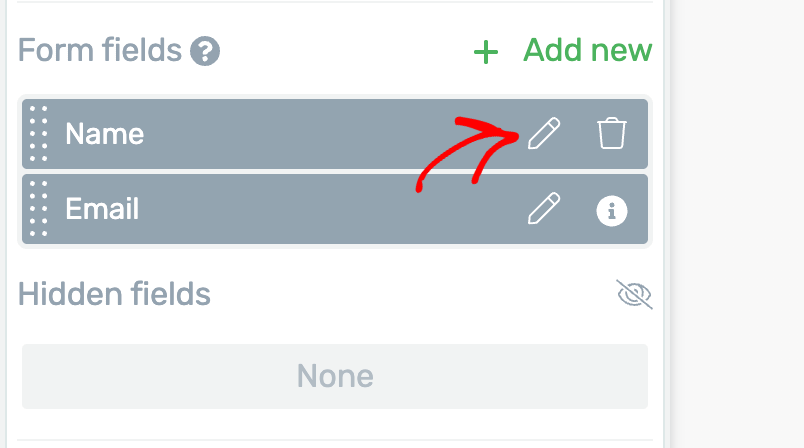
You can edit any of the fields by clicking on the “Edit” option (pencil icon) next to it. This will open a drop-down with the options you have for editing the field. Let’s take the “Name” field for example:

You can set the “Name” field to be required as well, by checking the “Required” checkbox, or you can change its placeholder by deleting the current placeholder and replacing it with the one you want to be displayed.

Moreover, you can check the “Show Label” box, in case you want the name of the field type (label) to be shown above the respective field.

The placeholder is the name of the field, that is displayed inside the field. If you want, you can also replace this with a description. For e.g. instead of “Name”, you could write “Please write down your name in this field”.

Furthermore, if you want the field to have “Autofill Settings”, you can click on the “Autofill Settings” section. Then also “Activate Smart Complete” and define the settings in the drop-down that opens, just as described in this article.

After you finish editing the field, all you have left to do is to click on the “Apply” button to apply the changes.

Add the Phone field

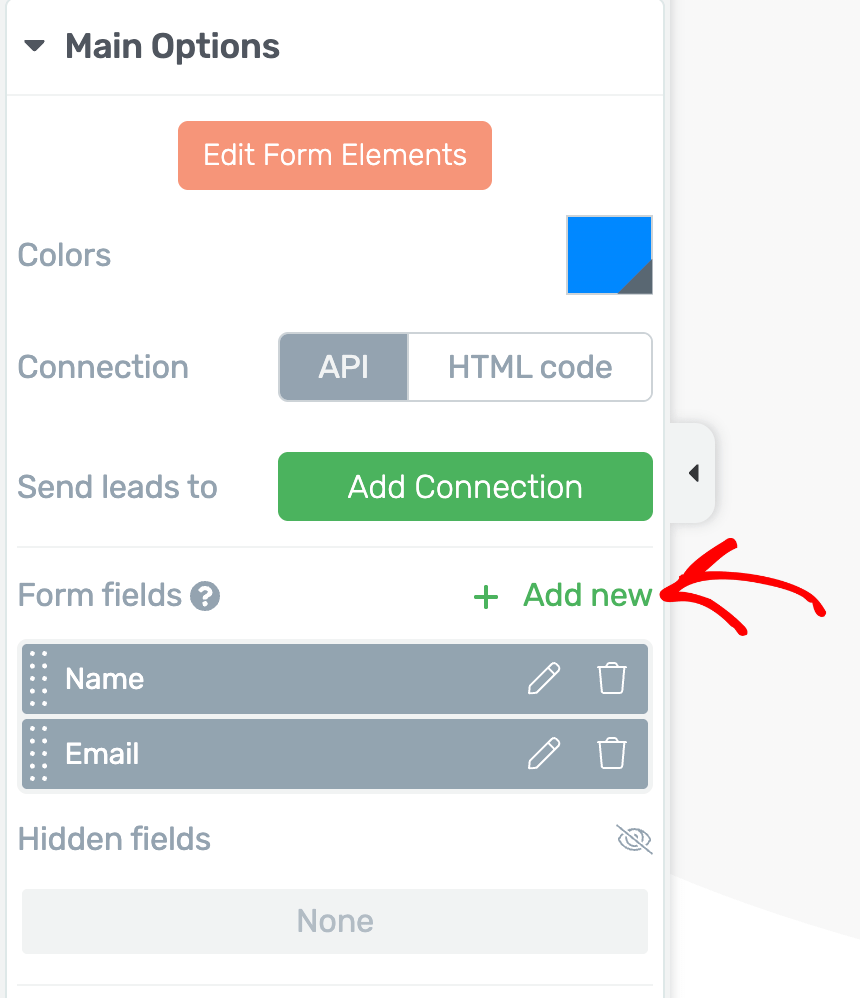
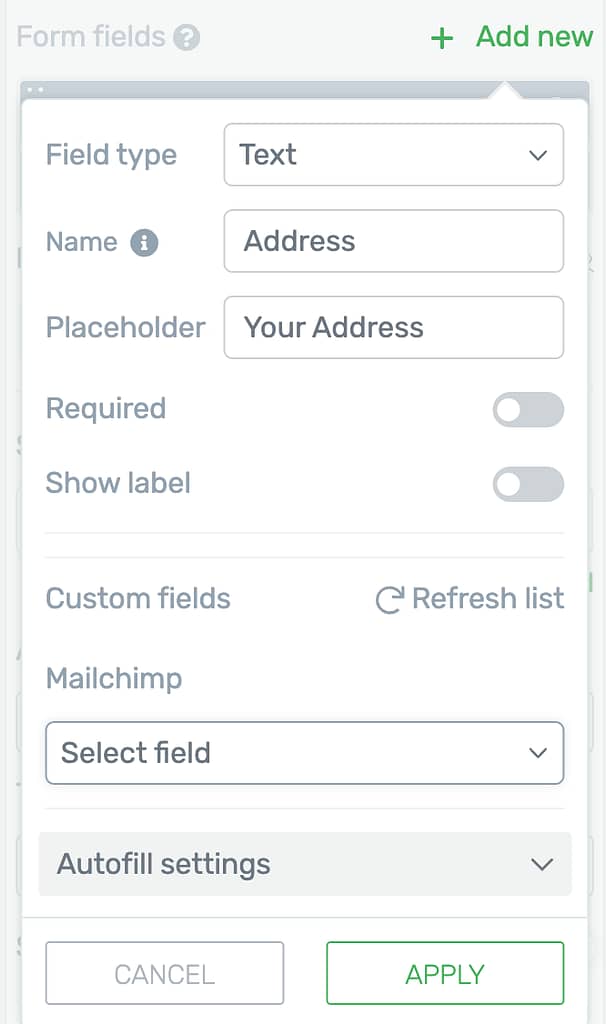
You can also add a new field, the “Phone” field, if you wish, by clicking on the “Add new” button and entering the necessary details (enter a placeholder, choose whether or not you want the field to be required) in the drop-down that opens:

Add a Custom Field

The “Lead Generation” element allows you to create custom fields, as well. We have created a separate article about how to add custom fields, and you can find it here.

Important!

The form fields will be visible in the left sidebar even if you have not created a connection yet. However, please remember that you need to create an API/HTML connection, in order for the “Lead Generation” element to work properly.

After Successful Submission

The next step is to choose what happens after someone uses the “Lead Generation” element to sign up. You can do this with the help of the “After Successful Submission” section.

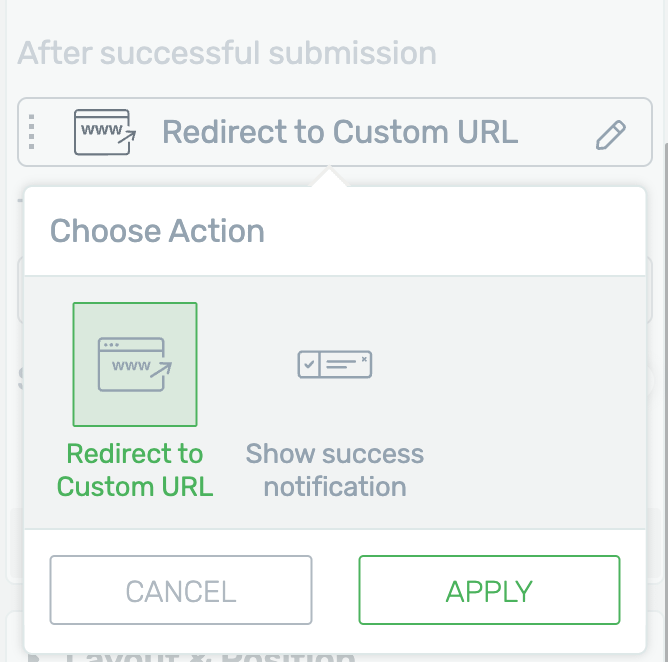
You have two possible options here: you can either redirect the users to a custom URL or show a success notification.

By default, the “Redirect to Custom URL” option is selected. If you click in the field where this appears, a drop-down will open with the other option as well:

Choose one of the two options here and then click on the “Apply” button. Once you do that, you will have to do the following:

Redirect to Custom URL

In the case of the “Redirect to Custom URL” option, you will have to add the URL. In the “Target URL” field that is displayed, you can enter the custom URL, the link to the page where you want to redirect the users to after they sign up:

You can also start typing the name of one of the pages from your website that you want to redirect users to. The system will search through the pages of your website and show you a list with results that match your search. You can simply select the page you want from the list and it will be added as the “Target URL”.

  • Send form values to thank you page

There is one more thing you can do if you have chosen the “Redirect to Custom URL” option. You can activate the “Send form values to thank you page” option.

This option comes in handy if you have set up a personalized Thank You page that you used as the “Target URL”, where you want to send the users who will complete your form.

The “Send form values to thank you page” option will send the values completed by users in the form (e.g. their name, email address, etc.) to the personalized thank you page as URL query-string variables.

In order to use this option, all you have to do is to activate it. You will see the option under the “Target URL” field. To activate it, click on the switch next to it:

Once activated the switch will become green and the option will add the values, your subscriber filled in, to the end of the Thank You page address (Target URL), as a URL query string:

If you want to see what variables will be sent/forwarded to the URL of the Thank You page, click on the “View variable details” text, below the option:

This will open a little pop-up with the variable names of each of the fields you have added to your “Lead Generation” element (a), as well as a view of how they will be incorporated (b), at the end of the Thank You page URL (Target URL):

Note: In order for this option to work properly, you will have to use the Dynamic Text feature on the Thank You page/Target page. The Dynamic Text feature will make it possible to display the collected values on the page.

When you are setting up the dynamic text, choose the “Request Data→URL QueryString” option for it, and then define:

  • the Variable name (this should be the same as shown in the “View variable details” part of the “Lead Generation” element),

  • and the Default Value (which will be displayed, if no corresponding value was completed in the form created with the “Lead Generation” element).

Once these are defined, click on the “Insert” button from the Dynamic Text pop-up:

Also, don’t forget to save your work on the Thank You page once you are done, with the “Save work” button, from the bottom-left part of the editor.

After that, the “Send form values to thank you page” process will be all set up and ready.

Show success notification

In the case of the “Show success notification” option, a field will appear where you can enter the success notification that you want to display after someone signs up. By default the text “Success!” is entered here, but you can easily delete it and replace it with your own text:

Once you have also set up what happens after a successful submission, the “Lead Generation” will be customized and connected to the service of your choice.

HTML Code

Besides connecting the “Lead Generation” element to a service through an API connection, you also have the option of doing an HTML integration instead. This means that you can set up your connection by inserting an HTML code.

The difference between these two ways is that the HTML integration gives you the possibility of adding extra fields with the help of an HTML Autoresponder Code.

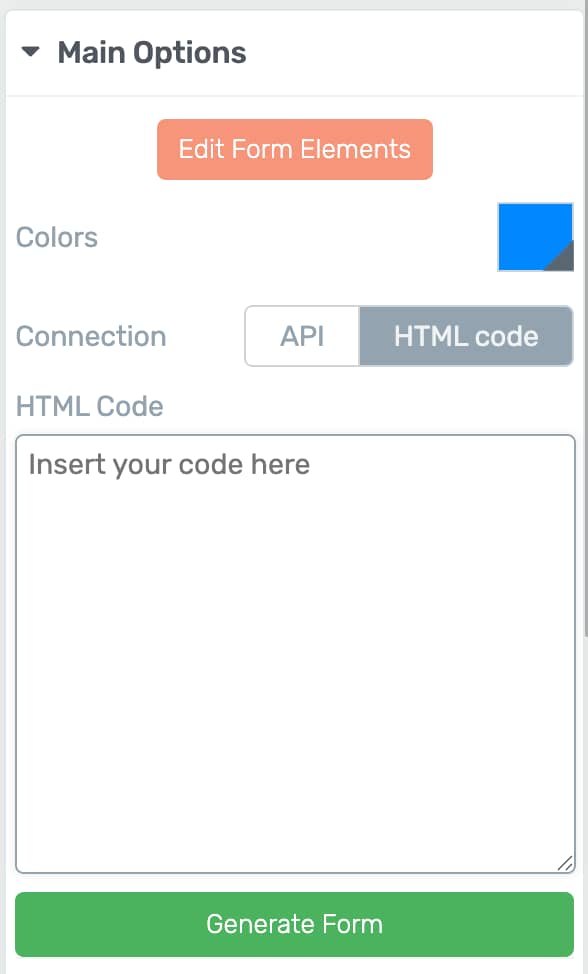
In order to do this, simply click on the “HTML Code” option from the “Connection” section of the “Main Options”:

This will open a field where you can insert your HMTL code and then, you will have to click on the “Generate Form” button in order to apply the HTML code to the “Lead Generation” element:

When you click on the “Generate Form” button, you will see the changes directly in the editor, applied to the “Lead Generation” element. The customized fields will be added to the element.

Forms Fields

After you generate the form, you will be able to edit the “Form Fields” using the “Form Fields” section below the “Generate Form” button:

In order to edit one of the fields click on the “Edit” option (pencil icon) next to them. Then, you can edit the field exactly like you would edit the field added for an API connection, as shown above.

Moreover, you can also delete the fields that are not mandatory, by clicking on the little trash icon next to them.

Hidden Fields

Besides the “Form Fields” you can also use the “Hidden Fields” section, in case the form you have generated contains hidden fields:

If you click on the “Edit” option (pencil icon) next to one of the hidden fields from this section, you will be able to use the “Autofill Settings” → “Smart Complete” feature for it, as described above.

Advanced Settings

After setting up the fields of the “Lead Generation” element, you can also set up the “Advanced” options for it.

First, click on the “Advanced” section of the “Main Options”:

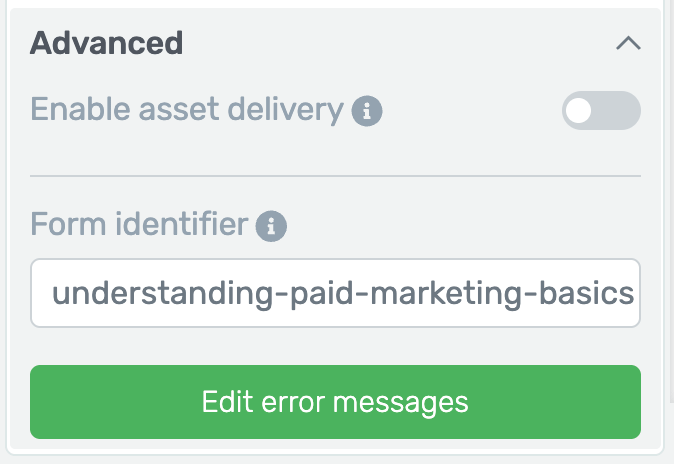
This will display the “Advanced Options” of the “Lead Generation” element. They are as follows:

Enable asset delivery

Activate this toggle if you want to enable the asset delivery feature for this form:

After you activate the toggle, you can proceed with selecting an asset group from the next drop-down:

If you want to learn more about asset delivery and how you can use it on your website, then this article from our knowledge base might be useful to you.

Form identifier

In the next field, you are able to find a unique form identifier, that you can copy and use with other Thrive Suite products:

You can easily and quickly search for this form in Thrive Ultimatum or Thrive Automator, simply by pasting this code in the form field.

So, if you are trying, for example, to trigger a Thrive Ultimatum countdown when a lead generation form is submitted, you can simply paste this code in the trigger field and the system will automatically recognize it:

Spam prevention

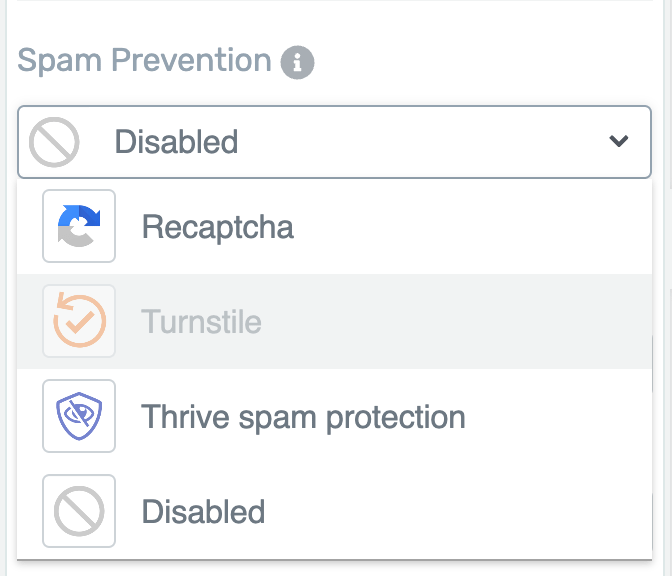
If you wish to get ahead of spam signups, you can add a captcha system to your “Lead Generation” element. In order to do this, you must first have an API connection set up with Google ReCaptcha. If you need help with this, please check out this tutorial.

Edit error messages

After clicking on this option you will see a pop-up window open with various types of error messages that you can customize.

You can replace the default messages by typing in the messages that you want your users to see if they do not fill out the respective fields correctly:

You also have the option of adding an additional error message called “Signup failed”. If you activate this option you will be able to set one more error message for the rare cases when the sign-up will fail.

Just type in the message you want to show in these cases in the field that appeared with the default “Error” text:

After you have finished setting up the error messages, click on the “Save” button to change them and apply them to the element.

Use the Rest of the Options

Last but not least, you also have the option of customizing the “Lead Generation” element even further, using the more general options:

For example, you can adjust its positioning on the page, using the “Layout & Position” options, or add a background color to it using the “Background Style” option.

These general options can also be found in the left sidebar, below the “Main Options” of the “Lead Generation” element.

Since these options are available for almost every Thrive Architect element, we have separate tutorials about each of them in our knowledge base.

If you want to find out more about the general options or other Thrive Architect elements, please take a look at the tutorials here.

After you have finished setting up every aspect of the “Lead Generation” element, you can save the page and preview it to see how the element will look like for the visitors of your website.

While previewing, you can also try to use the element to see how it will work for people who want to sign up through it.

Hopefully, this article was useful for you. If so, please reward our efforts with a smile below 🙂


Was this article helpful?

Related Articles

>