Do you want to get notified about email signups, a completed AB test, or anything similar? Creating a notification in the Notification Manager lets you enable messages so you never miss out on key information.
In this article, we’ll show you how you can access the Notifications Manager in Thrive Themes and enable notifications on your website.
Accessing the Notifications Manager
To access the Notifications Manager in Thrive Themes, open the WordPress admin area, navigate to Thrive Dashboard >> Thrive Dashboard, scroll down to Notification Manager and click on Manage Notifications.
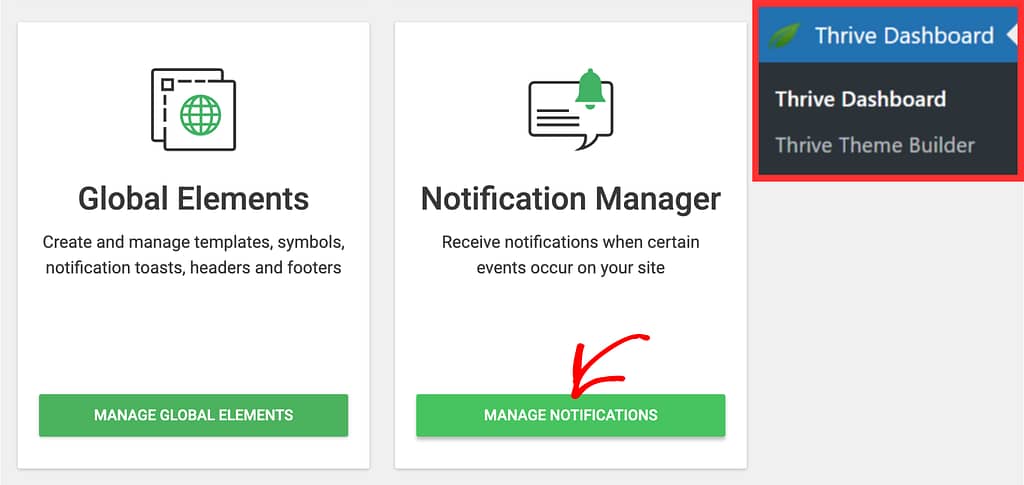
When you click Manage Notifications, you’ll be taken to a page where you can add, edit or remove notifications from your website.
Enabling Notifications
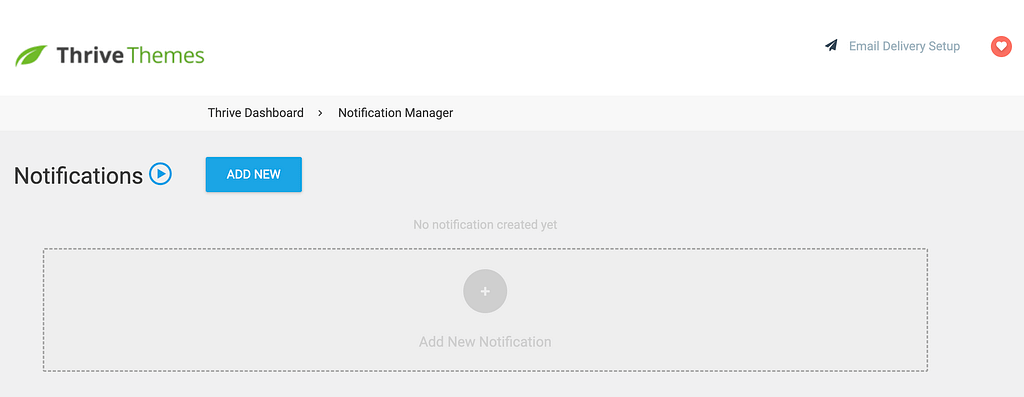
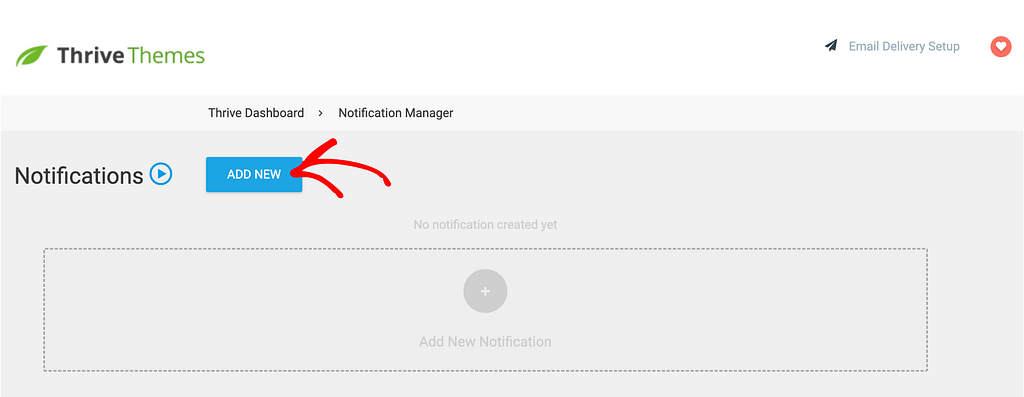
To enable Notifications on your website, on the Notifications Manager page click the Add New button.
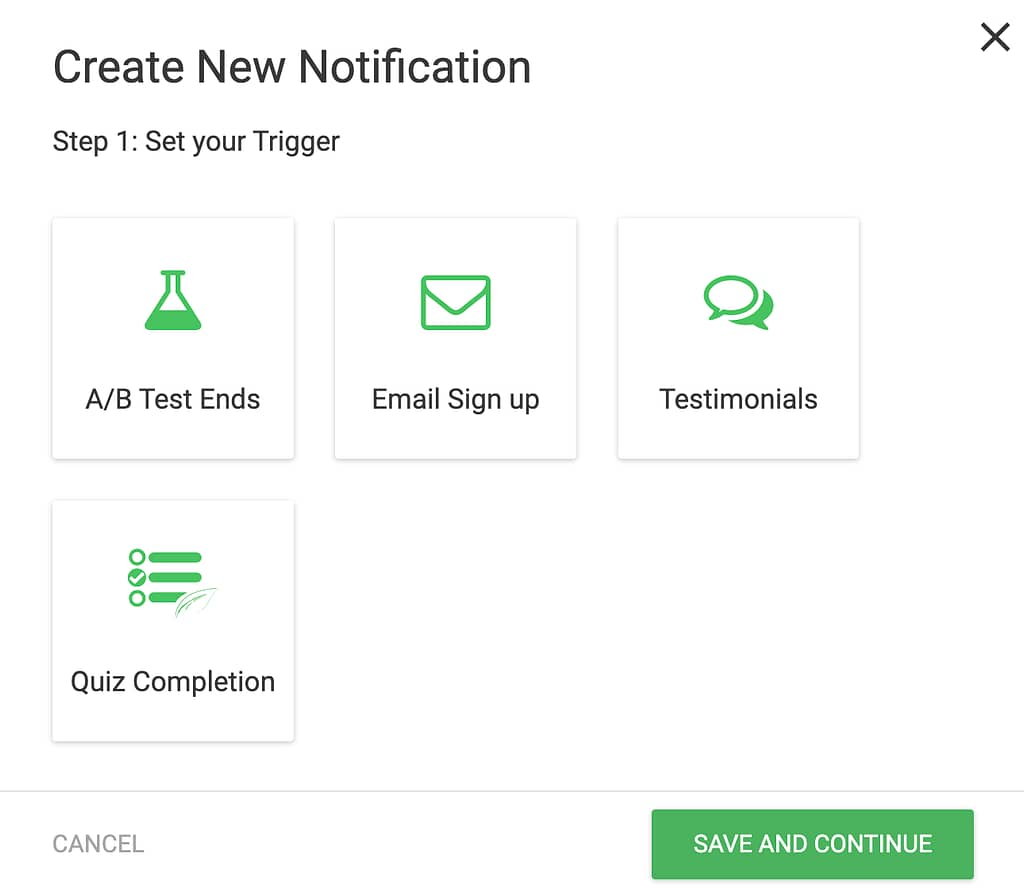
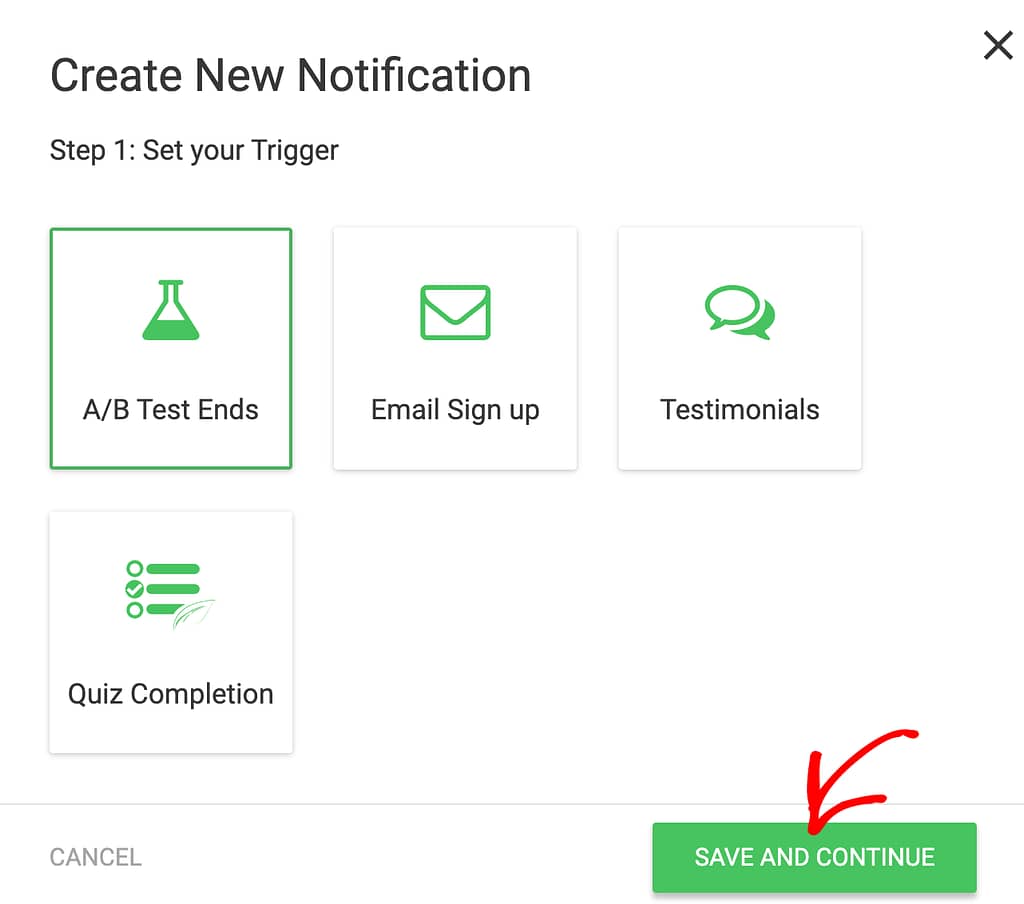
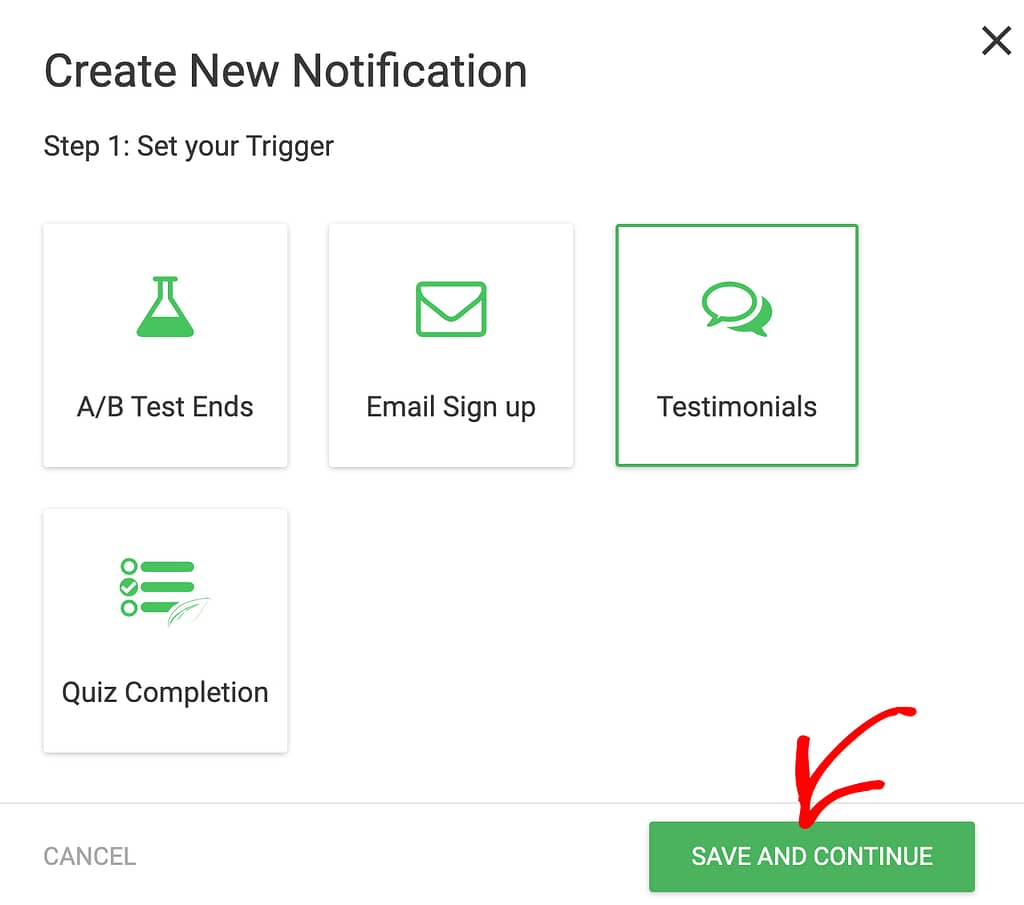
When you click the Add New button, you’ll see a popup to select a trigger.
On this popup, select the trigger that should shoot the notification and click the Save and Continue button.
The popup lets you select one of the following Notification triggers.
- A/B Test Ends: Notifies you when an A/B test ends.
- Email Sign Up: Notifies you when a user signs up.
- Testimonials: Notifies you when a user leaves a testimonial for you.
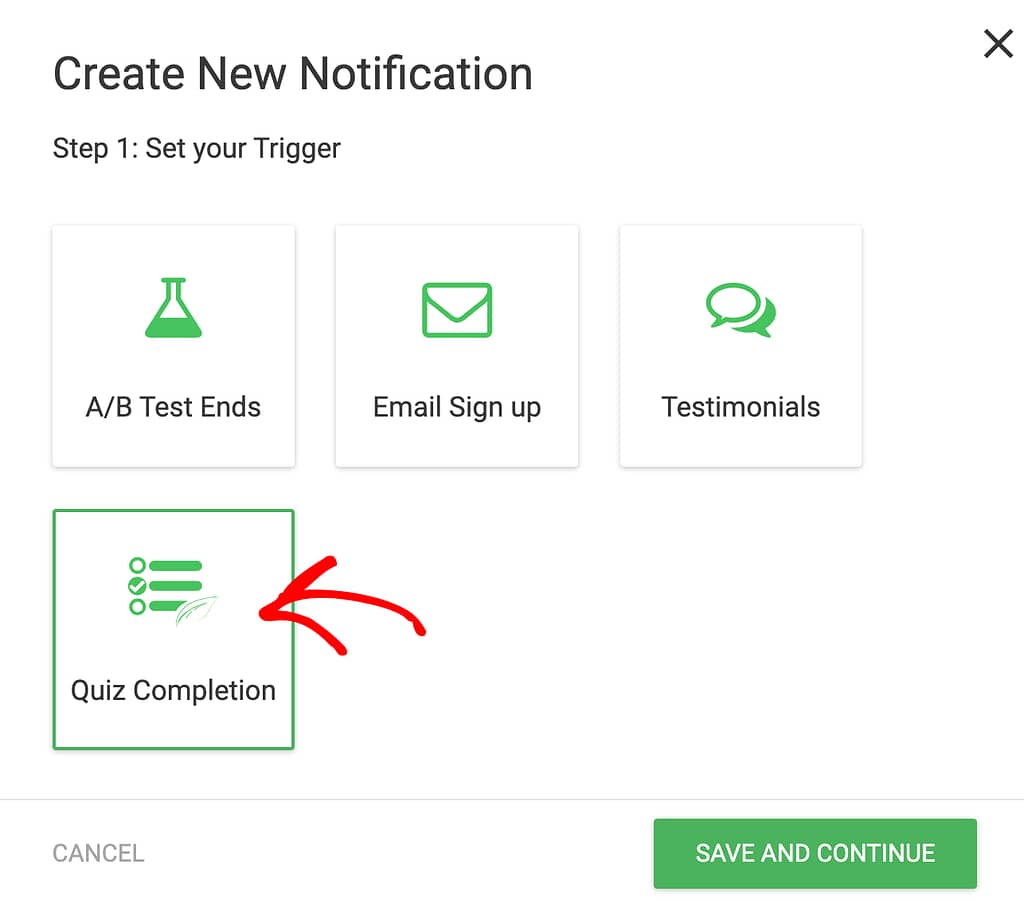
- Quiz Completion: Notifies you when a user completes a quiz.
Enabling Notifications for A/B Tests
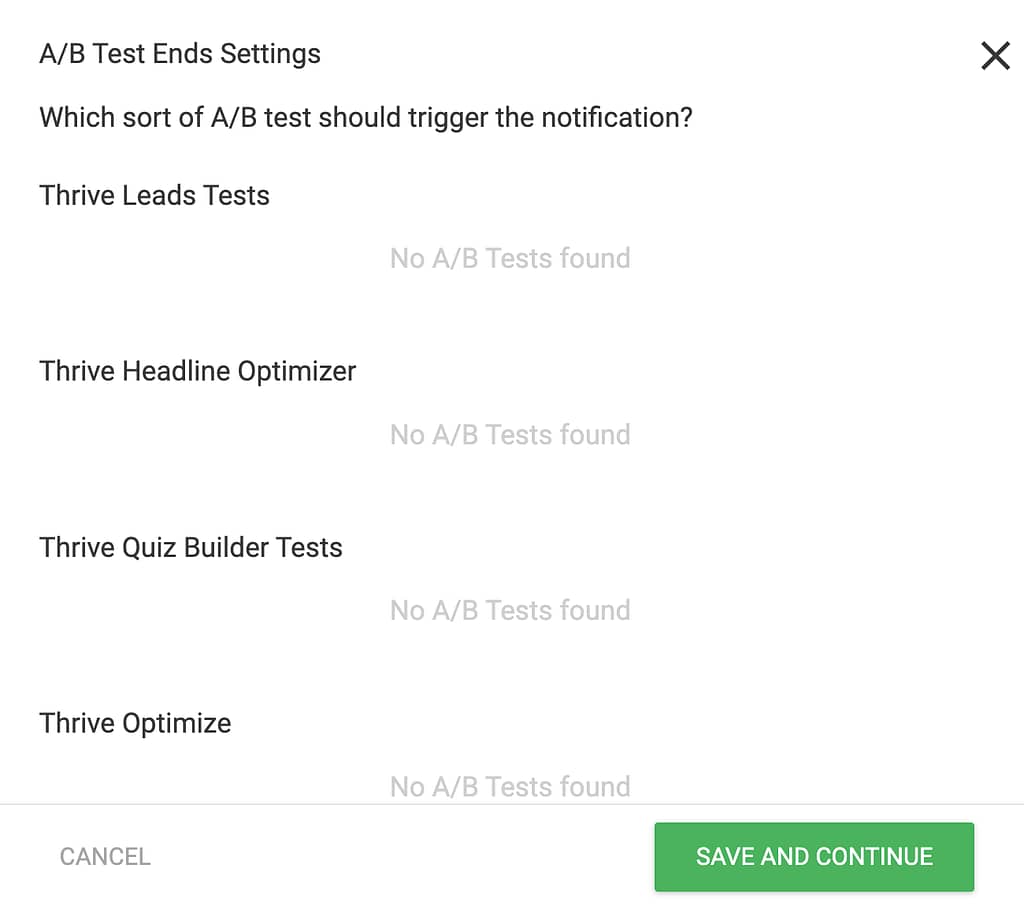
To enable this notification, first select A/B Test Ends.
If you choose the “A/B Test Ends” trigger, you’ll see a question asking which type of A/B test should send the notification. You can pick from your existing tests in Thrive Leads, Thrive Quiz Builder, or Thrive Optimize and click on the Save and Continue button.
After you select the trigger as A/B test ends and click to Save and Continue, you’ll have to select the action to be performed.
- Send Email Notification
- Call a Custom Script
- WordPress Notification
In this step, select the action as explained in this section here, complete the required settings and click Save Notification.
Enabling Notifications on Email Sign Ups
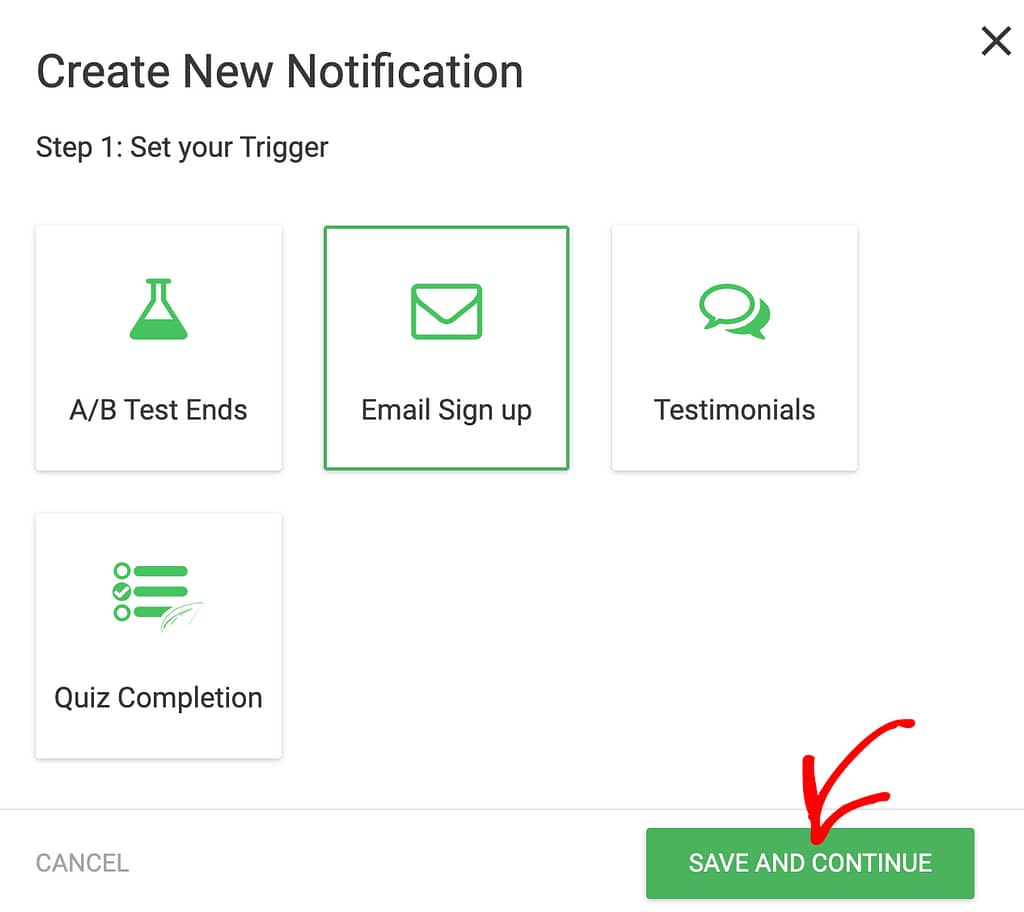
To enable this notification, first select Email Sign Up.
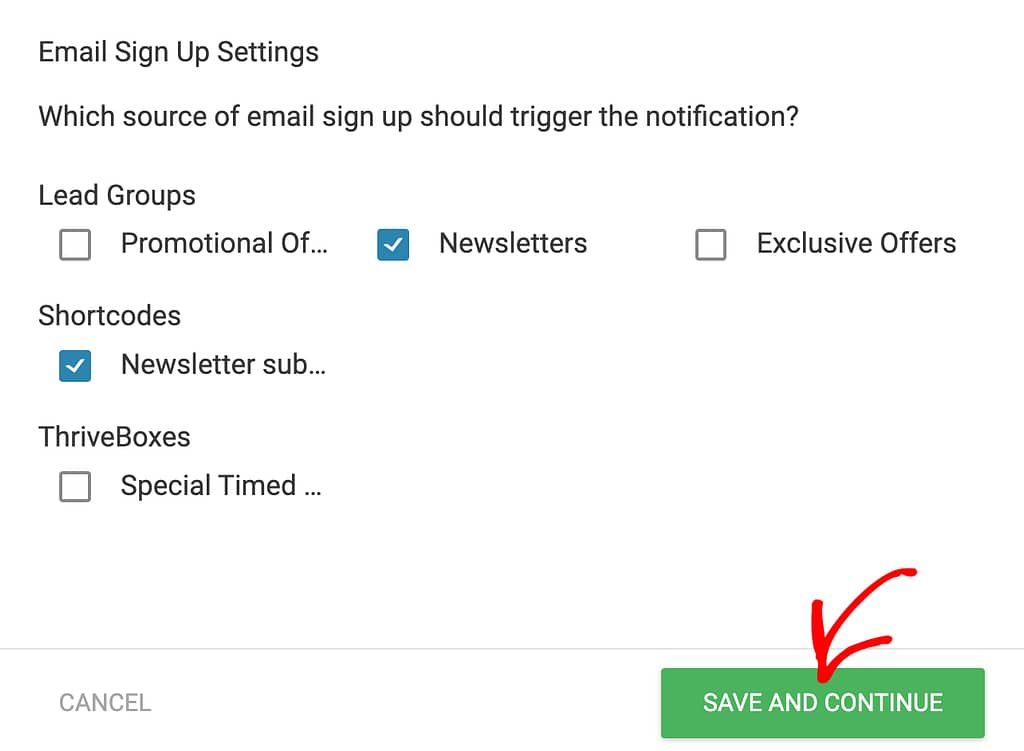
If you choose the “Email Sign up” trigger, you’ll be asked which type of email sign up should send the notification. You can pick from your existing Lead Groups, Shortcodes, or ThriveBoxes and click the Save and Continue button.
After you select the trigger as Email Sign up and click to Save and Continue, you’ll have to select the action to be performed.
- Send Email Notification
- Call a Custom Script
- WordPress Notification
In this step, select the action as explained in this section here, complete the required settings and click Save Notification.
Enabling Notifications on Testimonials
With this notification type, you’ll get a message whenever someone submits a testimonial using a testimonial form on your WordPress site.
To enable this notification, select Testimonial and click the Save and Continue button.
Once you set this up, you’re done and can move on to the next step.
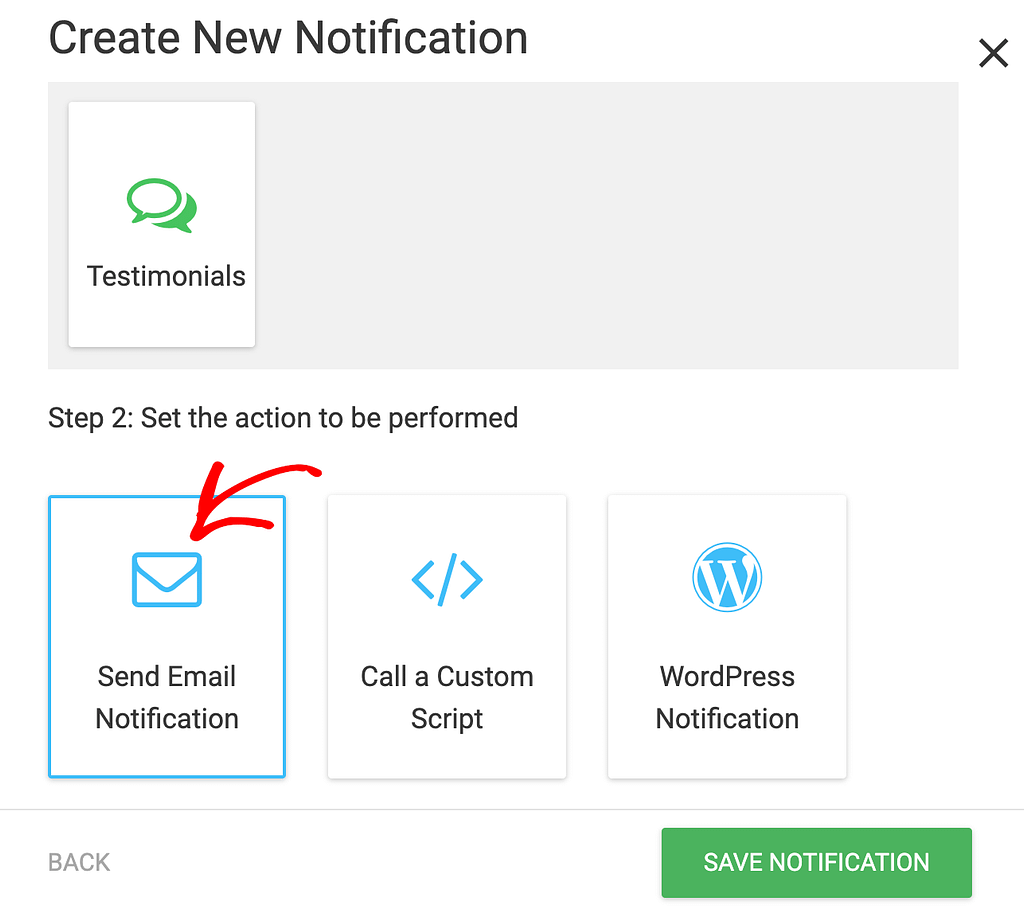
After you select the trigger as Testimonials and click to Save and Continue, you’ll have to select the action to be performed.
- Send Email Notification
- Call a Custom Script
- WordPress Notification
In this step, select the action as explained in this section here, complete the required settings and click Save Notification.
Enabling Notifications on Quiz Completion
To enable this notification, select Quiz Completion and click the Save and Continue button.
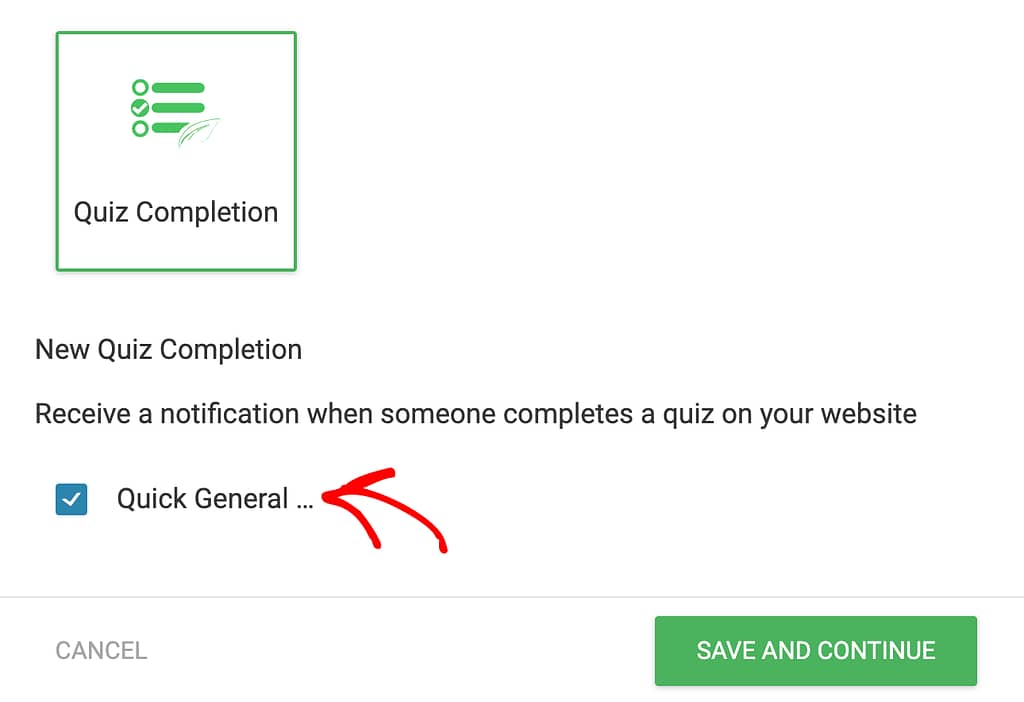
After selecting Quiz Completion, scroll down and select the quiz that you want to be notified about and click the Save and Continue button.
After you select the trigger as Quiz Completion, you’ll have to select the action to be performed.
- Send Email Notification
- Call a Custom Script
- WordPress Notification
In this step, select the action as explained in this section here, complete the required settings and click Save Notification.
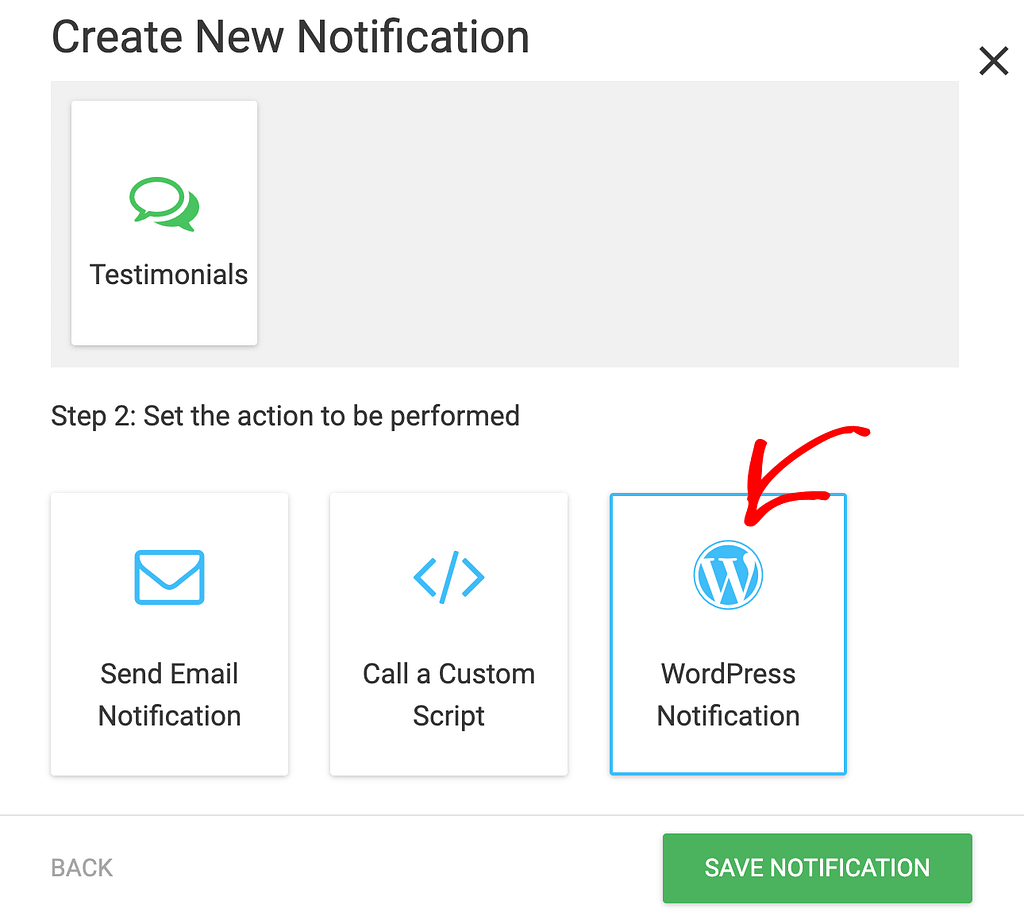
Selecting the Types of Notifications
When you select the trigger that should activate a notification, the next step asks you to select the type of notification you want to receive.
You’ll have to select one of the following:
- Send Email Notification
- Call a Custom Script
- WordPress Notification
Send Email Notification
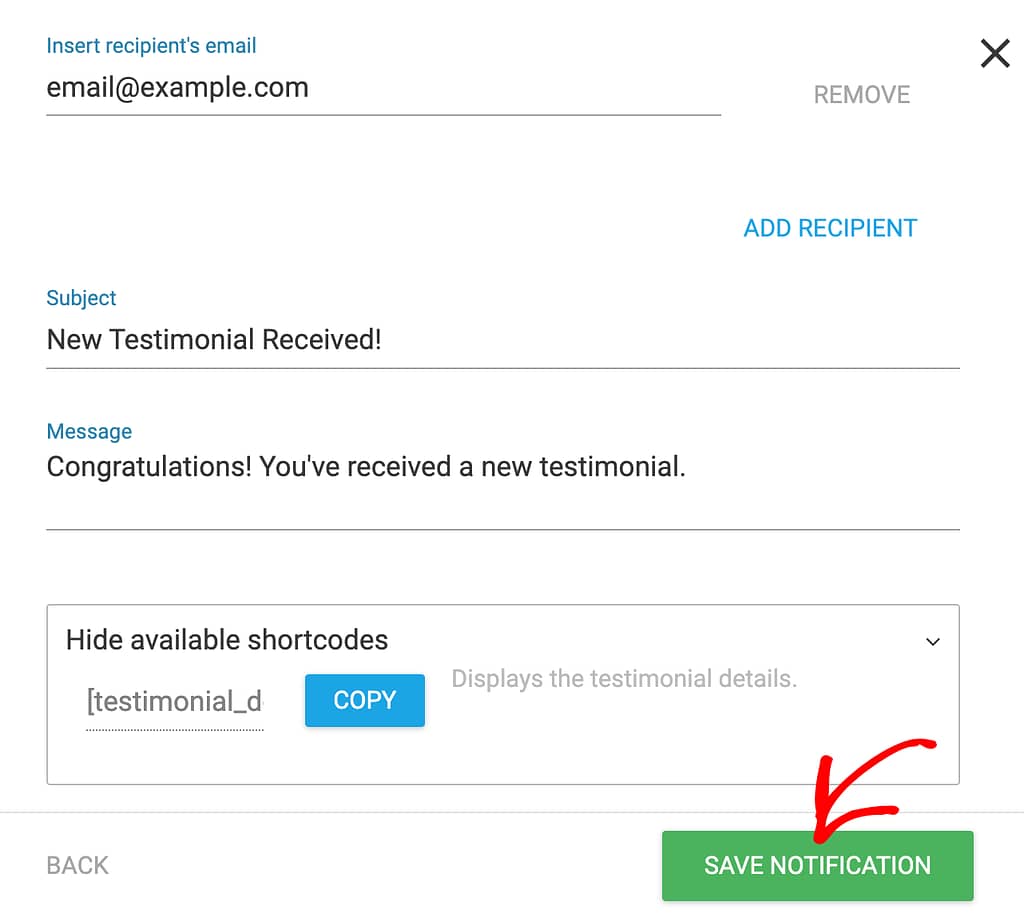
If you want to send an email notification on receiving a testimonial, select Send Email Notification.
When you select to send an email notification, scroll down on the popup to set the recipient’s email address, the subject and the message you want to send through email. With this, click the Save Notification button.
Note: To send an Email Notification, you need to have an email delivery service integration set up on your website. If you haven’t done this yet, check out the available integrations in this article.
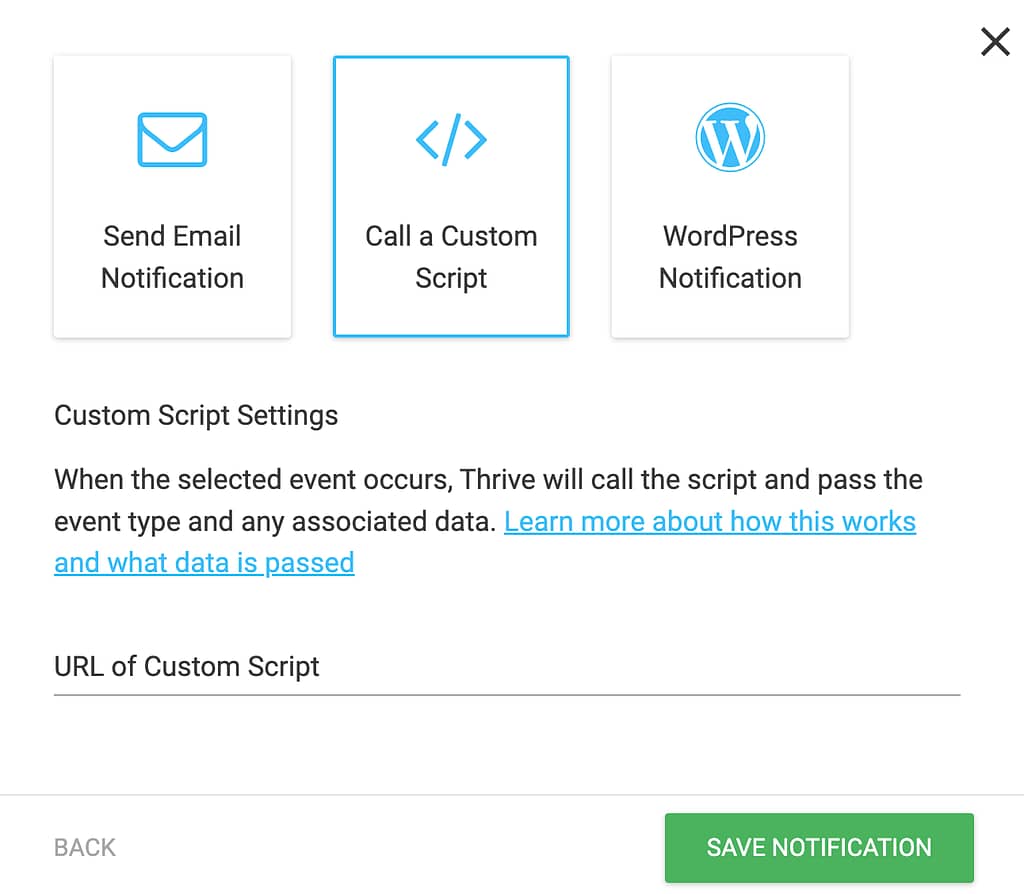
Call a Custom Script
If you pick the Call a Custom Script option instead of Send Email Notification, you’ll see a box where you need to paste the URL of your Custom Script. If you want to learn more about how using a custom script works, read our document here.
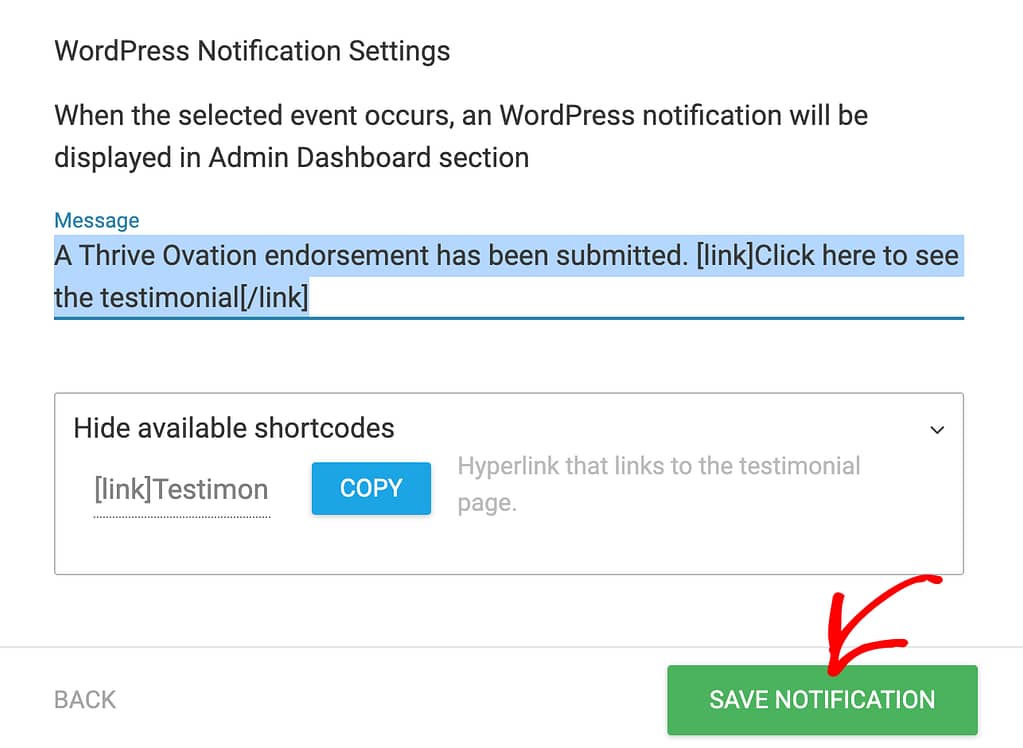
WordPress Notification
If you choose the WordPress Notification option, you’ll get a message on your WordPress Admin Dashboard when a certain action happens.
When you select WordPress Notification, scroll down and add/edit the message in the given field and click the Save Notification button.
We’ve just seen how you can access the Notification Manager in the Thrive Dashboard, set up triggers and the notifications you want.
Next, if you want to enable notifications for Thrive Comments on your website, here’s a document that’ll help.