Do you want to link to a specific section on another page or post? This can be helpful, for example, when you refer to something specific that’s explained better on another page.
With Thrive Architect, you can easily link out to specific elements, like a paragraph or image, on other pages or posts.
In this article, we’ll take a look at the steps that’ll help link to an element on another page.
Creating a Target URL
The first step for creating a URL is deciding what element you want to link to. Then, you’ll need to assign a label to that element.
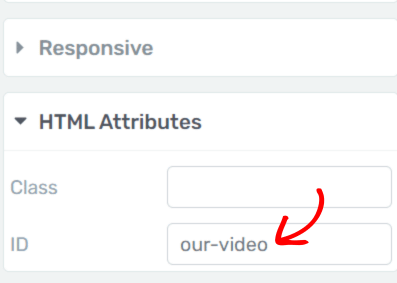
Let’s say you want to link to a video on your About Us page. First, open the About Us page editor and click on the video element. After clicking this, in the left panel, you should see a box named HTML Attributes. This includes a field named ID.
In the ID field, add a label for your video. IDs can’t include spaces, so be sure to replace any spaces with hyphens (-). For example, we’re going to give our video this ID: `our-video`

You can read more about using ID as an HTML attribute in this article here.
After labeling a target element “our-video”, it is time to add this to the page URL.
So, let’s say the About Us page URL is as follows:
https://www.example.com/about-us/You can now construct the URL that will lead straight to the target video. This will be the URL of the page, followed by a “#” symbol and the ID of the element we’ve just inserted in the “HTML Attributes” section.
This makes the target URL:
https://www.example.com/about-us/#our-videoYou now have a target URL that will take users to the specific element on another page when they are on the link.
Linking to the Target URL
Now that you’ve created a target URL, you can set up your link.
To add the link to a text, open the post, select the text, and click on the chain icon (linking option) seen in the panel options.

In the dropdown that appears, select Static, enter the created URL into the URL field, and click on the Insert button.

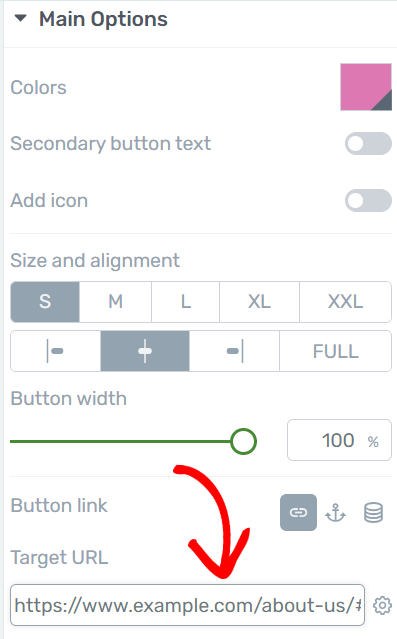
Similarly, if you want to pass the link through an element like a button or an image, click on the button, image, or a similar element and navigate to the Main Options section in the left-side panel.
Under the Main Options, you’ll find an option to add a link to the element. This is where you enter the above-created link in the Target URL field.

You can refer to the detailed document to know more about adding hyperlinks using Thrive Architect.
We’ve just seen how you can construct a target URL and link to an element on another page of your website.
Next, need help styling the links you display on your website? Here is an article about how you can style links to make them look good and grab attention.