Do you want to display different pricing tables during sales without having to do that manually? With the Conditional display feature in Thrive Architect, you can set the custom pricing table to replace the original one for a set period of time.
In this article, we’ll show you how you can enable your website to show up a different pricing table during the sales period.
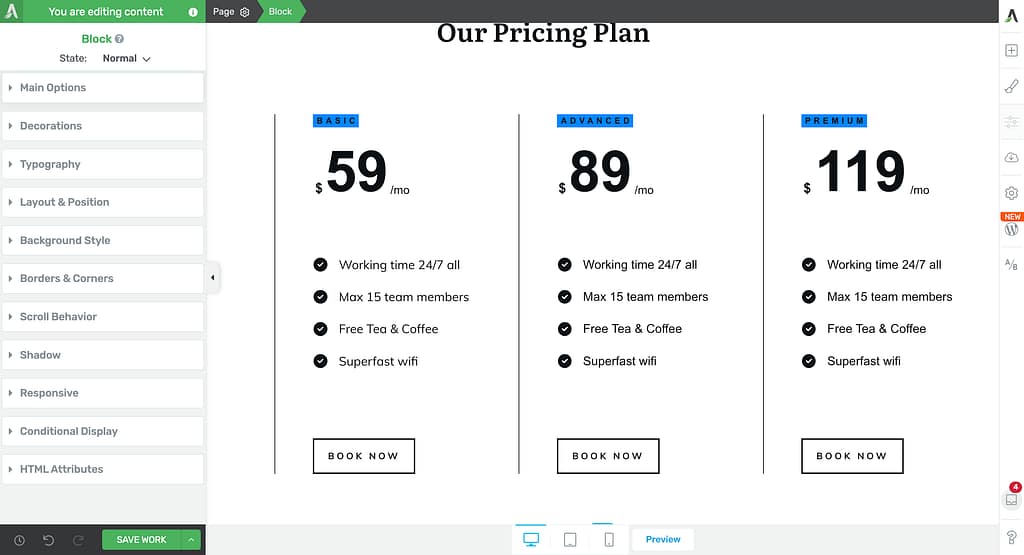
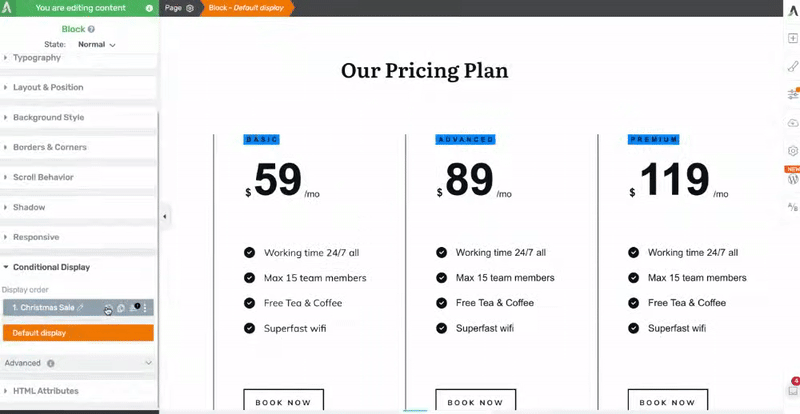
Adding a Pricing Table to a Page
A pricing table is a section where you can add all the pricing options you have to offer. With the Pricing Table element in Thrive Architect you can customize and add all your pricing options.
If you’ve already added the Pricing Table element on the page, open the page in the Thrive Architect editor.
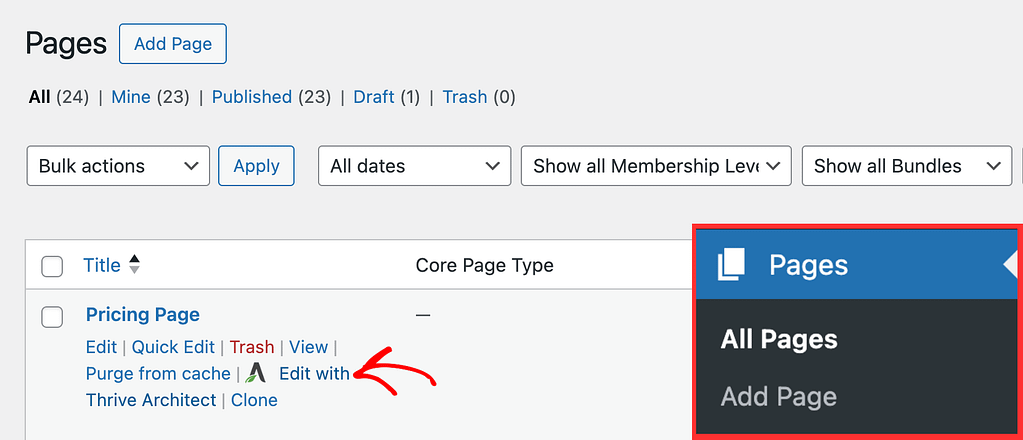
If you haven’t yet added the element, start by opening your WordPress admin area, navigating to Pages >> All Pages, hover on the page you want to edit and click Edit with Thrive Architect.
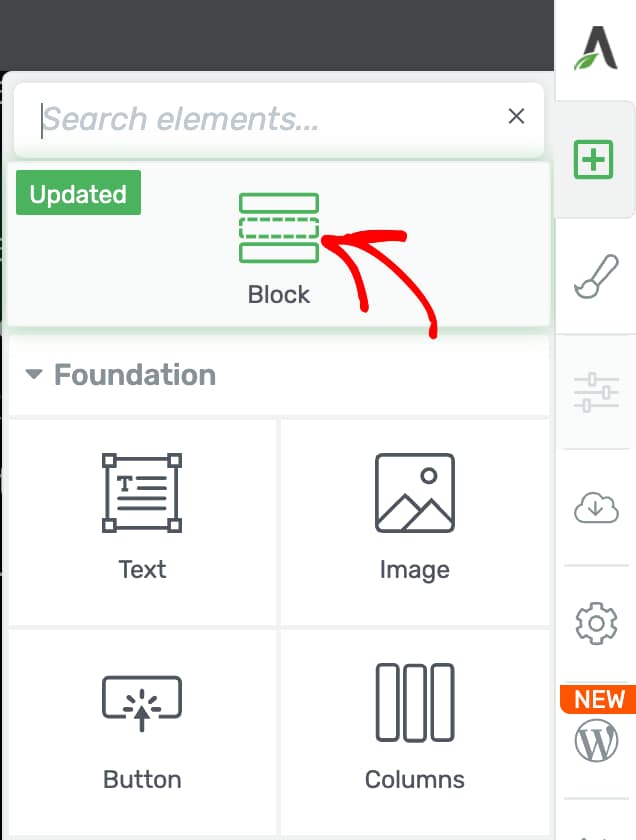
In the editor, go to the right panel and click the plus (+) icon.
Note: To apply the conditional display feature to a pricing table, ensure it is added within an element such as a Background Section, a Content Box, or a Block that supports this feature.
In the Thrive Architect elements list, search the Block element and drag and drop it on the page.
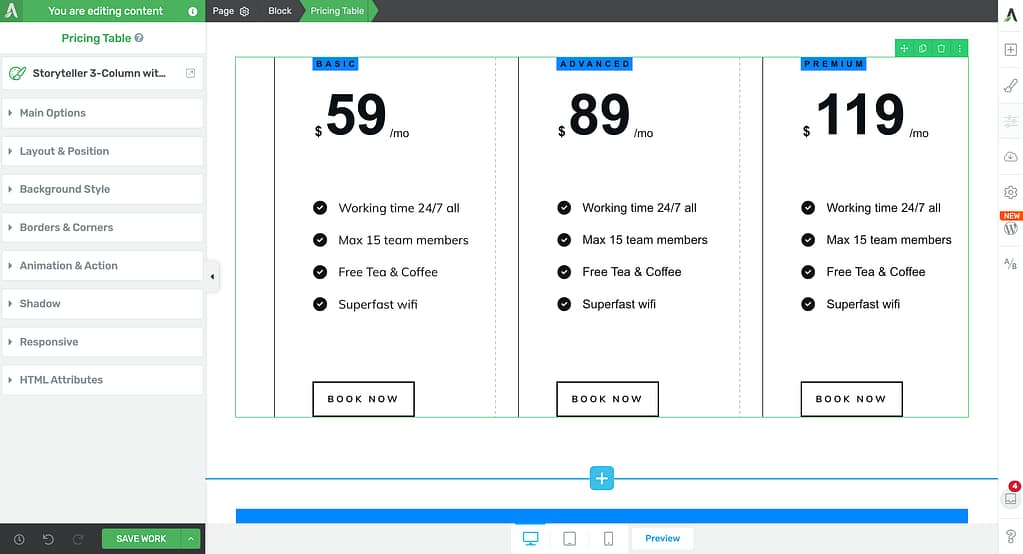
After adding a Block to the page, again search the Pricing Table element in the Thrive Architect elements list and drag and drop it inside the Block.

Dragging and dropping the element on the page will open a popup where you have to select the template you want to use.
You can read more about customizing the Pricing Table element in our dedicated document.
Managing the Conditional Display of the Pricing Table
When you’ve added the pricing table inside a Block on a page, the next step is to set up the conditional display for it.
Since the Conditional Display feature cannot be added to a Pricing Table element directly, we’ll be adding it to the Block.
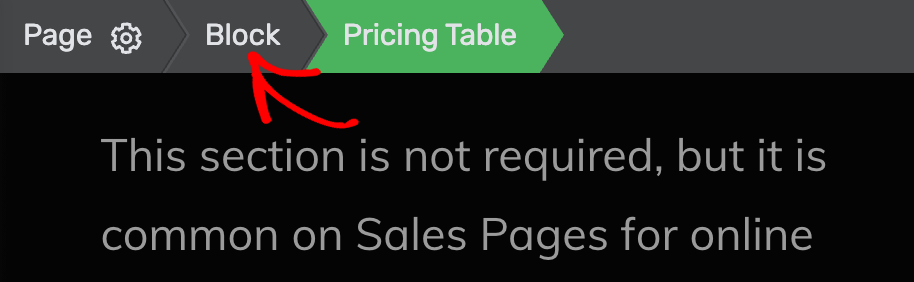
To do so, first click on the Block element in the breadcrumb.
Clicking to open the Block, will also open the Block options in the left column.
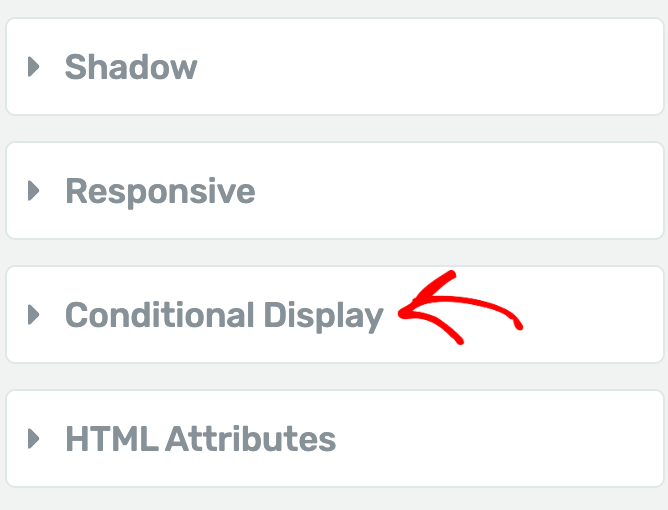
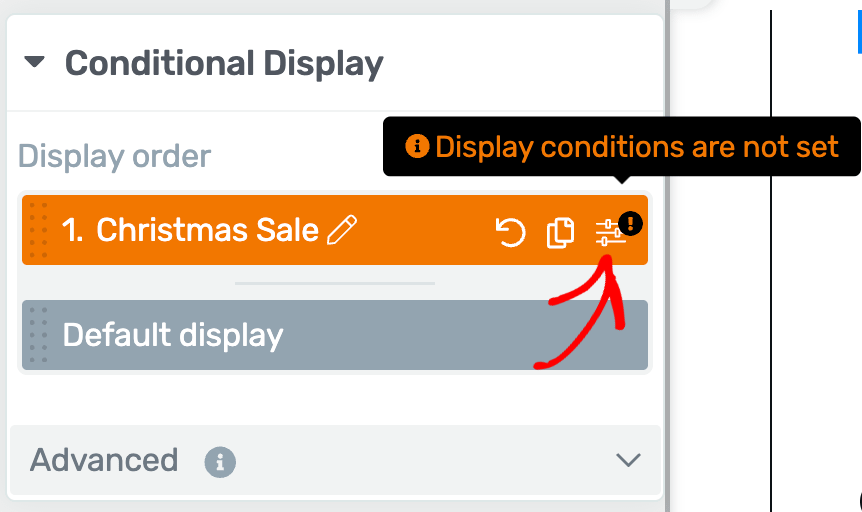
In the left column, click to open the Conditional Display options.
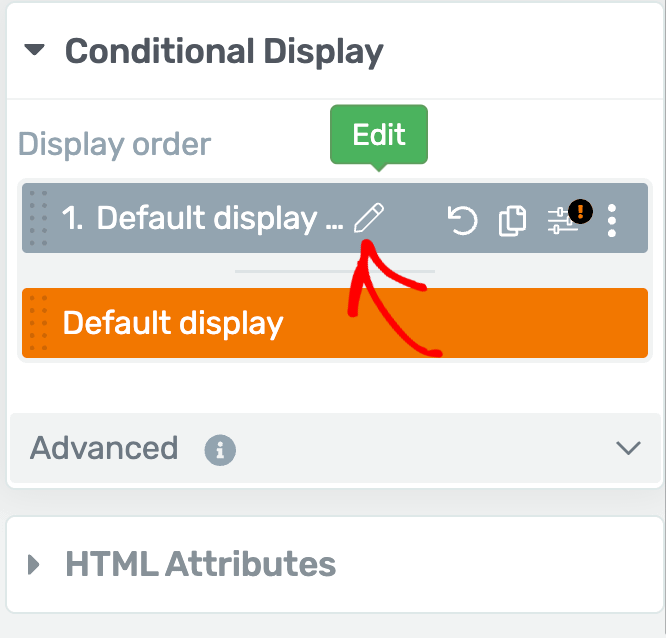
Under Conditional Display, you’ll see a Default display tab. On this tab, click the duplicate icon.
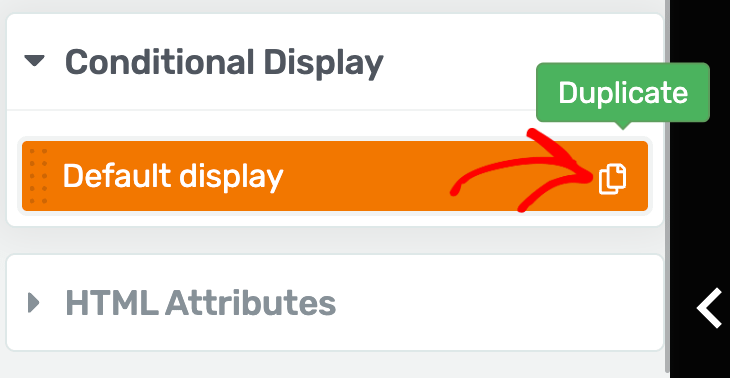
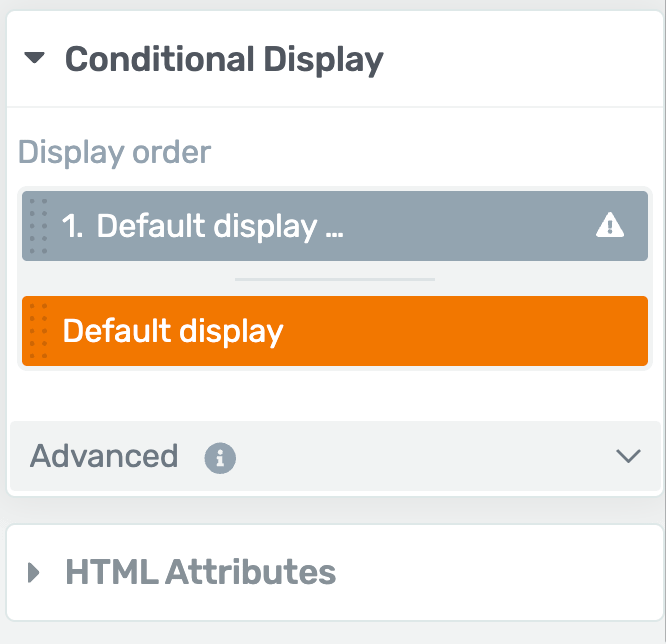
When you click the duplicate icon, this will instantly create a second display, which is a copy of the default one.
Before we proceed, just so there is no confusion, it’s a good idea to rename the duplicate display created under Conditional Display.
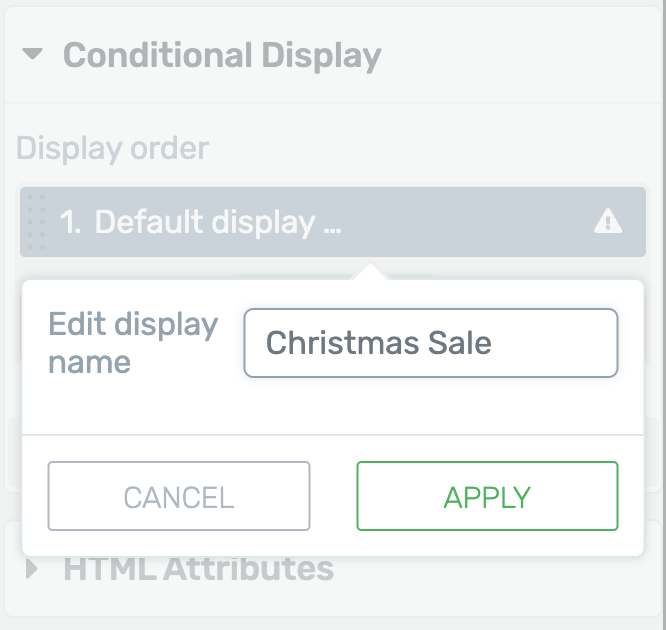
To do so, hover on the Display tab and click the pen icon.
Clicking the pen icon will open a dropdown where you enter the new display name and click the Apply button. For this example, we’ll name it Christmas Sale.
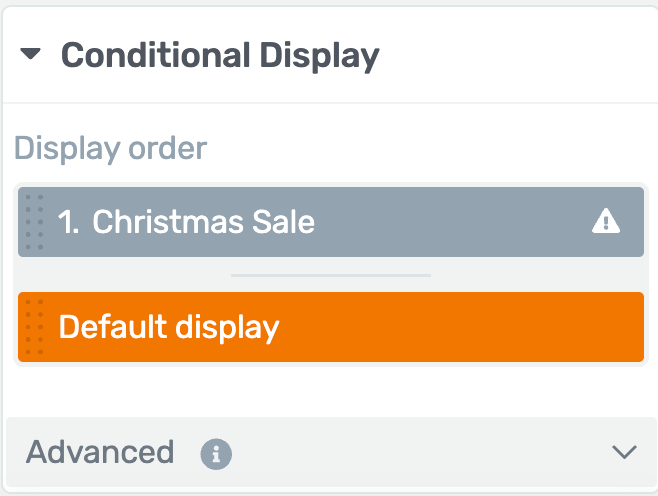
The next thing worth noting is that the active display is highlighted in orange under Conditional Display. Here, active means the display opens in the page editor.
After creating a duplicate display and renaming it, the next step is to change the pricing in the duplicate display meant to be displayed during the sales period.
To edit the pricing table in this display, under Conditional Display, click on Christmas Sale display.
When you click on a tab under Conditional Display, you’ll see that block open in the editor where you can change the prices you want to display for the sale.
Just like the pricing, you can change text, icons and styling of the pricing box.
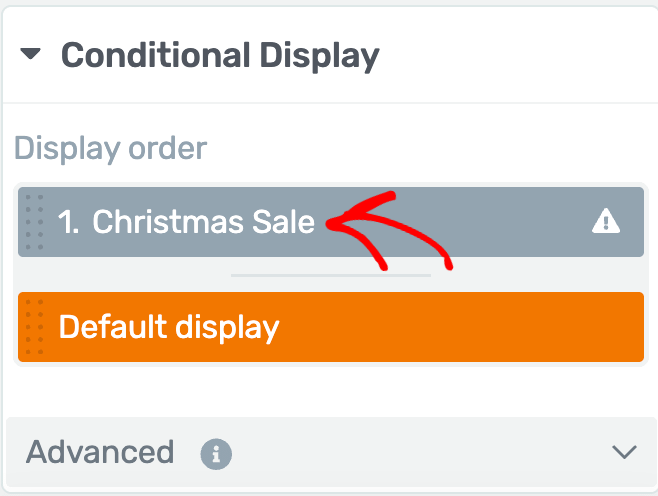
When you finish creating a duplicate display of the block containing the pricing table, the next step is to set the conditions to display it.
To set display conditions for the Christmas Sale display, under the Conditional Display settings, hover on the Christmas Sale tab and click the filter icon.
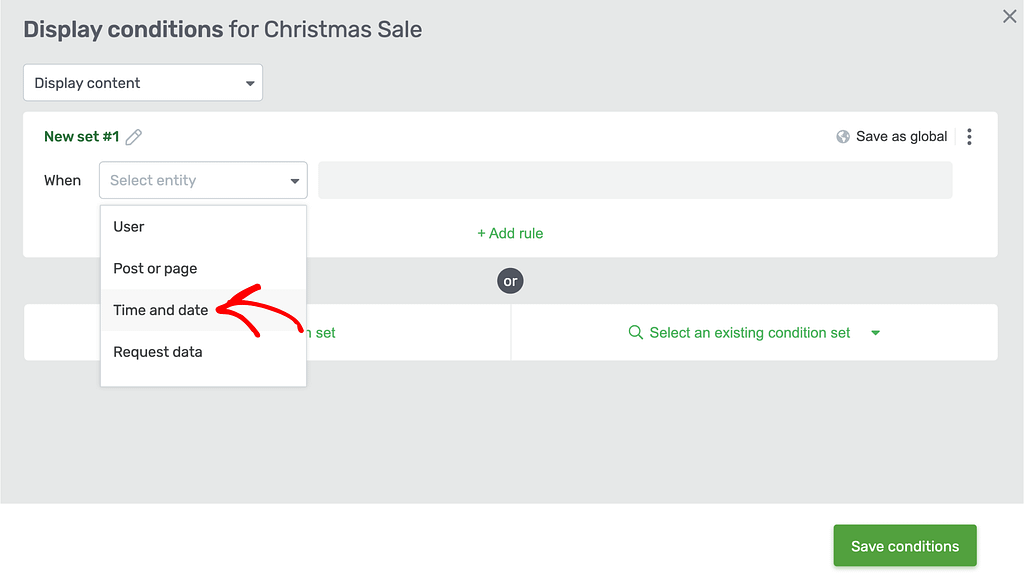
When you click to open the conditional display settings of the new display, you’ll see a popup where you have to set a condition when this block will be displayed.
On the popup, click on + New condition set.

After clicking to add a new condition set, click the first dropdown and select Time and date.
When you select Time and date in the first dropdown, click to open the second dropdown and select Date.
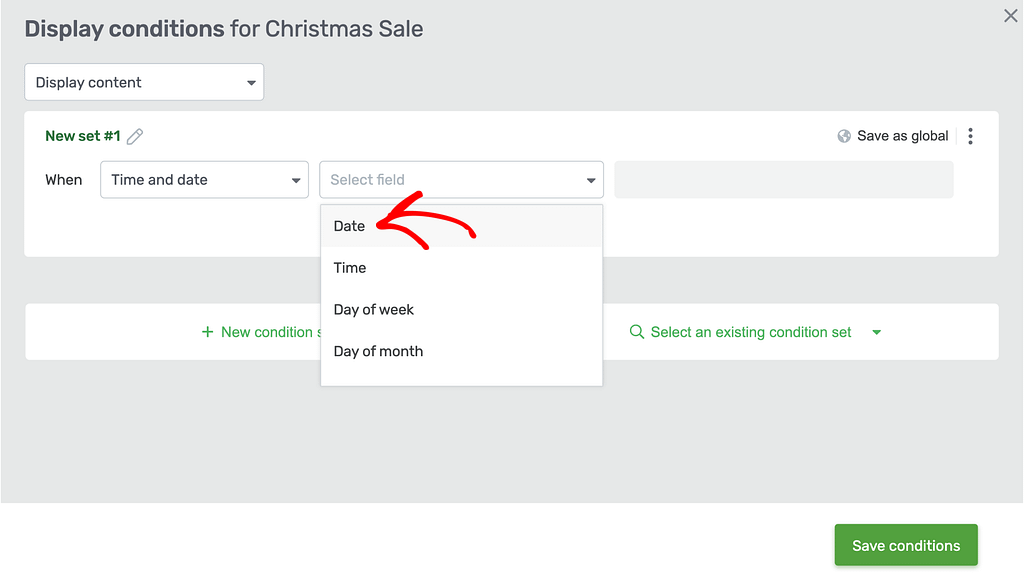
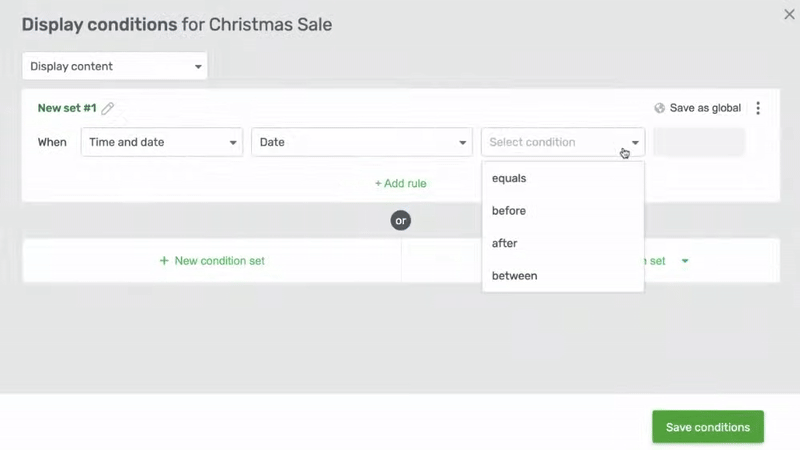
Selecting Date in the second dropdown will show up the third dropdown with the following options.
- Equals: The condition will be triggered only on the specified date you select in the next field.
- Before: The condition will be triggered from the present moment until the date selected in the next field.
- After: The condition will be triggered after the specified date you select in the next field.
- Between: The condition will be triggered between the start date and the end date you select in the next fields.
A sale period can be a single day or a number of consecutive days. If you are running a sale on a single day, select equals in this dropdown.
For this example, let us consider we are offering a sale between 24th to 27th of December 2025. Therefore, select between in the third dropdown and select the date range in the following fields.
After you’ve entered the date range when you want to display the Sale pricing, click the Save conditions button.
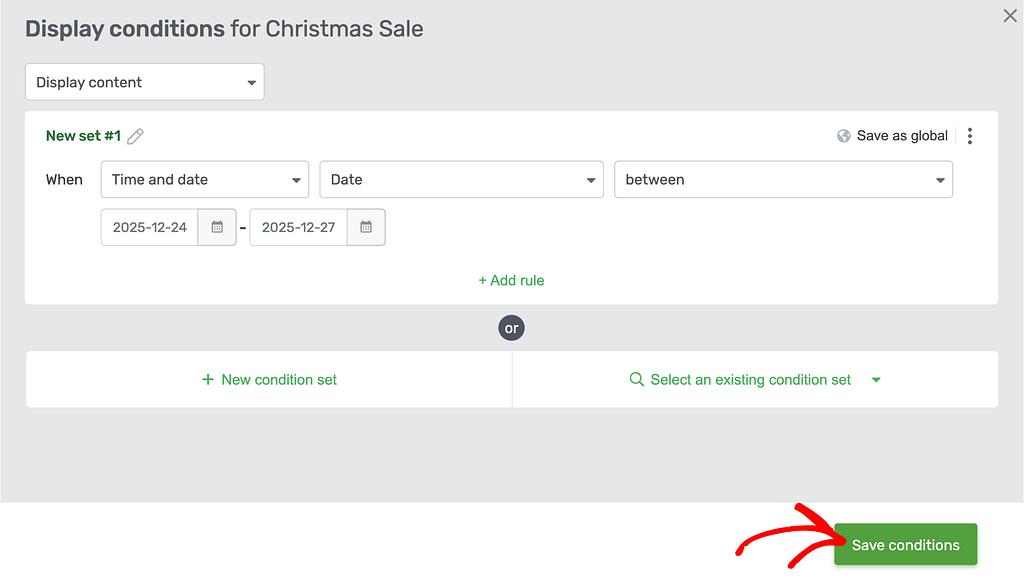
Saving this will ensure that the new pricing table you created in the duplicate block will be shown only between the set dates – i.e. between the 24th of December to the 27th of December 2025 in this example.
With Thrive Architect’s Conditional Display feature you can add many more conditions or combinations of conditions used to display content on a page. You can read more about Conditional Display settings in our document.
Next, are you a local business and want to display sections based on your working or closing hours? Here’s our document that can help you set that up.