Do you want to show or hide a section based on your closing hours every day? The Conditional Display feature can help you set this up especially when you have a local business or one that wants web content to be shown according to the working hours.
In this article, we’ll show you how you can display different content within the same section based on your business timings.
Creating a Content Section in Thrive Architect
To add a conditional display to a section, first complete the section you want to show up.
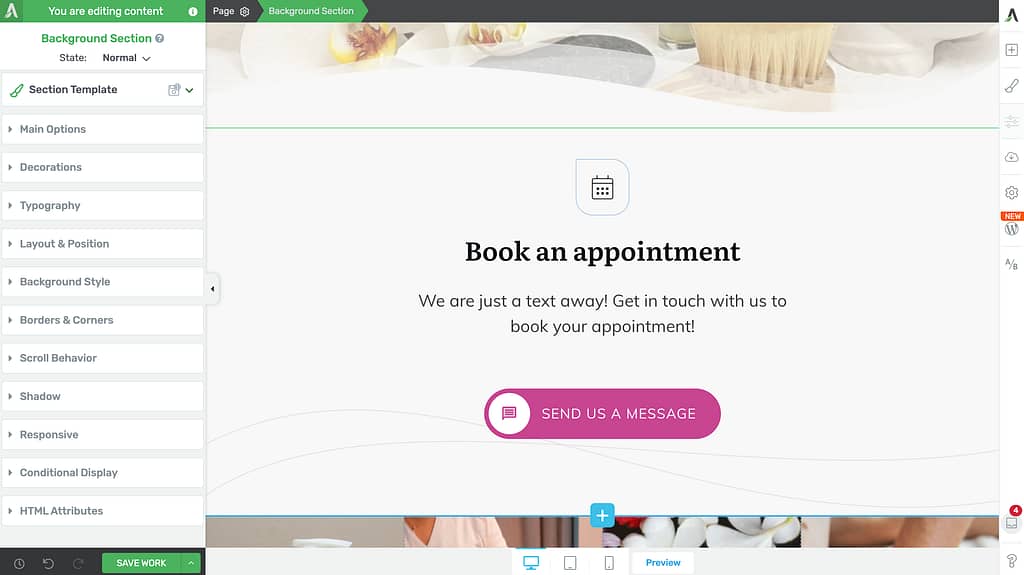
In this example, we’ll consider a local business that shows a button letting users send in a message at the click of a button. This section should be shown only during the business hours and should be replaced by another one when the business is closed.
In this example, we’ve added a call-to-action that allows users to send an SMS only during business hours. To understand how you can allow users to drop you a message automatically on the click of a button, read our article here.
To build a page and add sections to it using Thrive Architect, refer to our document here.
This section will be replaced by another one that will inform users that the business is closed and redirect them to the Contact page during the business closing hours.
Enabling Conditional Display Based on Business Hours
To enable conditional display on an existing section, you’ll first need to duplicate the current section, make the edits you want and then set the display conditions.
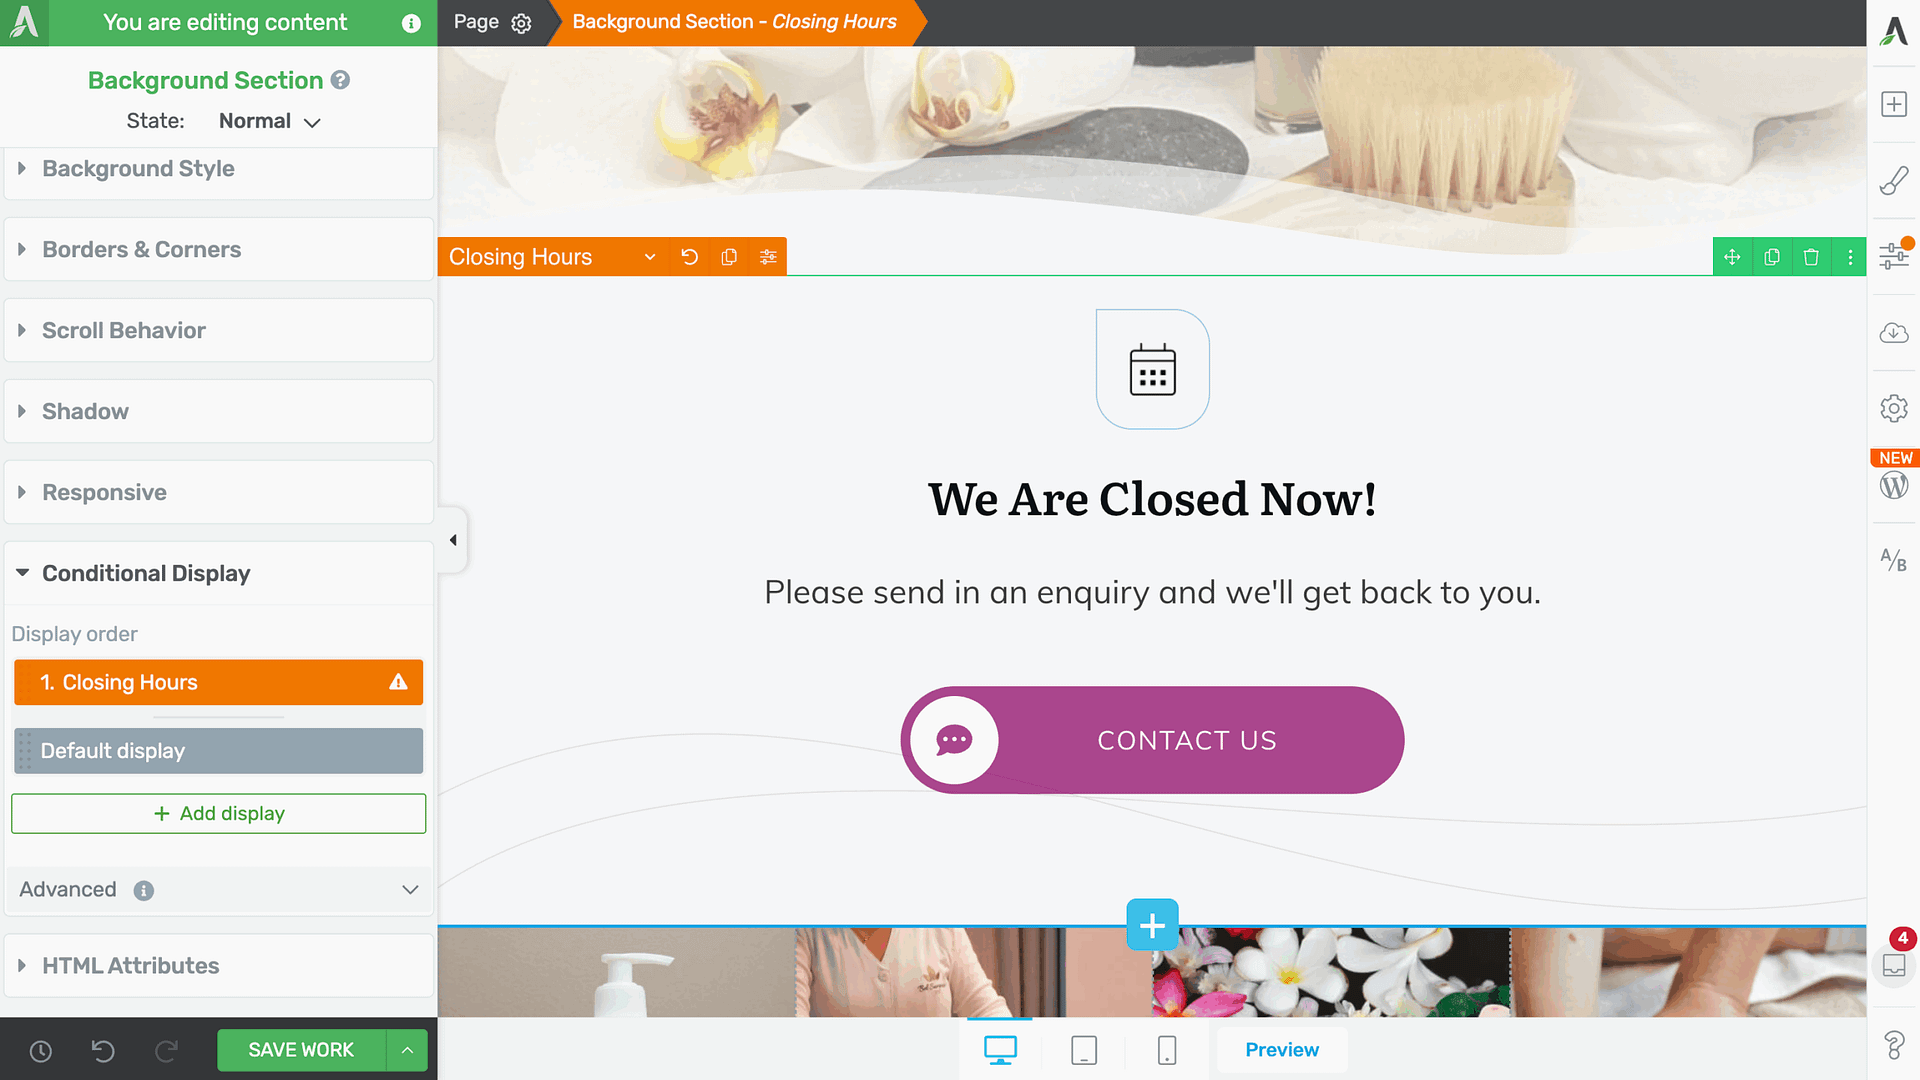
To begin, open the page in the Thrive Architect editor, click on the Background Section (or the container element you’ve included the section in). This will open the element options in the left column.
In the left column, scroll down and click to open the Conditional Display tab.

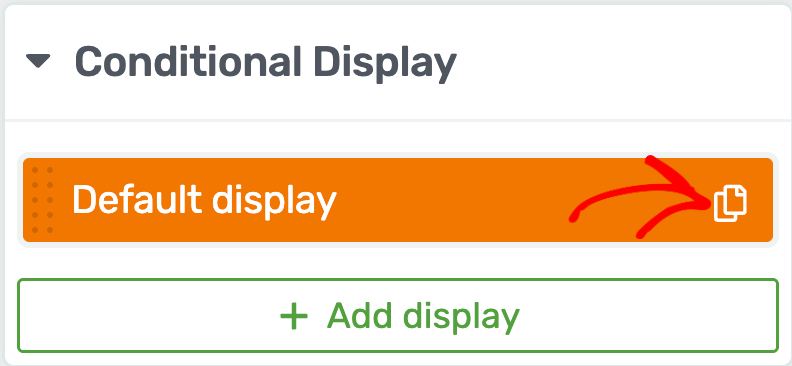
Under Conditional Display settings, you’ll see the active section.
To add a conditional display, clone the current section and add a display condition to it.
To clone the section, hover on the current section and click the duplicate icon.
After duplicating the current display, we recommend you to rename the duplicate display to avoid confusion.
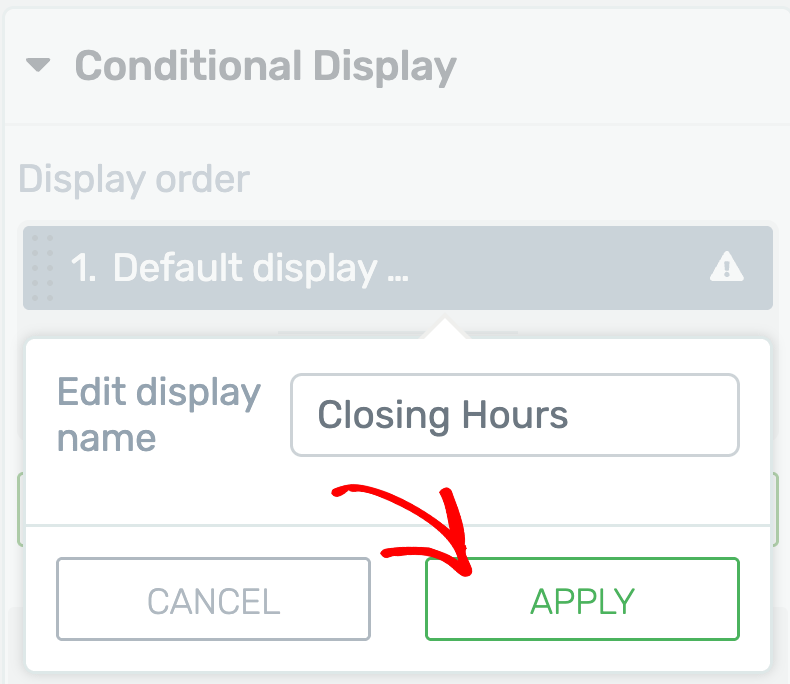
To rename the duplicate display, hover over it and click the pen icon.

After clicking the pen icon, enter the display name in the given field and click the Apply button.
We’ve renamed the duplicate display as Closing Hours for this example.
When you rename the duplicate display, click on it to open that in the editor.
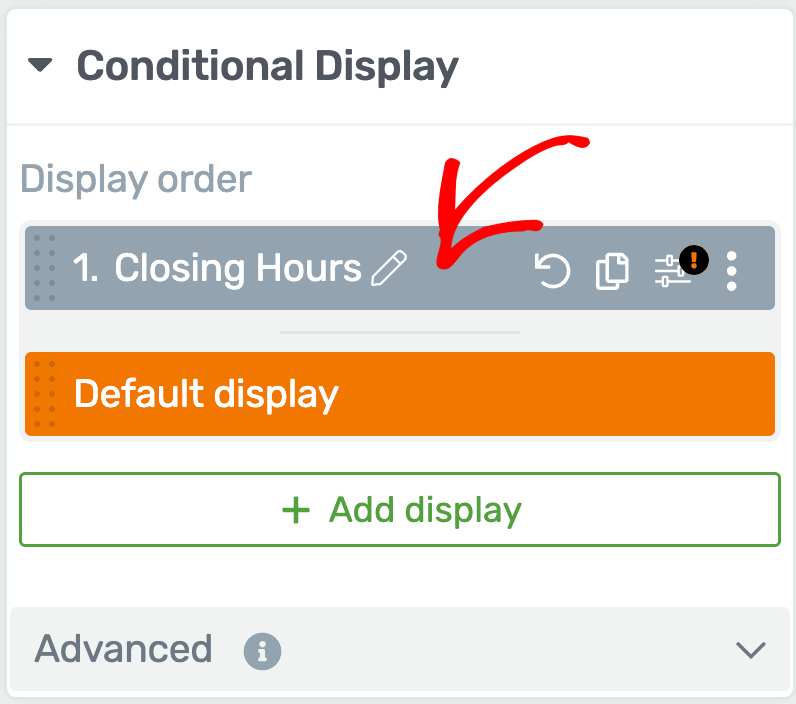
Clicking to open the duplicate display – the Closing Hours display in this example, you’ll see it open the editor.
In the editor, make the required changes by editing the content, style, or by adding and removing elements as you want.
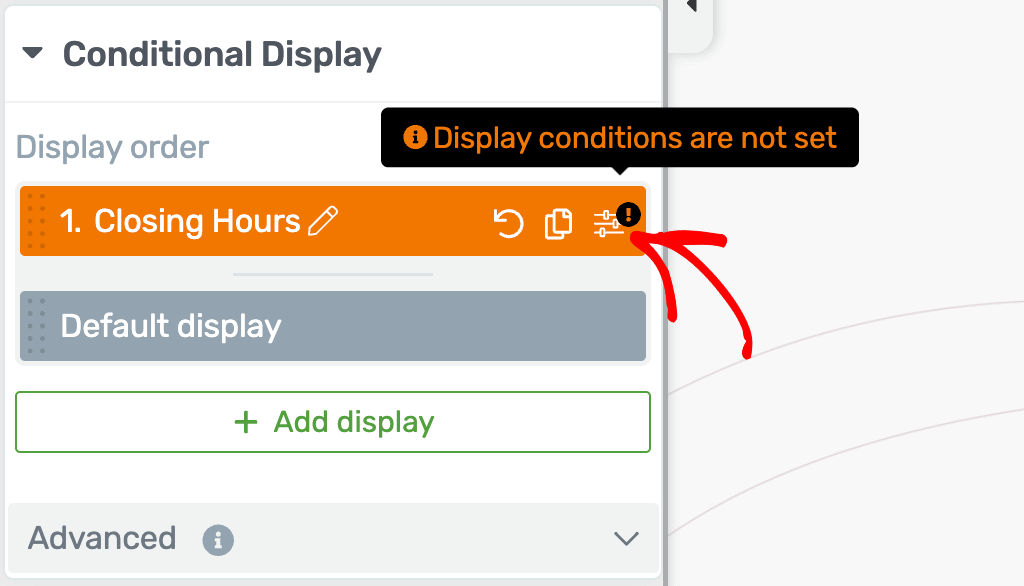
Once you finish editing the Closing Hours display, hover on the display tab and click the filter icon.
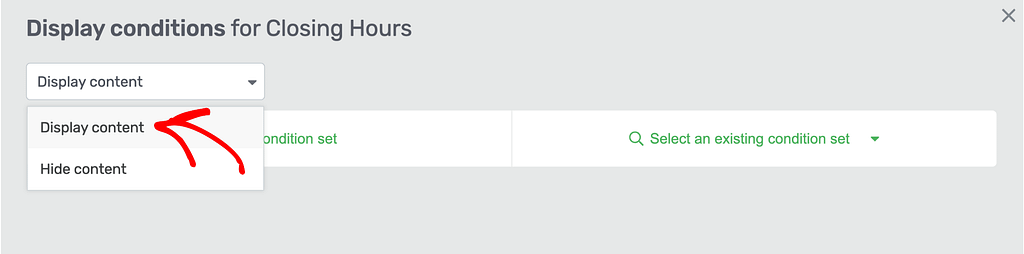
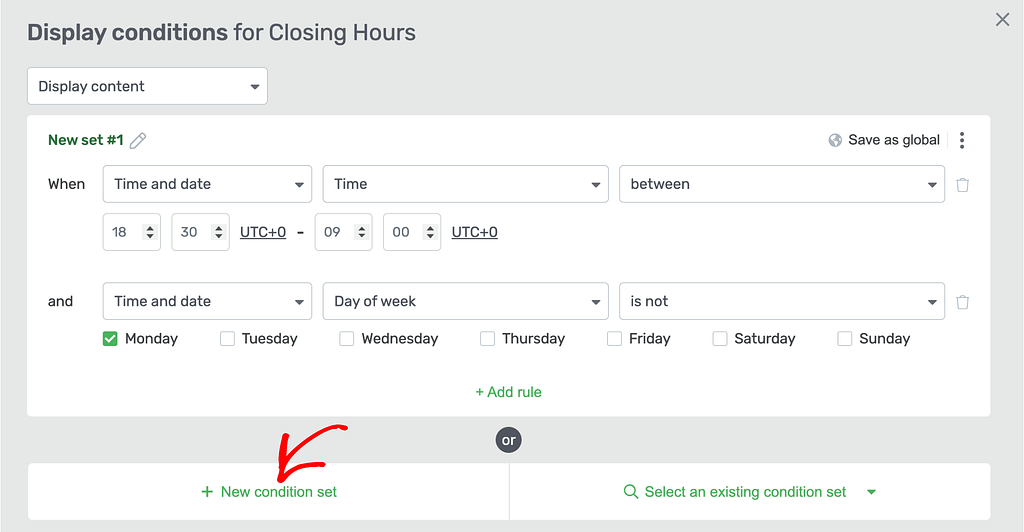
When you click to add a condition, you’ll see a popup where you click on the top dropdown and select Display content. Doing so will let you add a condition for when you want the content to be displayed.
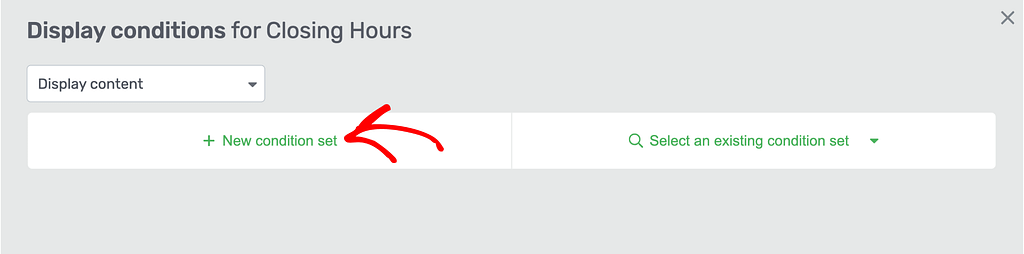
To continue, click + New condition set.
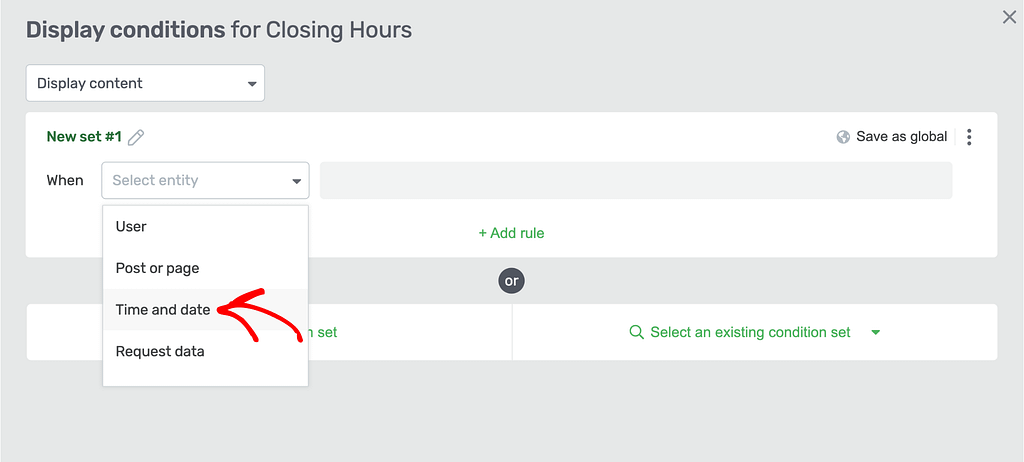
When you click to add a new condition set, click the dropdown to select the entity as Time and Date.
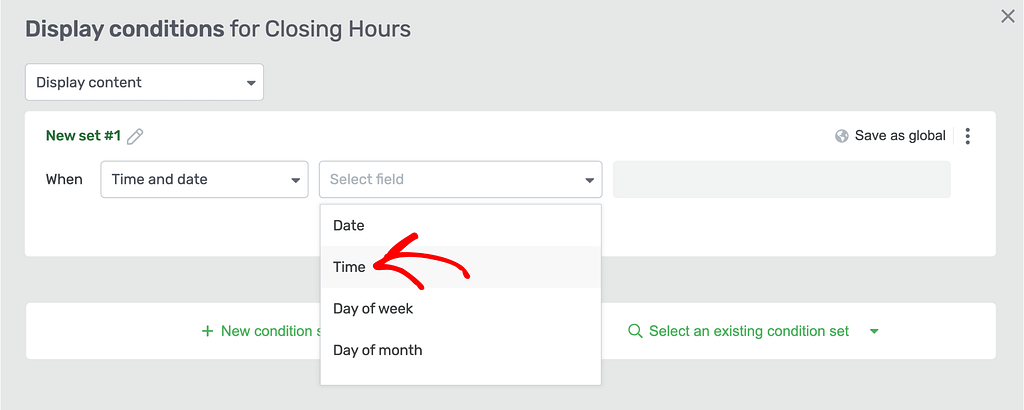
After selecting the entity, click the net dropdown and select the field Time in it.
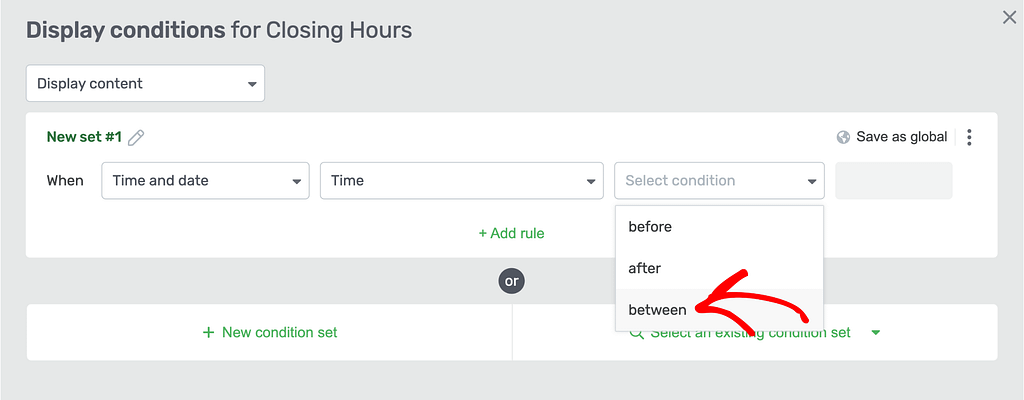
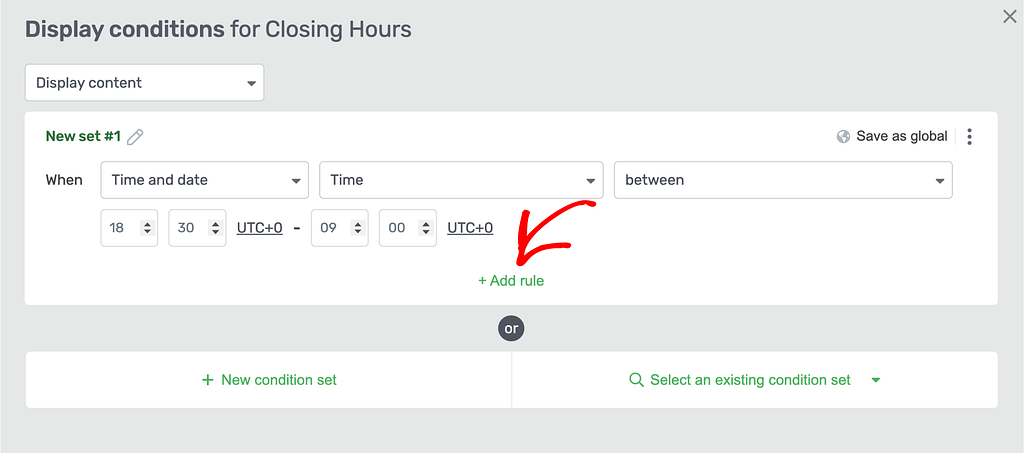
When you select Time, click on the next dropdown and select between.
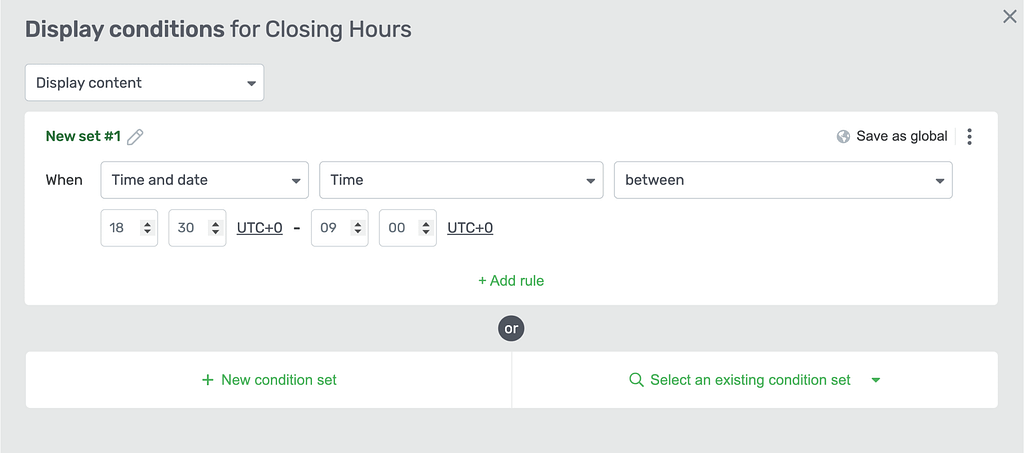
This means that the business will be closed between 18:30 to 9:00 UTC.
To add this condition, select between in this field.
After selecting between, enter the closing hours in the fields given below.
As mentioned, the business is closed on Monday and open all the other days of the week.
This means that the Closing Hours display should be shown up between 18:30 to 9:00 UTC on all days except Monday.
To ensure the above timing is added to other days except Monday, click the +Add rule link.
Once you click to add a rule, click the dropdown to select the entity Time and Date.

After selecting the Time and Date entity, in the field dropdown, select Day of week.
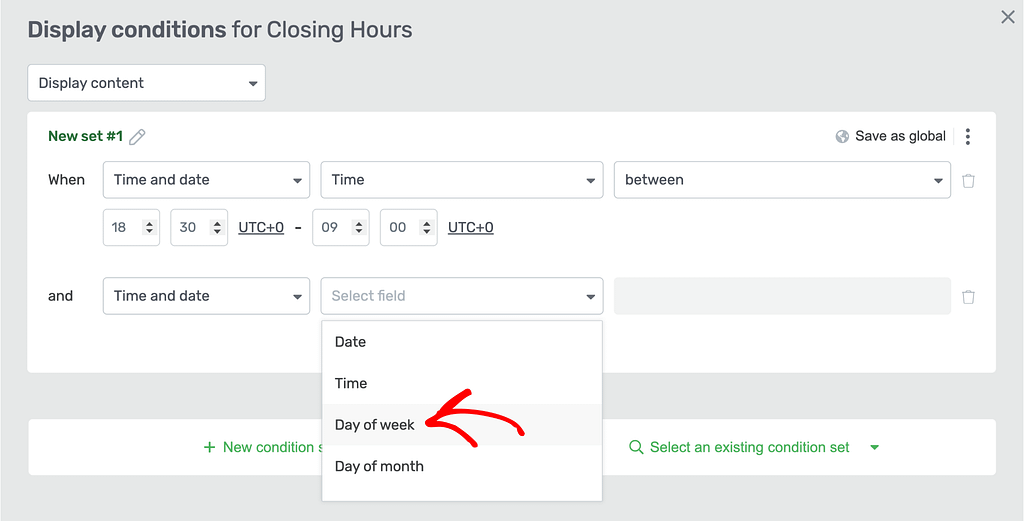
When you select Day of week, in the next dropdown select Is not.
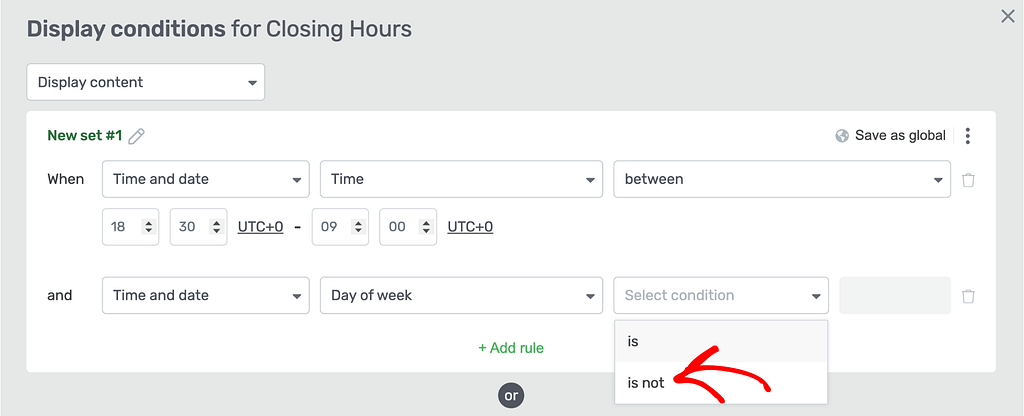
In this example, we want to apply this condition to the selected time on days other than Monday.
This means in the next step, select Monday.
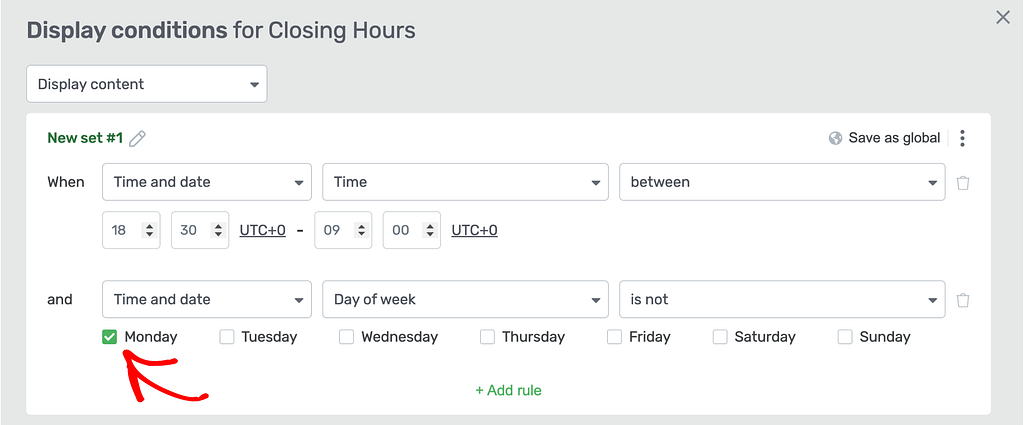
Now, this entire condition that we set means the Closing Hour display will be shown on all days except Monday between 18:30 and 9:00 UTC.
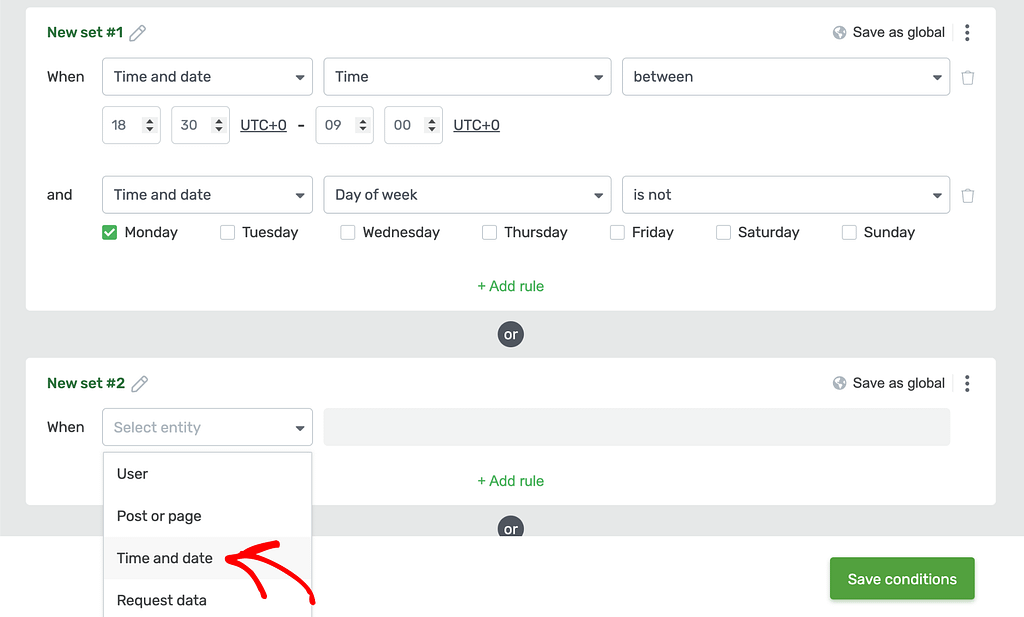
But, as mentioned above, the business has a weekly off on a Monday. So, we want to display the Closing Hours display on Mondays every week.
To do so, start by clicking the +New condition set link.
To add the or condition rule, click the dropdown to select the entity – Time and Date.
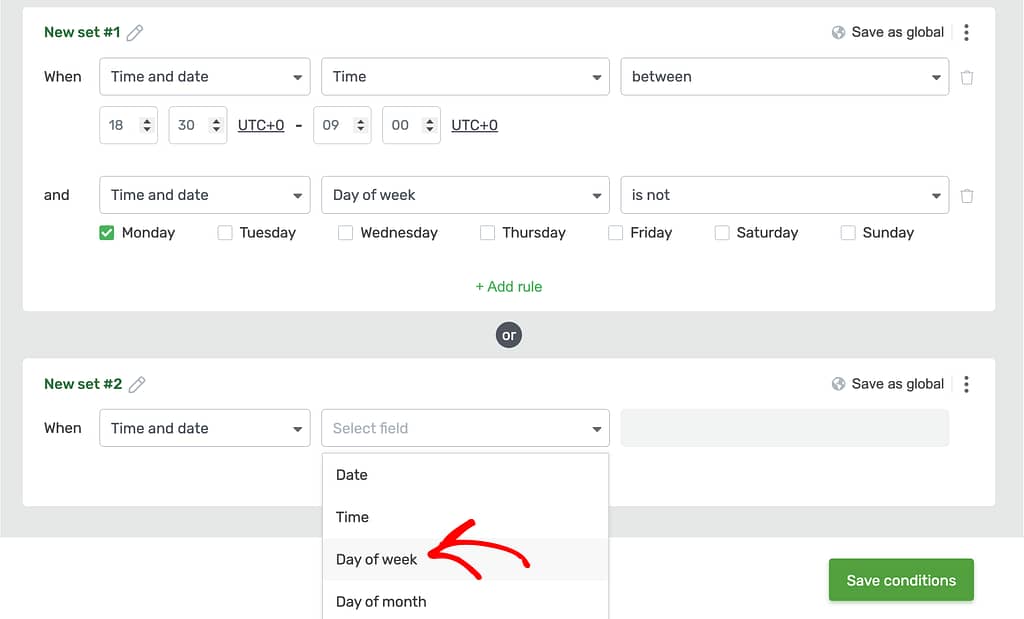
After selecting the entity, click the next dropdown and select the field Day of week.
When you select Day of week, select is in the next dropdown.
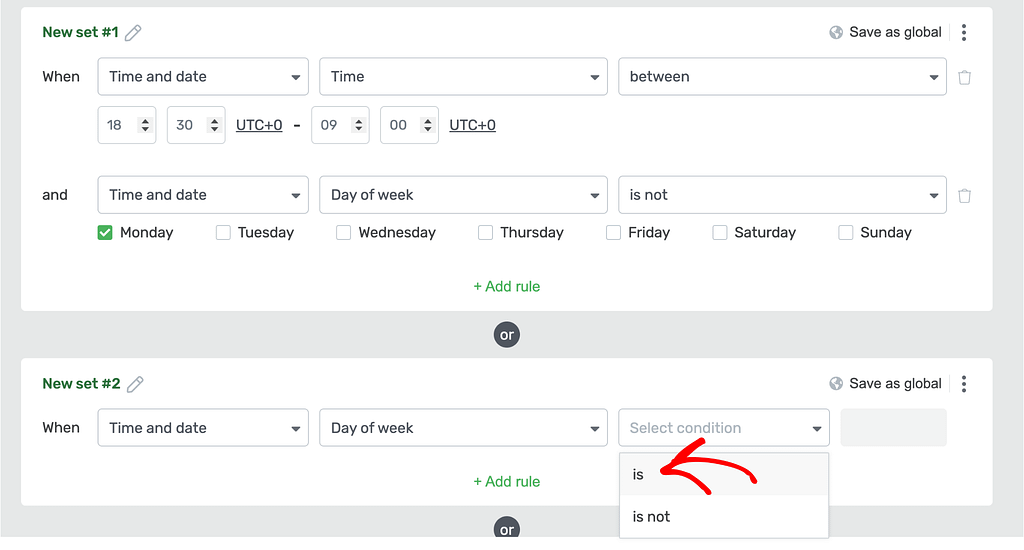
In the next step, select Monday.
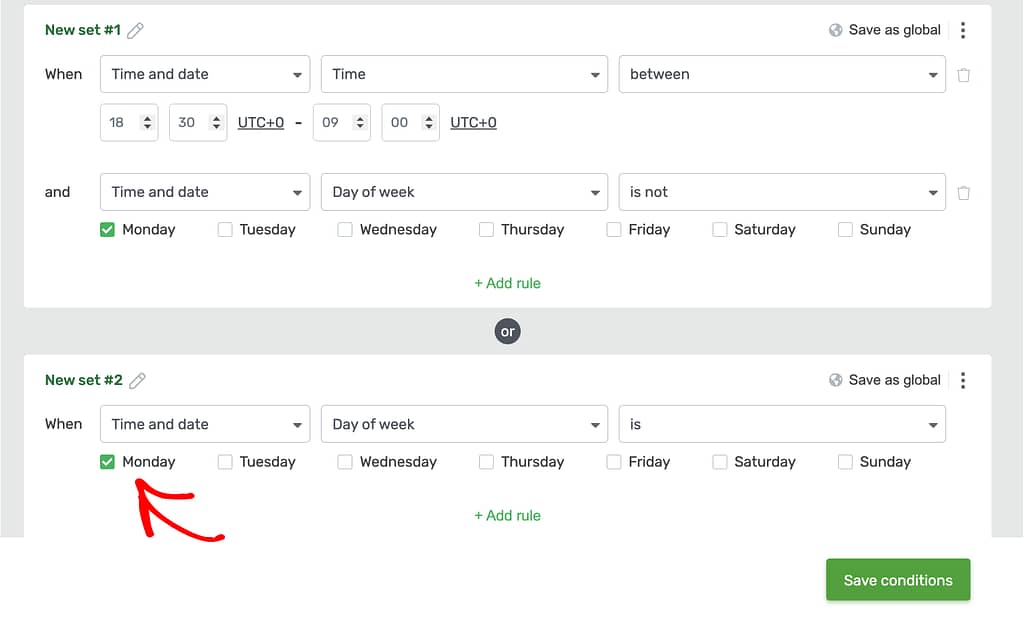
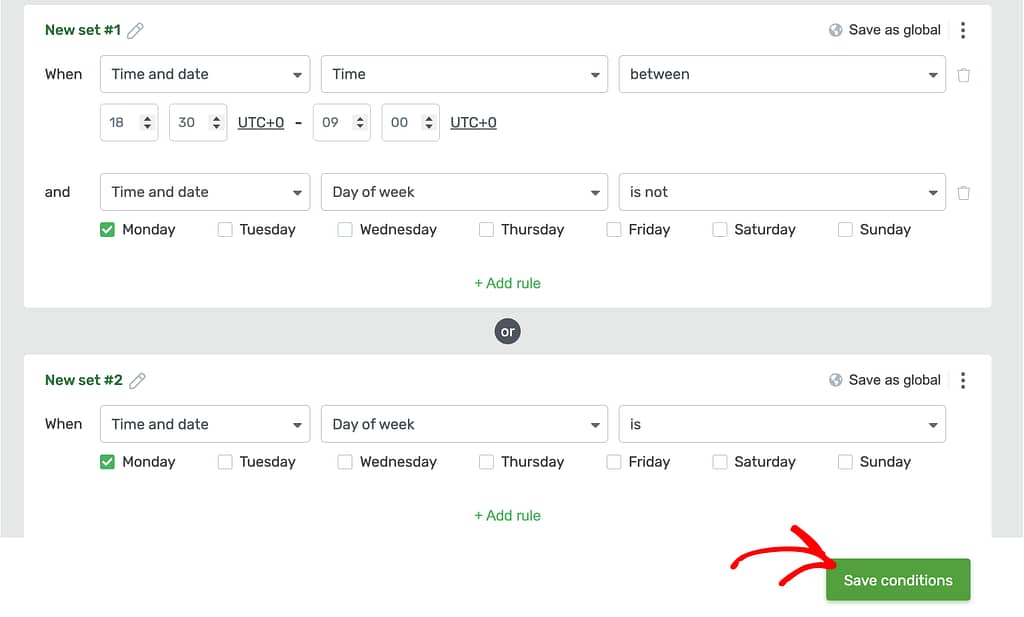
Now, the conditions you’ve added will ensure the Closing Hours display will be shown up between 18:30 to 9:00 on all days of the week and for the full day on Mondays.
After you’ve added all the above conditions, click the Save conditions button on the popup.
When you finish all of this, click the Save Work button in the bottom left to save all the changes made on the page.
We’ve just seen how you can add conditional display rules for a section you want to show during the times your business is closed.
Next, do you want to display customized pricing plans for sales promotions and the other days? You can refer to our document here.