We’ve introduced a new feature – the ability to add a “User Profile” element to your pages/posts. This element is available if you have either Thrive Apprentice or Thrive Theme Builder installed.
What this element does, is that it allows your logged-in users to edit their user information, change their email, password, and so on.
If you need help setting this element up, or understanding what you can use it for, please check out these resources:
- How to use the “User Profile” element – Knowledge Base article
- February 2021 updates – blog post
The purpose of this article is to show you one of the ways in which this feature can be implemented on your website.
Here’s an example of such a setup: you can create two separate pages on your site – “My Profile” and “Edit Profile”.
→ The “My Profile” page is the page where the user can see their details (name /email /etc.),
→ and the “Edit Profile” page is the one where they can actually edit the information from.
This last page should have the “User Profile” element added to it.
Then, we can make the “My profile” page visible for logged-in users only.
This way, we can achieve the following result: if a Thrive Apprentice user is logged in, they will have the option to view their profile information and, even further, to edit it.
In this article, I want to show you one of the ways to get this done.
Create the “My Profile”/ “Edit Profile” pages
Firstly, if you want to achieve something similar to the example that I’ve stated above, you will have to create two separate pages.
For that, as you probably know by now, you’ll have to access the left sidebar of your WordPress admin dashboard, hover over “Pages” and click on “Add New”:

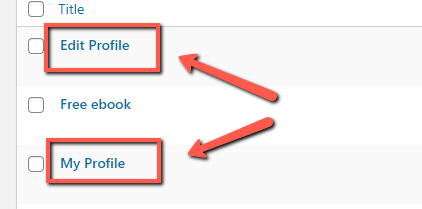
In this case, I’ve created two different pages:
Customize the pages
Naturally, after creating the two pages, you can open them in the Thrive Architect editor, and customize them as you wish.
“My Profile” – customize this page using dynamic information
The “My Profile” page will be the page where the logged-in users can view their information.
We can also include an “Edit Profile” button, that can link to our “Edit Profile” page, so that the users can have a quick path to editing their information.
So, this page can look something like this:
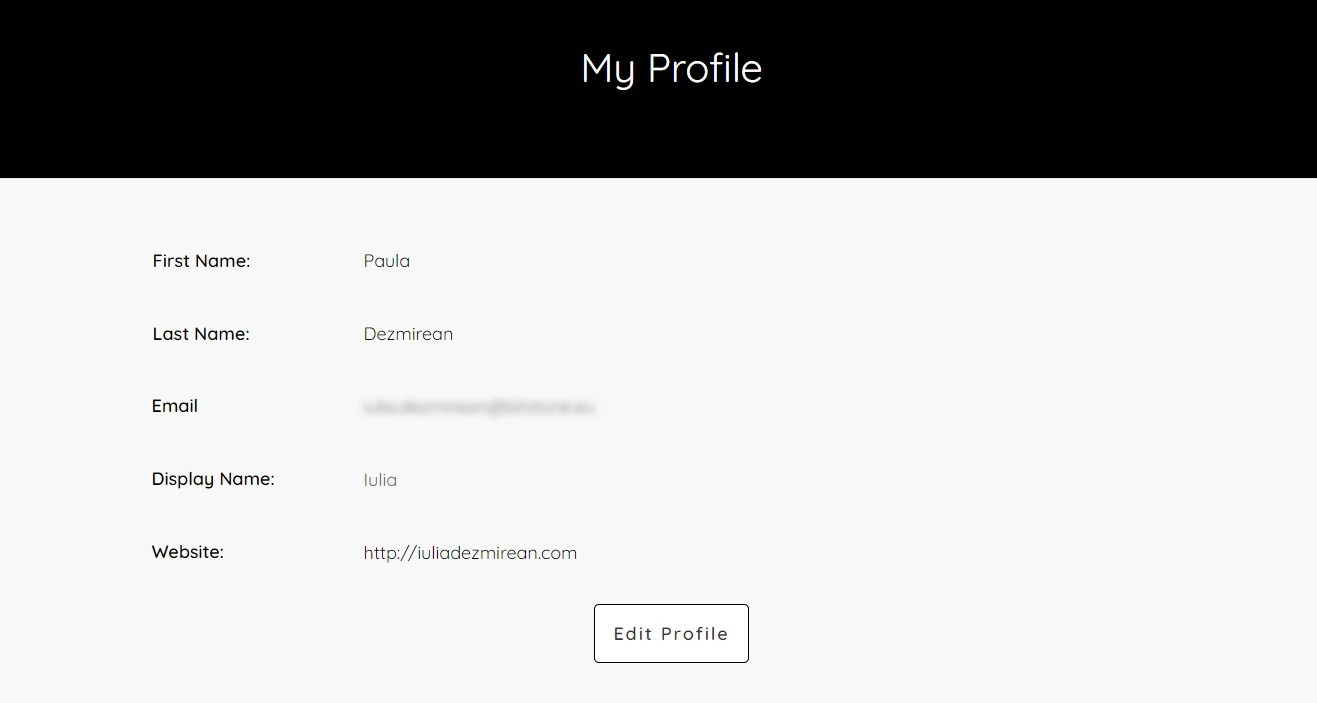
This can be very easily achieved: every field can be added as a “Text” element.
The static text will be manually added, and the actual name/last name/email/etc. can be inserted as dynamic information.
Here is how I created the page:
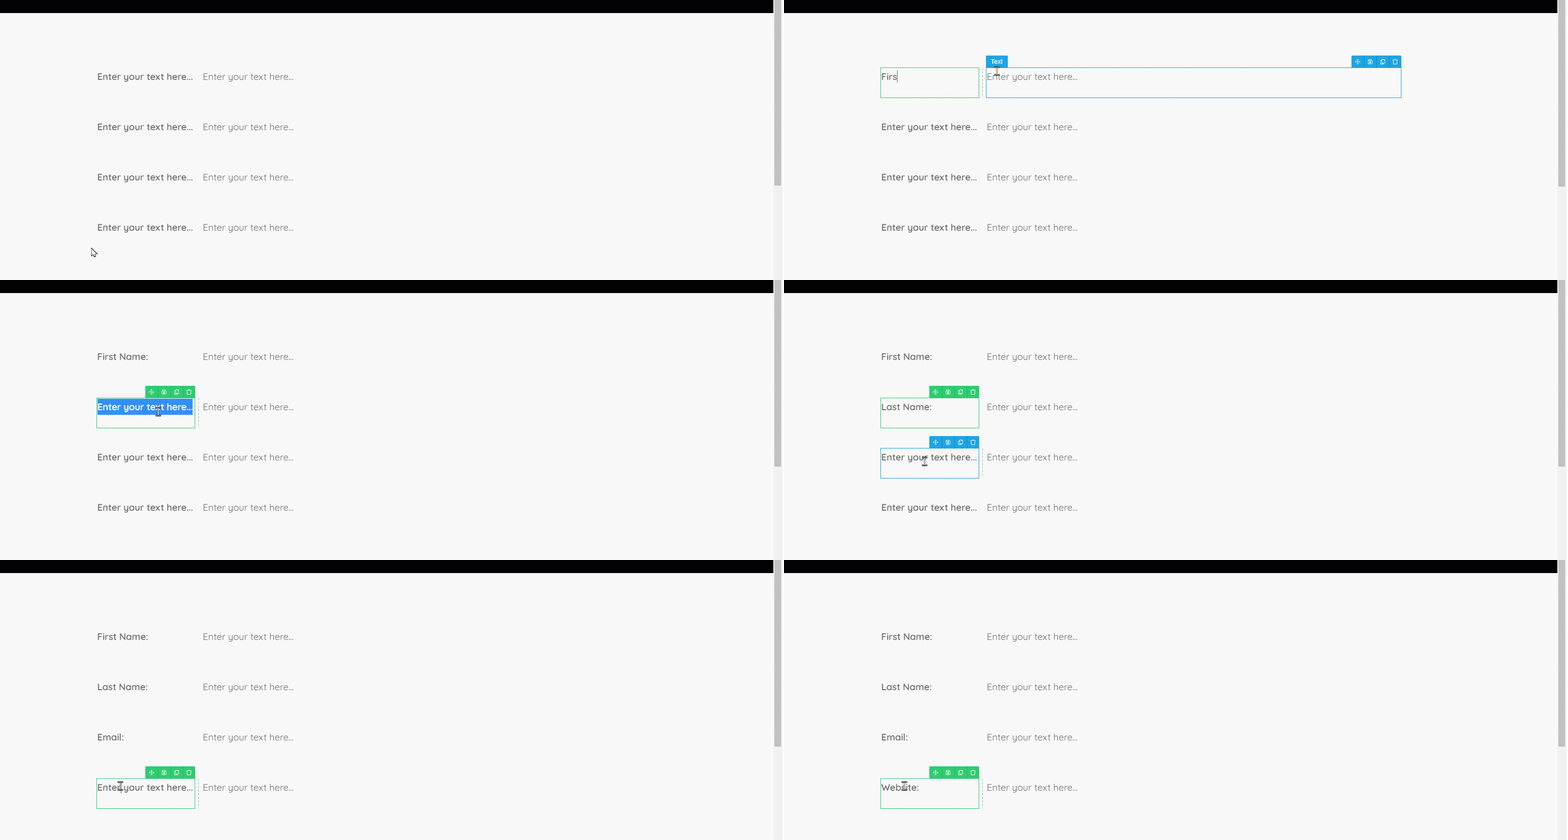
- I started by adding a “Text” element to the page:

- Then I added another “Text” element, to the right side of the previous one:
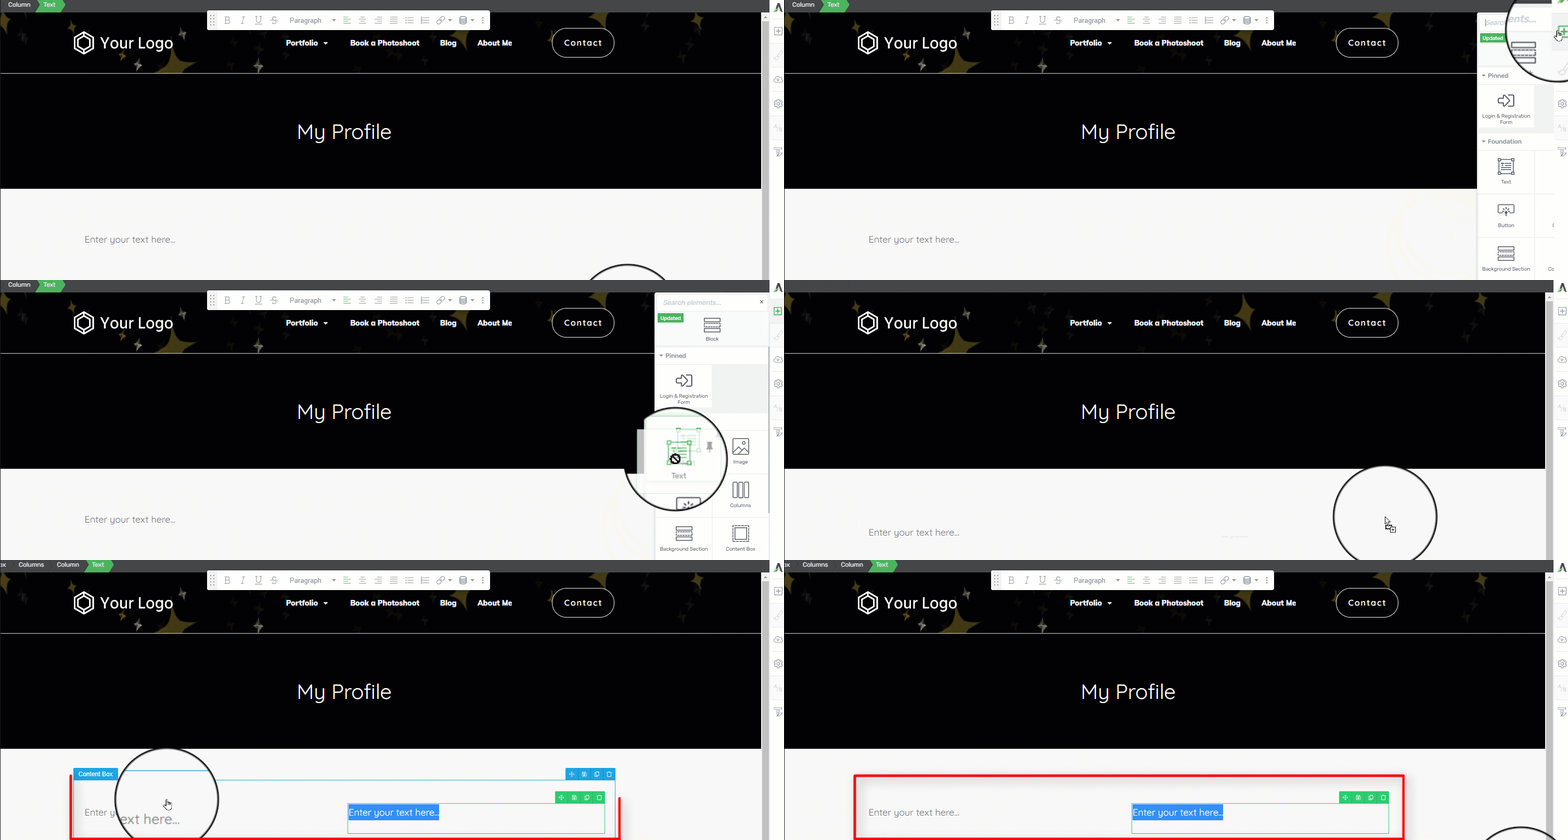
When you do that, Thrive Architect will automatically englobe the two “Text” elements into two columns.
- I duplicated the “Column” element to create the desired number of fields:
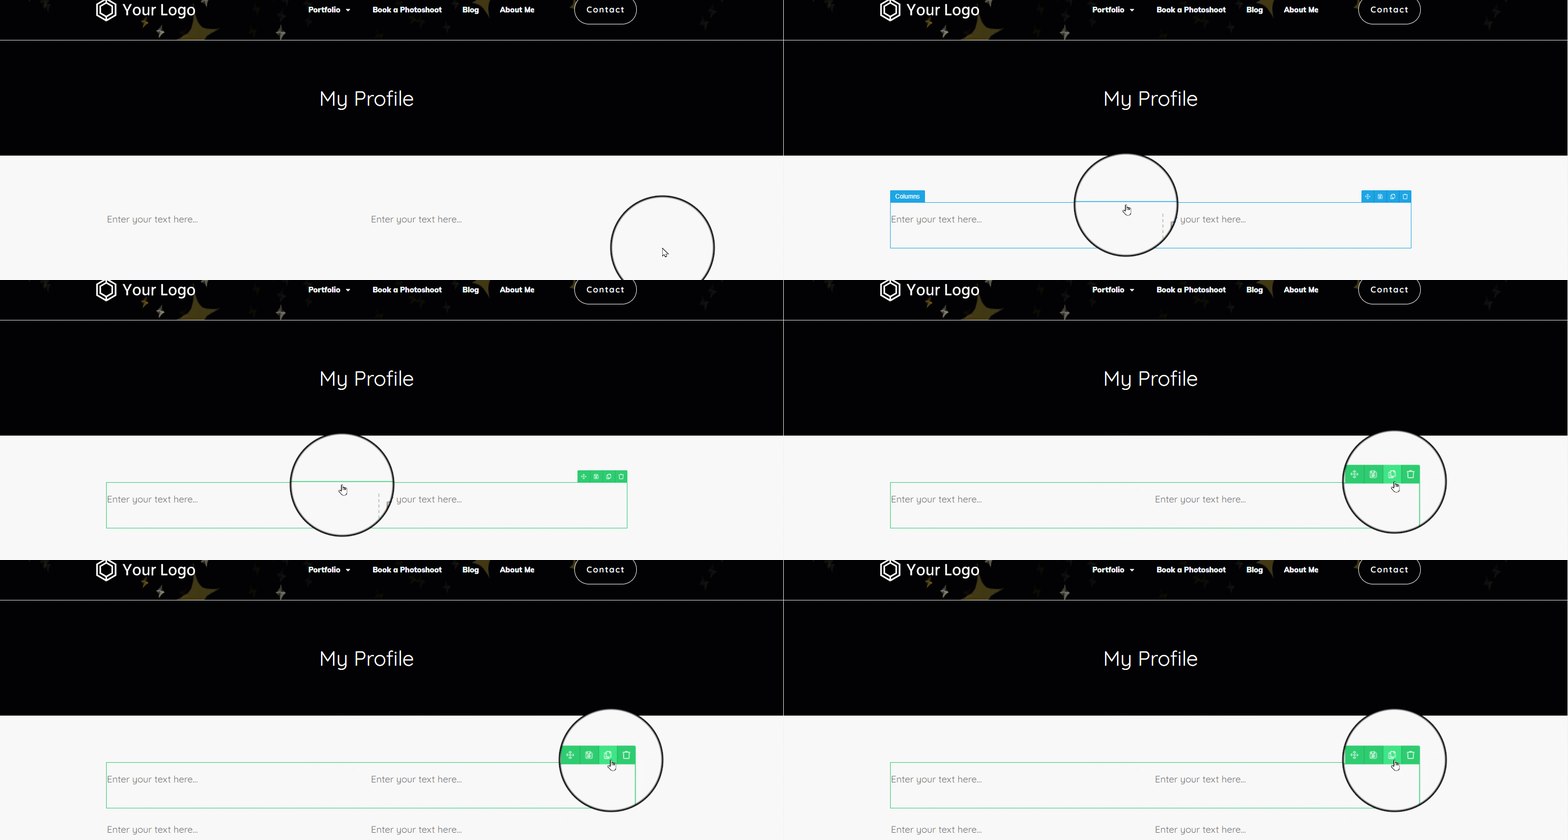
This way, in a matter of seconds, my page will look like this:
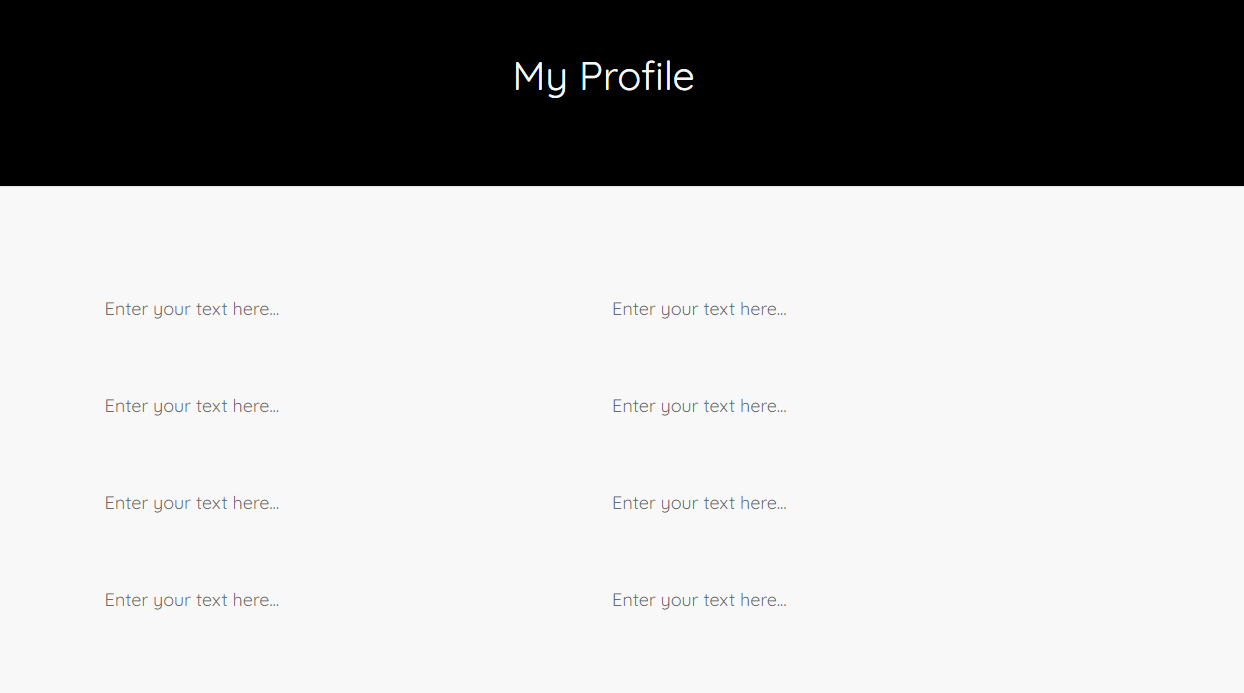
We now have two columns of text. You can, of course, customize everything, change the alignment, positioning, font size, and all of that.
I want the first column of text to be the static part, which means that I will manually add the text I want to be shown:
For the second column, I will take advantage of Thrive Architect’s “Dynamic Text” feature, so I will add the corresponding dynamic value to each of the “Text” elements.
So, for example, for the “First Name”, I will use the “WordPress User First Name” option, from the “User Data” dynamic text source:
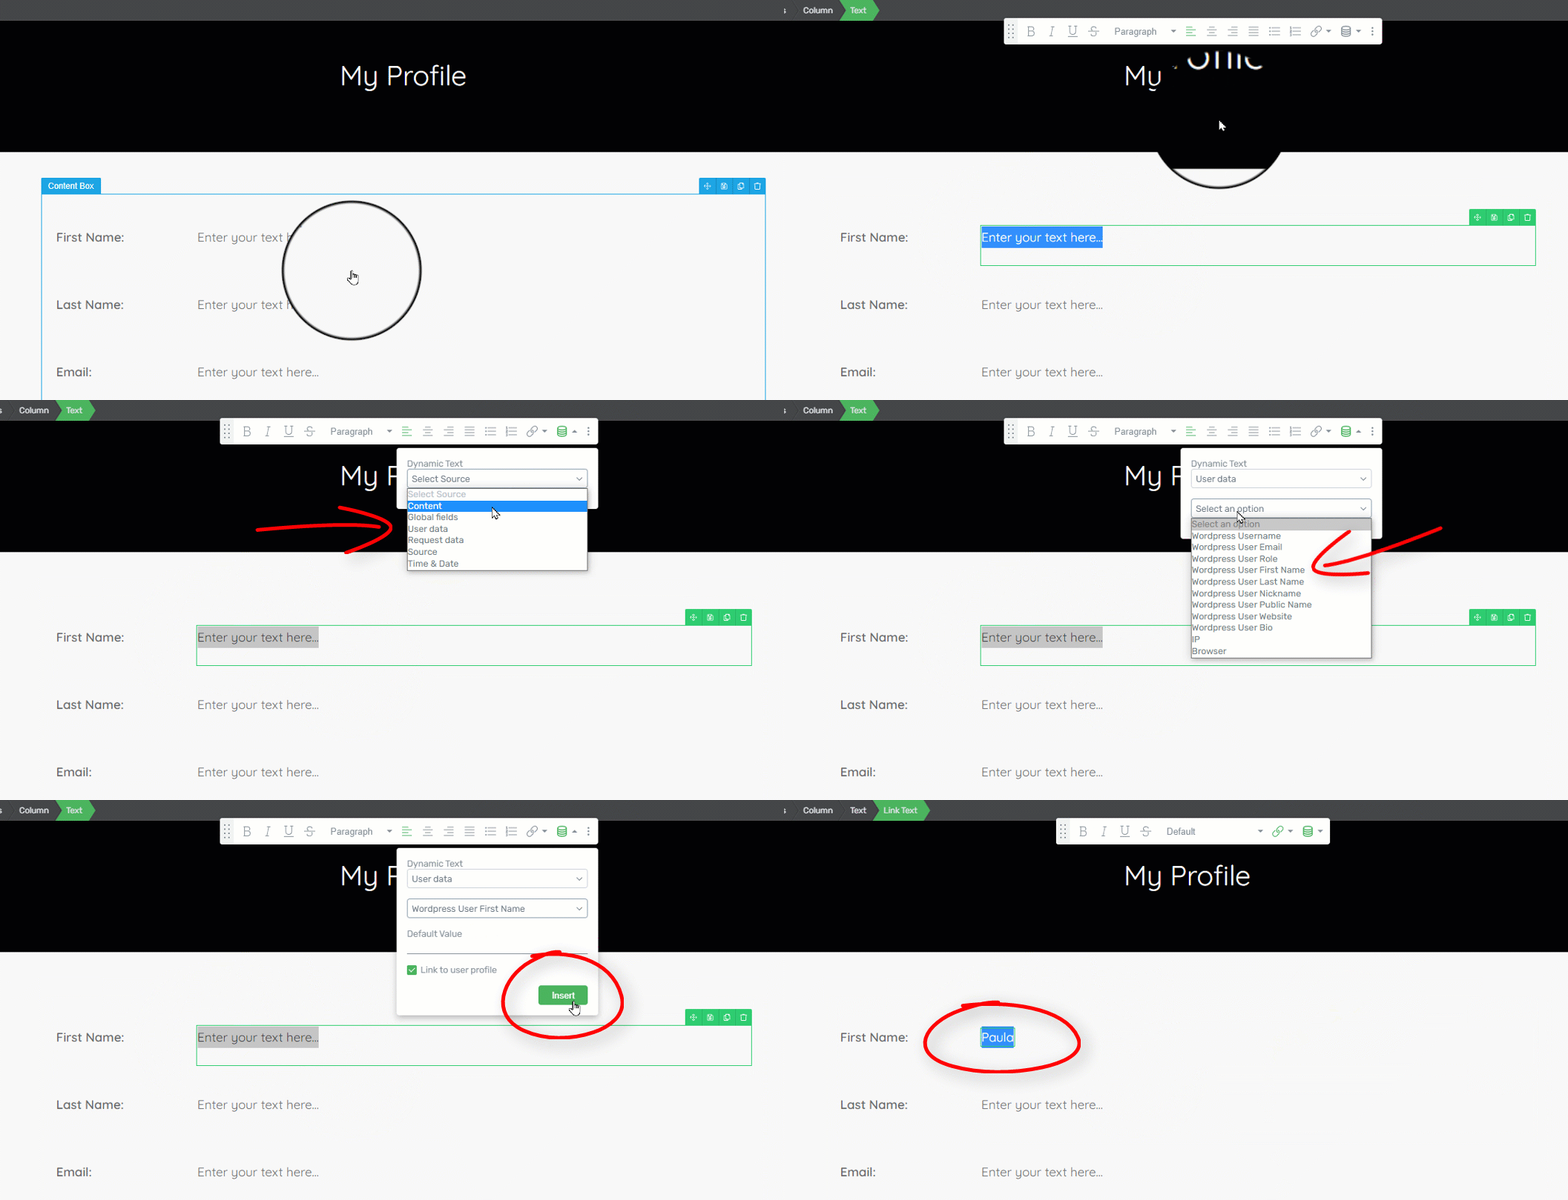
I will do the same for the rest of the information that I want the users to see:
|
First Name |
Dynamic Text Source: User Data “WordPress User First Name” |
|
Last Name |
Dynamic Text Source: User Data “WordPress User Last Name” |
|
|
Dynamic Text Source: User Data “WordPress User Email” |
|
Display Name |
Dynamic Text Source: User Data “WordPress User Public Name” |
|
Website |
Dynamic Text Source: User Data “WordPress User Website” |
The page will look like this:

|
Important: Please keep in mind that, if you don’t use dynamic text here, the information will not be updated, when the users change their profile details. |
As you can see, I have also added a “Button” element, that I linked to the “Edit Profile” page, which is where the users can change their information from.
If you’re not sure how to use the “Button” element, and how to add a link to a page on it, please check out this article.
Now that the “My Profile” page has been set, we can move on to the other one.
“Edit Profile” – customize this page using the “User Profile” element
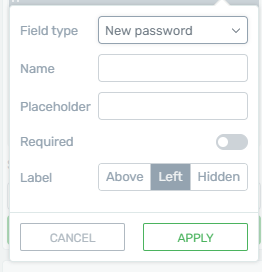
This is the page where we will add the “User Profile” element, which will allow users to quickly change the information they want.
Please take a look at this article if you need help setting up this element.
|
Note:
So, for example, if on the “My Profile” page the users can see their name, email, and website, make sure that this is the information they can change from the “Edit Profile” page: 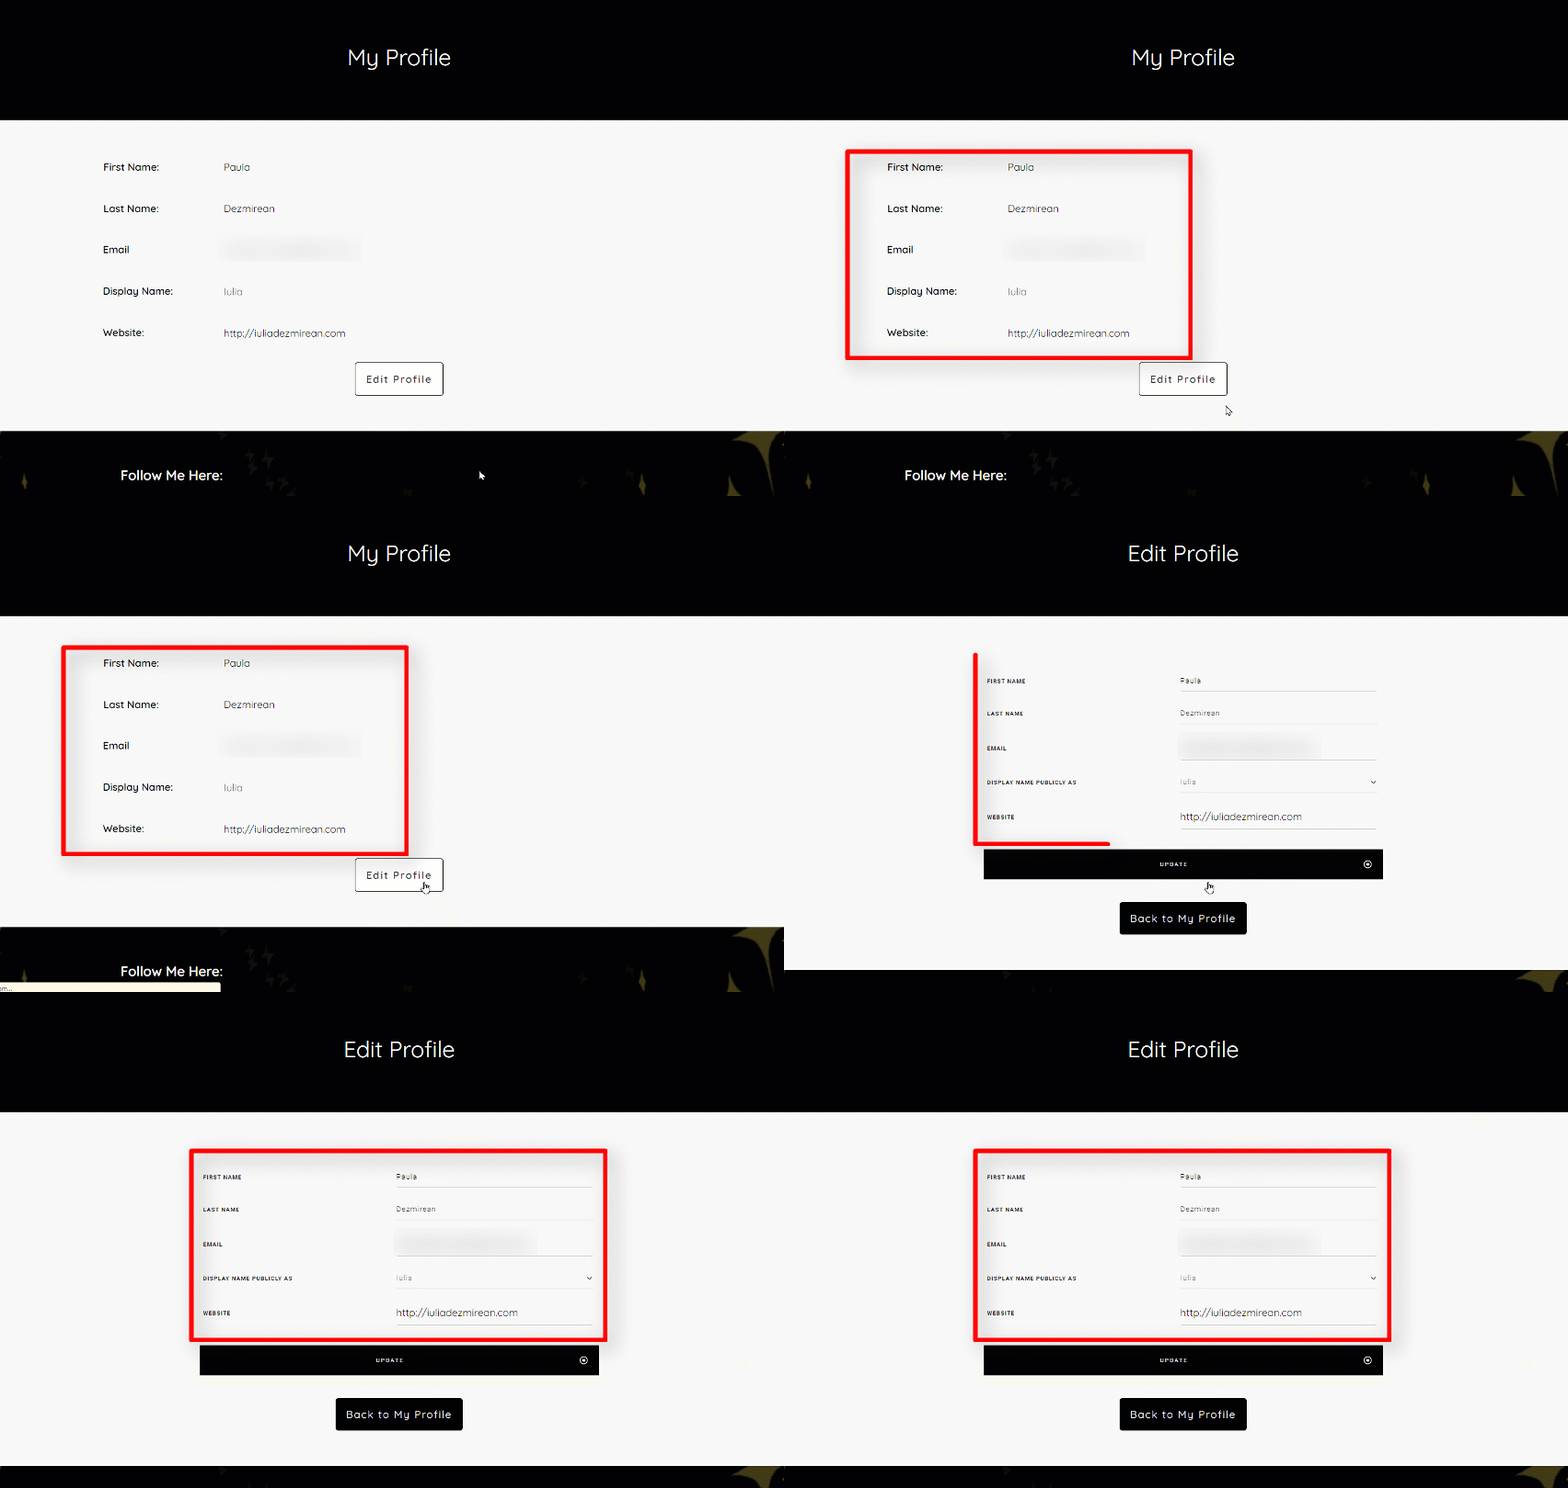
 |
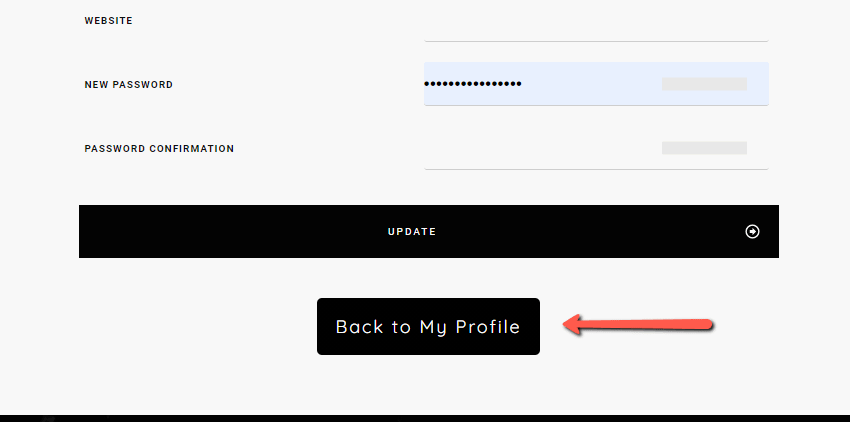
Moreover, you can also add a “Back to my profile” button, which links to the “My Profile” page, if you want the users to be able to quickly go back to that page:
The two pages are all set, you can go ahead and publish them.
What’s left to do is add a button to the Thrive Apprentice menu, which links to the “My profile” page. We can make this button visible for logged-in users only.
Add the “My Profile” button to the menu and make it only available for logged-in users
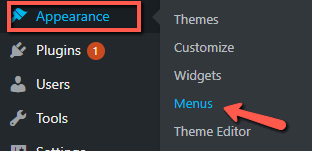
First of all, we’ll have to access the “Menus” section, by hovering over “Appearance”, in the left sidebar of the WordPress admin dashboard:
This article will go into more details about setting up a Thrive Apprentice menu, so please check it out if you need more information.
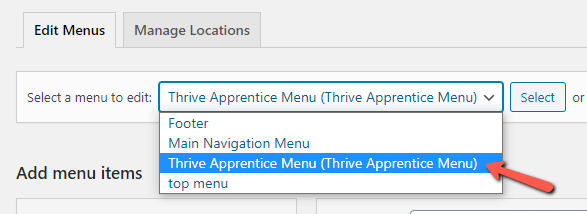
From the top side of the page that opens, choose the menu that you want to edit. This should be your Thrive Apprentice menu:
And then click on “Select”:

From the left side of the screen, from the “Add menu items” section, click on the “Pages” section, to expand it:
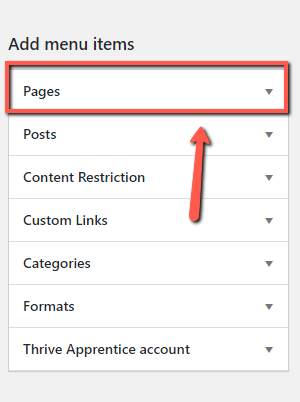
This allows you to add a page to your Thrive Apprentice menu. When the section expands, you will see a list with all of your pages.
Select the “My Profile” page:
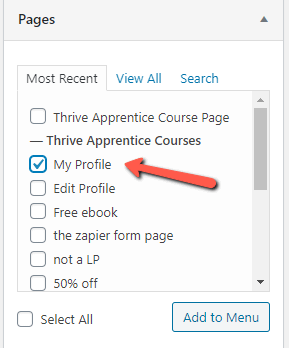
Then, click on “Add to Menu”:

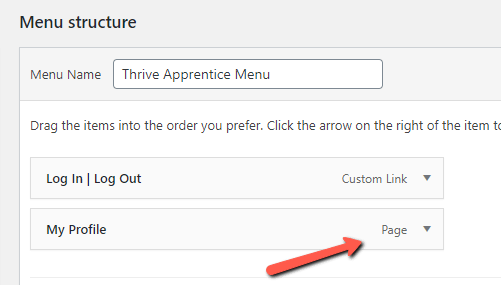
You will see the new item in the menu structure. We still need to make it available for logged-in users only.
To do that, click on the down arrow, to expand the item’s options:
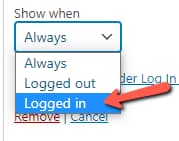
You can edit a few things here, and one of the options is called “Show when”. This means that you can choose when the custom link should be shown on the menu. This is set to “Always” by default.
Click on the down arrow next to the field, to open a dropdown with more options:
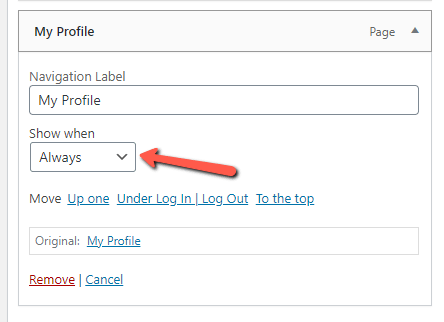
From this list, choose “Logged in”:
Make sure to save everything:
We’re all done!
As a result, the logged-in users of my site will see the “My Profile” option in their menu, which will take them to the “My profile” page, where they can see all of their details.
If they want to change some of the information, they can click on the “Edit Profile” button, and that will allow them to create the necessary modifications:
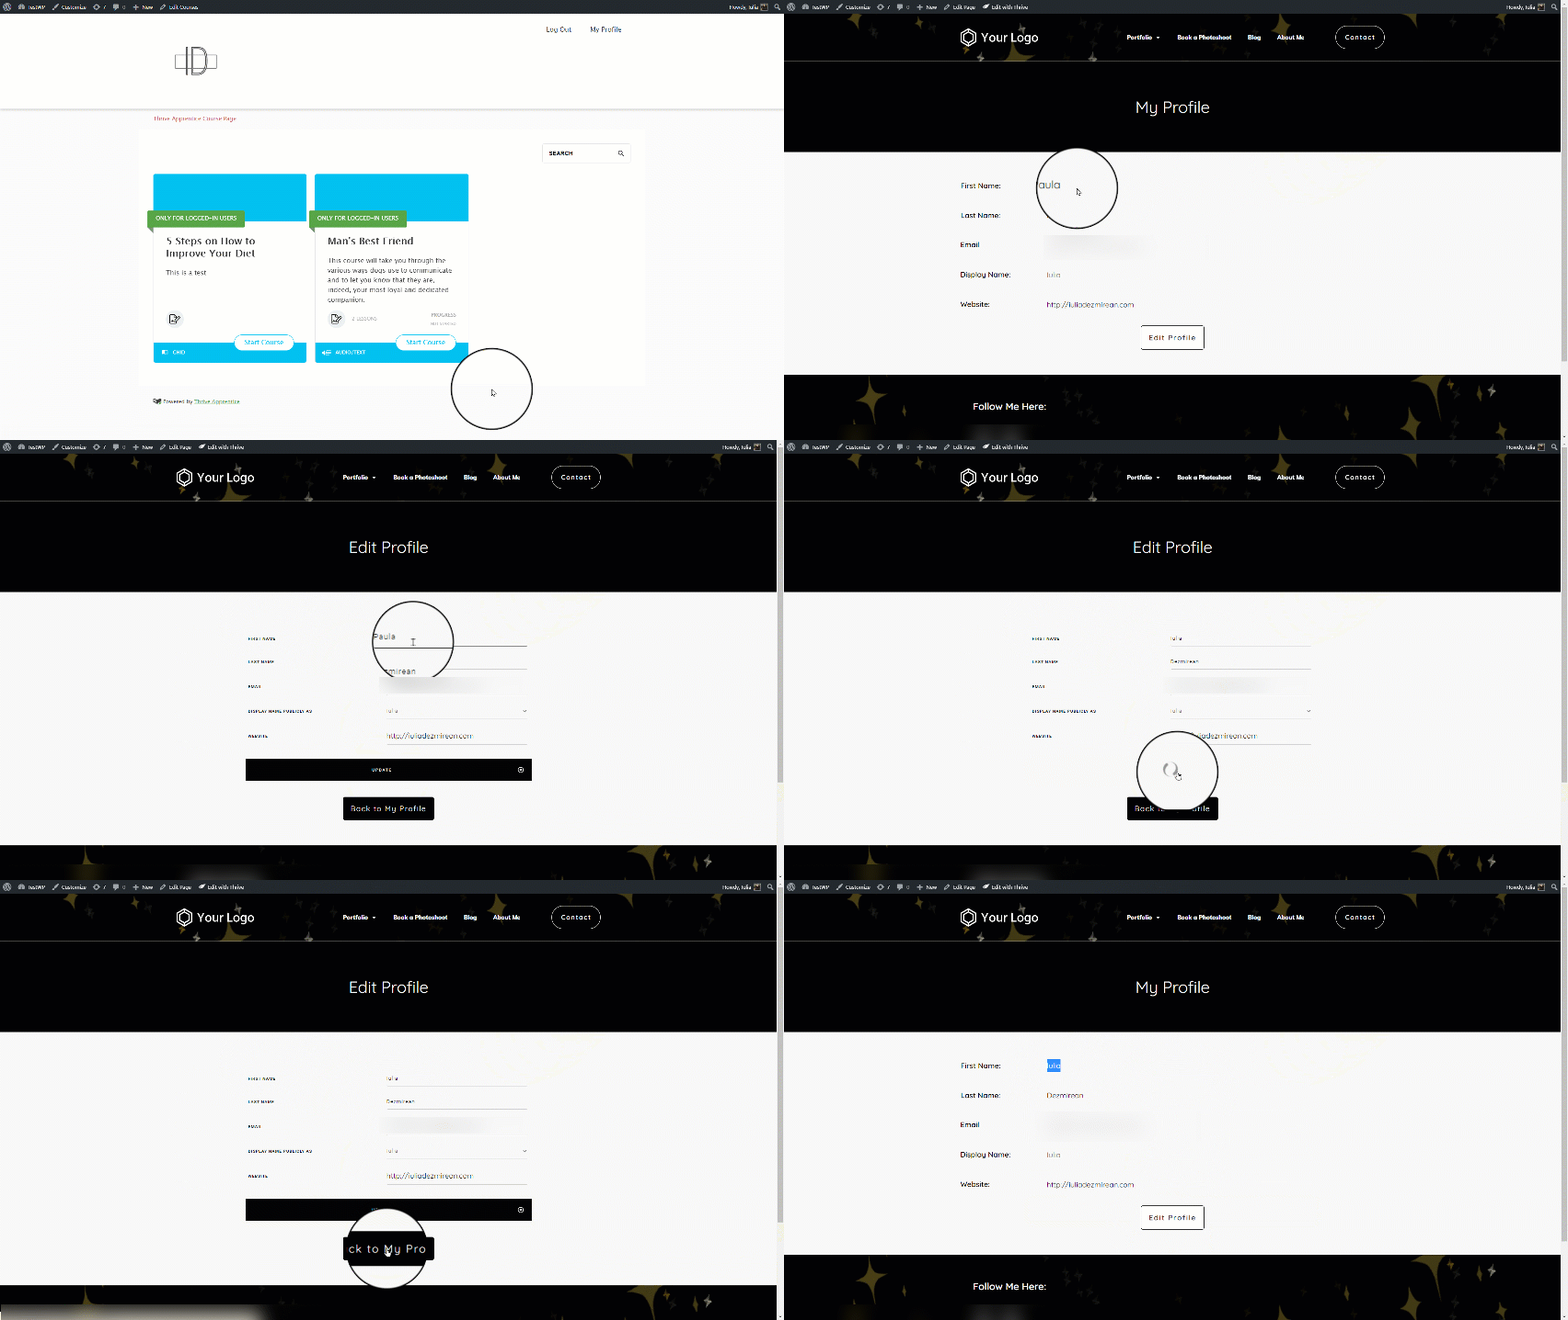
The visitors that have not yet logged in, will not have the “View my profile” option in the Thrive Apprentice menu.
This was an example of how you can set up the “User Profile” element and integrate it on your website.
Please keep in mind that this is one of the many ways in which the feature can be used, and this is just a suggestion, if you are in a similar situation to the one presented above.
I hope this article was helpful. Make sure to check out all of the articles and tutorials from our knowledge base, if you need help with various Thrive Themes features and products.
You might also find this article useful, which goes through the steps to be taken if you want to add a “Log In” / “Log Out” / “Register” button to your Thrive Apprentice menu.