Do you want to add your website users and visitors to an autoresponder while they register on the website? With Thrive Themes it is possible for you to register a user to your website and simultaneously add him to an autoresponder of your choice.
In this article, we’ll be using the “Login & Registration” element, to show how you can simultaneously allow your visitors to register to your website to access one of your Thrive Apprentice courses, and add them to the mailing list of your chosen autoresponder.
To proceed, please ensure you have followed the steps in the following documents in order.
- Understand the working of Thrive Apprentice
- Create a Thrive Apprentice course
- Create a free online course funnel
After your course is ready and published, you will have to set up some access rules so that only the visitors who register on your website can access it.
- Creating a Product in Thrive Apprentice
- Setting up Access Requirements for the Product
- Adding a Login & Registration Form to a Post/Page
- Setting Up an API Connection with Your Autoresponder
- Setting up a GDPR Checkbox
- Setting Up After Submission Actions
Creating a Product in Thrive Apprentice
In order to set up access rules, you’ll have to create a product in which you can add your course (and other content types, as well).
To create a product in Thrive Apprentice, refer to our detailed document here.
Setting up Access Requirements for the Product
Once you’ve created and set up a Thrive Apprentice product, navigate to the Thrive Apprentice dashboard >> Products, and click on the product you’ve created.
On the Products settings page, click Access requirements in the left column.
On the Access requirements page, click on WordPress Role.
Since you want to add registered users to a mailing list in an autoresponder, the role you need to select under WordPress Role is Subscriber.
After you select the WordPress role in access requirements, click the Save button seen in the bottom right.
To know more about access requirements and how you can publish subscriber-only courses, read our documentation here.
Adding a Login & Registration Form to a Post/Page
After setting the Access Requirements, the next thing you need to do is to create a page or post in which you can offer the visitors the possibility of registering to your site so they can get access to your course.
The easiest way to do that is with the help of a “Login & Registration Form” element. This element allows you to quickly set up a form through which any visitor can register to your website.
After the element has been added to your page, click the element and see the “Main Options” open in the left column.
Under Main Options, select the Type of form as Register.
When you select Register type form, click the Edit Form Elements button.
On the Edit Form Elements screen, you’ll see an orange background on the editor screen, which means you can edit the form elements.
While in this mode, you’ll see a field under Main Options in the left column where you can choose where to send leads.
Setting up an API Connection with Your Autoresponder
To add a connection with your preferred autoresponder, click the form in the editor, click Register >> Edit Form Elements, and then click the Add Connection button beside the Send lead to the field under Main Options.
After you click the Add Connection button, select the autoresponder to which you want to send the leads.
For example, I’ll select Keap (Infusionsoft) here.
When you select the autoresponder, select the mailing list or the tag you want to apply to the leads captured through this form.
Once you select the autoresponder, mailing list, or tag, click the Apply button to save your changes.
Setting up a GDPR Checkbox
The GDPR law states that users cannot be added to a mailing list without consent. Therefore, it is important to add a GDPR checkbox to the form.
To add a GDPR checkbox in the Edit Form Element mode, click +Add New under Main Options in the left column.
After you click Add New, select the field type in the drop box by choosing the GDPR checkbox.
Once you select the field, you can fill in the attributes by referring to this document and clicking the Apply button.
All the visitors registering on the website to access a Thrive Apprentice course will also be added to the chosen autoresponder.
This way, you can send very specific offers and promotions only to those subscribers who were added to your list through this funnel. Your email marketing campaigns can target a specific set of subscribers based on their previously shown interest in your Thrive Apprentice course subjects.
Setting Up After Submission Actions
Now that you’ve added a registration form, set up the auto-responder, added a GDPR checkbox, you can manage the after submission actions.
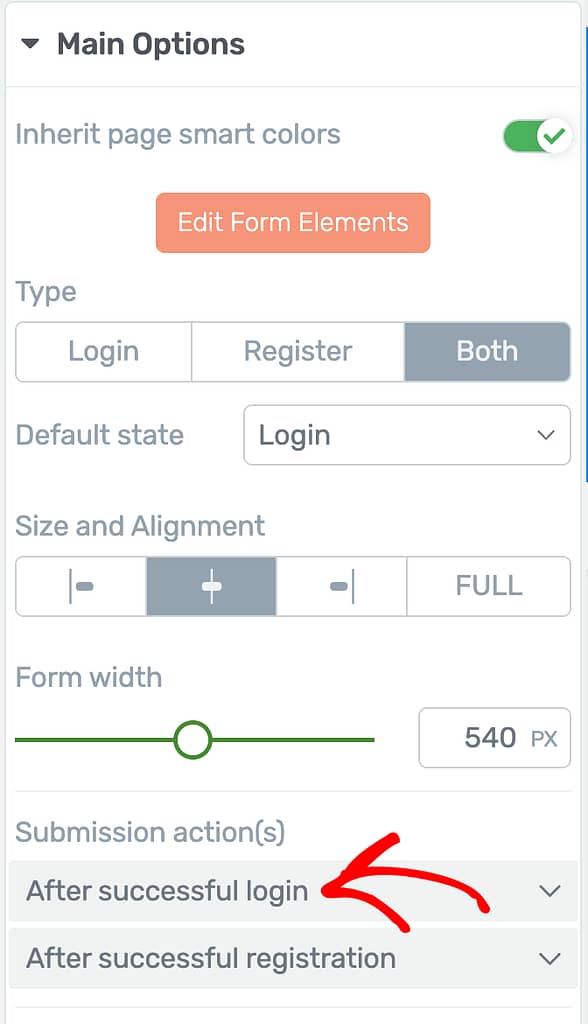
To select an action after successful submission, click to open the After successful login options.

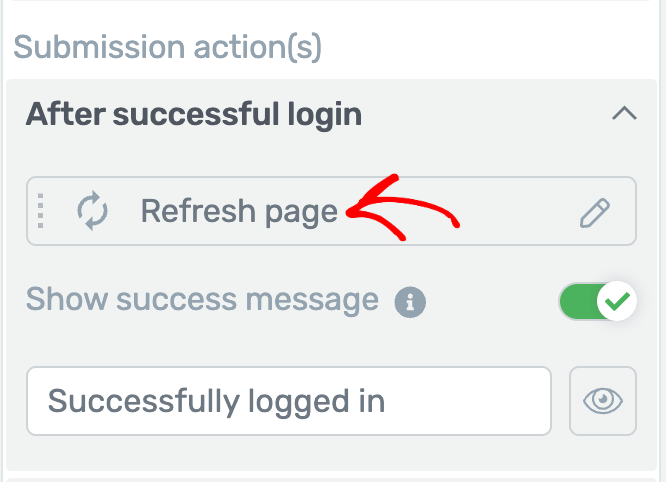
When the After successful login options open, you’ll see a dropdown where you can select the action you want to be performed. The default action selected here is Refresh page.
To select an action, click the dropdown with Refresh page on it.

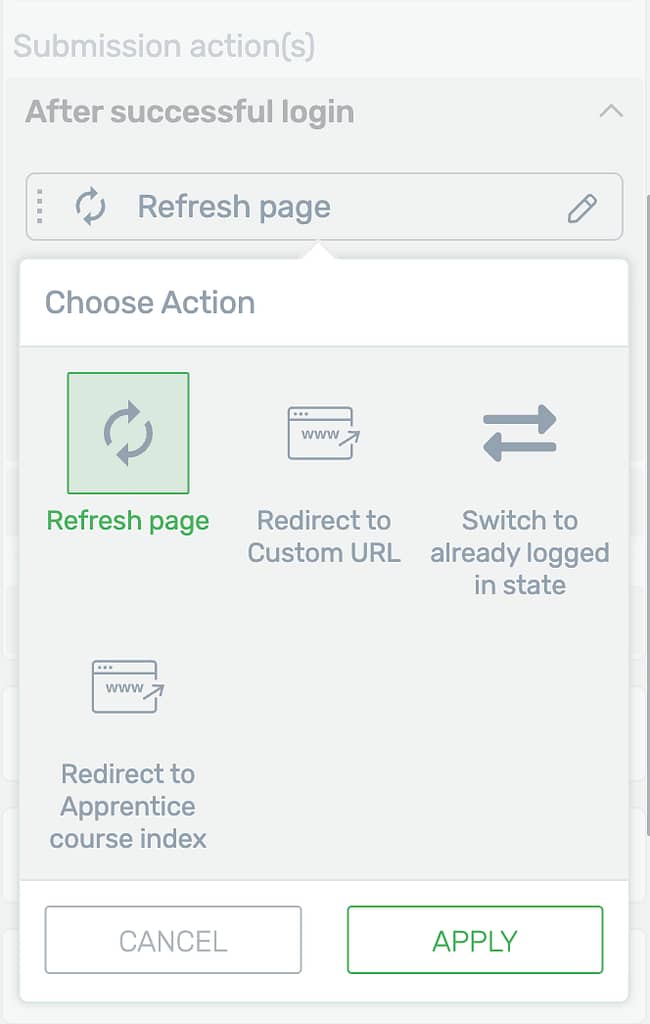
Clicking on the dropdown, opens a list of actions you can choose from.
- Refresh page: Refreshes the page and displays a message you enter for the users to see.
- Redirect to Custom URL: Redirects the user to a custom URL you enter after they’ve successfully logged in.
- Switch to already logged in state: This switches the website state to an already logged in state.
- Redirect to Apprentice course index: Redirects users to the Apprentice course index on your website.

Next, you can grant access to Thrive Apprentice courses based on user roles on your website. Here is a document that’ll help you learn more.