This article will explain how to manually remove an “Access Token” from your site.
An “Access Token” allows you to grant temporary access to your website in a more secure way, without the need to provide your WordPress admin details. You can read more about what a token is and how it works in this article.
By default, a token will expire 14 days after you’ve created it. However, if needed, you can remove it manually before the expiration day comes. Here is how to do that:
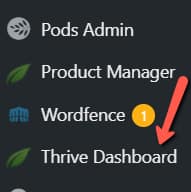
1. Open the Thrive Dashboard
In your WordPress admin dashboard, in the left sidebar, click on “Thrive Dashboard”:

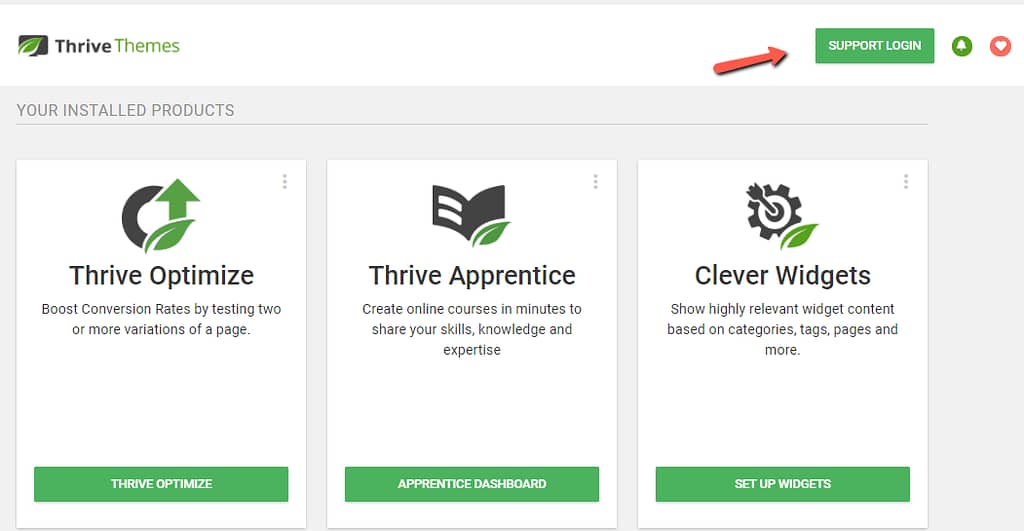
2. Click on ‘Support Login”
In the Thrive Dashboard, click on the “Support Login” button from the top right side of the page:

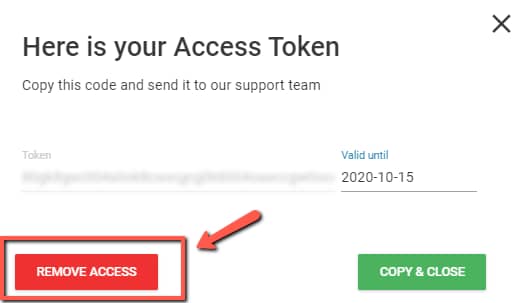
3. Remove Access
A pop-up will open, with your existing token and its details. To remove it, click on “Remove Access”:

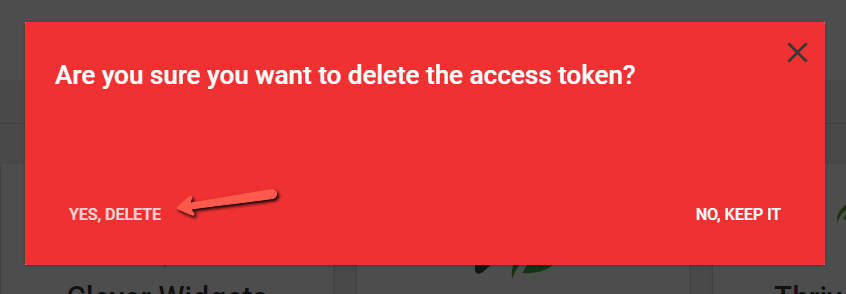
4. Confirm
All there’s left to do is to click on “Yes, delete” in the next pop-up:

Then, you will be taken back to the Thrive Dashboard, with a small success notification to confirm that the token has been removed:

This is how to easily remove a support access token from your Thrive Themes site. If you need more information about the access tokens that you can generate here, please check out this article.
For more information about Thrive Themes and all of our products, don’t hesitate to check out our knowledge base, here.