While setting up a “Lead Generation” element, either on the opt-in gate of your quiz or on the results page you set up for it, you have the option to send the quiz result to your autoresponder, via a custom field.
Before you start, you should set up a new field in your autoresponder where you will want the quiz results to be sent. Details on how to do that can be found here.
1. Connect the Element to an Autoresponder
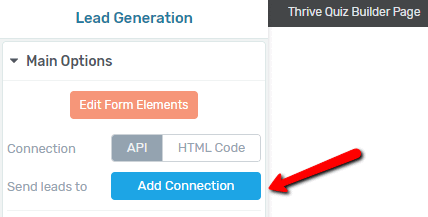
You can easily do this, using the “Add Connection” option, that appears in the left sidebar, when the “Lead Generation” element is selected:
If you need details on how to add this connection, you can check out this article about it.
Since you will want to use a custom field, you should make sure the autoresponder you connect with here, has the custom field integration available.
2. Add a New Custom Field to the Element
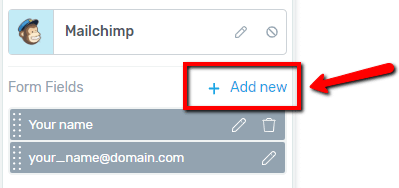
Once the connection is added, click on the “Add new” option from the “Form Fields” section in the left sidebar:
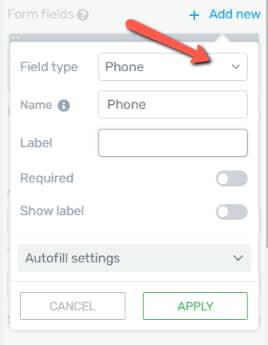
A drop-down will open. Click on the field from the “Field type” section, to open the list of fields you can add:
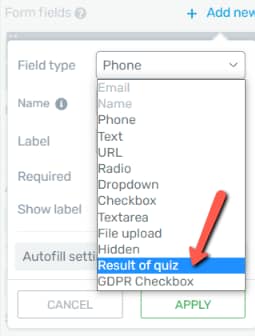
Then, select the “Result of quiz” custom field type from the list:
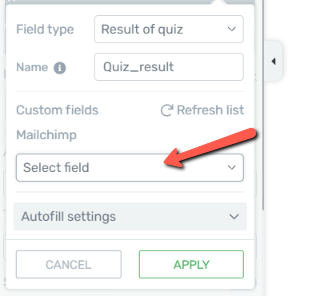
Now, you have to set up to which field in your autoresponder should the quiz result be sent. You can do this in the following drop-down that appeared. First, click on the “Select field” from it:
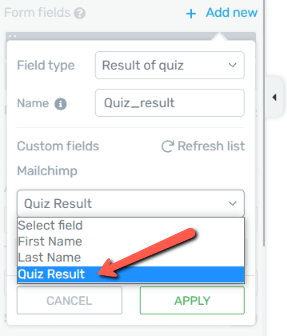
Then, choose the field you have set up specifically in your autoresponder to contain the data sent from this “Result of quiz” custom field:
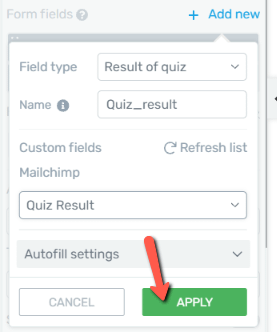
Finally, click on the “Apply” button, to add the custom field:
After you do this, the “Result of quiz” custom field will be added as a hidden field to the “Form fields” of your “Lead Generation” element:
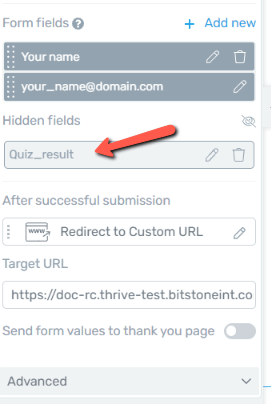
This way, whenever someone will complete the quiz, and then sign up through the form you are creating with the “Lead Generation” element here, the hidden custom field will be completed automatically with the result the user obtains in the quiz.
Therefore, after they sign up/subscribe through the form, the results of the quiz will be automatically sent to the autoresponder, along with the other information from the form.
The quiz results will appear in the designated field you have set up for them. Here is an example of how this will look like in MailChimp:

After you finish setting up the opt-in gate or the results page, where this “Lead Generation” element with the hidden “Result of quiz” field is, don’t forget to save the changes using the “Save Work” button from the bottom-left side of the editor:

If you want to find out more about how various options/features work in Thrive Quiz Builder, check out our knowledge base.