Curious about how you can make your progress tracking more engaging and transparent for your users? By enabling the “Current Progress” option in the Progress Bar element’s left sidebar, you can easily display real-time updates of progress, helping users stay informed and motivated.
In this article, we’ll show how you can use the Current Progress option of the Progress bar in Thrive Architect.
- Accessing the Current Progress Option
- Entering Static Value in Current Progress Option
- Entering Dynamic Value in Current Progress Option
- Fetching Dynamic Value From a Custom Field
Accessing the Current Progress Option
To access the Current Progress option of a Progress bar, you first need to ensure you’ve added the Progress Bar element on the page.
Once you add the Progress Bar on the page, click on it to open the left column options.
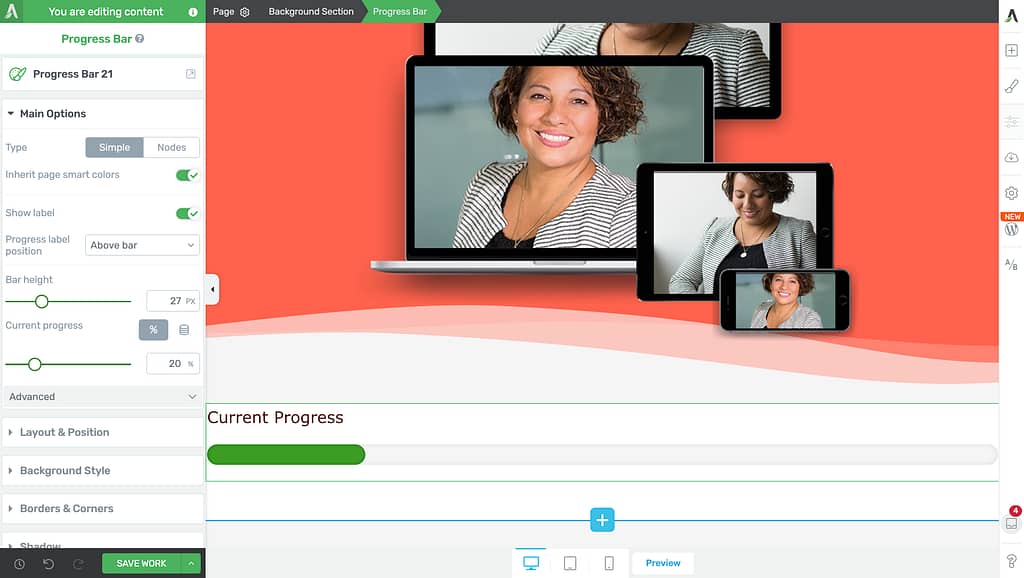
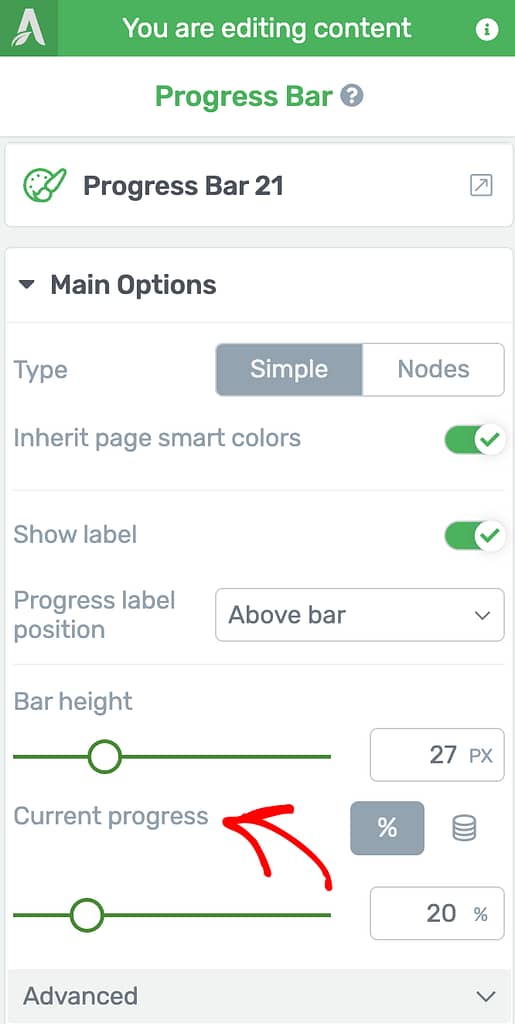
In the left column, under Main Options, scroll down to the Current Progress setting.
Entering Static Value in Current Progress Option
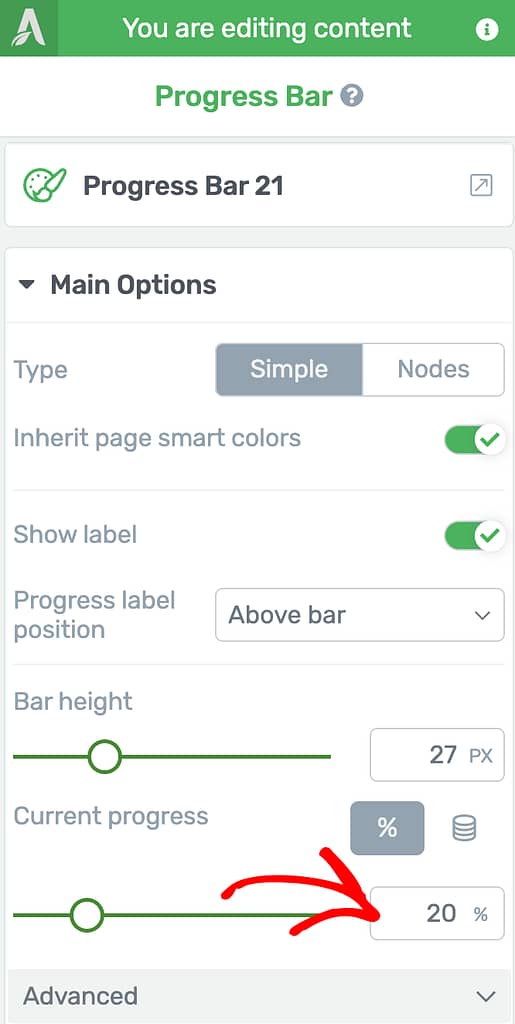
You can set the progress bar to show a fixed progress status by setting the progress percentage in the settings. To do so, click on the Progress Bar element, open the left column options, beside the Current progress setting, click on the percentage (%) icon to choose to enter the complete percentage.
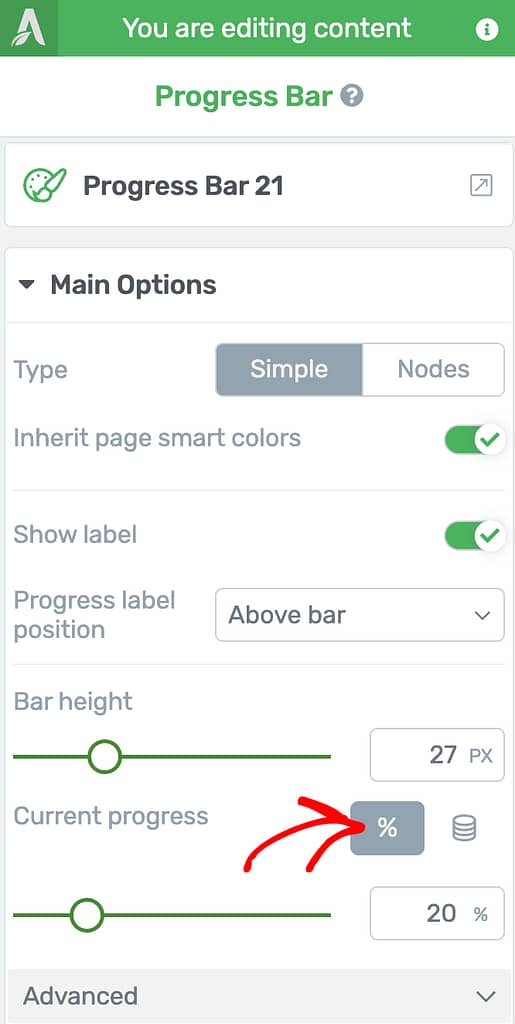
When you click on percentage, use the slider below or the box to select or enter the percentage you want the progress bar to reflect.
Entering Dynamic Value in Current Progress Option
To set a dynamic value that’ll be reflected in the progress bar, click on the drum icon beside the Current progress setting.

Selecting to add a dynamic source for the progress bar will show two dropdowns to select the source. To do so, select Request data in the first dropdown and the relative options in the next dropdown.
For this example, we’ll proceed selecting Request data in the first dropdown and see the options available in the second dropdown.
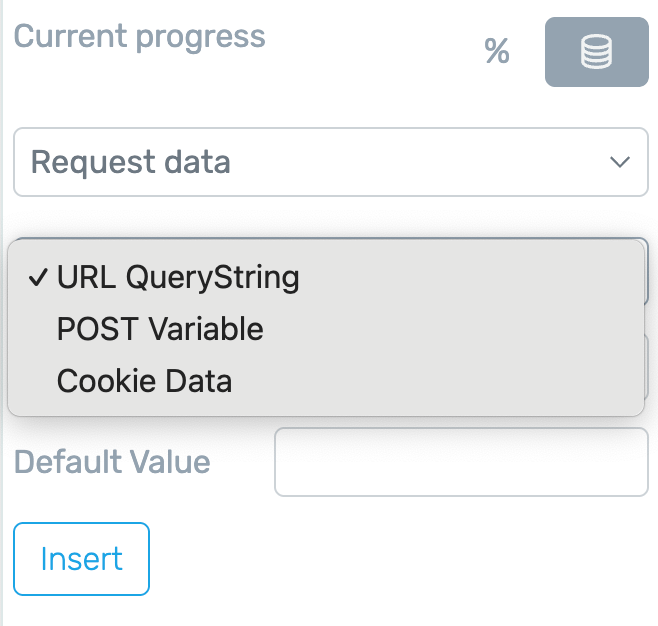
URL QueryString
A URL QueryString is a segment added to the end of a webpage’s address, following a question mark (?), that passes specific data to the page.
By inserting key-value pairs like ?value=number in the URL, users can dynamically change what is displayed on the page; for example, showing different progress percentages on a progress bar without editing the page itself.
If a default value is set, the feature displays that number automatically, but using a QueryString allows for flexible, real-time updates that personalize or modify the content according to the information specified in the URL.
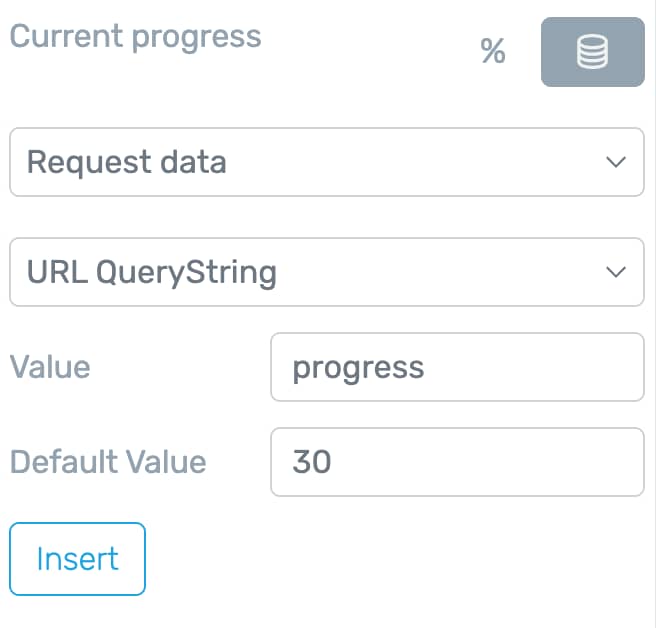
To set this up, select URL QueryString in the second dropdown after Request data.
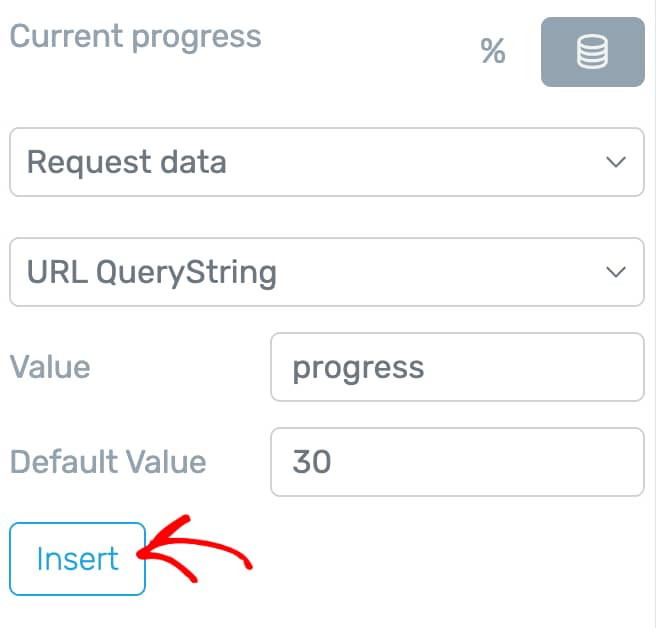
When you select URL QueryString, enter progress in the value field and a number in the default value field.
So, progress in the value field means you are setting this up to show the progress in the bar and the number in the default value field shows the progress bar to the set value.
Once you finish entering these values, click the Insert button.
To modify the value and the progress shown, go to the URL of the page and, at the end of it, add this part: ?value=number.
In this example, value is progress and number is the numerical value of the percentage of progress you want the bar to reflect.
Therefore, the URL in this case will be something like this:
https://your-domain.com/pag-slug/?progress=30This will show 30% progress in the progress bar on the page.
POST Variable
A POST variable is a type of dynamic data received through a POST request, commonly sent when a user submits a form on a website. This method allows you to automatically fill elements on a page, such as a progress bar in this case.
For example, after a user completes a form (like one made with Jotform), they are redirected to another page where the progress bar displays the value they entered. This approach enables personalized, real-time updates to page content based on the data provided through the POST request.
To use the POST Variable feature, you’ll have to create another page that has a form.
Creating and Customizing the Form
In this example, we’ll use a Lead Generation form on a page which when submitted will pass the form variable values through the redirect URL.
To begin with, add the Lead Generation element to a page in the Thrive Architect editor.
When added to the page, click on the Lead Generation element to open its settings in the left column.
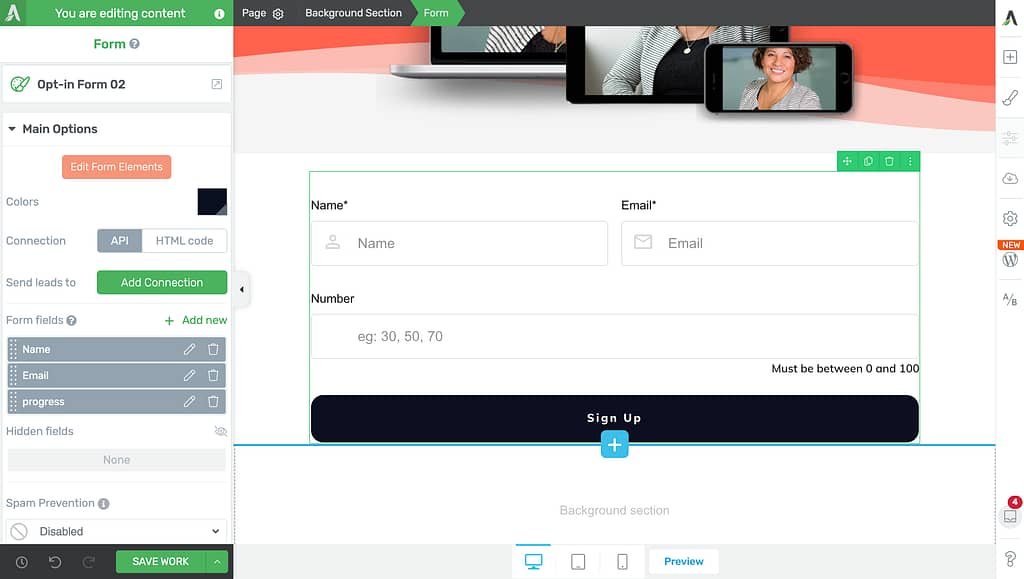
When added on the page, add a form field that accepts numbers as inputs. To do so, add a form field in the lead generation element.
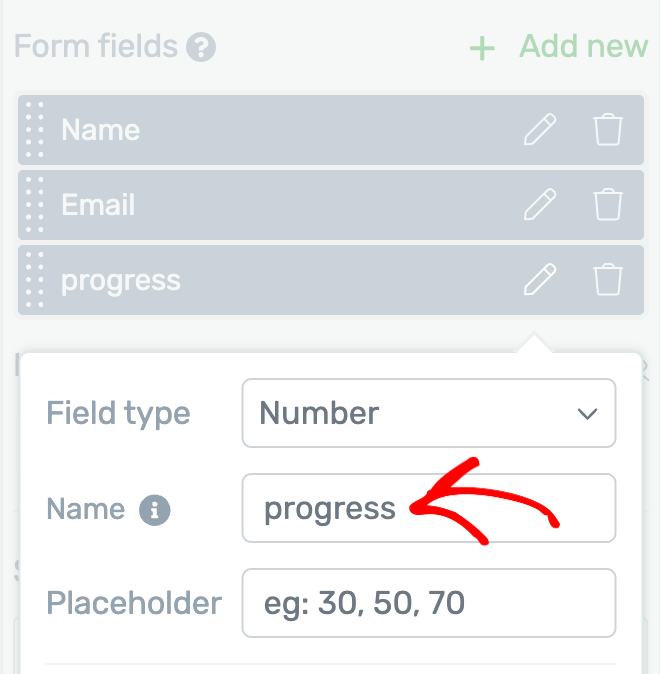
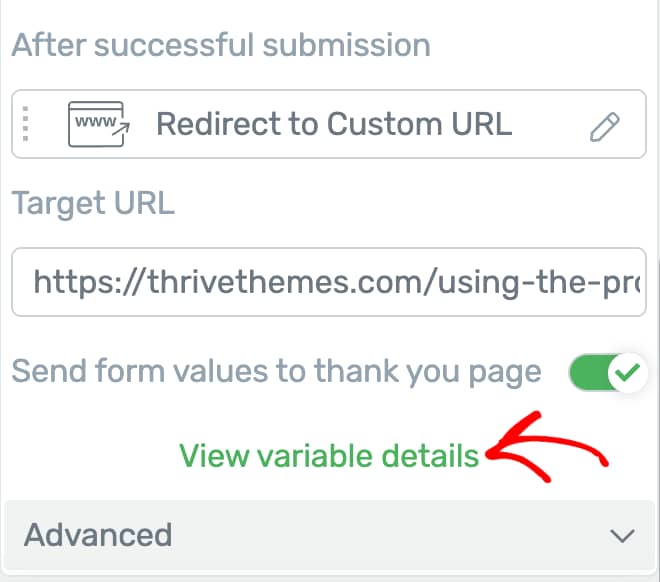
Once you add the Number field in the form, the input that the users submit through this field will be sent to the page to reflect the progress in the progress bar. To ensure this information is passed, in the left column, under After successful submission, select the action Redirect to custom URL.
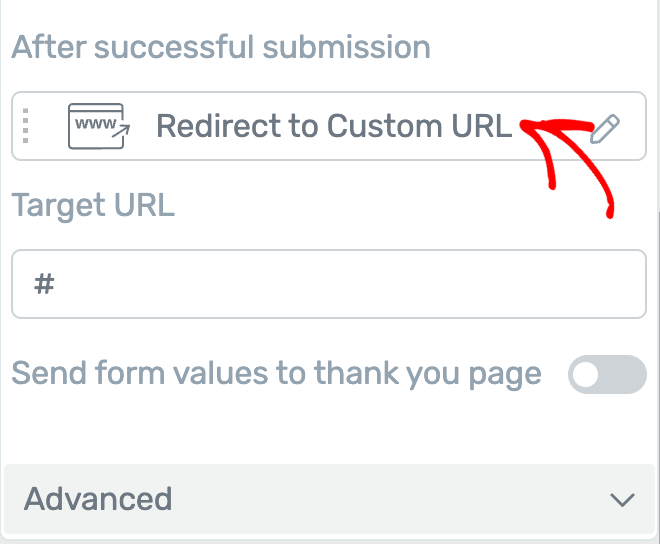
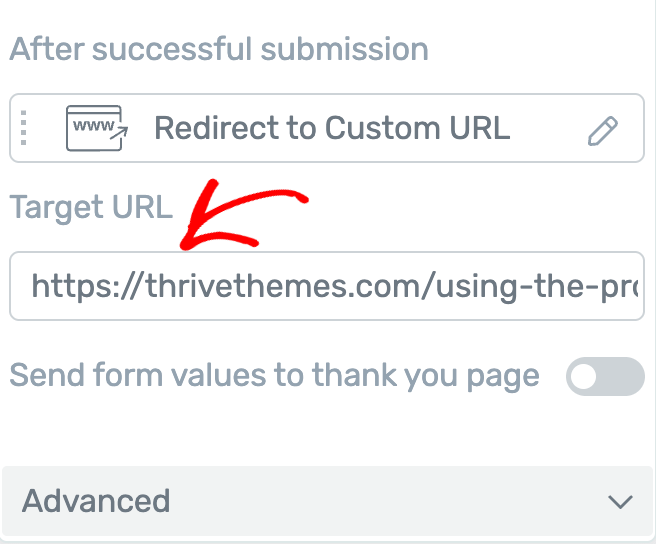
After selecting to redirect the user, enter the URL of the page containing the progress bar in the Target URL field.
When you select the action and enter the URL you want to redirect the users to, choose to send these variables to the page by clicking the toggle button beside Send form values to thank you page.
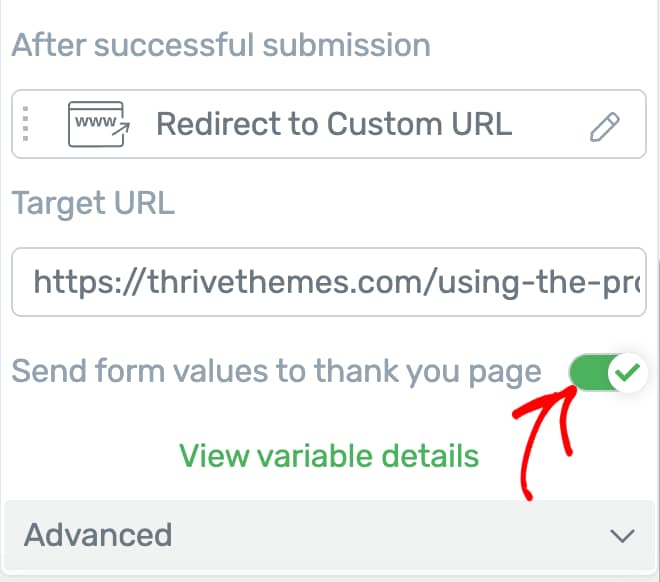
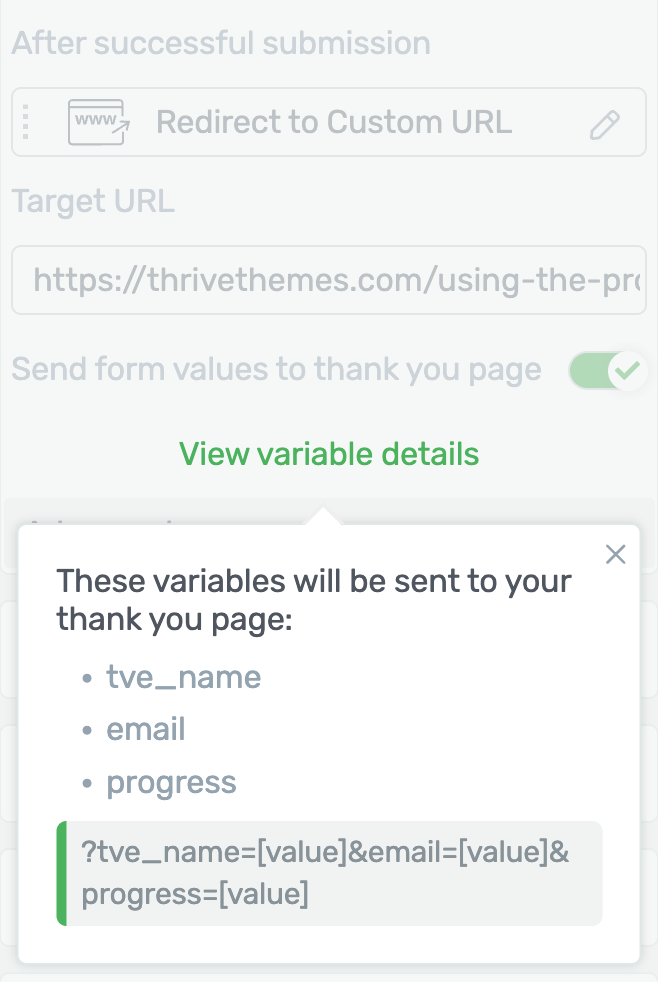
Once enabled, you’ll be able to see the variable details that’ll be passed to the page by clicking View variable details.
Clicking to view variable details, you’ll see the values that’ll be passed to the page.
Once done, click the Save Work button to save changes made to the page containing the Lead Generation element.
Cookie Data
When you select Cookie Data, the progress in your progress bar will be marked based on the cookie data it fetches.
To do so, select Cookie data in the second dropdown when you select Request data to fetch dynamic information for the progress bar.
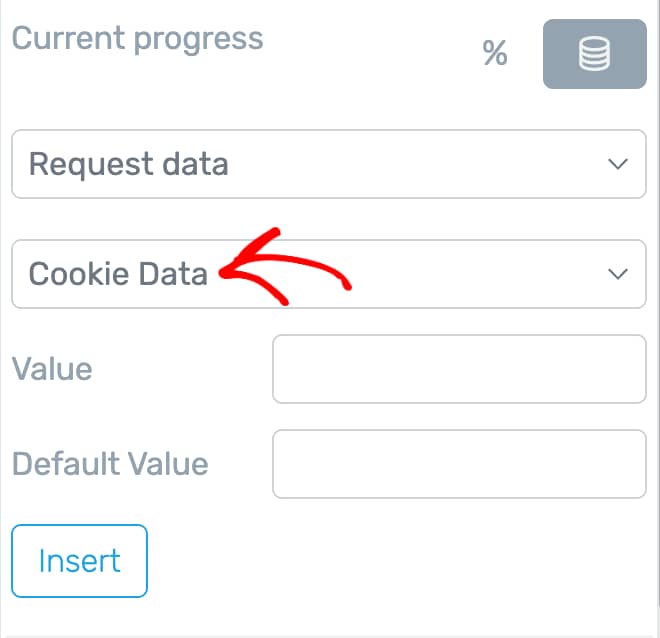
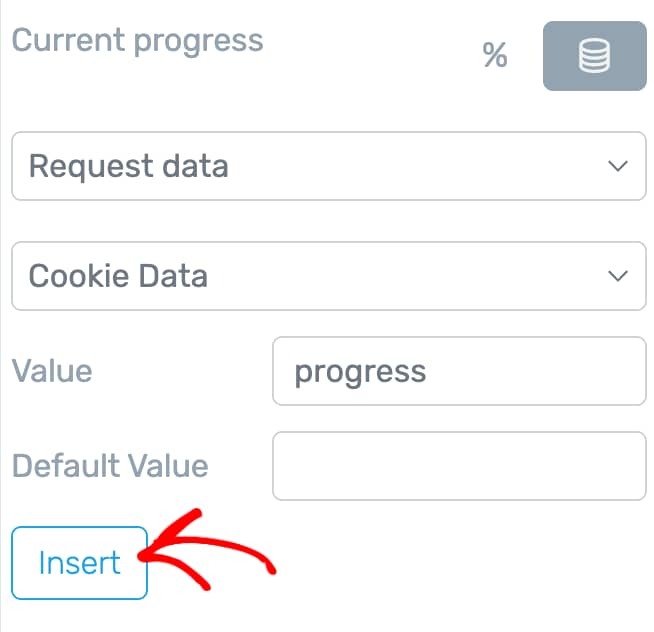
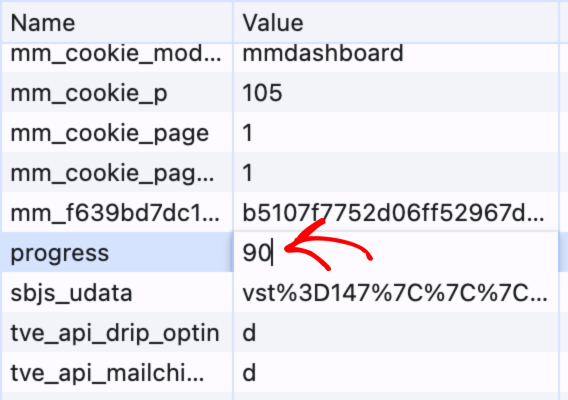
When you select Cookie data, enter progress in the Value field and click the Insert button.
After clicking Insert, publish the page that contains the progress bar and open it in a new tab.
When on the page, right click and click on Inspect.
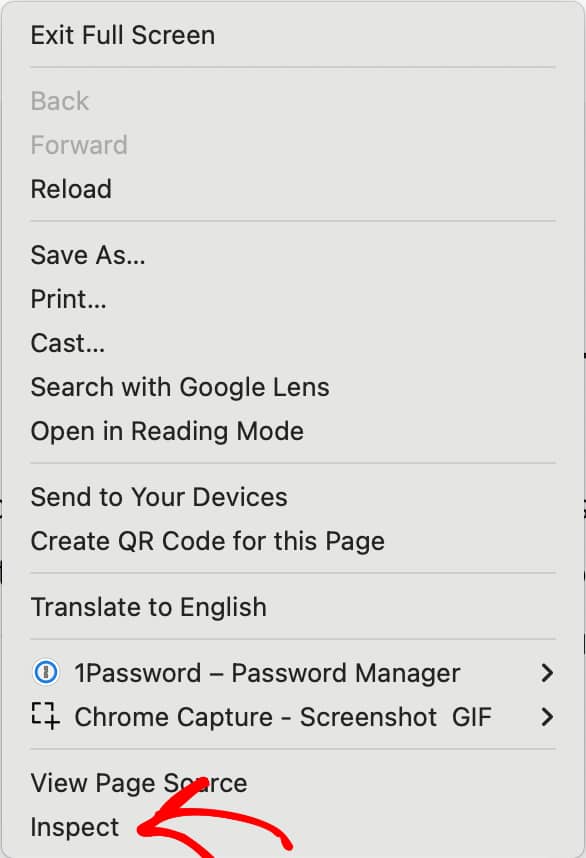
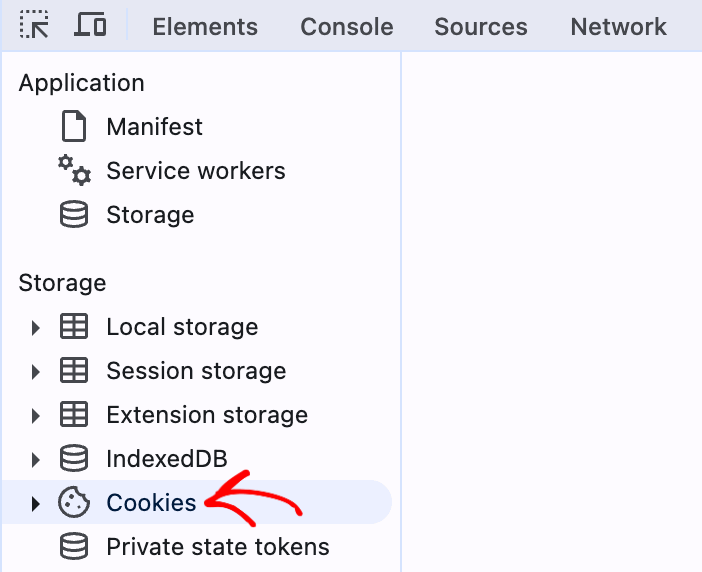
After clicking Inspect, in the window, click to open the Applications tab.

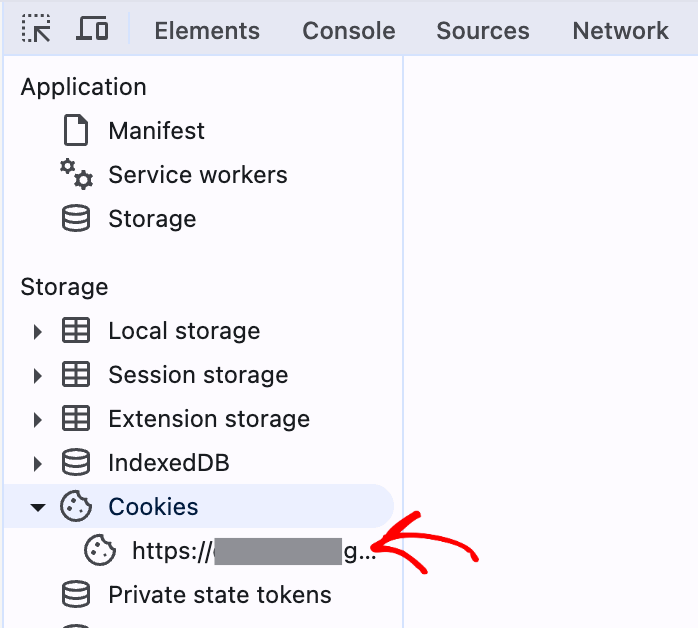
Under Applications, in the left sidebar, click on Cookies.
Under Cookies, click on the URL you see.
Clicking the URL will open the list of cookies in a table. Here, you can delete all the present cookies or go down the list.
In a blank row, right click and select Add new.
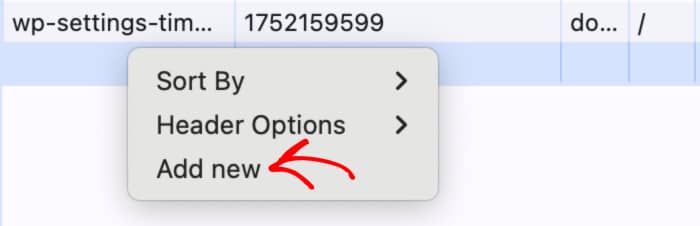
When you click Add new, enter progress in the Name column and a number in the Value column. The number here will be the percentage you want the progress bar to show.
Fetching Dynamic Value From a Custom Field
With Thrive Architect it is possible to populate the progress bar using custom fields.
In this section we’ll show you a stepwise process of how you can set and fetch custom field values in a progress bar.
- Creating a Custom Field
- Setting a Custom Field Value in a Post
- Dynamic Value Settings in a Progress Bar
Creating a Custom Field
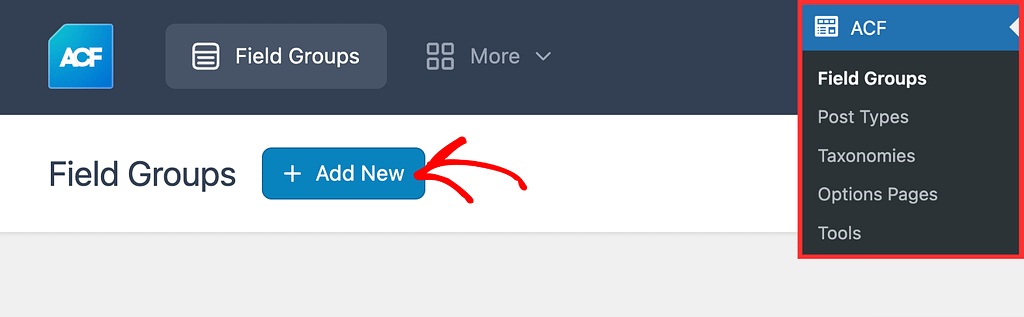
To be able to fetch the value of a custom field in a progress bar, you’ll need to first create a custom field in Advanced Custom Fields. To do so, open your WordPress admin area, navigate to ACF >> Field Groups, and click the + Add New button to create a new field group.
When a new Field group is created, add the name of the group and scroll down to the Fields section.
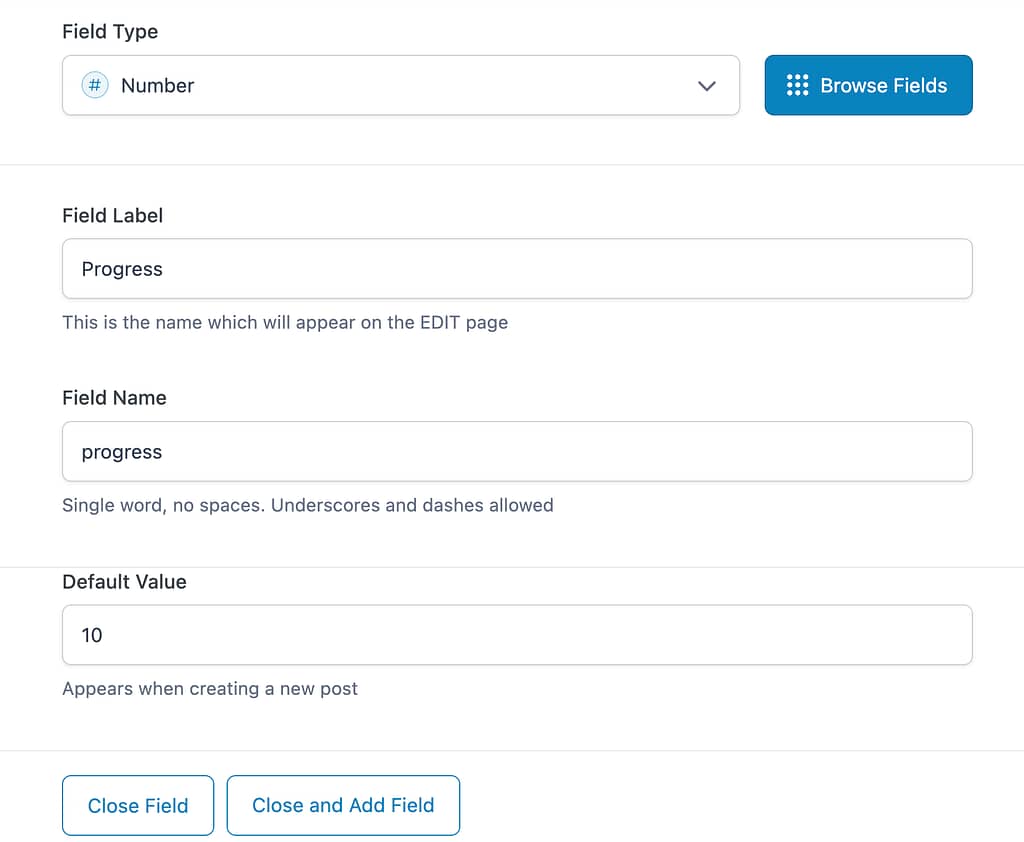
In the Fields section, click on the dropdown beside Field Type and select the type as Number or Range. We select Number here.

After selecting the Field type, enter the following values in the fields below.
- Field label: Progress
- Field name: progress
- Default value: (optional – any number between 0 to 100)
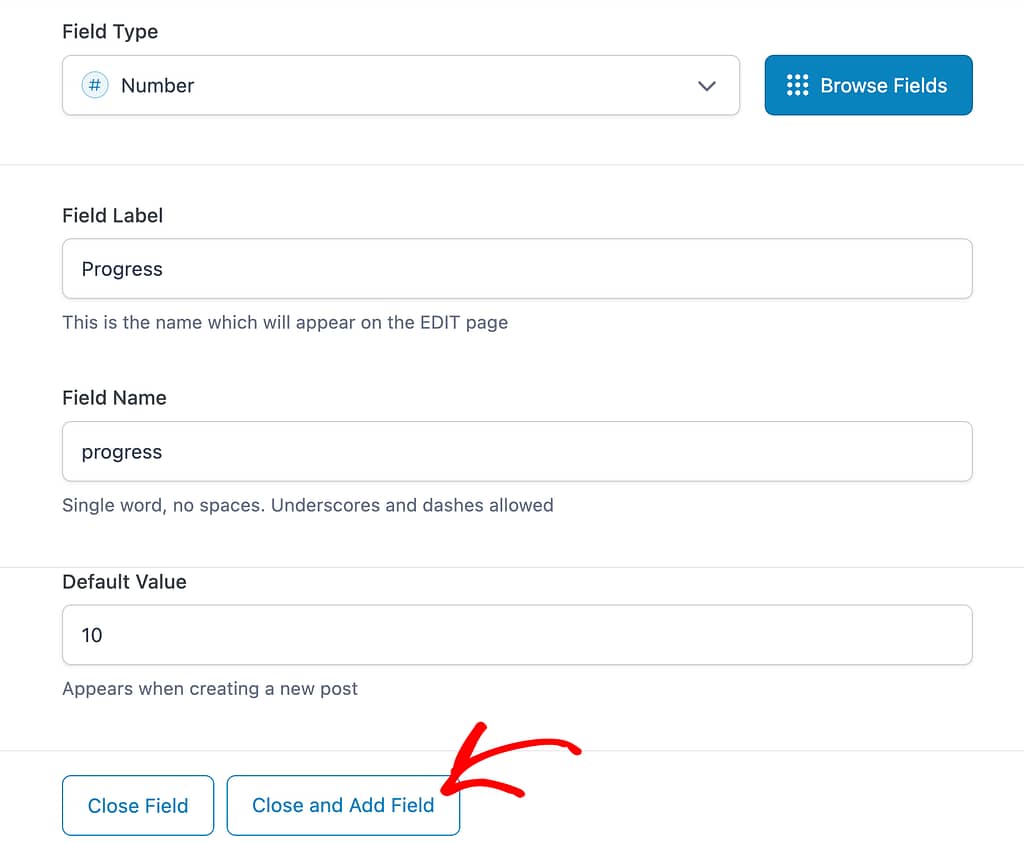
When you fill all the fields, click the Close and Add Field button.
Setting a Custom Field Value in a Post
Once you create a custom field in the Advanced Custom Field plugin, the default value you’ve added will be fetched to set the progress in the progress bar.
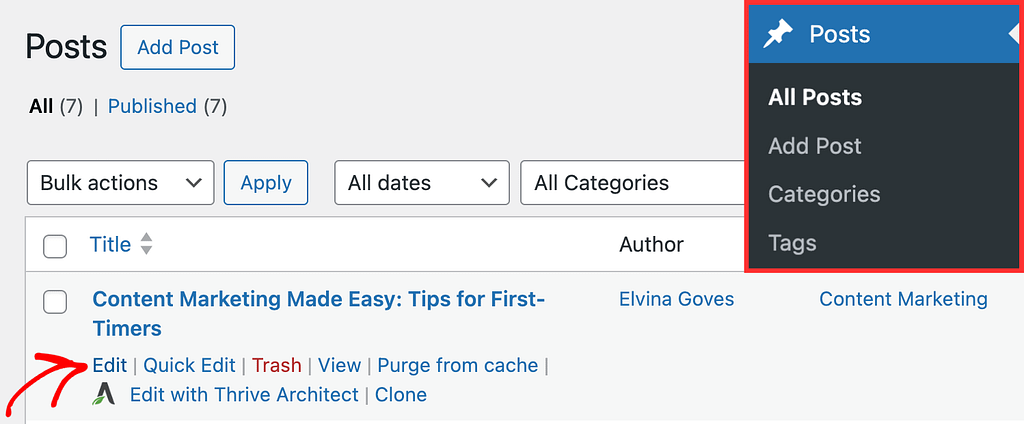
If you haven’t set a default value while creating a field, open the post where you want to display the progress bar. To do so, open your WordPress admin area, navigate to Posts >> All Posts, hover on the post you want to edit and click on Edit.
In the post editor, scroll down to see the newly added custom field and enter the value you want.
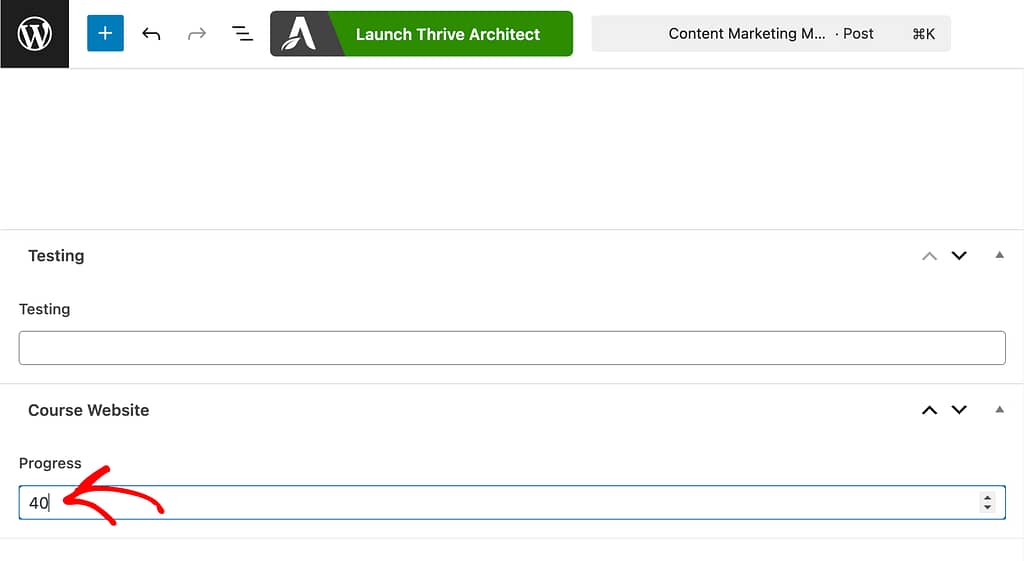
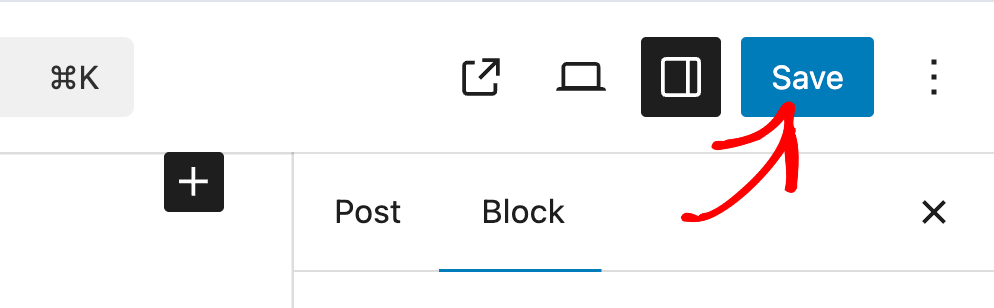
After adding the custom field value, scroll up and click the Save button.
Dynamic Value Settings in a Progress Bar
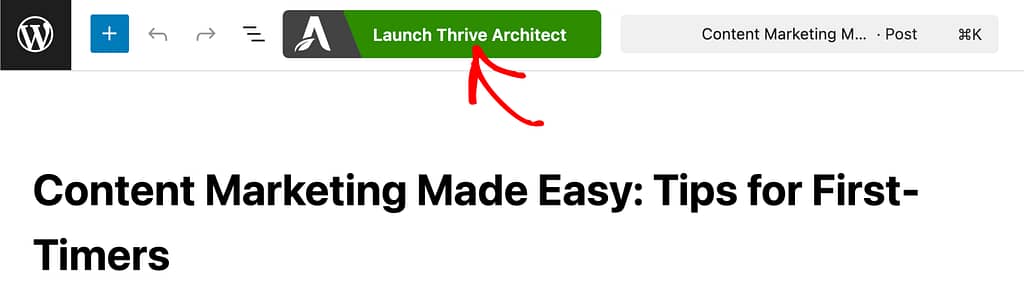
Once you set a value to the custom field in the post, scroll up and click the Launch Thrive Architect button in the top bar.
In the Thrive Architect editor, go to the right panel and click the plus (+) icon.
After clicking the plus icon, you’ll see a list of Thrive Architect elements. From this list, drag and drop the Progress Bar element on the post. When you drag and drop the Progress Bar on the page, you’ll see a popup where you select a progress bar template you want to use.
Once the progress bar is in the post, click on it to open the settings in the left column.

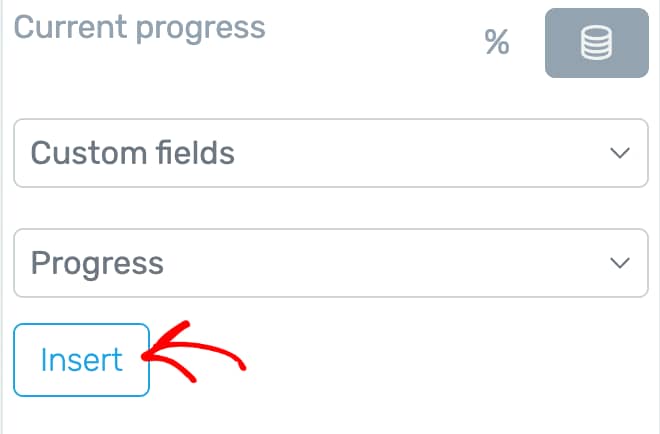
To set a dynamic value that’ll be reflected in the progress bar, click on the drum icon beside the Current progress setting.
Selecting to add a dynamic source for the progress bar will show two dropdowns to select the source. To do so, select Custom fields in the first dropdown and progress in the second dropdown.
After you select these options, click the Insert button.
This will fetch the custom value that you entered in the custom field in the post editor.
Before you exit, ensure you click the Save Work button to save the Thrive Architect changes you’ve made to the post.
We’ve just seen how you can choose to add and use dynamic values to a progress bar in Thrive Architect.
Next, do you want to add a Progress bar to a Thrive Apprentice lesson? Here’s our document that’ll help.