Do you want to offer downloadable files like PDFs, or other lead magnets as soon as a user submits a Thrive Leads or a lead generation form successfully? You can use the Asset Delivery feature to deliver a lead magnet automatically on form submission.
In this article, we’ll show you how to set up asset delivery and a lead generation for it.
- Overview of Asset Delivery
- Accessing the Asset Delivery Set Up Wizard
- Creating an Asset Group
- Understanding the Asset Delivery Dashboard
- Adding Assets to Opt-in Forms
Overview of Asset Delivery
Asset Delivery is the process of delivering an asset like a PDF file, cheat sheet, spreadsheets, short courses, videos, templates, etc. in return for a user’s email ID or details that you capture through a form.
The main components needed in asset delivery are as listed below.
- An opt-in form created in Thrive Leads or a Lead Generation element in Thrive Architect.
- An auto-responder or a CRM that will help you store, manage and nurture the leads captured through the opt-in form.
- A lead magnet that you want to deliver as the asset after successful form submission.
- An email delivery service that’ll ensure the deliverables are sent out immediately without landing in spam.
To learn how to create an opt-in form in Thrive Leads, you can refer to the guide here or add a Lead Generation element to a page.
Accessing the Asset Delivery Set Up Wizard
To open the Asset Delivery set up wizard in Thrive Leads, begin by opening your WordPress admin area, navigating to Thrive Dashboard >> Thrive Dashboard, hover on the Thrive Leads block and click the three dots on the top right corner.
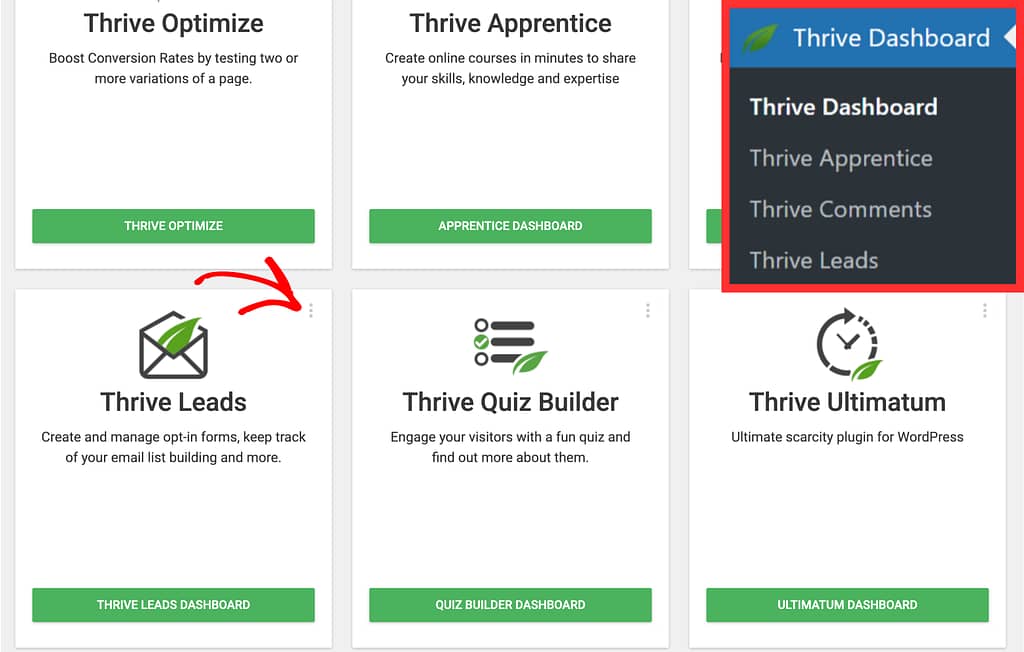
When you click the three dots, click on Asset Delivery from the options that appear.
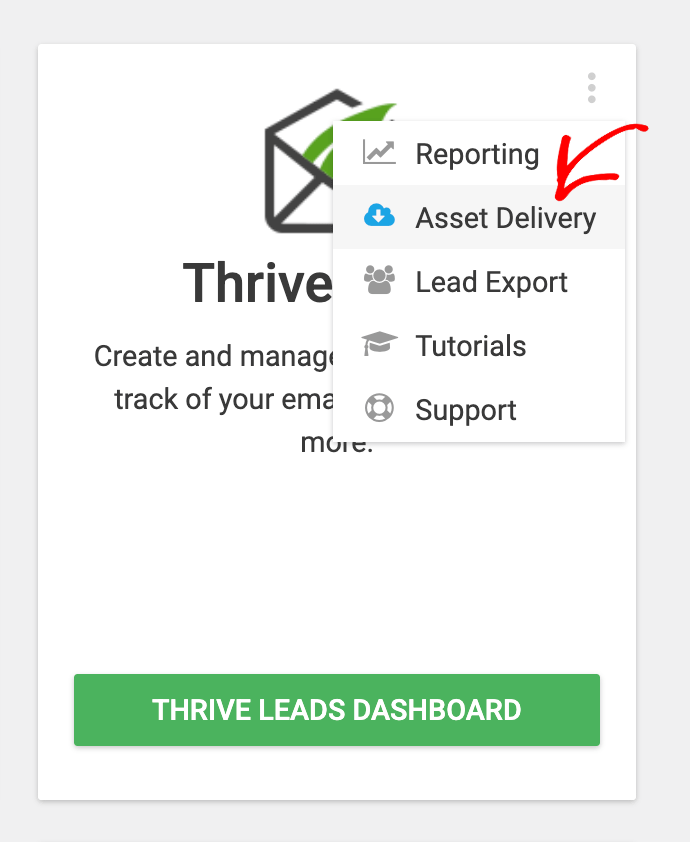
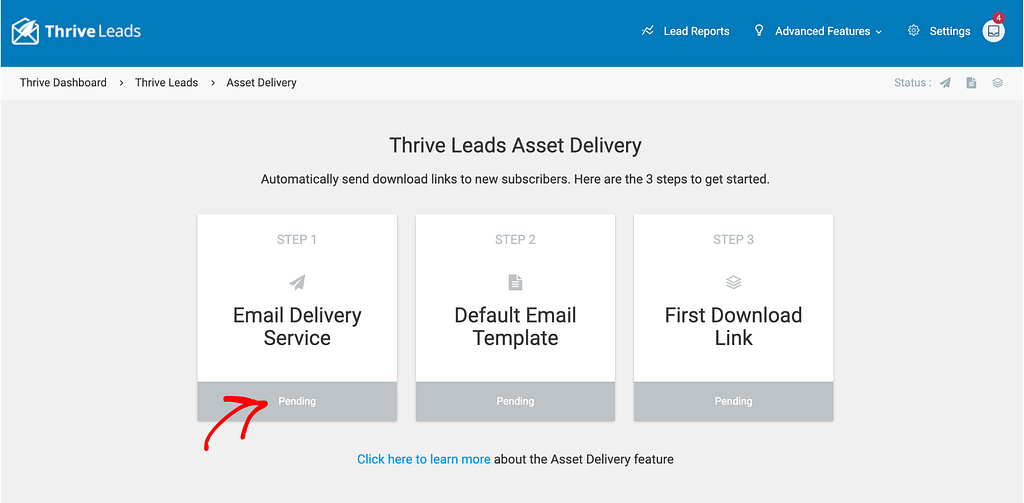
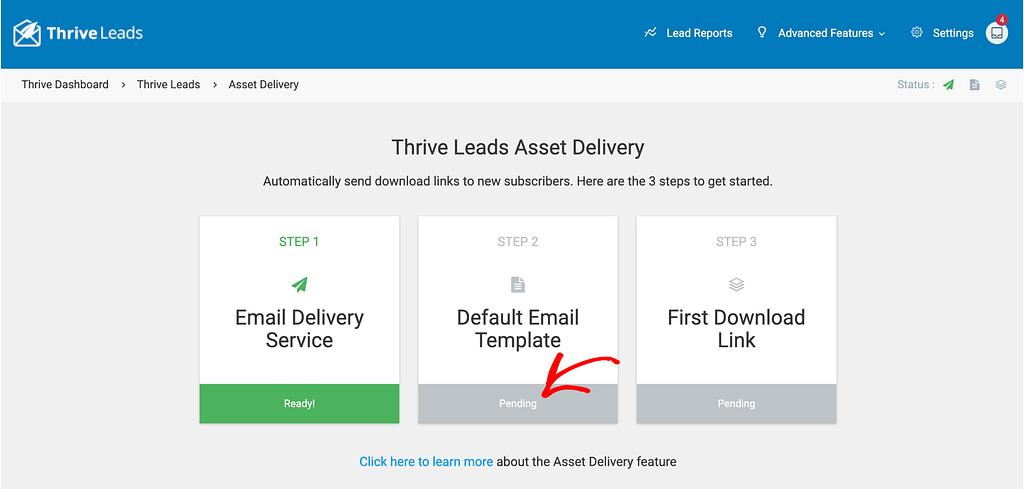
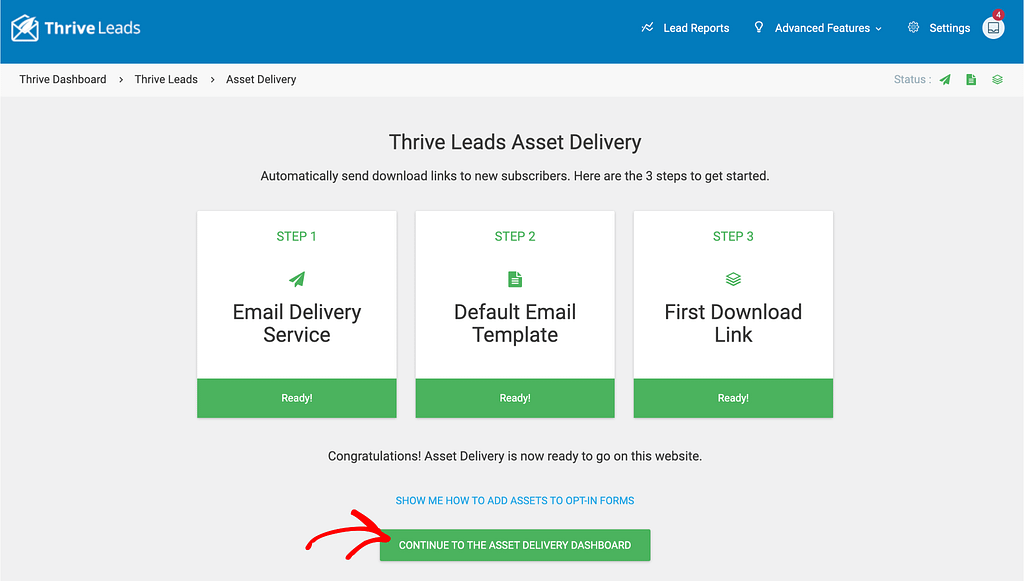
Clicking on the Asset Delivery for Thrive Leads, you’ll be taken to the Asset Delivery dashboard where you can set this up in 3 easy steps.
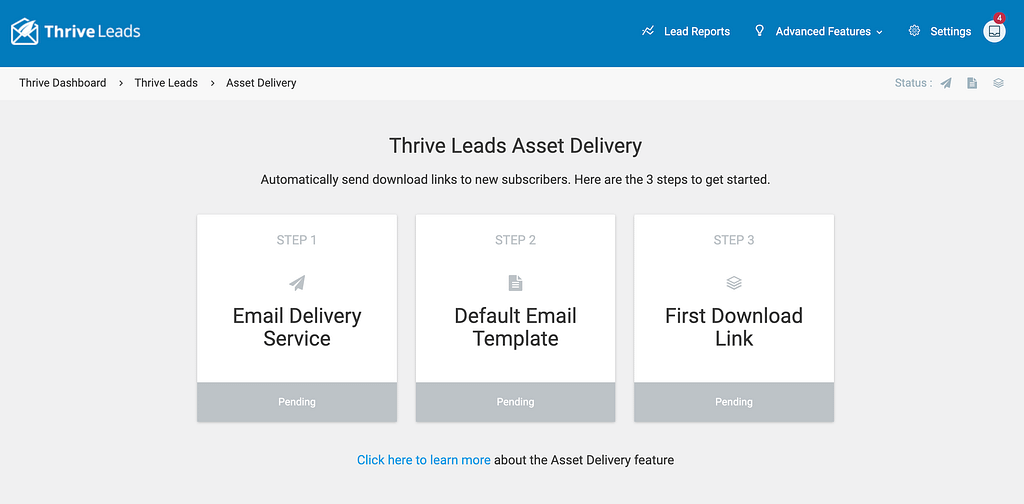
Creating an Asset Group
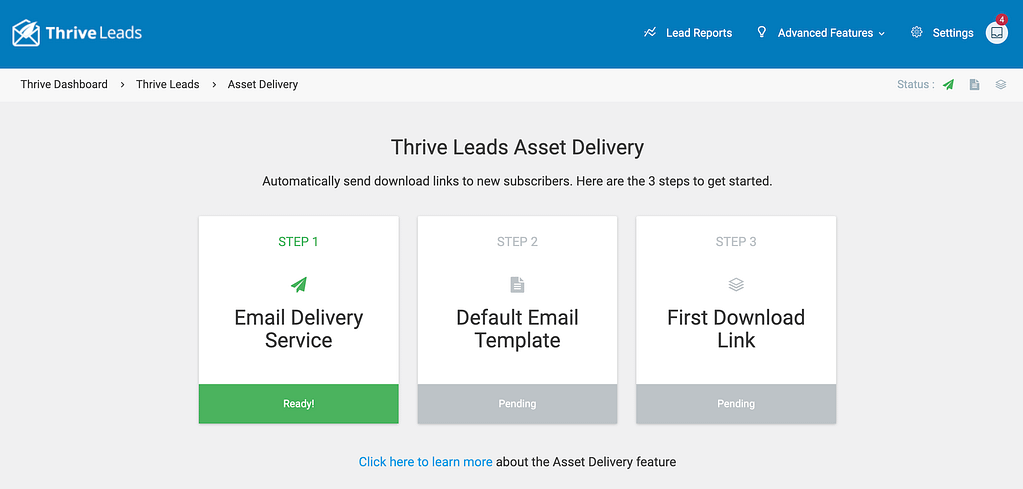
When you open the Asset Delivery dashboard in Thrive Leads, you’ll find the three main steps where you have to pick an email delivery service, set up a default email template and create the first download link.
Step 1: Selecting an Email Delivery Service
To begin with the asset delivery settings you first need to ensure you have integrated Thrive Dashboard with a reliable email delivery service that assures delivery of emails in the inbox.
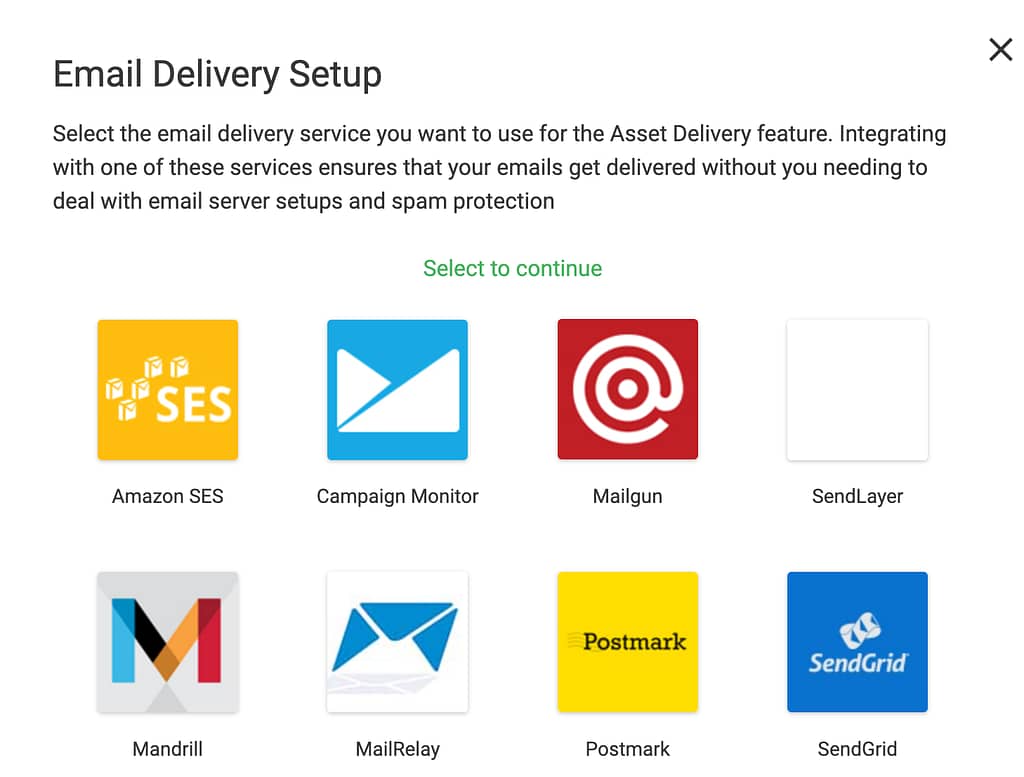
You can choose any of the following email delivery services to proceed.
- SendLayer
- Amazon SES
- Mailgun
- MailRelay
- Mandrill
- Postmark
- SendGrid
- Brevo, formerly known as SendinBlue
- SparkPost
If you’ve already connected any of these through the Thrive Dashboard you’ll find the step 1 block that mentions a connection with an email delivery service marked in green. In case of this, you can directly move to Step 2.
If you haven’t set an API connection with any of the above mentioned email delivery service, click on Pending under the Email Delivery Service block.
After clicking the Email Delivery Service block, you’ll see a popup where you will have to select the email delivery service you want to use.
After you select the Email Delivery Service, enter the API key and click Continue.
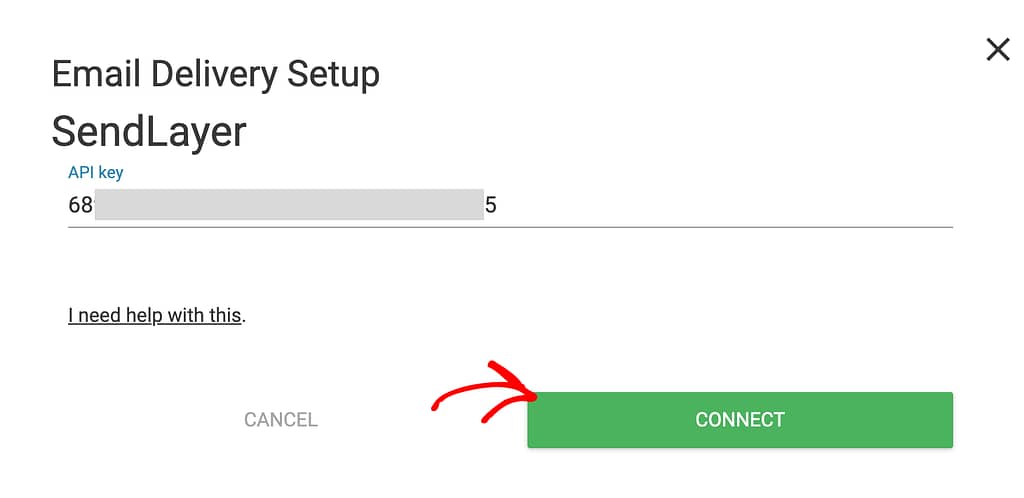
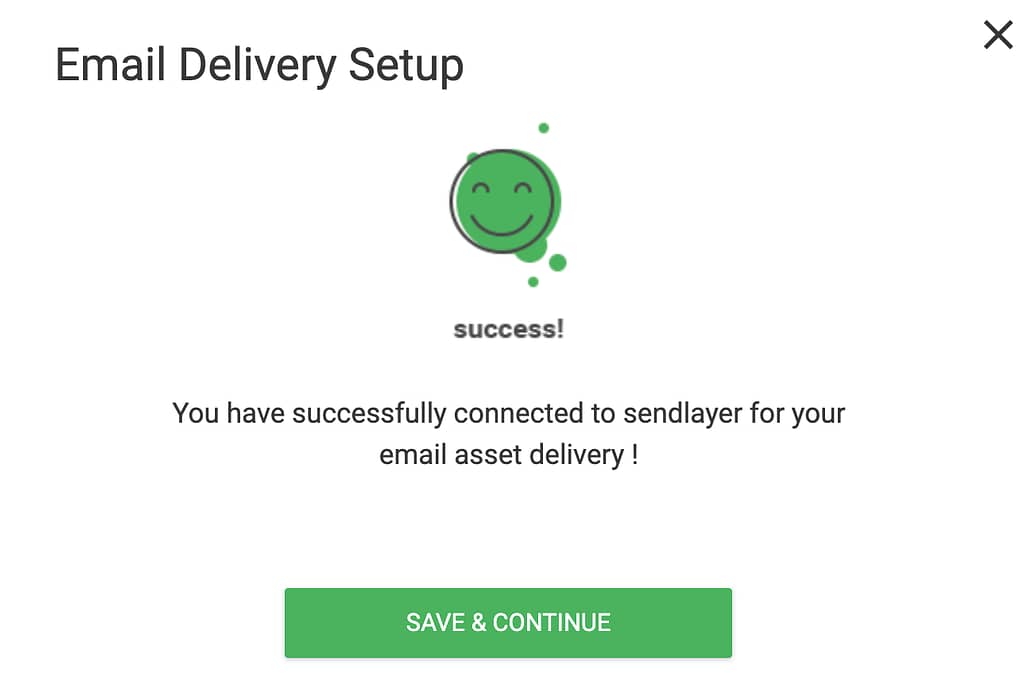
When you click Continue, you’ll see a success message on the popup.
Step 2: Editing the Default Email Template
After you’ve selected an email delivery service, click on Pending on the Default Email Template block.
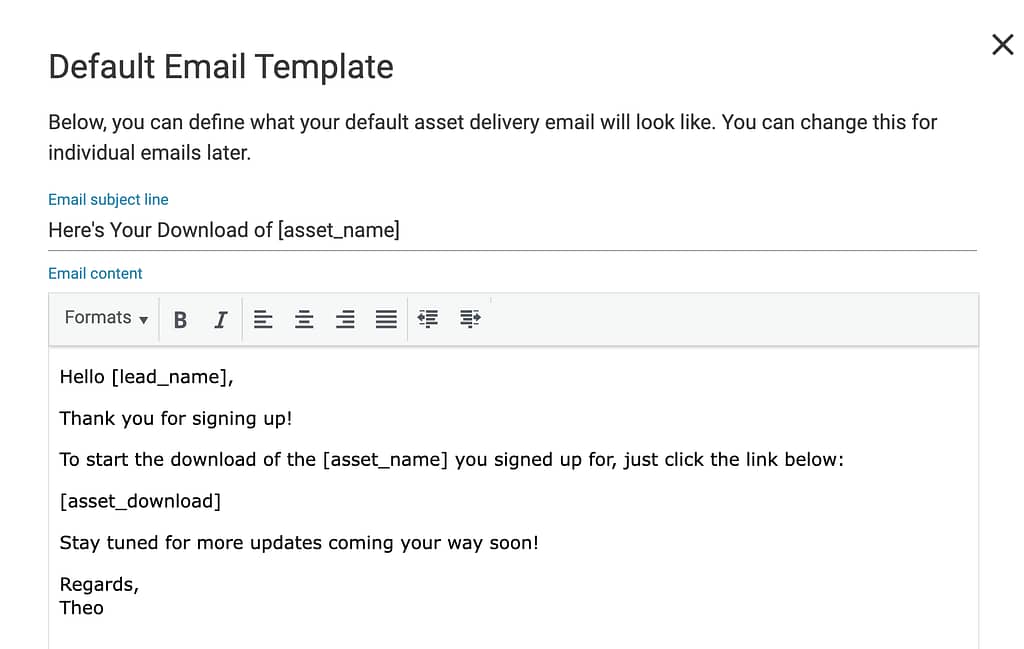
When you click on the Default Email Template block you’ll see a popup where you can edit the Email subject and the content.
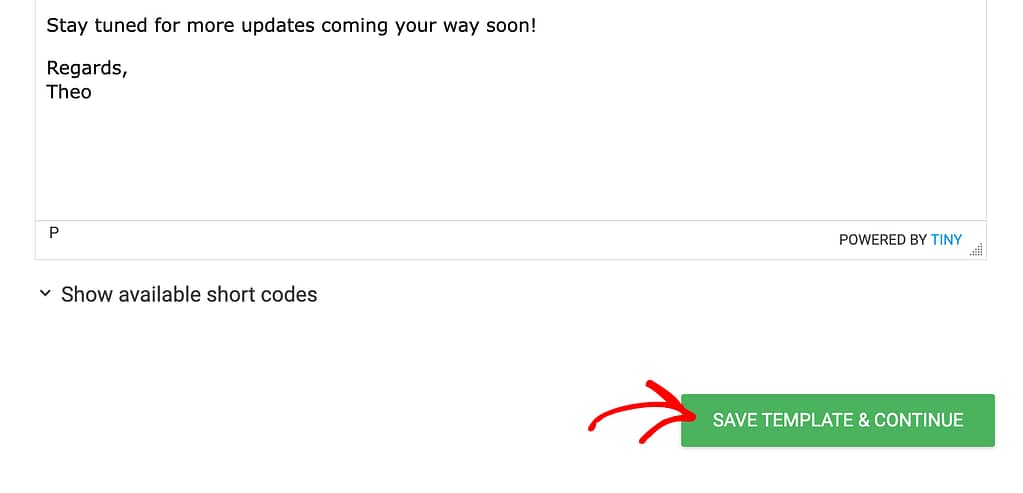
After you’ve finished editing the email subject line and the content click Save Template and Continue.
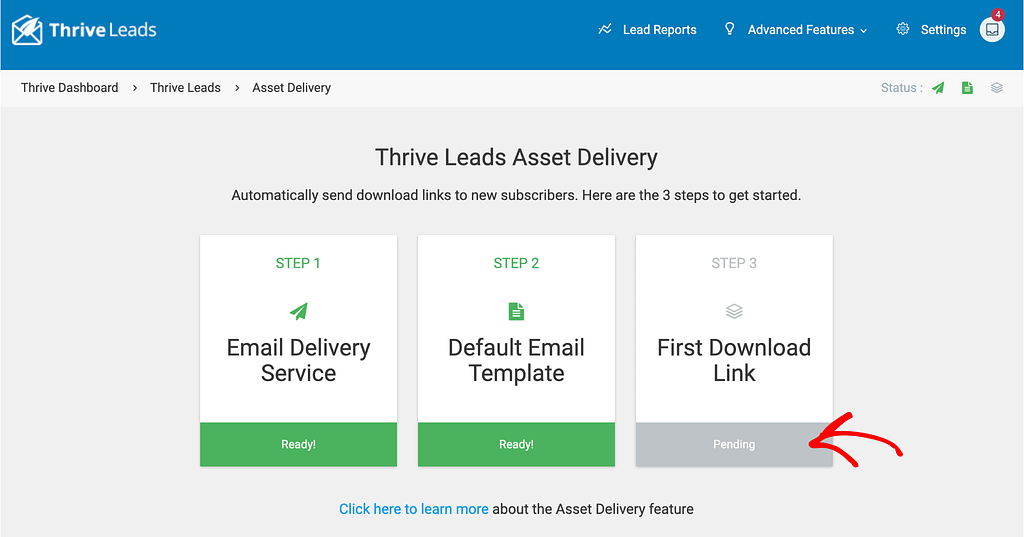
Step 3: Generating the First Download Link
After you’ve selected an email delivery service and edited the default email template for asset delivery, step 3 lets you get the download link that you can share.
To get the download link, click Pending on the First Download Link block.
When you click to get the first download link, you’ll see a popup where you enter an asset name and click the Save & Continue button.
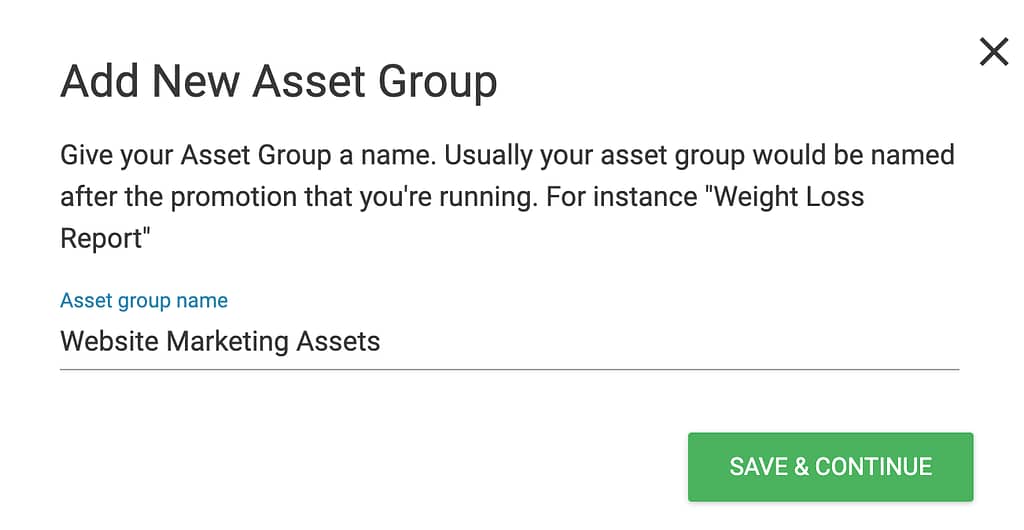
When you click Save & Continue, you’ll be taken to the next step that is to add a new file you want to give away as an asset.
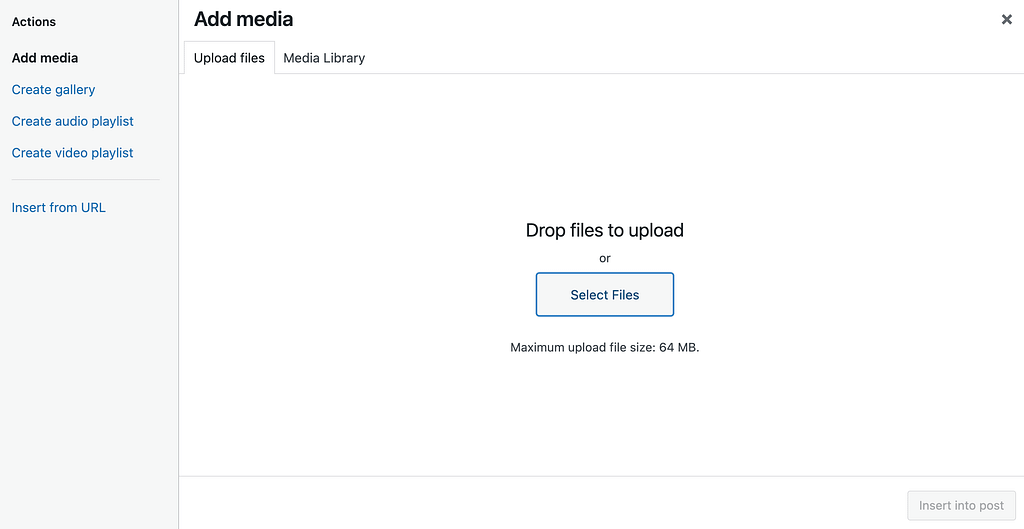
To add the asset, click the Add New File button.

Choosing to add a file will open the Media Library where you can select or upload the file from your computer to be used as an asset here.
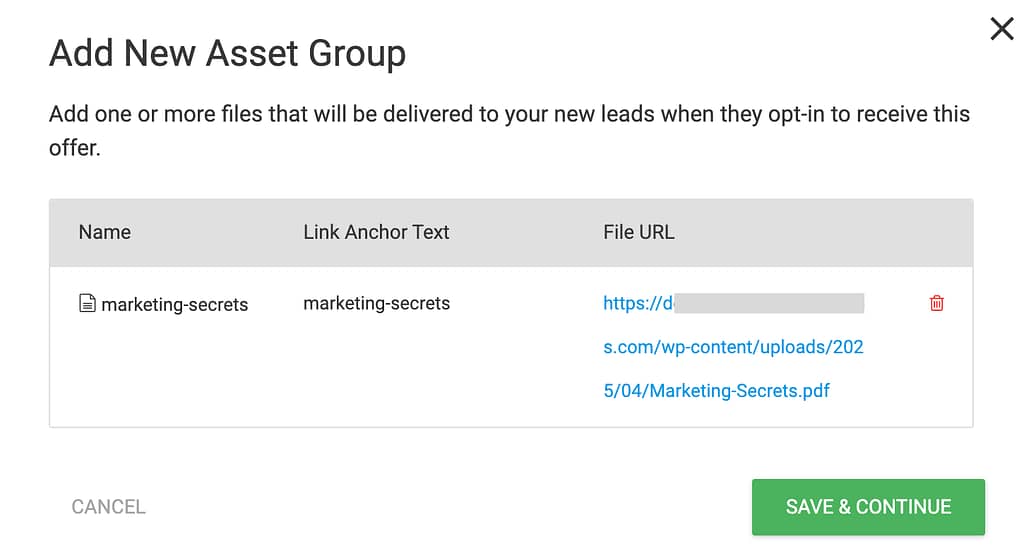
After selecting and uploading the file, you’ll see it added on the popup. To proceed, click the Save & Continue button.
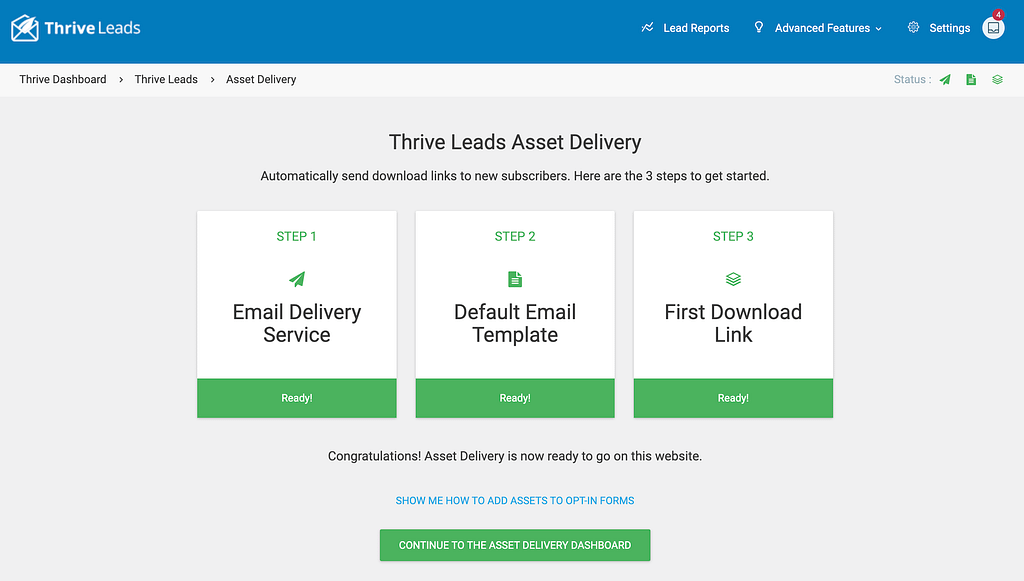
Once you click Save and Continue, you’ll be taken back to a page where you’ll see all the steps marked ready.
Understanding the Asset Delivery Dashboard
When you complete adding an Asset Group following the steps above, you can go back to the Asset Delivery dashboard by clicking the Continue to the Asset Delivery Dashboard button.
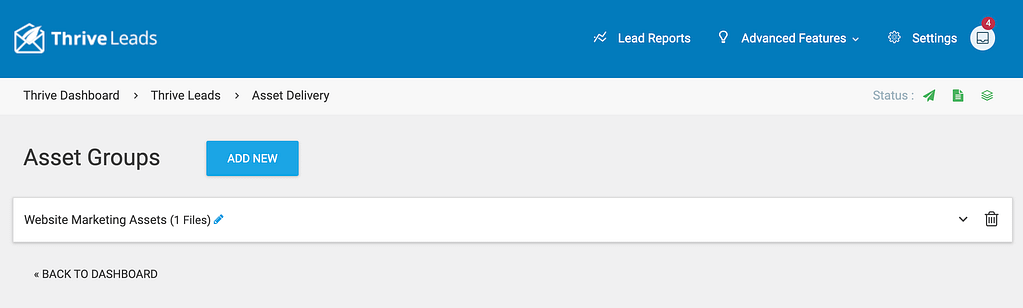
Clicking the button will take you to the Asset Delivery Dashboard.
Adding a New Asset Group
The Asset delivery dashboard lists the present Asset groups that you’ve created on the website.
To add a new asset group, click the Add New button.
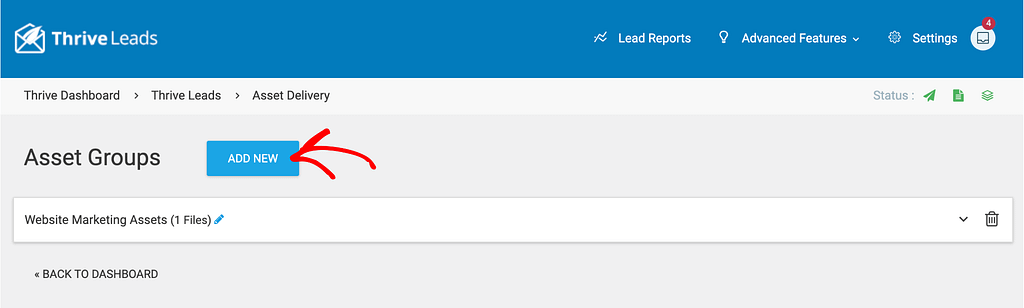
Clicking the Add New button will again open the popup where you enter the Asset group name, add a file, etc. just like we did above.
Previewing and Customizing the Asset Delivery Email
To preview the asset delivery email start by clicking on the down arrow on the Asset group block.
When you open the Asset group details, click on Preview Email to see how the email will look.
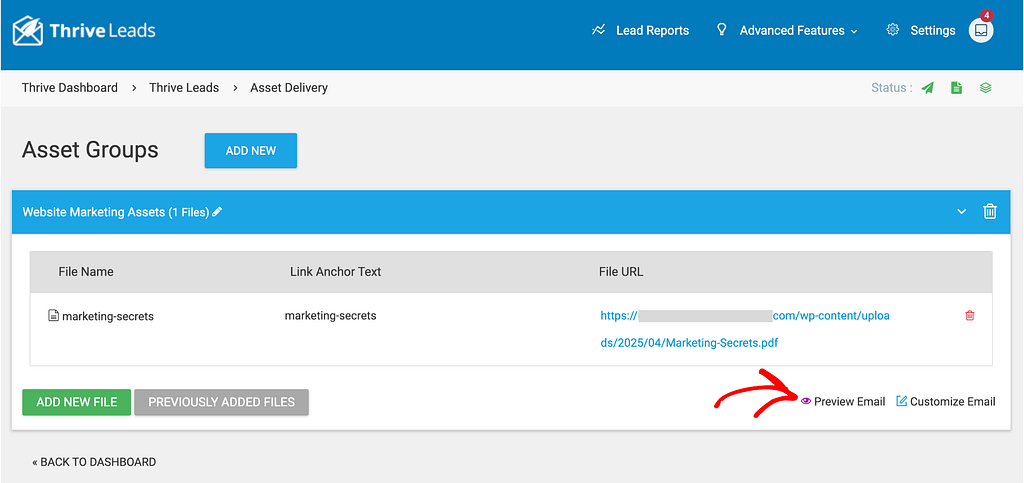
To customize the email, click on the Customize Email link.
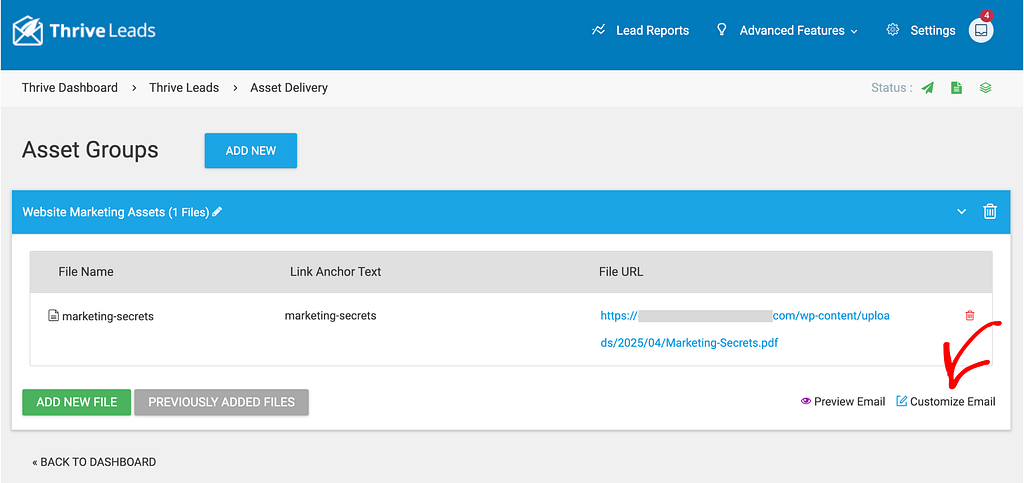
When you click to customize the email, you’ll see a popup where you can edit the Email subject line and content.
Adding a New File to an Asset Group
To add a new file in an already created asset group, in the Asset Delivery dashboard, when you click to open the Asset group details, click Add New File.
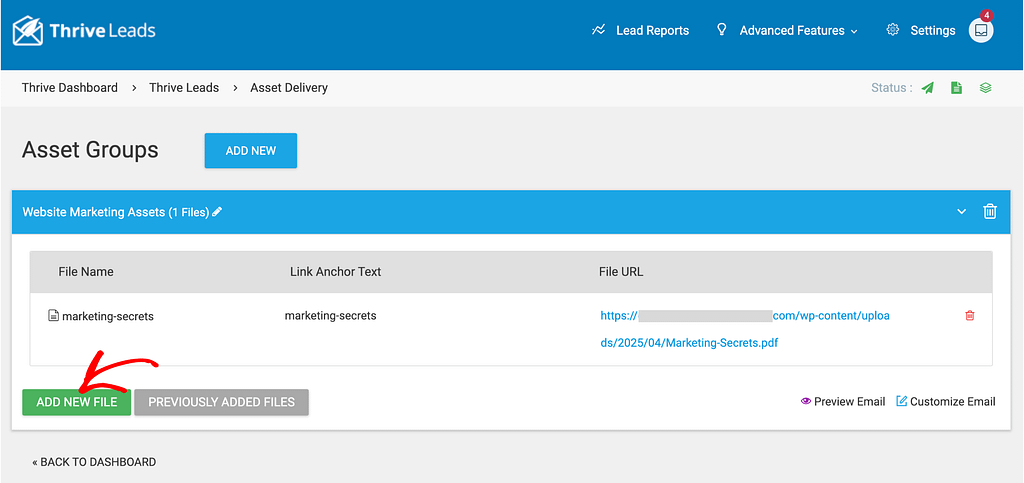
Similarly, if you want to use an already uploaded file click the Previously Added Files button.
In both of these cases, you’ll see a popup to upload the file and save it as an asset as seen in the previous steps above.
Status Indicators of Asset Delivery
The Asset Delivery dashboard has three status indicators you see in the top right corner.
These indicators when clicked will give you information about the email delivery setup, default email template, and an option to create a new asset group.

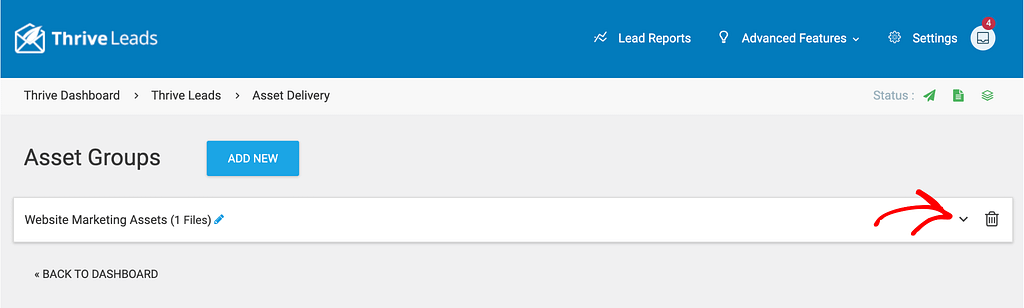
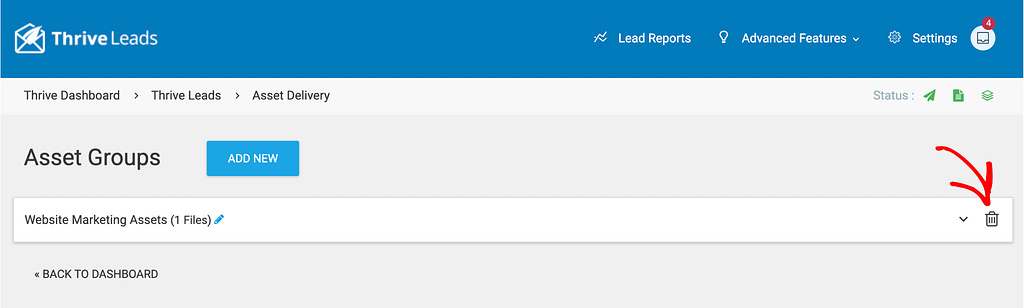
Renaming an Asset Group
To rename an asset group, open the Asset Delivery dashboard and click on the pen icon beside the asset name.
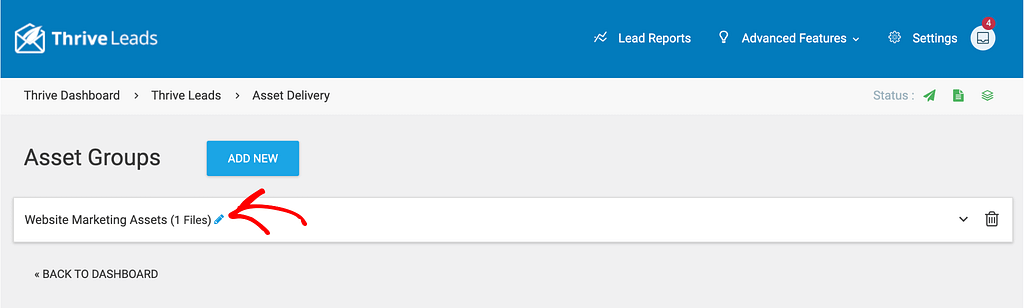
Clicking the pen icon will let you edit the Asset group name.
Deleting an Asset Group
To delete an existing asset group, open the Asset delivery dashboard and click the bin icon on the Asset group block you want to delete.
Adding Assets to Opt-in Forms
Now that you’ve created an Asset group and added a file to it, it’s time to add the asset group to an opt-in form.
To do so, ensure you have a Lead Generation element added on a page or a Thrive Leads form you want to use.
In this example, we’ll see how you can add asset delivery to a Lead Generation element. To do so, open the page containing the Lead Generation element in the Thrive Architect editor.
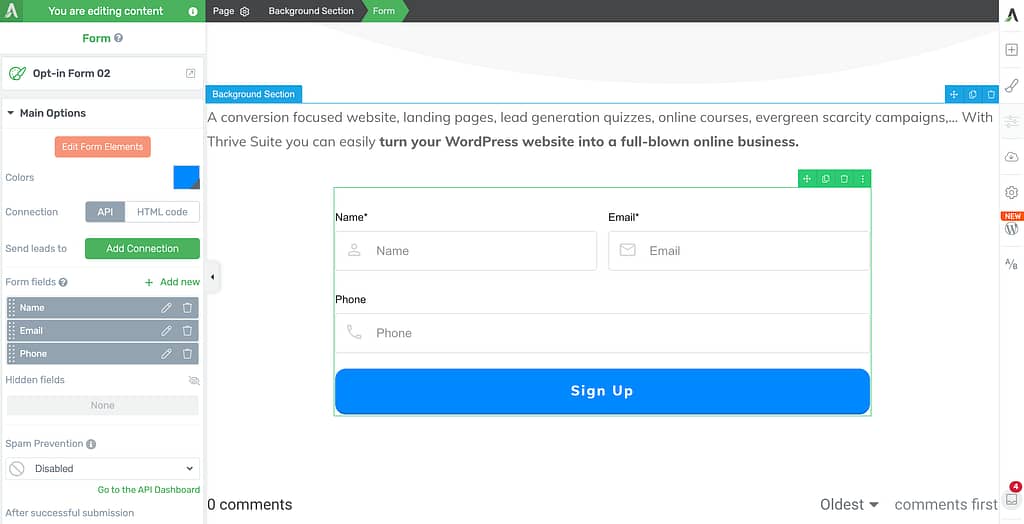
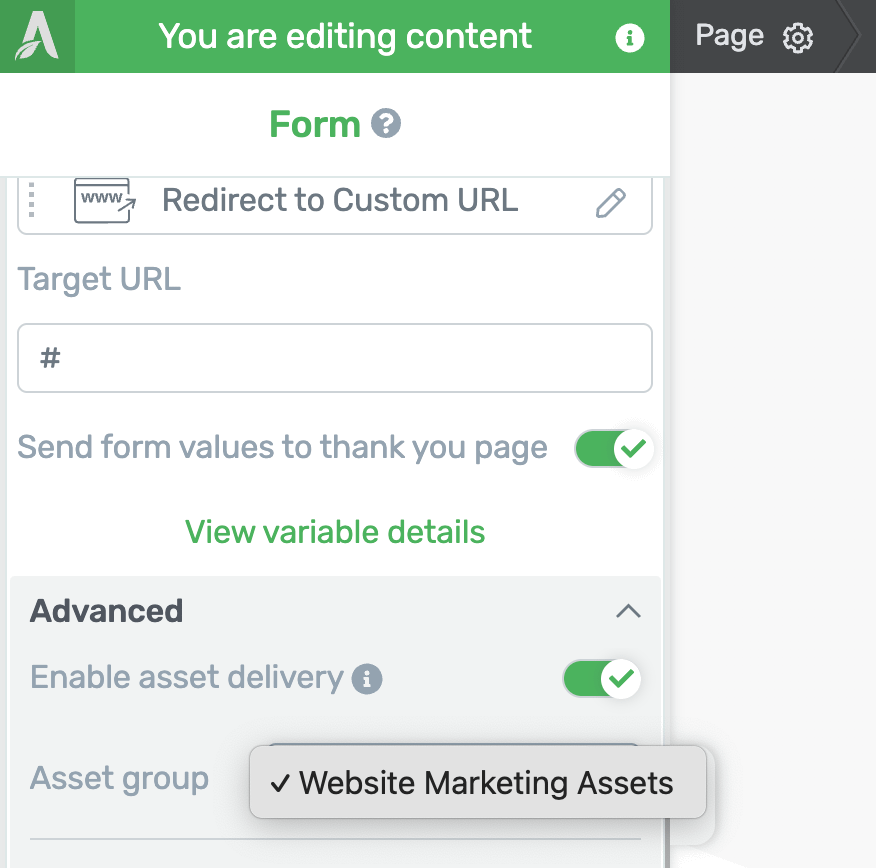
When you click on the form, under the Main Options in the left column, click to open the Advanced options.
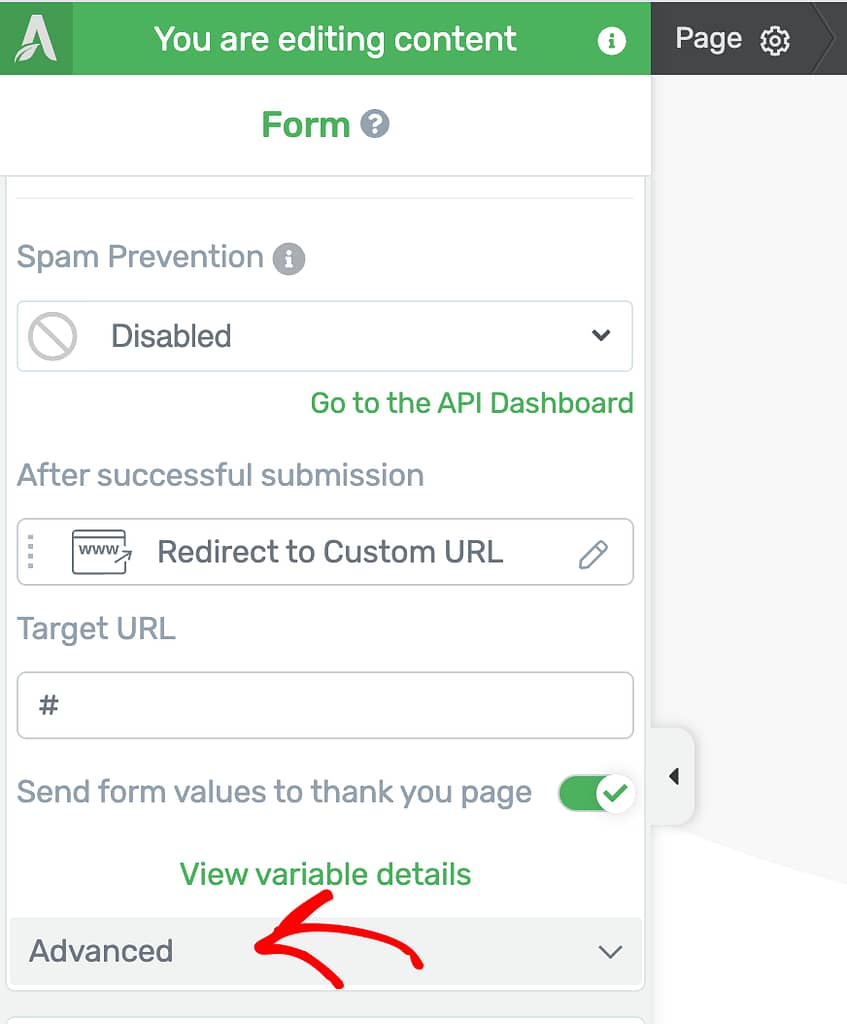
When you open the Advanced options, click on the slider to Enable Asset Delivery for the form on the selected Lead Generation element.
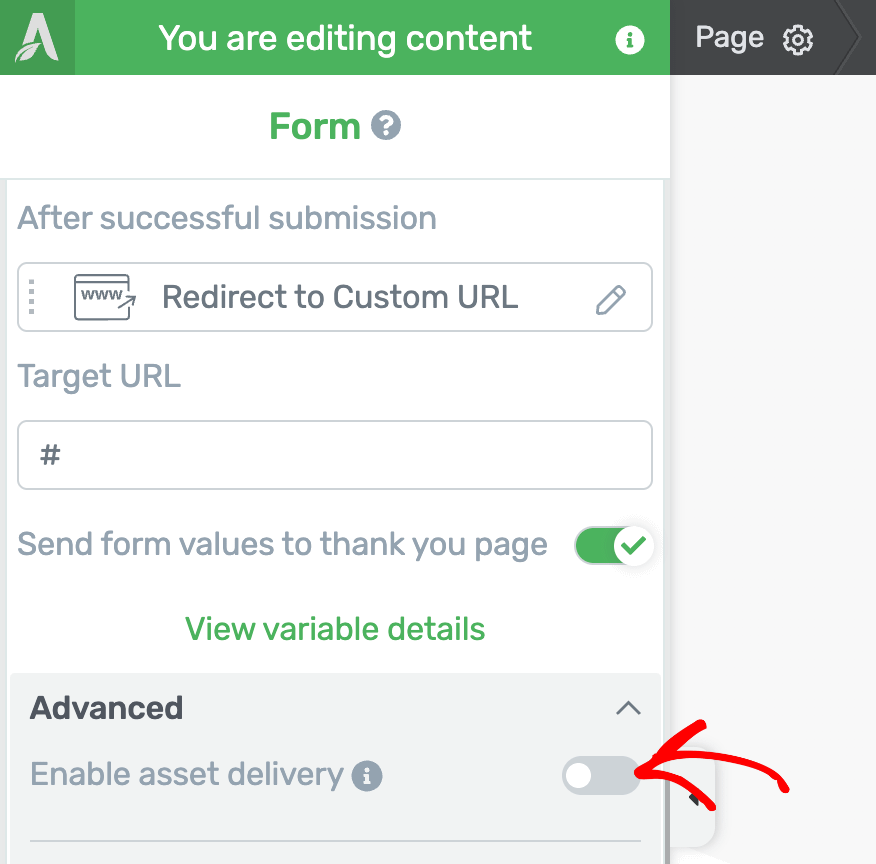
After enabling asset delivery, select the Asset group you want to add to the form in the selected lead generation element.
Just like the Lead Generation element, you can add an asset group to a Thrive Leads form too.
We’ve just seen how you can add an asset group so that you’ll deliver a downloadable asset after a user submits a form on a lead generation element successfully.
Next, do you want to ensure you selectively deliver offers and add subscribers based on user consent? Here’s our document that will help.