The Decorations option is one of the general options that are available for more elements, such as the “Background Section”, the “Content Box”, the “Testimonial”, the “Guarantee Box” and the “Styled Box”.
This option comes in handy if you want to customize the sides of the elements or you want to use the decoration to divide certain parts of your page.
In order to use it, first click on the element you want to customize and then, on the “Decorations” option from the sidebar.
Select the side that you want to customize and click on the drop-down menu to see the decorations that you can choose from:
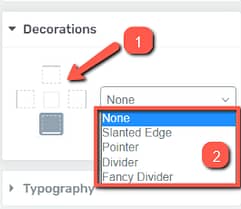
Slanted Edge
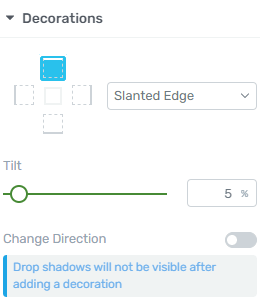
If you select the “Slanted Edge” decoration, you will have the option of changing the “Tilt” size by dragging the slider under it or entering a value manually in the box next to it.
You can also “Change the Direction” of the decoration by simply clicking on the on/off switch next to this option.
Pointer
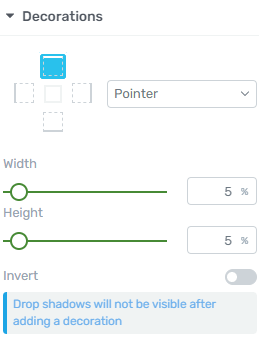
This decoration has different options from the previous one. You can adjust the “Width” and the “Height” of the Pointer and you can also choose to invert it.
Divider
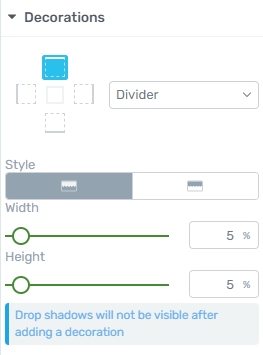
You can choose from two “Styles” for this decoration. Simply click on them to see how they change on the element in the editor: you can choose the one with the pointy edges:
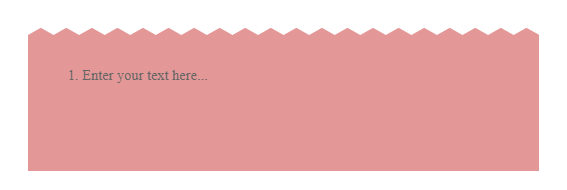
Or one with rounded edges:

You can also adjust the “Width” and the “Height” as well, by dragging the slider or entering a value manually.
Fancy Divider
The fourth decoration is a more complex one called “Fancy Divider”. After you select it, you will see another section appear where you can choose the type of “Fancy Divider” you want to apply to your element:
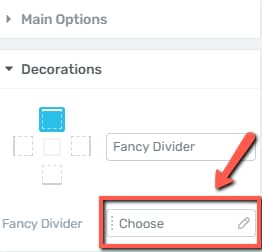
Click on the box with the “Choose” option from the new “Fancy Divider” section. This will open a pop-up window with all the “Fancy Dividers” that are available:
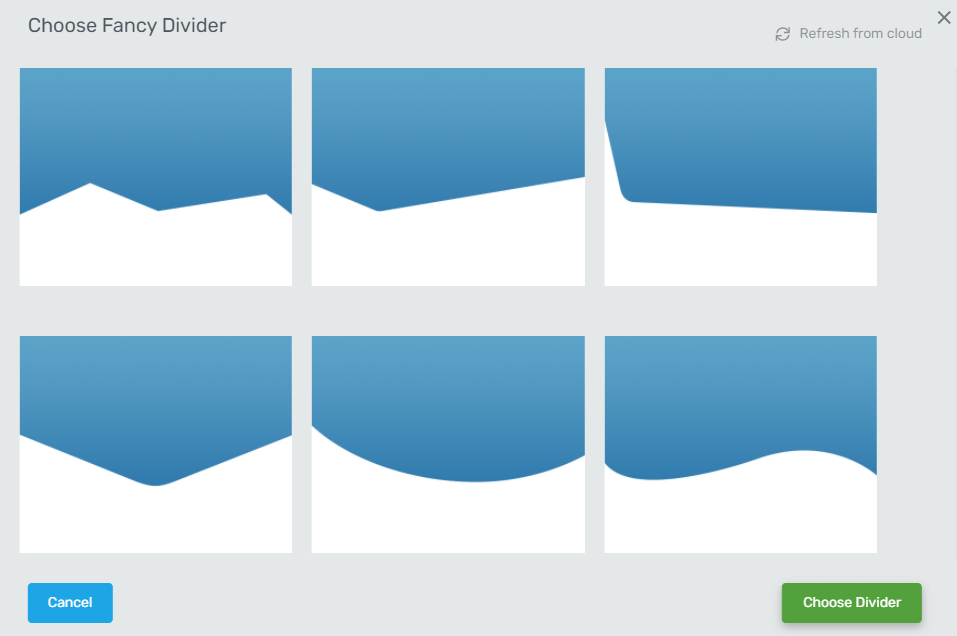
Scroll down to see all of them in the pop-up window. When you have decided which one you want to apply to the element, just click on the respective “Fancy Divider” and then, click on the “Choose Divider” button from the bottom right corner of the window.
Once the “Fancy Divider” has been selected, you will see its options appear under the “Fancy Divider” section of the left sidebar.
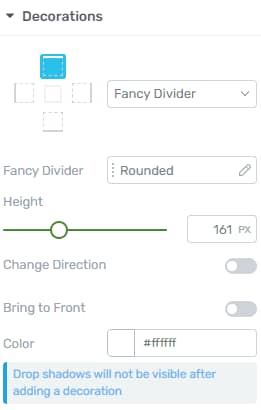
Each of the “Fancy Dividers” comes with different options. Based on which one you have chosen, use the following options to customize your decoration:
Height
If you want to change the height of the “Fancy Divider”, simply drag the slider under this option or enter a value manually, just like in the case of other decorations.
Change Direction
You can easily change the direction of the “Fancy Divider” by using the on/off switch next to this option.
Bring to Front
This option is useful when you have two fancy dividers applied to the same background section for example.
You can use the “Bring to Front” option to select which one you prefer to be displayed in front of the other.
Color
It is advisable to apply a color to your “Fancy Divider”, in case you want to add it to an element that has no color applied to it.
You can add color to the decoration by clicking on the “Color” option. When the color picker opens, you can use it to set the color you wish and then, click on “Apply”.
If you want to see best practices regarding the use of Fancy Dividers, please follow this link.
When you are done, you can save the page and preview it to see the decorations you have applied to your element.
A few things to keep in mind about the decorations:
-
The regular decorations (the “Slanted Edge”, the “Divider”, and the “Pointer”) can be applied to any of the four sides of an element; while the “Fancy Divider” can only be applied to the top or bottom side.
-
If you apply a “Slanted Edge” for example to your element, it might happen that the edge starts overlapping the content. You can fix this if you add a bottom padding to your element.
-
When the “Fancy Divider” is applied to a background section, that background section should have a neighboring section that is white (has no Background Style) or has a solid color as the background. In the case of the solid color, it is advisable to give the “Fancy Divider” the same color that the neighboring section has in order for it to look good.
In case you want to know more about the Thrive Architect elements, please consult our knowledge base.
Hopefully, this article was useful for you. If so, please reward it with a smile below 🙂