In our latest update release, we added an important new feature in the Thrive Dashboard, called Notification Manager, from which all Thrive notifications can be managed.
At the moment we have a limited number of triggers implemented but we will expand this over time so that you can manage your notifications for all your Thrive products in one place.
With this new feature, you can set up different actions to be performed when certain events take place on your website.
Below you can find details on how to use the “Call a Custom Script” notification and what information is passed to your script.
How to use the “Call a Custom script” notification
Once you have selected a trigger for your notification:

You will be prompted to choose an action to take place once the notification has been triggered:
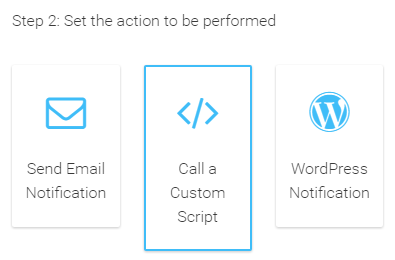
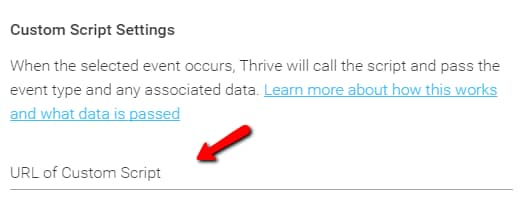
Choose the “Call a Custom Script” option and you will be presented with a field where you need to paste the URL of the Custom Script you want the notification to be sent to:
Once you added the required URL and saved the notification, you will be able to see the notification added to your Notification Manager Dashboard:

Now when the trigger you selected is set off, the Notification Manager will call the custom script. As you can see in the image above, for the notification that you just created, you can also add another action (1) or delete (2) the entire notification.
What information is passed to your script?
In this section, we will illustrate the steps you can take to test the functionality of the “Call a Custom Script” action and also detail the information that is being forwarded to your script.
How to test the “Call a Custom Script” notification action
An easy way to test the “Call a Custom Script” action is by using the RequestBin website. Navigate to their website and click on the “Create a RequestBin” button:
Now your bin and script have been created. Next, you need to copy the Bin URL that you can see below:
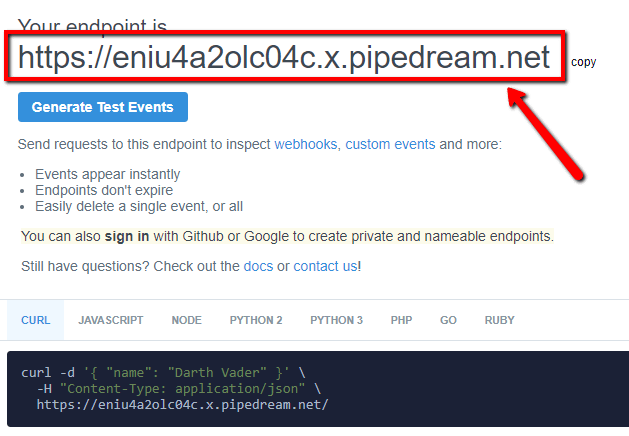
And you need to paste it in the setup of your notification:

Once you have finished the setup of your notification and you saved it, next time the trigger is set off, the notification information will be sent to that script.
For the example set in RequestBin, in order to see the information forwarded, all you have to do is go back to your opened bin page and refresh it. Below you can see two examples of what information is passed to your script, depending on the trigger that you chose for your notification.
Information passed for an A/B Test Ends trigger
If you have set an “A/B Test Ends” trigger for your notification:
This is the information that will be passed to your script:

More information about the parameters passed to your script:
thrv_event – split_test if your trigger is the A/B Test Ends;
test_url – the URL to take you to your finished test report;
test_id – the ID of your test;
winning_variation_name – the name of the winning variation.form;
winning_variation_id – the ID of the winning variation/form.
Information passed for an Email Sign Up trigger
If you have set an “Email Sign Up” trigger for your notification:
This is the information that will be passed to your script:
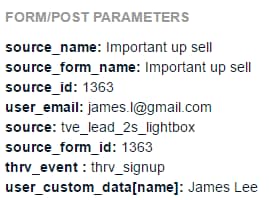
More information about the parameters passed to your script:
source_name – the name given to the Lead Group, Lead Shortcode, or ThriveBox;
source_form_name – the name of the winning form;
source_id – the ID of your Lead Group, Lead Shortcode, or ThriveBox;
user_email – the email the visitor used to sign up to your form;
source – tve_lead_group for a Lead Group, tve_lead_shortcode for a Lead Shortcode and tve_lead_2s_lightbox for a ThriveBox;
source_form_id – the ID of the winning variation/form;
thrv_event – thrv_signup if your trigger is the Email Sign Up;
user_custom_data[name] – the information in the other fields that your form has. In this case, the name the visitor used in the name field of the form