In this article, you’ll learn how to add custom scripts and analytics tracking codes to your Thrive Architect landing pages, insert custom CSS using the script manager, and configure typography settings for landing page-wide font styling.
Landing page scripts let you add tracking pixels (Google Analytics, Facebook Pixel, etc.), custom JavaScript, and CSS directly to a specific landing page. Because landing pages bypass your theme, scripts added through your theme or WordPress settings may not load—so this feature ensures your tracking and custom code works correctly.
Adding Custom Scripts to a Landing Page
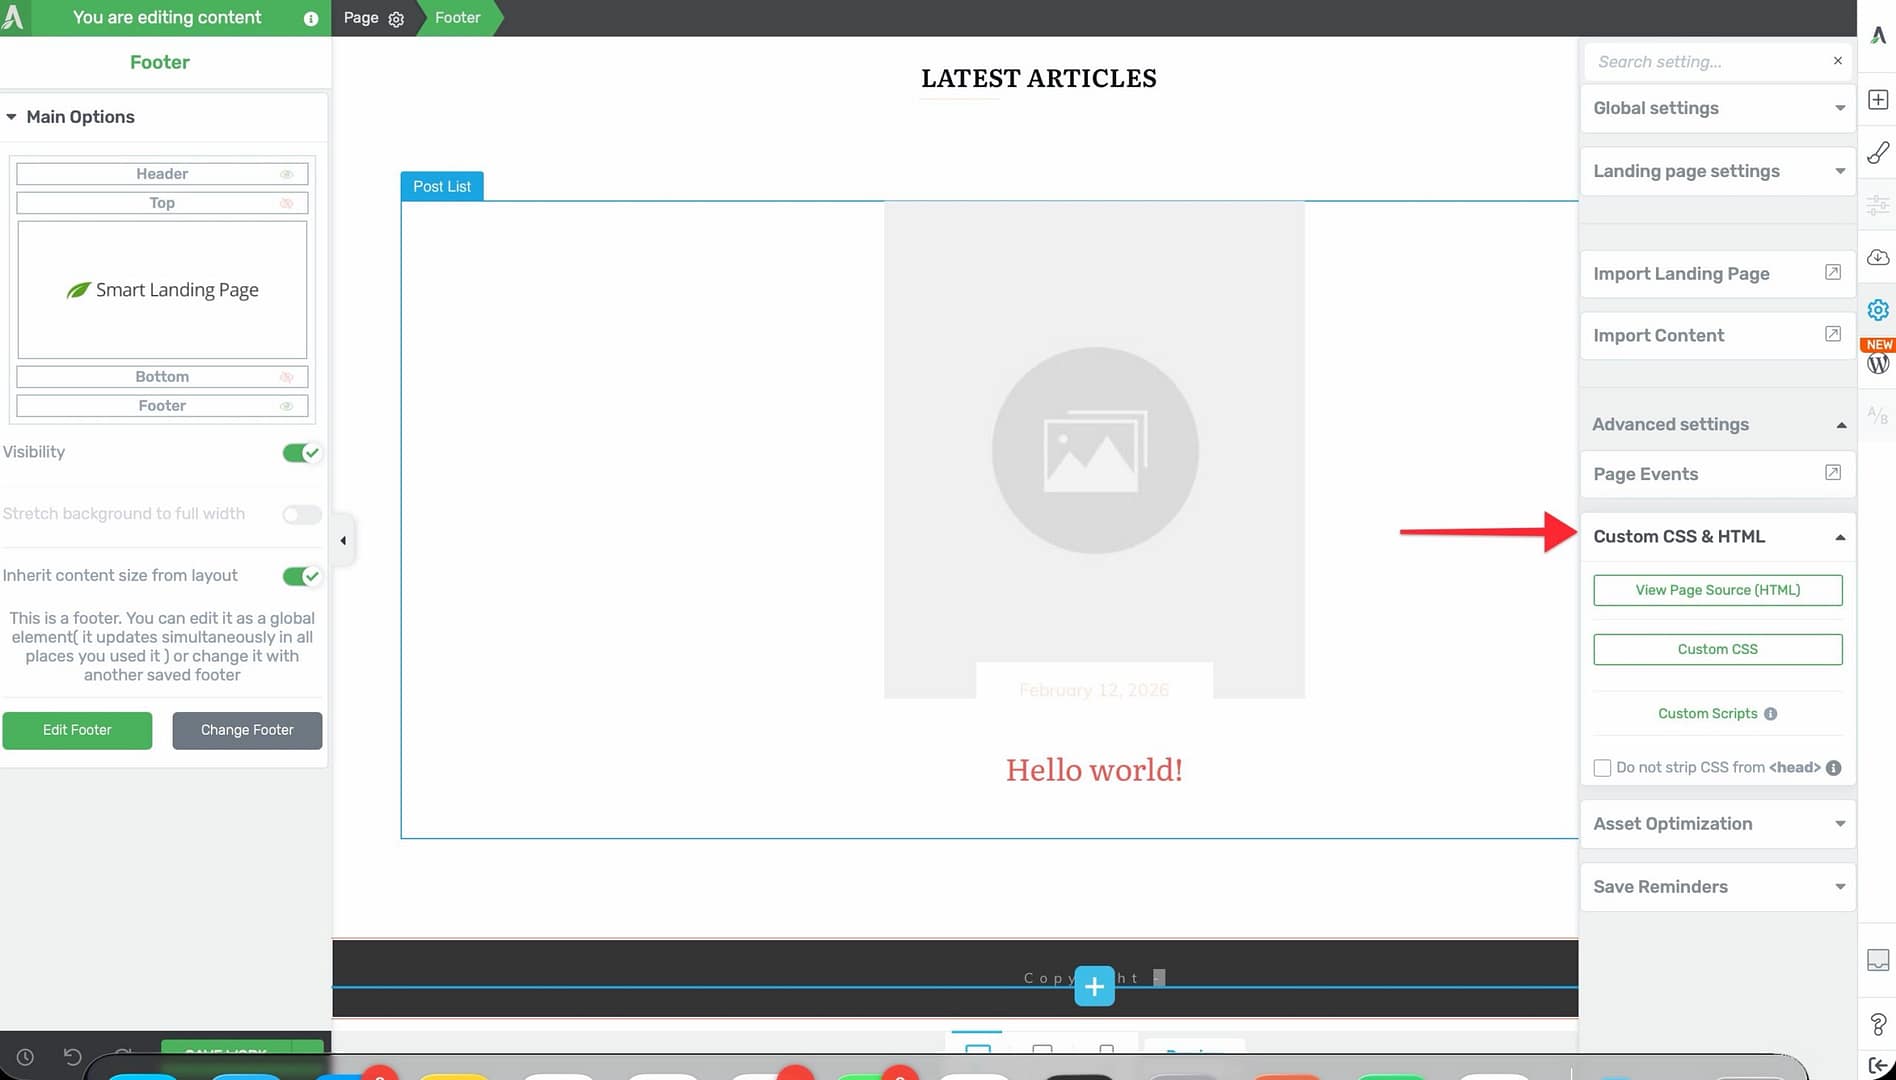
Custom scripts are added through the Advanced Settings section in the right sidebar. You can place scripts in three locations: the page , the beginning of the page , or the end of the page .
Accessing the Custom Scripts Settings
- Open your landing page in the Thrive Architect editor.
- Click the Settings icon (gear) in the right sidebar.
- Expand the Advanced Settings section.
- Click Custom Scripts.
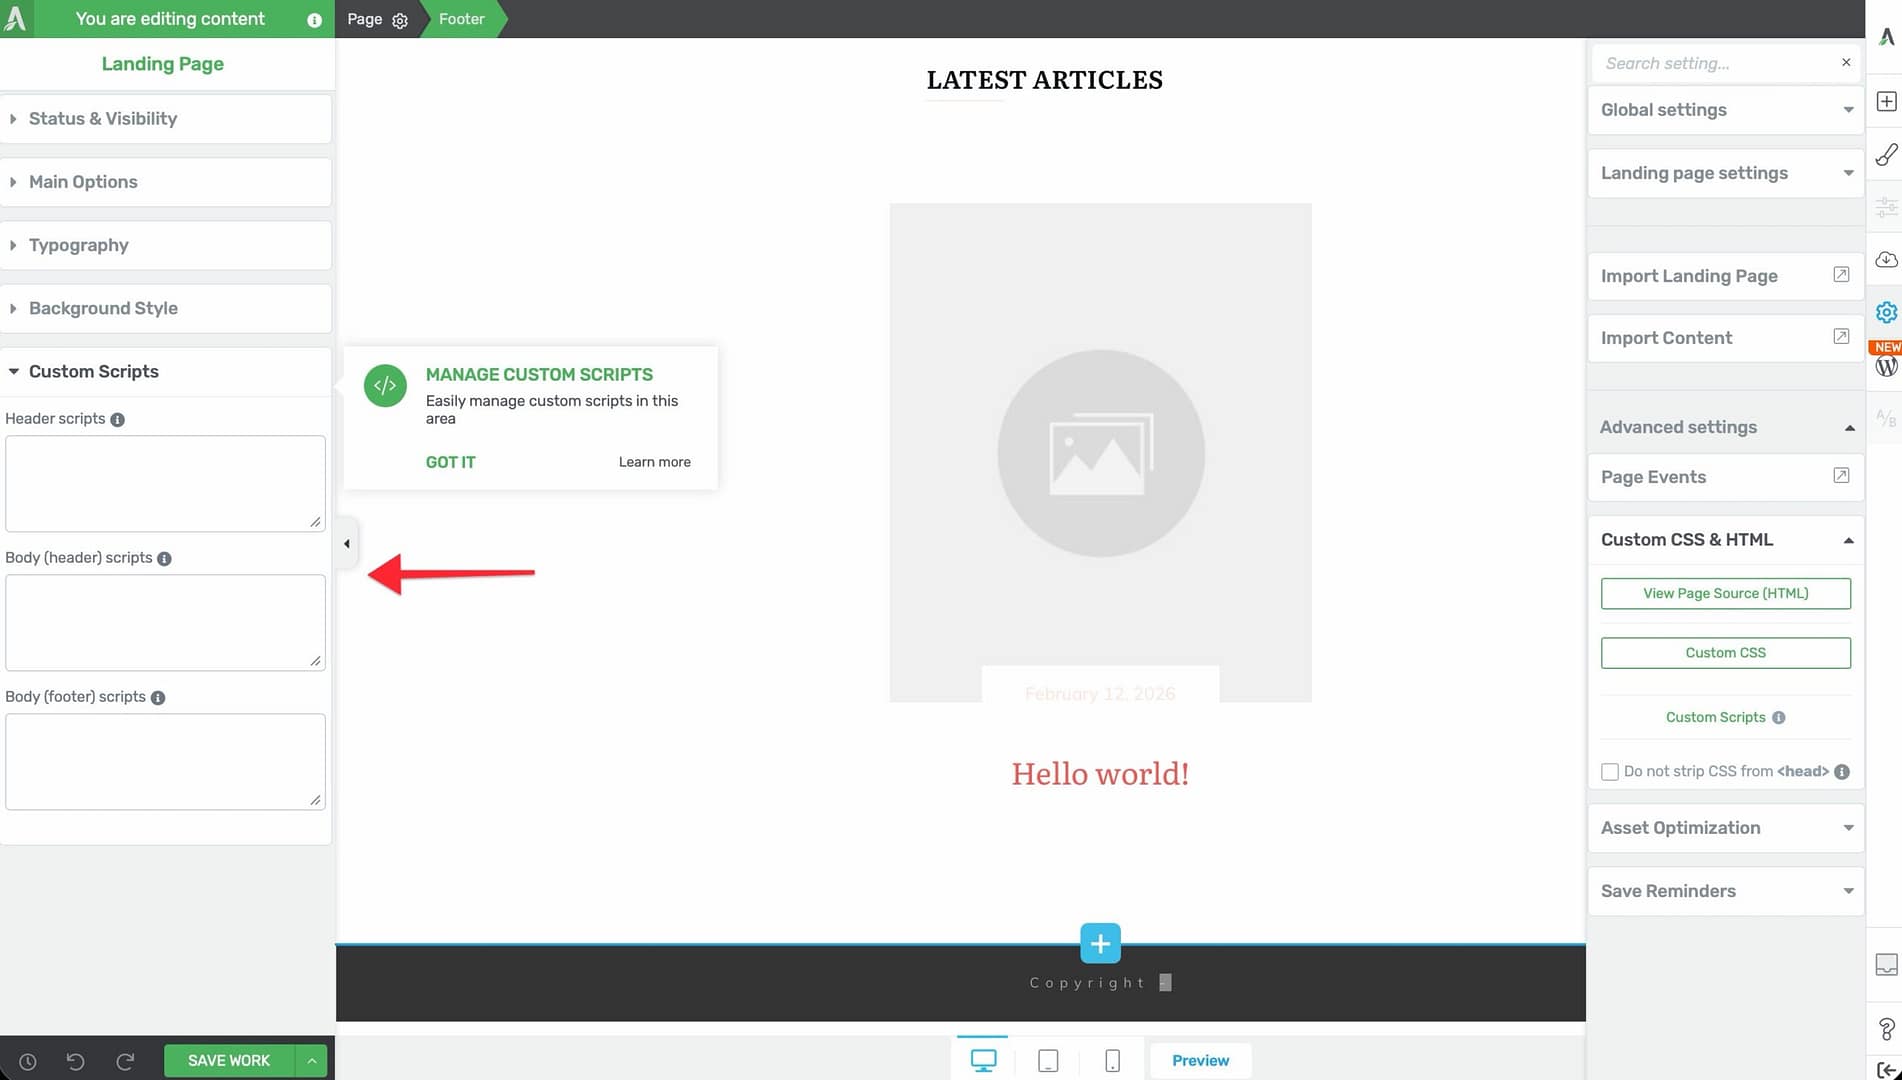
Script Placement Areas
You’ll see three text areas where you can paste your scripts:
- Header Scripts — Code placed here is inserted into the section, before the closing tag. Use this location for:
– Analytics tracking codes (Google Analytics, Google Tag Manager) – Facebook Pixel base code – Meta tags and structured data – CSS stylesheets loaded via tags
- Body (Header) Scripts — Code placed here is inserted immediately after the opening tag. Use this location for:
– Google Tag Manager noscript fallback containers – Tracking pixels that require early body placement – Scripts that need to run before the page content renders
- Body (Footer) Scripts — Code placed here is inserted before the closing tag. Use this location for:
– Deferred analytics and tracking scripts – Chat widgets and support tools – Scripts that should load after the page content renders
Adding a Script
- In the right sidebar, navigate to Settings > Advanced Settings > Custom Scripts.
- Paste your script code into the appropriate text area (Header, Body (Header), or Body (Footer)), depending on where the script needs to be placed.
- Click Save to apply the changes.
- Save the landing page using the Save Work button at the bottom of the editor.
Using Scripts for Analytics and Tracking
Here are common use cases for landing page scripts:
Google Analytics / Google Tag Manager
- Copy the tracking snippet from your Google Analytics or Google Tag Manager account.
- Paste the main tracking script into the Header Scripts area.
- If your tracking setup includes a
- Save the page and verify tracking is active by checking your analytics dashboard.
Facebook Pixel
- Copy the Facebook Pixel base code from your Facebook Events Manager.
- Paste it into the Header Scripts area.
- Save the page.
Other Tracking Pixels
The Custom Scripts feature works with any JavaScript-based tracking code, including:
- LinkedIn Insight Tag
- Pinterest Tag
- Twitter (X) Pixel
- Custom conversion tracking scripts
- Retargeting pixels
Tip: If you use the PixelYourSite plugin, it has built-in integration with Thrive Architect landing pages and will load automatically without requiring manual script insertion.
Inserting Custom CSS via the Script Manager
You can add custom CSS to a specific landing page by wrapping it in
Adding Custom CSS
- Navigate to Settings > Advanced Settings > Custom Scripts.
- In the Header Scripts area, add your CSS wrapped in
<style>
  .my-custom-class {
    background-color: #f5f5f5;
    padding: 20px;
    border-radius: 8px;
  }
</style>- Click Save to apply.
This approach is useful for:
- Overriding default element styles on a specific landing page
- Adding custom animations or transitions
- Styling third-party embed codes or shortcode output
- Fine-tuning responsive behavior with media queries
Note: For page-wide CSS changes that apply to all pages on your site, use the Custom CSS option in Thrive Dashboard > Global Settings instead of the landing page script manager.
Typography Settings on Landing Pages
Landing pages include a dedicated Typography settings panel that lets you set default font styles for different HTML tags across the entire page. This is a landing page-only feature—normal pages inherit typography from your theme.
Accessing Typography Settings
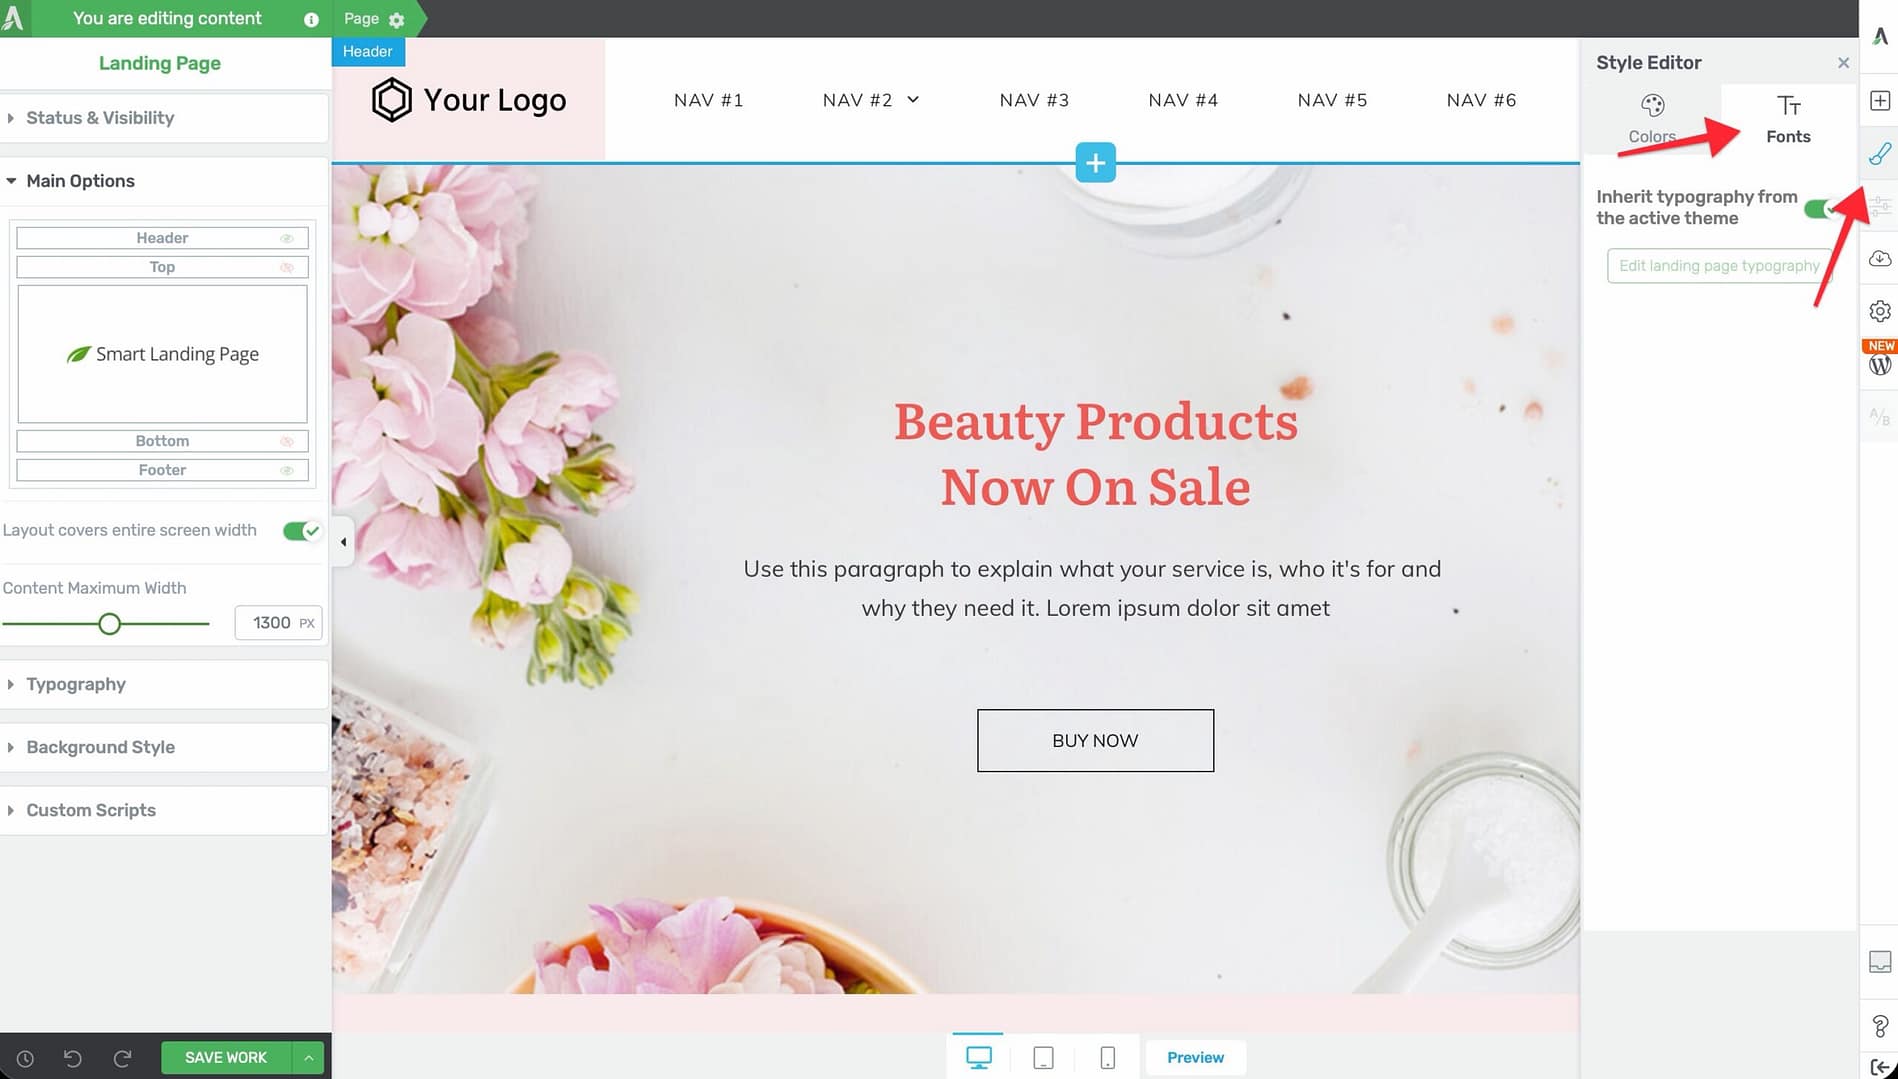
- Open your landing page in the Thrive Architect editor.
- Click the Central Style Panel icon in the right sidebar.
- Look for the Typography section.
Configuring Typography

The typography panel lets you set default font styles for individual HTML tags. You can configure styles for:
- Paragraphs — Default body text styling
- Headings (H1 through H6) — Each heading level can have its own font family, size, weight, color, line height, and letter spacing
- Links — Default link color, hover color, and underline behavior
- Blockquotes — Styling for quoted text blocks
For each tag, you can customize:
- Font Family — Choose from Google Fonts, system fonts, or custom fonts uploaded through Thrive Dashboard
- Font Size — Set the default size in pixels, ems, or rems
- Font Weight — Select from available weights (Light, Regular, Bold, etc.)
- Color — Set the default text color
- Line Height — Control the spacing between lines of text
- Letter Spacing — Adjust the spacing between individual characters
- Text Transform — Apply uppercase, lowercase, or capitalize transformations
How Typography Settings Work
- Typography settings establish the default styles for a landing page. Individual elements can still override these defaults with their own styling.
- When you change a typography setting (for example, changing all H2 headings to a new font), every H2 on the page that hasn’t been individually styled will update automatically.
- Typography settings are saved with the landing page and are included when you save the page as a template or export it.
Tip: Set your typography first before building out the page content. This gives you consistent baseline styles, and you only need to override individual elements when you want them to look different.
Frequently Asked Questions
Do Custom Scripts Affect Page Loading Speed?
Custom scripts load as part of the page’s HTML, so they execute in order. Placing heavy scripts in the section can delay page rendering. For performance-critical landing pages, use asynchronous loading (async or defer attributes) when possible, or place non-critical scripts in the Body (Footer) section so they load after the page content.
Can I Add Scripts to a Normal (Non-Landing) Page?
The Custom Scripts feature described here is specific to landing pages. For normal pages, you can add scripts through your theme’s settings, a plugin like Google Site Kit, or by using the Custom HTML element inside Thrive Architect.
Are Typography Settings Available on Normal Pages?
No. The Typography settings panel is only available on landing pages. Normal pages inherit their typography from your WordPress theme.
Can I Use the Same Scripts on Multiple Landing Pages?
You need to add scripts individually to each landing page. For site-wide tracking, consider using a plugin like Google Tag Manager or adding scripts through Thrive Dashboard > Global Settings > Script Manager.
Related Resources
- Getting Started with Landing Pages: How to Get Started with Landing Pages in Thrive Architect
- Landing Page Templates: How to Use Landing Page Templates in Thrive Architect
- Headers and Footers: How to Use Headers and Footers on Landing Pages
- Custom CSS: Editing HTML and Adding Custom CSS in Thrive Architect
That’s it! You’ve learned how to add custom scripts for analytics and tracking, insert CSS through the script manager, and configure landing page typography settings for consistent font styling.