Would you like to start using a Thrive Themes plugin on your website? In this guide, we’ll walk you through downloading the Thrive Product Manager from your account, installing it on your WordPress site, and enabling the Thrive products you want to use. All you need is an active Thrive Themes license and admin access to your WordPress site.
Downloading the Thrive Product Manager Plugin
All Thrive plugins are installed through the Thrive Product Manager, our plugin and license manager. This lets you find all of your purchased Thrive products on one page and install them with a single click.
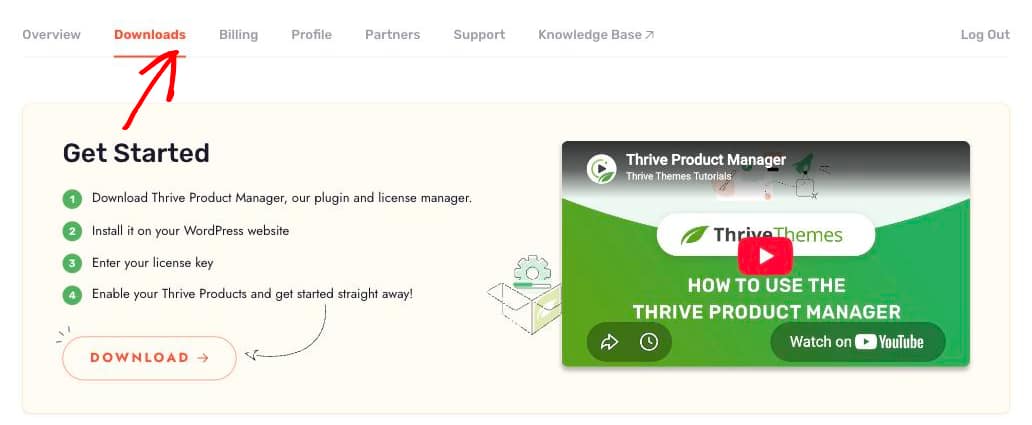
To get started, log in to your account at thrivethemes.com/login and click the Downloads tab in the menu at the top of your account dashboard:
In the “Get Started” section, click Download to save the Thrive Product Manager zip file to your computer:
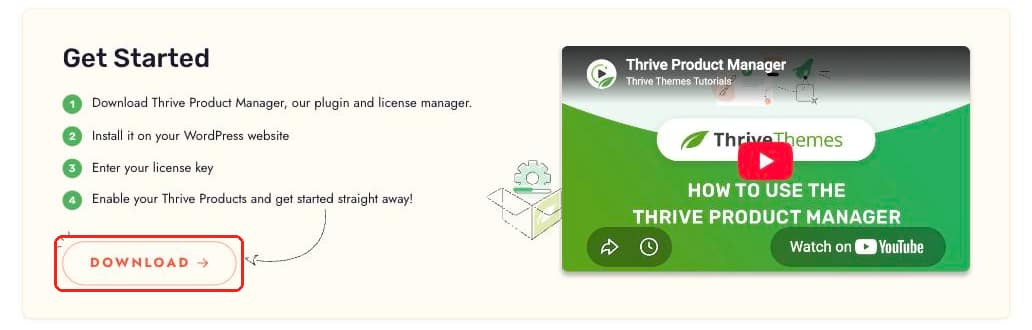
Note: In some cases, the file may unzip as you download it and appear as a regular folder. The folder must be zipped to use the WordPress plugin uploader. Check out these guides on zipping files for Windows and Mac.
Installing the Thrive Product Manager on Your WordPress Site
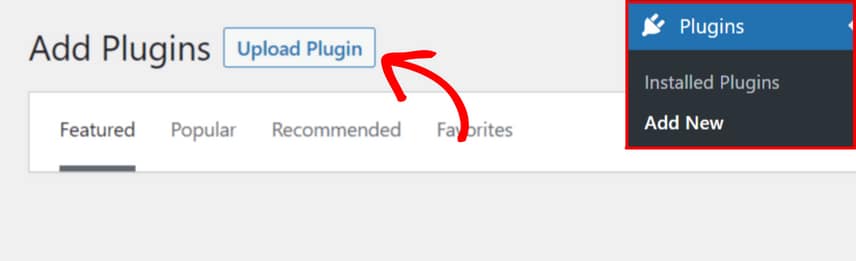
Now that you’ve downloaded the plugin zip file, log in to your WordPress site. Inside the admin dashboard, navigate to Plugins » Add New and click the Upload Plugin button.
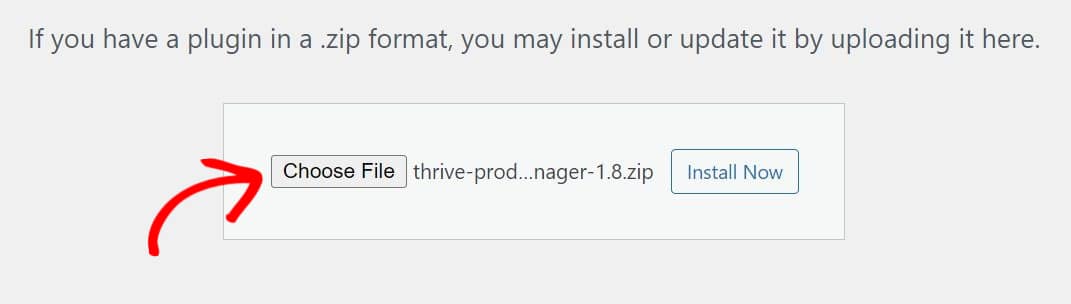
Next, click Choose File and select the zip file you downloaded from your Thrive Themes account. After adding the file, click Install Now, and activate the plugin once the installation finishes.

Enabling Your Thrive Products
With the plugin activated, click Product Manager in the left admin menu. To connect the site to your Thrive Themes account, click Log into my account.

Log in on thrivethemes.com with your usual email and password. You’re then brought back to your website.
Next, choose which of your licenses this website uses. On the License Selection screen, click the checkbox next to each license you want to use here.

A license marked Expired can’t be selected here. Its Renew link takes you to thrivethemes.com, where you can renew it.
Below the list of licenses, click Continue.

If you own more than one license, any license already covered by one you ticked is greyed out and stays free for your other sites.
For more on combining licenses, see our guide on choosing licenses in Thrive Product Manager.
You’ll now see all of the Thrive plugins your licenses include. Next, check the Install plugin option for each plugin you want to use.

When you’re done choosing, click the Install selected products button at the bottom of the page.

The installation takes a few seconds, and your products are then ready to use.

Note: To ensure the products you have installed keep working properly on your website, the Thrive Product Manager has to remain installed and activated on it.
That’s it! Your Thrive products are installed and ready to go. Next, you might want to learn how to manage which websites are using your license.
Frequently Asked Questions
Do I need my license key?
No. Thrive Product Manager connects to your account when you log in. You then pick your licenses on the License Selection screen.
Your license keys are still listed in the “My Licenses” table on the Downloads tab of your account dashboard. The same table shows your renewal date and site activations.