In this article, you’ll learn how to connect Thrive Architect forms with external services using webhooks. Webhooks enable you to automate workflows and send form submission data to your favorite apps in real-tie without requiring a separate automation plugin.
What You’ll Learn
- Setting Up a Webhook Connection
- Configuring Request Settings
- Mapping Form Fields
- Adding Custom Headers
- Testing Your Webhook
- Benefits of Using Webhooks
Setting Up a Webhook Connection
This example uses a dummy webhook URL to demonstrate the implementation. You can apply these same steps to connect with any third-party service that accepts webhook data.
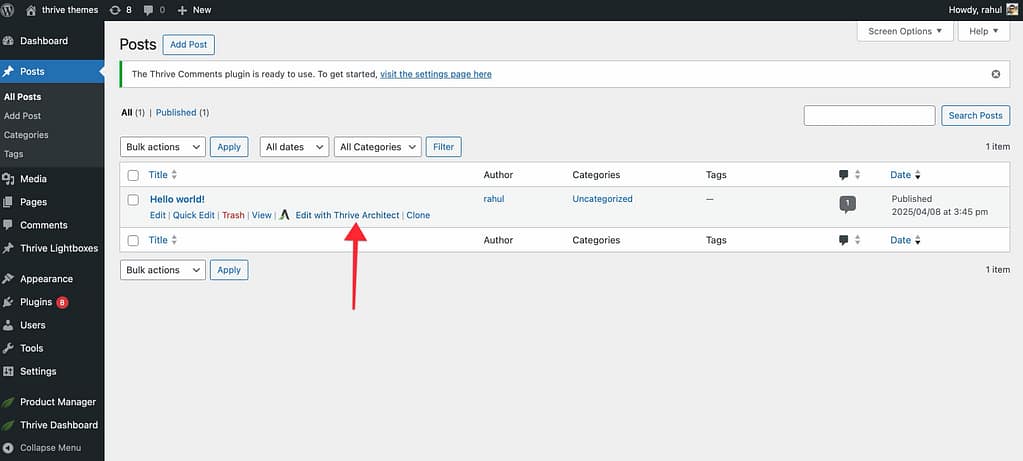
Step 1: Open Your Page in Thrive Architect
First, open the page where you want to add the webhook integration in the Thrive Architect editor.
Step 2: Add a Contact Form
In the right panel, click the plus (+) icon to open the elements list.
From the list of elements, drag and drop the Contact Form element onto your page.
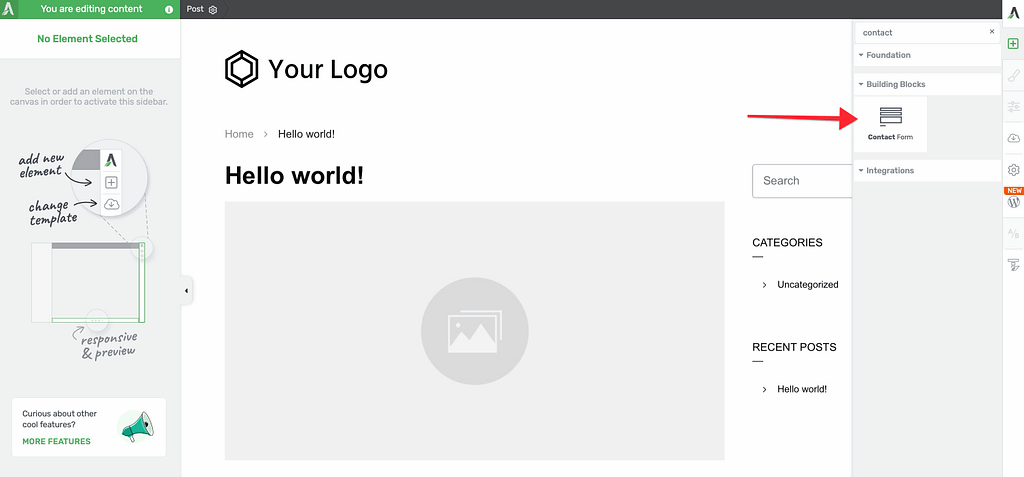
When prompted, select a template for your form. The form will be added to your page at the selected location.
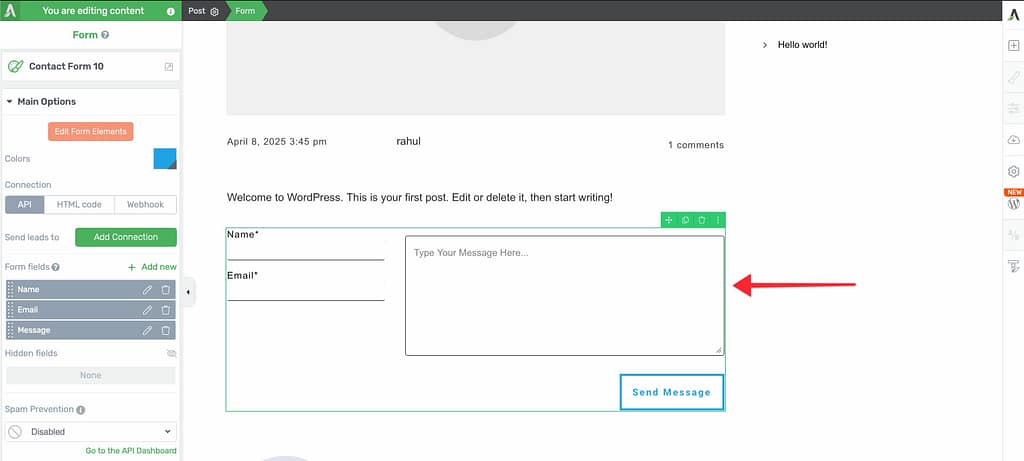
Step 3: Access Form Settings
Click on the Contact Form to open its options in the left column.
Important: Before proceeding to add a webhook, ensure you’ve added all the fields you need in the form. Adding new fields after establishing a webhook connection will delete the connection you’ve built.
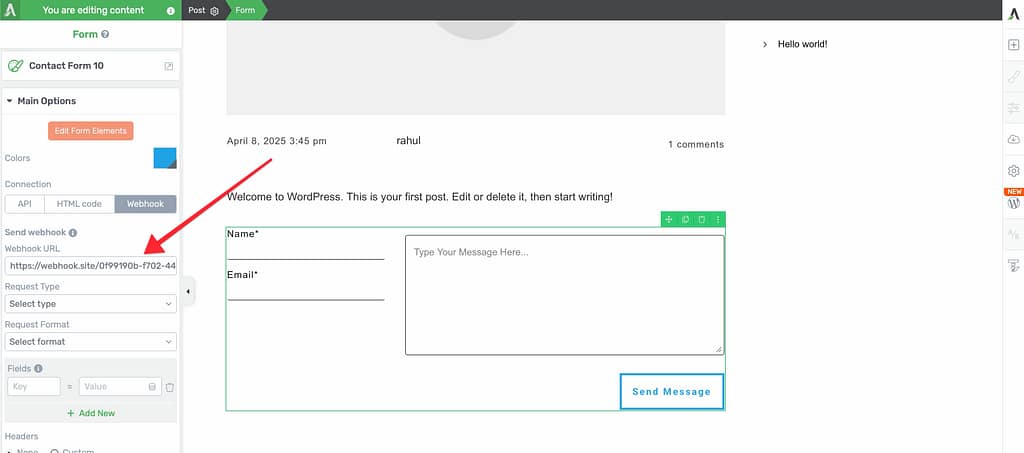
Step 4: Navigate to Webhook Settings
In the left column under Main Options, scroll down to Connections and click Webhook.
You’ll see a section where you can add and manage your webhook settings.
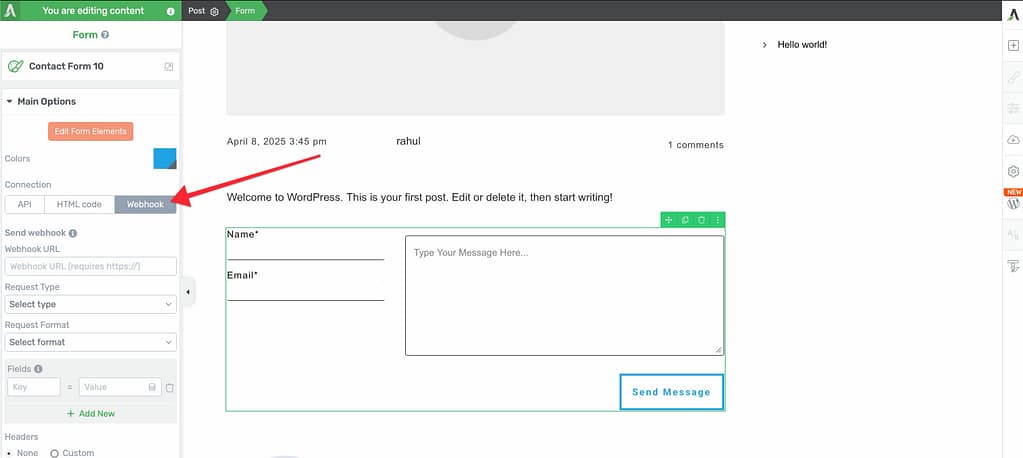
Configuring Request Settings
Add Your Webhook URL
The first field you’ll see is the Webhook URL. Enter the URL provided by the third-party service you’re connecting to.
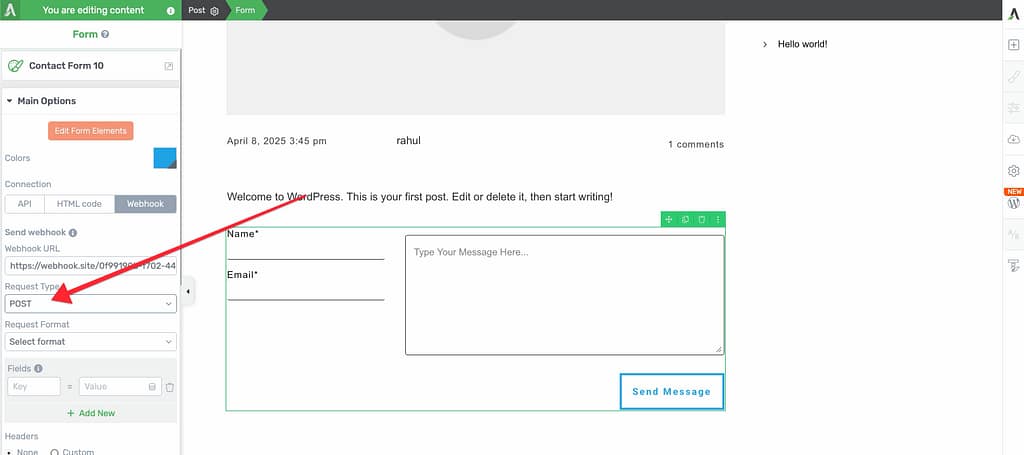
Select Request Type
Next, choose a Request Type from the dropdown menu. The third-party service you’re connecting to will specify which request type to use.
Available request types:
- POST: Sends new data to create a new entry (most common for form submissions).
- GET: Requests or retrieves specific information from another system.
- PUT: Updates existing data completely with new information.
- PATCH: Updates only certain fields of existing data.
- DELETE: Removes or deletes data from another system.
For this example, select POST since we’re submitting form data.
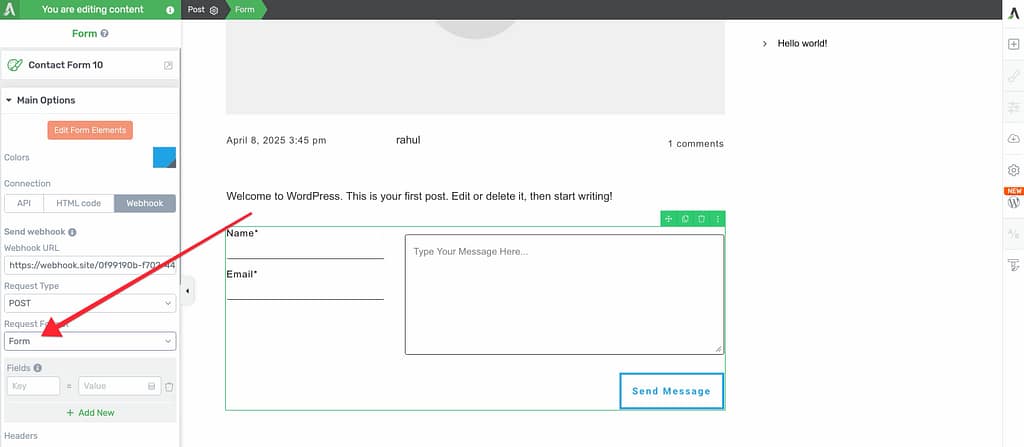
Select Request Format
After selecting the request type, choose a Request Format. This determines how the data is structured when sent to the receiving service.
Available format options:
- Form: Sends data as key-value pairs, like a typical web form submission (simple integrations).
- JSON: Sends data in JavaScript Object Notation, a popular format for structured data exchange.
- XML: Sends data in Extensible Markup Language, often used in enterprise systems.
For this example, select FORM.
Note: The third-party service will tell you exactly how they want to receive the information (request type, format, and what details to include). You just need to match your form settings to their requirements.
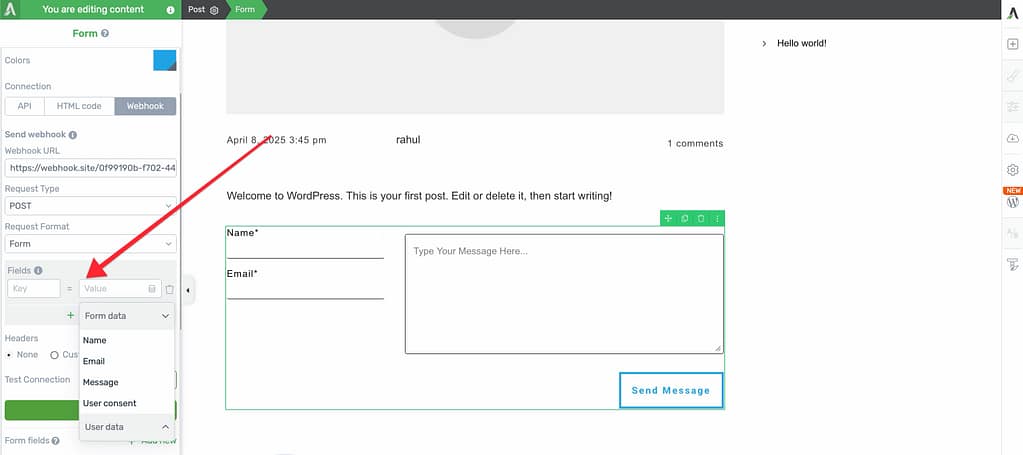
Mapping Form Fields
Once you’ve configured the request settings, you’ll need to map your form fields to the data structure expected by the receiving service.
In the Field Mapping section, you’ll see options to select keys and values.
- Key: The field name expected by the receiving service.
- Value: The corresponding form field from your Thrive Architect form.
Map each form field to its corresponding key in the external service.
Adding Custom Headers
Custom headers allow you to pass additional information along with your form data. This is useful for authentication (API keys, tokens) or sending contextual metadata.
Step 1: Enable Custom Headers
By default, the header setting is set to None. To pass custom values, click to select Custom.
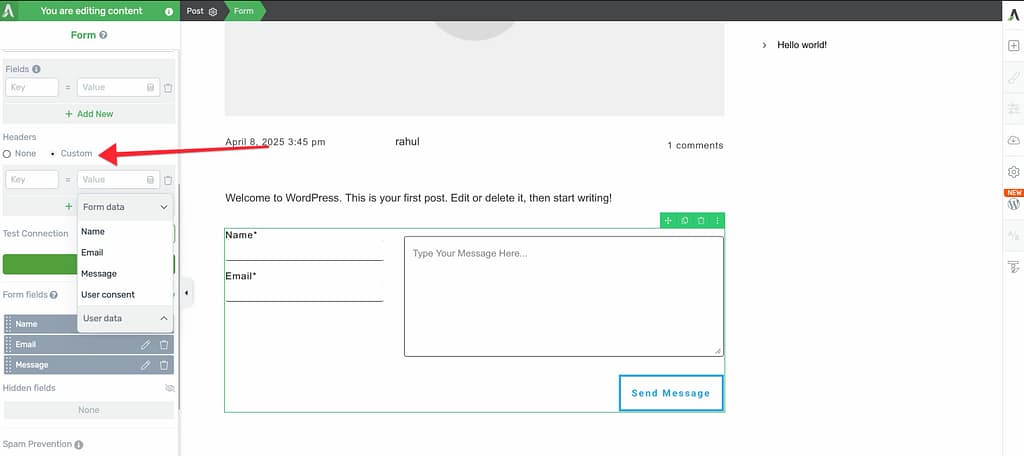
Step 2: Add Key-Value Pairs
After selecting Custom, you’ll see fields where you can add key-value pairs.
For example, you might want to send information about when the user last logged in:
- Key:
last_login - Value: Select the appropriate value from your available options.

You can also use custom headers to send user consent information (for GDPR compliance), which can be recorded as false by default if no visible checkbox is present on the form.
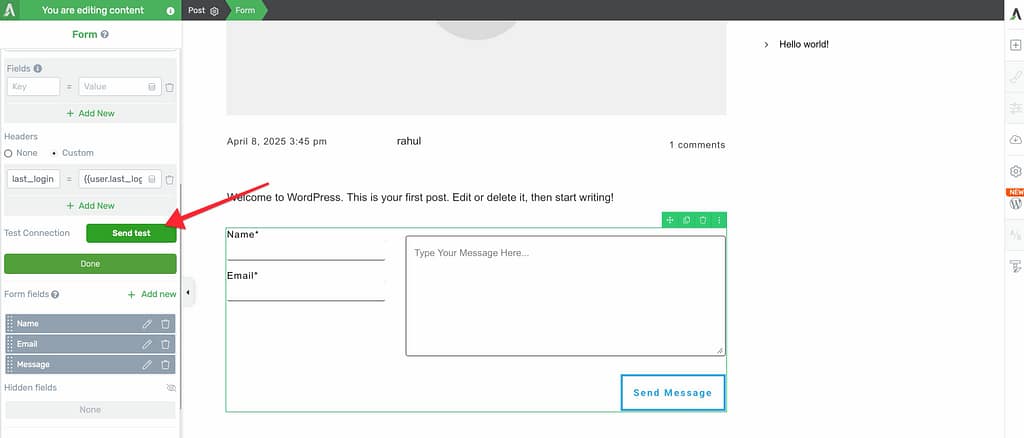
Testing Your Webhook
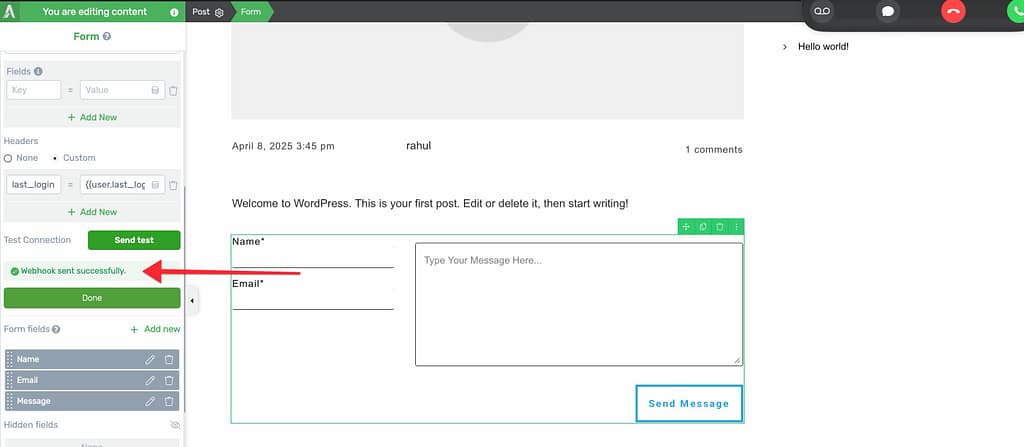
Once you’ve configured all your settings, it’s time to test the connection.
Click the Send test button to verify that your webhook is working correctly.
If the connection is set up properly, you’ll see a message saying “Webhook was sent successfully.”
To finalize your settings, click the Done button.
Benefits of Using Webhooks
Integrating webhooks into your Thrive Architect forms provides several powerful advantages:
Automated Data Transfer
Webhooks facilitate automatic, real-time transmission of form submission data to external applications. This eliminates manual data export and import, ensuring your connected systems are always up-to-date.
Customizable Data Mapping
You have precise control over which form fields are transmitted and how they’re mapped to the receiving service’s data structure. This flexibility ensures compatibility with a wide array of external platforms.
Enhanced Data with Custom Headers
Beyond standard form data, webhooks allow you to include additional custom information in request headers or the body. This can include contextual data like a user’s last login date or other relevant metadata.
User Consent Management
Thrive Architect’s webhooks can handle user consent statuses (such as GDPR compliance). This information can be passed to external systems even if a visible GDPR checkbox isn’t present on the form, helping you maintain legal compliance.
Flexible Configuration
Each form within Thrive Architect can have its own unique webhook configuration. This granular control allows for tailored integrations specific to the purpose and data requirements of individual forms.
Compatibility with Templates and Symbols
Webhooks work seamlessly with Thrive Architect’s template and symbol functionalities:
- Templates: When forms are present within a template, each instance will have its own independent webhook configuration.
- Symbols: Forms placed in a symbol will share a single, unified webhook configuration.
That’s it! You’ve successfully learned how to implement webhooks for custom integrations in Thrive Architect without needing a separate automation plugin.
Related Resources
- Thrive Themes Action Hooks & Custom Functions: Learn how to extend Thrive Themes with custom code.
- Extending Thrive Themes Capabilities as a Developer: Explore developer resources for advanced customization.
- Developing Custom Conditional Display Rules in Thrive Architect: Create custom logic for displaying content.