While creating the connection between your Thrive Apprentice courses and your SendOwl account, you will have to complete the “Checkout Settings”.
The first part of these settings is adding a Registration page. If you need details on how to do that, check out this tutorial.
The second part of the “Checkout Settings” consists of the “Thank You Page Settings”. This is where you can establish where your customers will be redirected, after they have purchased your course(s) through SendOwl.
Here are the steps you need to take in order to set this up:
Access the “Checkout Settings”
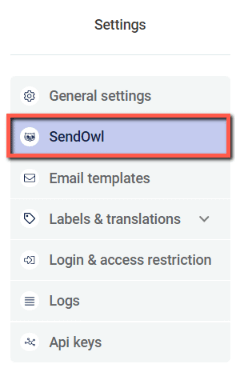
Go to your Thrive Apprentice navigation bar, and click on the “Settings” section:

Select “SendOwl” from the list of available options:
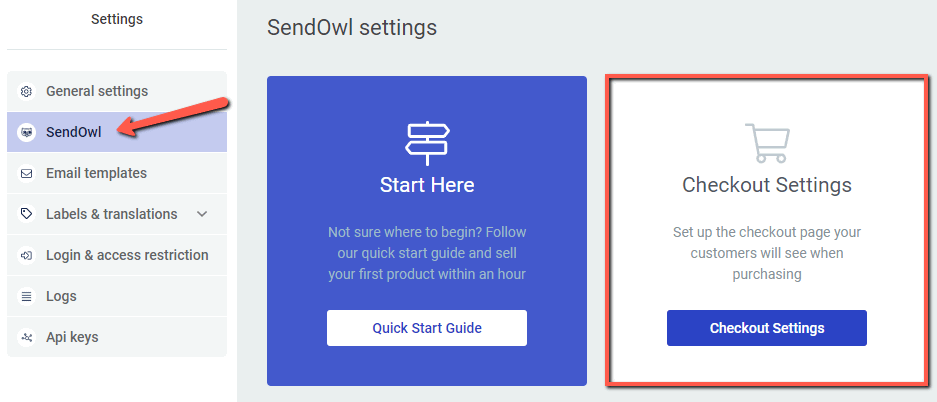
Once you have reached the “SendOwl” dashboard, look for the “Checkout Settings” card, and once found, click on “Checkout Settings”:
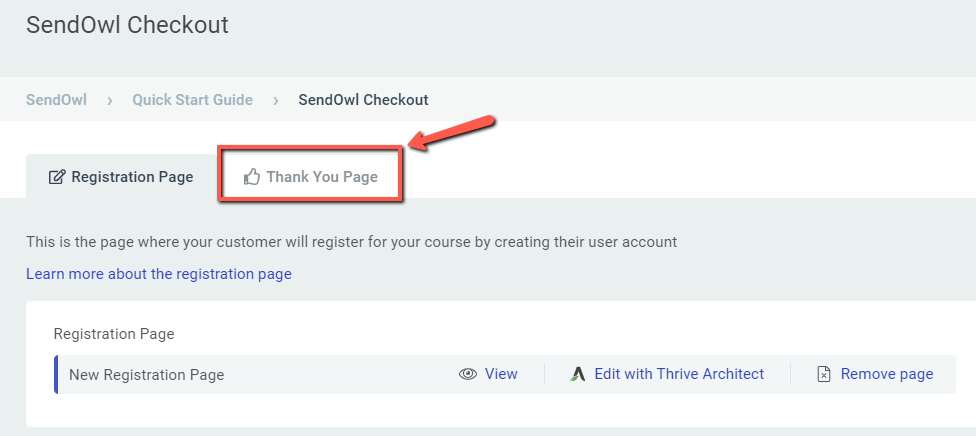
This will open the “Checkout Setting” page. Here you will have to click on the “Thank You Page” tab in order to open the “Thank You” page section:
Complete the Thank You Page Settings
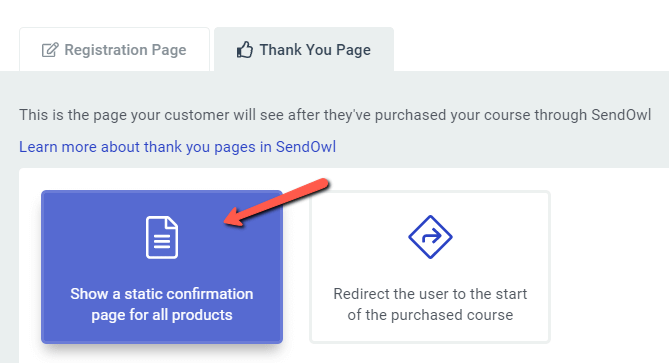
After you open this section, you will see that there are two settings you can choose from: you can either choose to have a static confirmation page for all products, or you can redirect the customers to the start of the purchased course.
1. Static confirmation page
The first option/setting you can go with is showing a static confirmation page for all your products. This means that you can add a “Thank You” page here, which will be displayed after people have bought your courses, in the form of SendOwl products.
If you choose to use this setting, the visitors of your website will be redirected to the same static “Thank You” page, regardless of which courses or how many courses they have bought.
Thus, you can add one page, a general one, for all your products.
In order to do this, click on the “Show a static confirmation page for all products” option to select and open it:
After it is opened, you will see that there are two ways in which you can add the static page: you can either add an already existing page or create a new one.
a) Add an already existing page
To add an already existing page, click in the search box that appeared and start typing in the name of the page that you have previously created and want to use as your static “Thank You” page here:
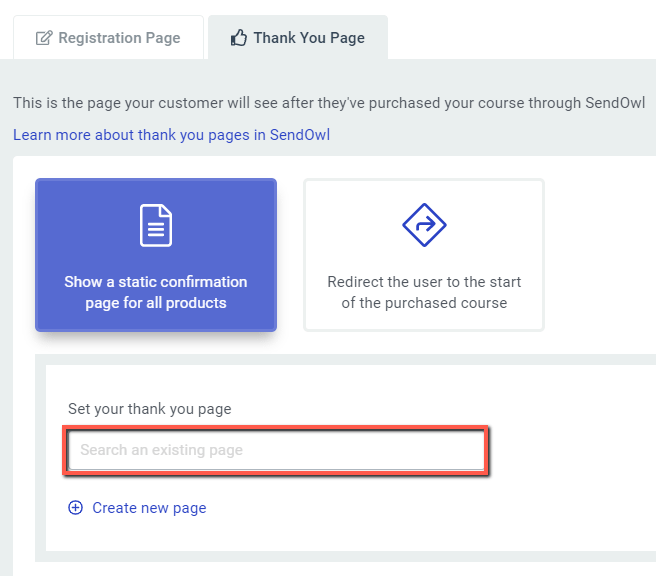
The system will look through the pages of your website, and a drop-down will appear with the results of your search, based on the term you have searched for:
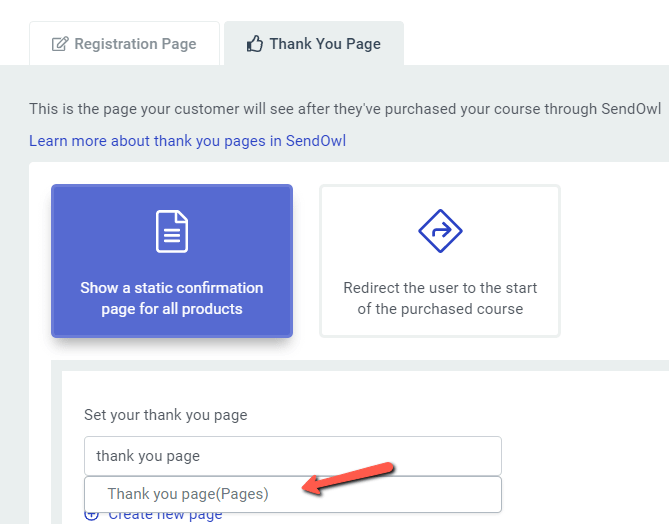
When the page that you are looking for appears, in the drop-down with the results, just click on it and it will be added as your static “Thank You” page.
b) Create a new page
If you want to create a new page that you add as your static “Thank You” page, then click on the “Create a new page” option which is under the search box:
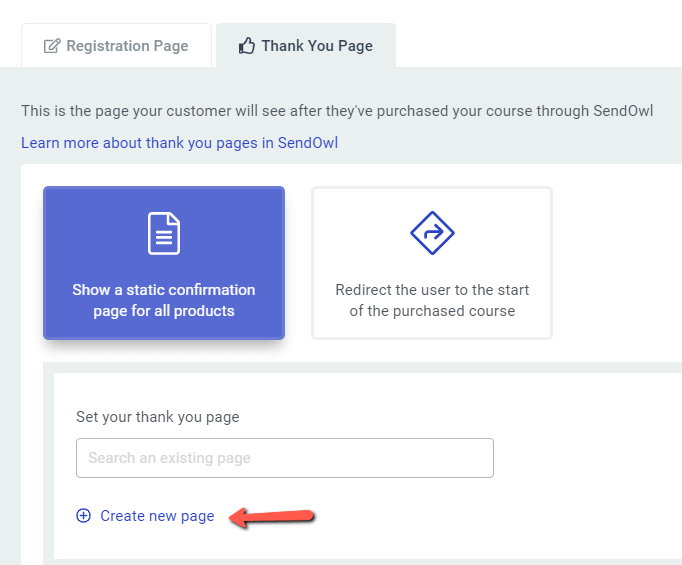
A new section will appear where you can create and add the page. Give a title for the new page in the “Page title” field and then, click on the “Add Page” button:
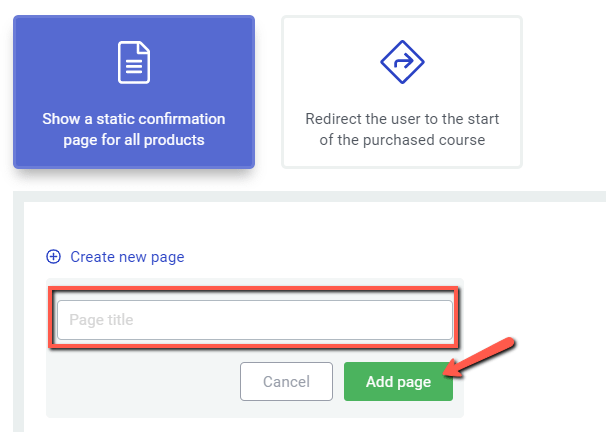
Once you have done that, the page will be created and added as your static “Thank You” page.
After you have added a page as the static “Thank You” page, three options will appear next to it. With the help of these you will be able to view, edit, and remove the page:

View page
You can use this option, the first option from the image above, to view the page you have added. Simply click on it and the page will be opened in a separate tab.
Edit page
This option, the middle one from the image above, will allow you to edit the page that you have set up as your static “Thank You” page. If you have Thrive Architect installed on your website, then the option will allow you to edit the page with it.
However, bear in mind, that if you don’t have Thrive Architect, then this option will be a simple “Edit” option that will take you to edit the page with the WordPress editor.
When you edit the page, customize it to fit your needs. Since this is the page customers will see after they purchase a course, you should add various elements/content to it that is generally available for thanking the customers.
Tip: Add links/buttons to the static Thank You page, that lead to the courses or the course index page that you have, so people can access the course they have bought.
-
Thank You Landing Page Templates
If you do have Thrive Architect, then, you will also have the possibility to add “Thank You” page templates to your page.
You can save time by using such templates because you will not have to build/edit the page from scratch. All you need to do is to customize the template according to your preferences.
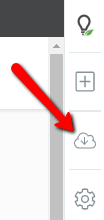
In order to use a “Thank You” page template, you will have to click on the “Change Template” option, which is the second one from the right sidebar:
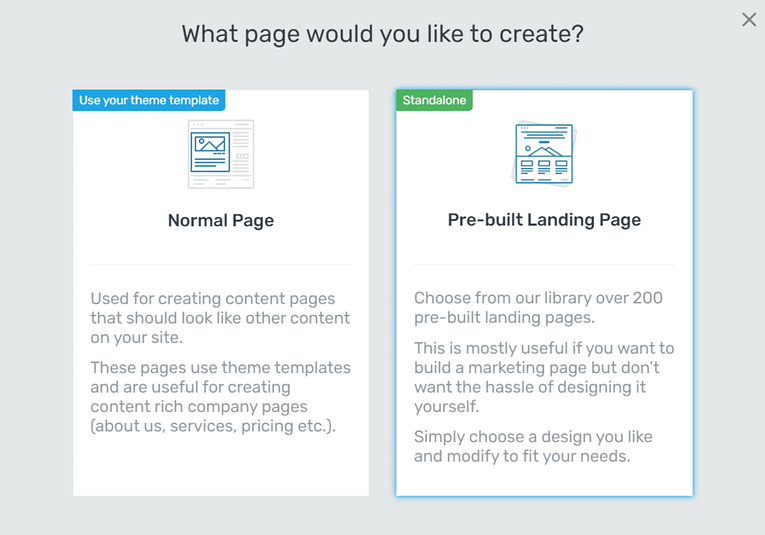
Then, in the pop-up that opens, click on “Pre-built Landing Page”:
And then, select the template that you want from the new pop-up window that appears:
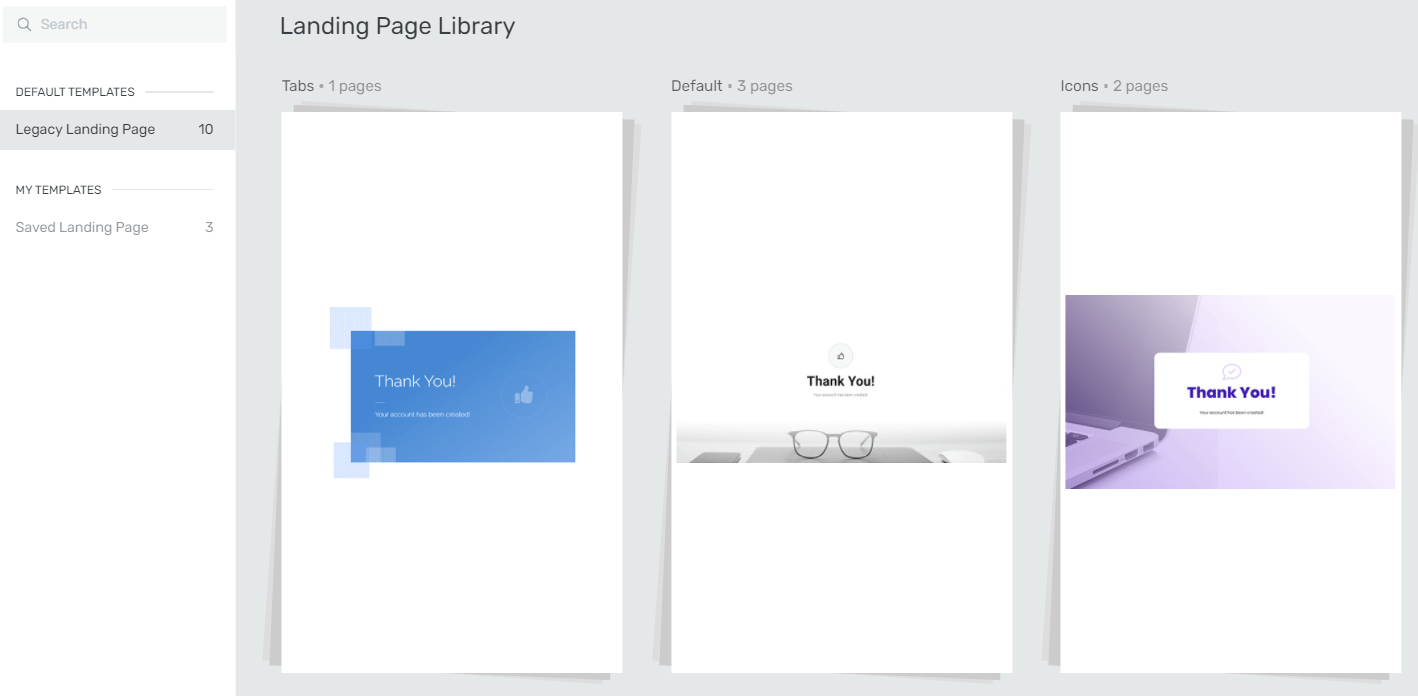
Once you selected the template, click on the “Apply Template” button, customize the template that was just added to your page and then save the “Thank You” page that you have just created.
Note: As mentioned above, if you do not have the Thrive Architect editor, then the “Thank You” page will be opened in the WordPress editor when you use the “Edit Page” option.
Please bear in mind, that this means the “Thank You” Landing Page Templates will not be available either.
Remove page
If you have changed your mind and you want to delete the current static “Thank You” page, then you can use the “Remove page” option from the options that are displayed on its right.
Simply click on it and then, confirm that you indeed want to delete this page. Once you have done that, the page will be deleted and you can add a new one.
2. Redirecting to the start of the course
The other “Thank You” page setting that you can choose consists of redirecting the customers to the start of the purchased course.
In order to do this, click on the “Redirect the user to the start of the purchased course” option to select and open it:

When you open this setting you will see two separate sections that represent two different scenarios:
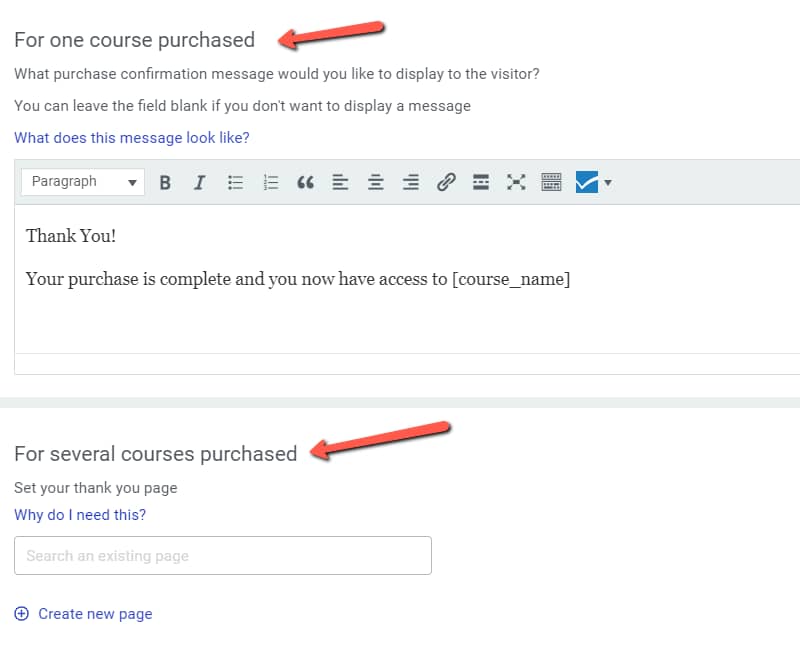
For one course purchased
Just as its name says, the settings from this section will be applied when a customer buys a SendOwl product, which is set up to give access to one course only.
So, if you have set up a separate SendOwl product for each of your courses, then this section will be applied. This means, that when customers buy the course, they will be redirected directly to the beginning of it, along with the message from this section:
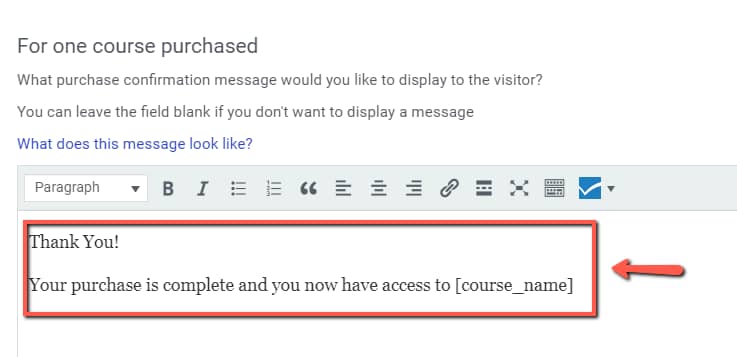
You can customize this message however you want, using the simple editor from this section, that it is in. Just make sure to keep the [course name] part in it.
This is a placeholder for the name of the purchased course, which means that it will change in accordance with which course was purchased. So when the visitors will see the message, this part will be replaced with the name of the course they just bought.
You can also simply delete this message altogether if you do not want it displayed. If you delete it, then the visitors will be redirected only to the beginning of the course, without seeing this message as well.
For several courses purchased
This second section represents the cases when you set up one SendOwl product but you tie it to more courses, meaning that the particular product gives access to more than one course.
If you have set up only one SendOwl product and you have protected more of your Thrive Apprentice courses with it, then this section will be applied after the purchase.
In this case, you have to add another “Thank You” page here. This will be shown after the purchase, rather than redirecting to the start of one of the courses. On this page you can display a link to every purchased course (or to your course index page) and the customers can choose which one to start with.
The process of adding a page is the same as it was in the case of the static “Thank You” page described above. You can either add an already existing page or create a new one as the “Thank You” page for multiple courses bought.
If you want to add an already existing page, you will have to click in the search box from this section and start typing in the name of the page you want to add:
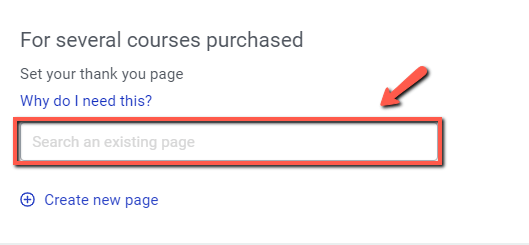
Then, select the page from the drop-down with the results that appear and the page that you have selected will be added as your Thank You page for multiple courses bought.
In case you want to create a new page, just click on the “Create new page” button from this section:
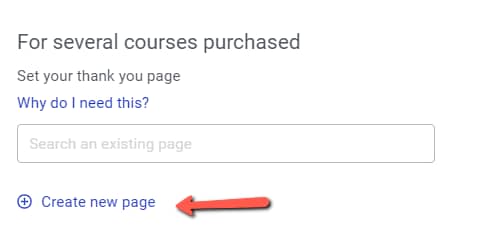
Then, complete the title of the new page and click on the “Add page” button:

Your page will be created and added as your Thank You page for multiple courses bought.
Once you have added the page, you can edit it in the exact same way, as you can edit the static “Thank You” page described above. After you have edited and saved the page, you have finished the Thank You page for several courses purchased.
Note: In order for the “Thank You” page Settings you complete to work properly, please make sure that you have saved the “Single Thank You Page Redirect URL”, that is provided in the Thrive Apprentice Quick Start Guide, as the Return URL in your SendOwl account. You can see detailed information on how to do this in this article.
So these are the two “Thank You” page Settings you can choose from. Select whichever you want, in accordance with how you manage/set up the connection between your SendOwl Products and your Thrive Apprentice courses.
If you want to find out more about how the Thrive Apprentice and SendOwl connection works, please look through this knowledge base section.
Hopefully, this article was useful to you. If so, please give it a smile below 🙂