Do you want to create a personalized menu that shows differently to logged in and logged out users and gives users access to their account too? With the Custom Menu element, you can edit and personalize menus to help students navigate through your online school easily.
In this article, we’ll show you how you can edit the Custom Menu element to display conditional login and logout links, display user account details, add a profile link, etc.
- Accessing the Custom Menu on the School Homepage
- Adding a Login Link to the Menu
- Adding a Logout Link to the Menu
- Adding a My Account to the Menu
- Displaying User Profile Image and Name in the Menu
Accessing the Custom Menu on the School Homepage
To access the School Homepage template, first open your WordPress admin area, navigate to Thrive Dashboard >> Thrive Apprentice, and click on Design.
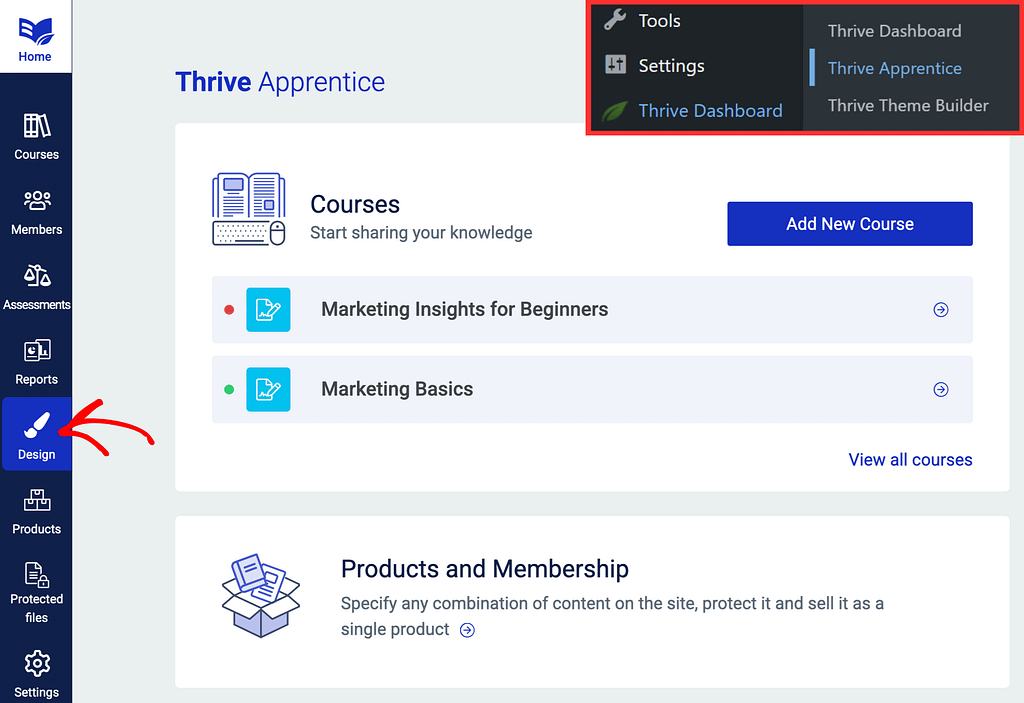
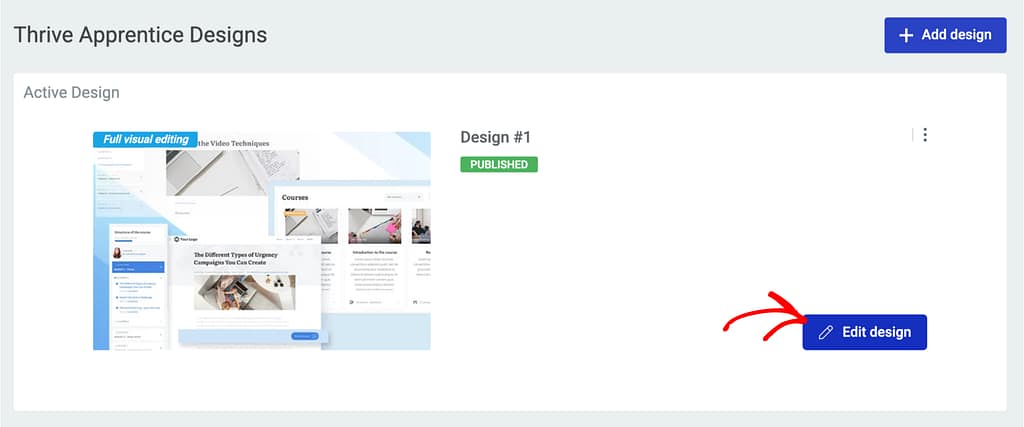
On the Design page, open the active design by clicking Edit design.
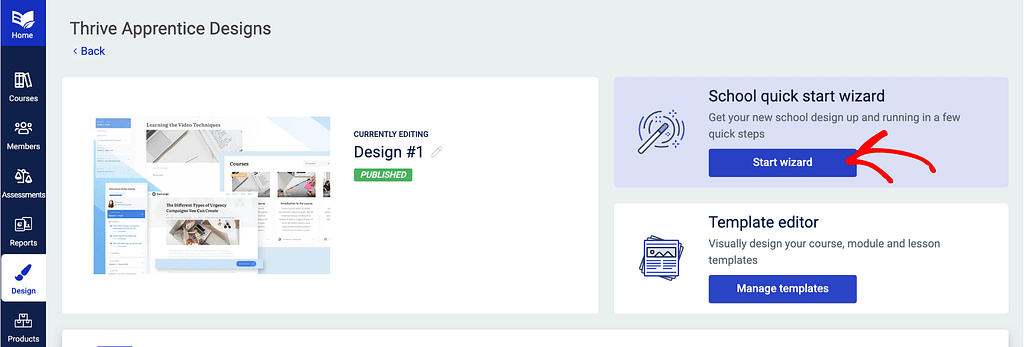
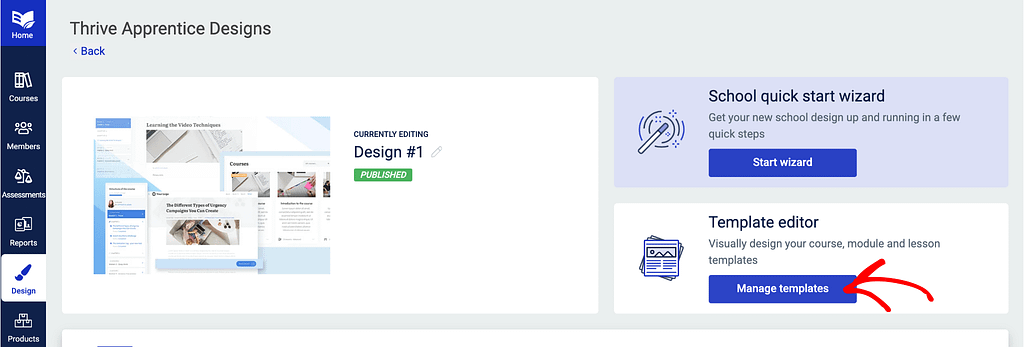
Clicking to edit the design will open a page where you can choose to manage templates or start the wizard.
Note: To proceed, you’ll need to ensure that you’ve added the custom menu to your school homepage. If you’ve already done that, continue by clicking the Manage templates button on the Template editor block.
If you haven’t added a custom menu to the school homepage, click the Start wizard button on the School quick start wizard block.
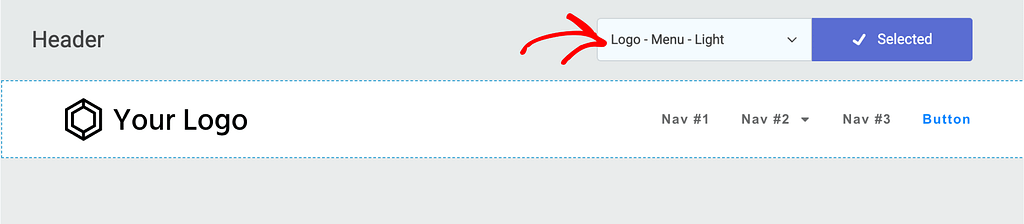
On the School Wizard page, under School design, click on Header.
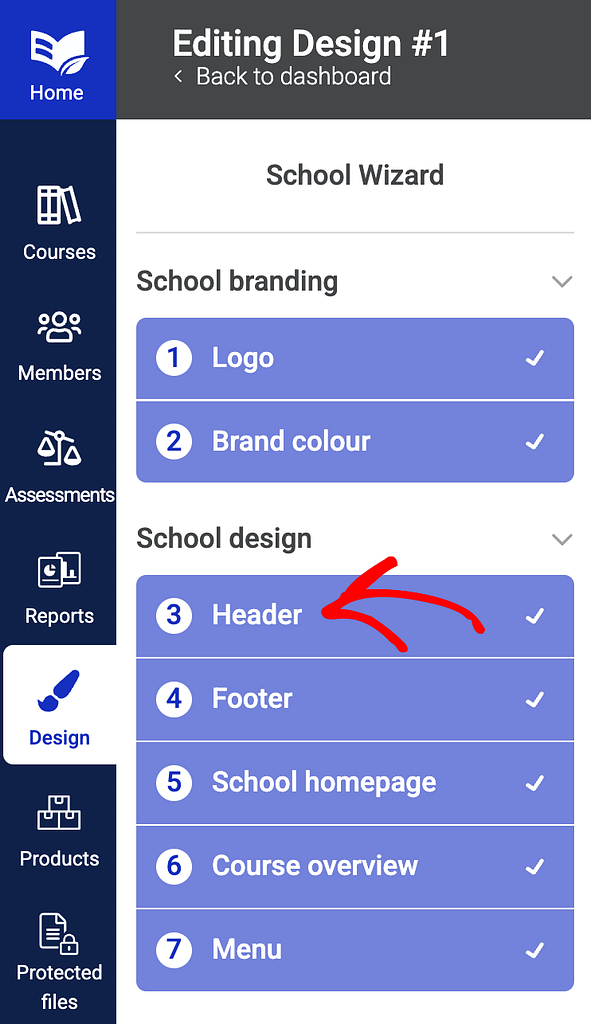
On the Header page, click the selected header to see the available header templates and click on the one you want to apply.
The above 3 steps are only if you haven’t added the custom menu you want.
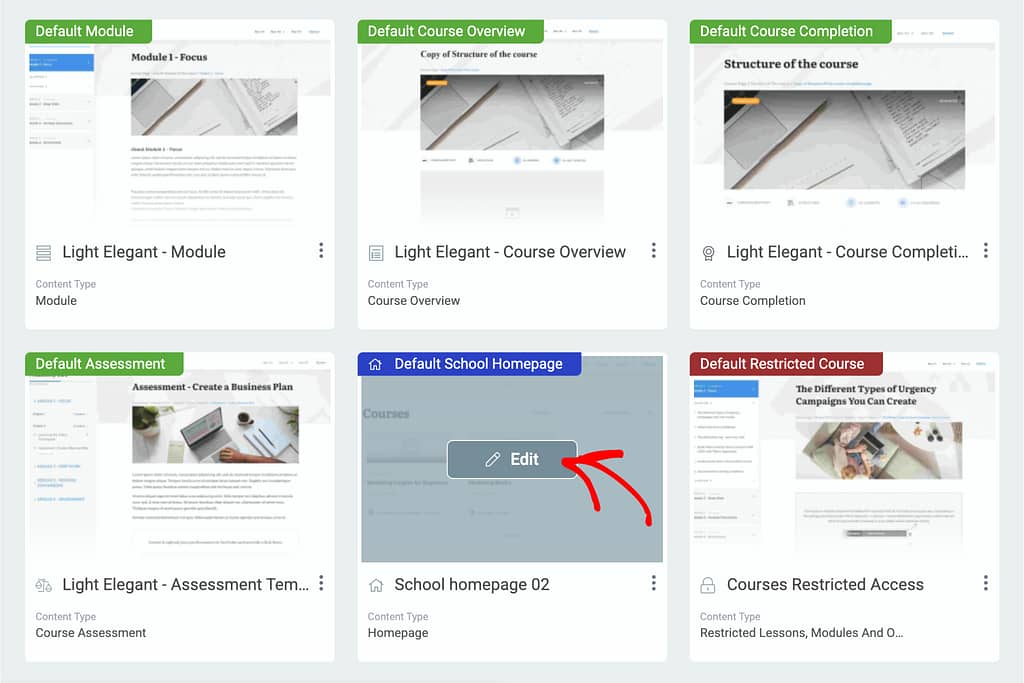
If you’ve already added the custom menu to the school homepage, on the Thrive Apprentice Design page, click the Manage templates button on the Template editor block.
When you click Manage templates, you’ll see all the templates Thrive Apprentice offers. On the templates page, hover on the Default School Homepage template and click Edit.
Clicking Edit will open the School Homepage in the editor. In the editor, click the Header on the page.
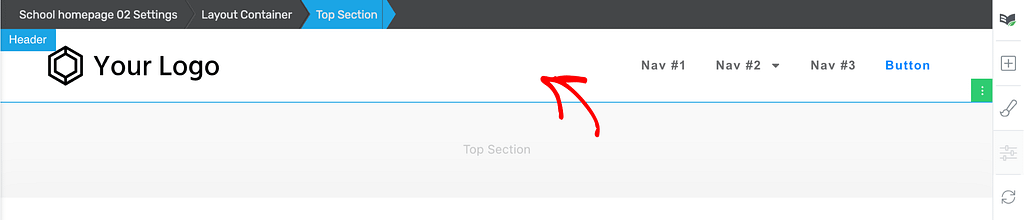
After clicking the Header, click the Edit button to open it in the Edit Mode.
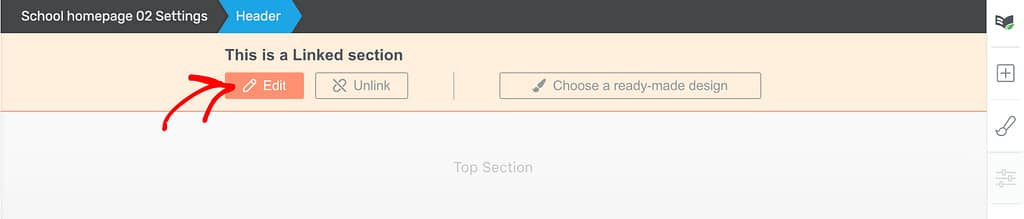
In the Edit Mode, click the Custom Menu element inside the Header.
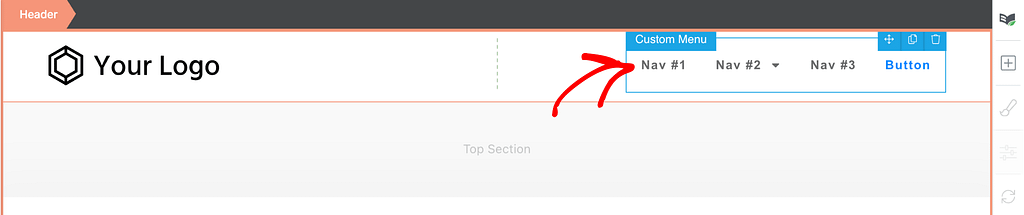
Clicking on the Custom menu will open its options in the left column. You can learn more about customizing the custom menu element in our document here.
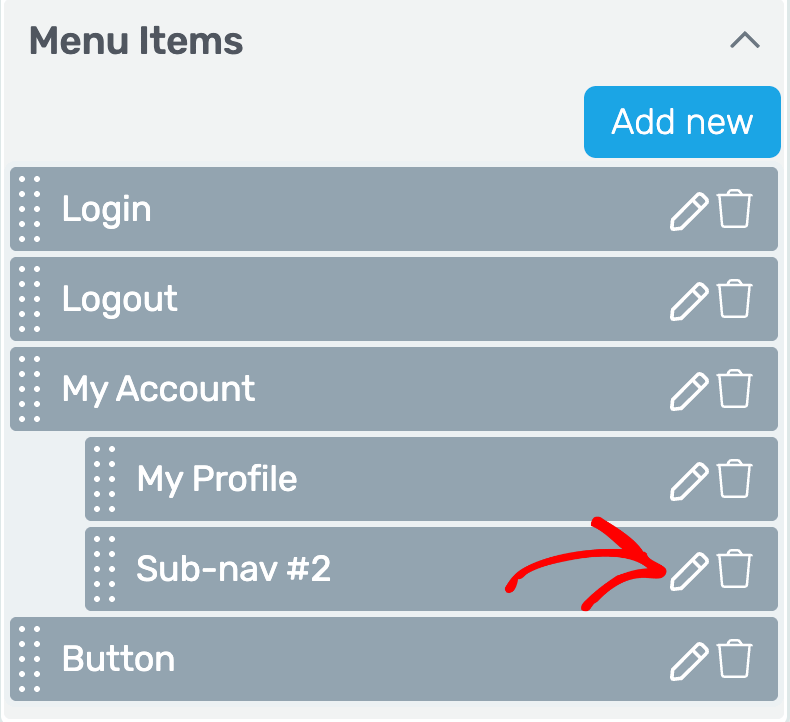
Also, since in this example, we have 2 submenu items added under the second menu item, we will reorder it for now. You can ignore this step in case you don’t have such submenu items.
Adding a Login Link to the Menu
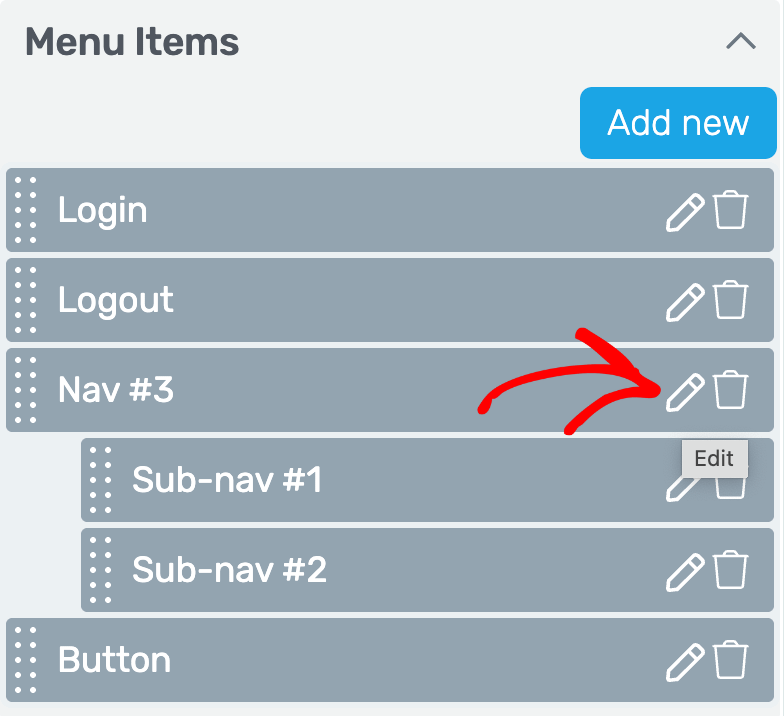
To add a login link to the menu, you’ll have to edit the menu items.
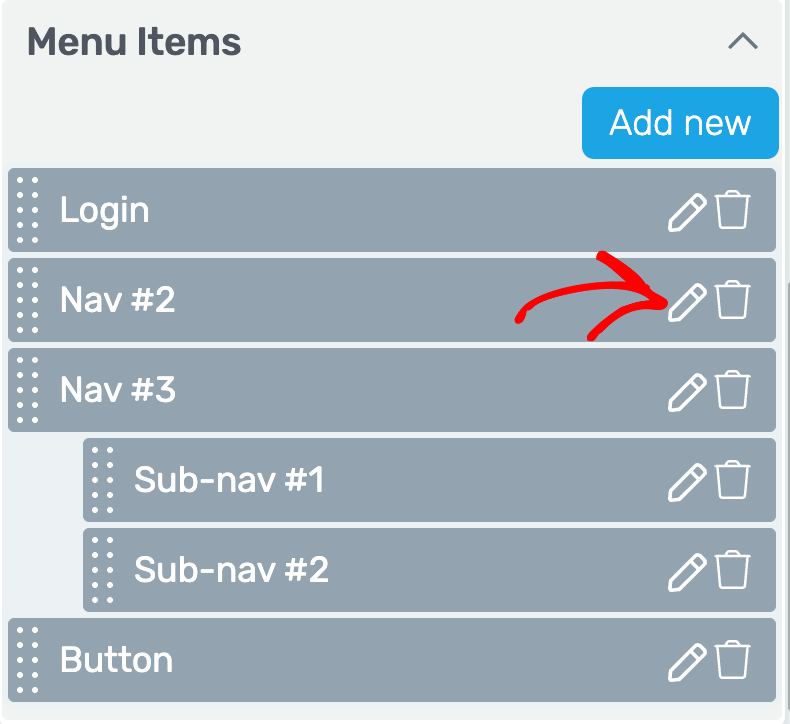
In the left column, click to open the Menu items in the custom menu.
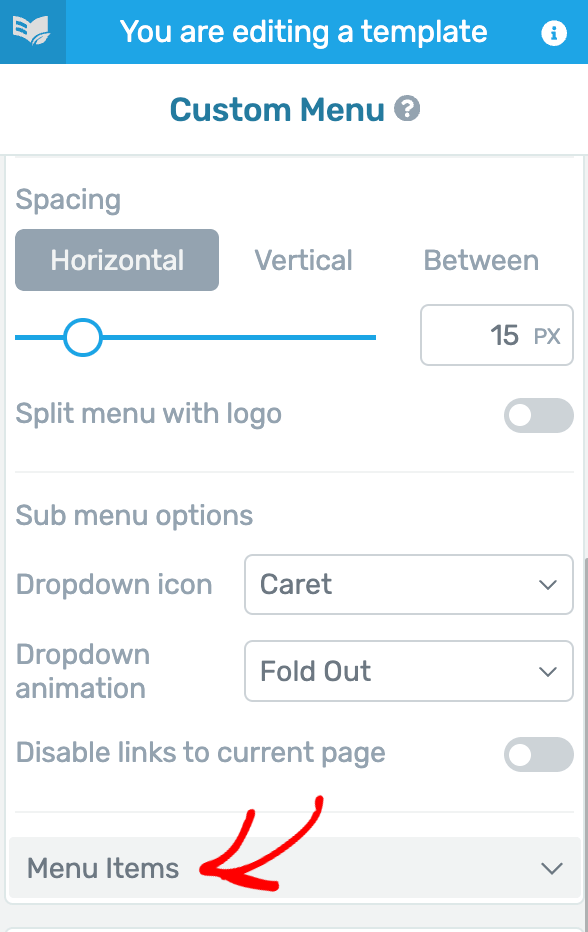
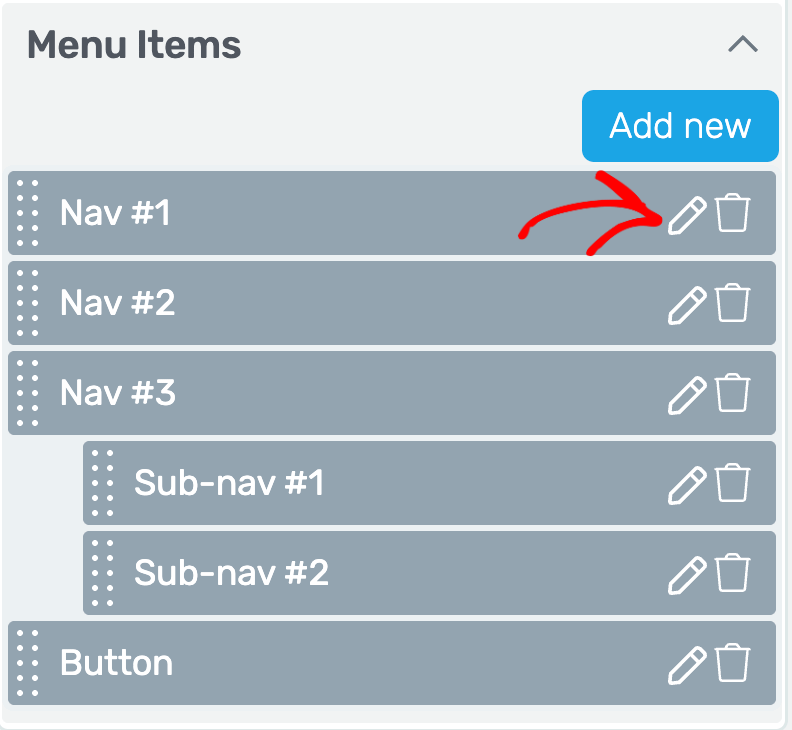
In the Menu items list, click on the pen icon beside the item you want to change. In this example, we’ll edit the first menu item.
When you click to edit the menu item, enter the Menu item name as Login.
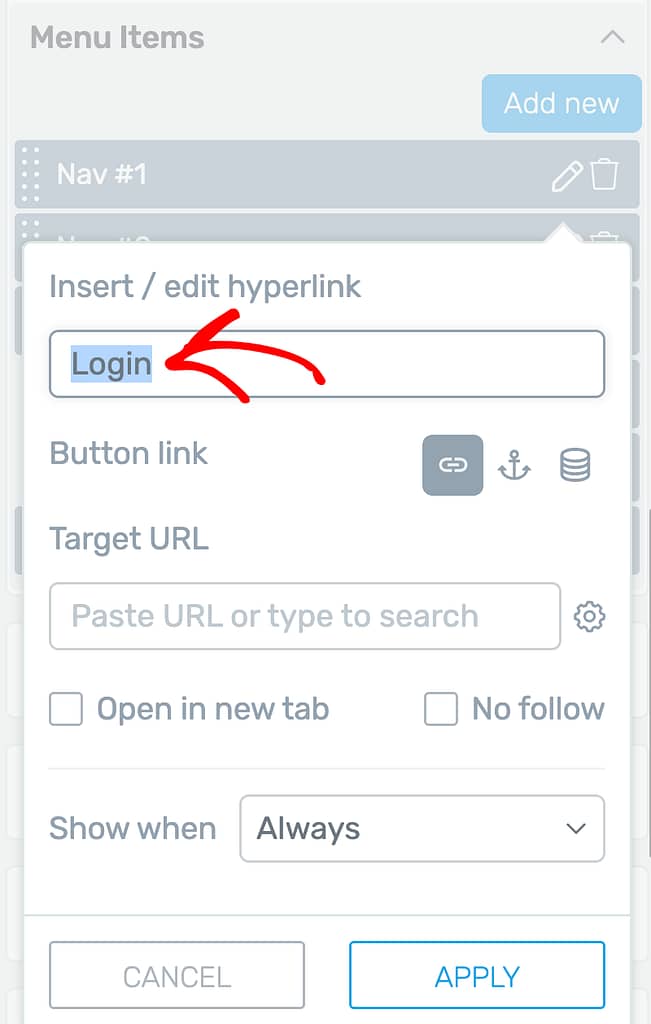
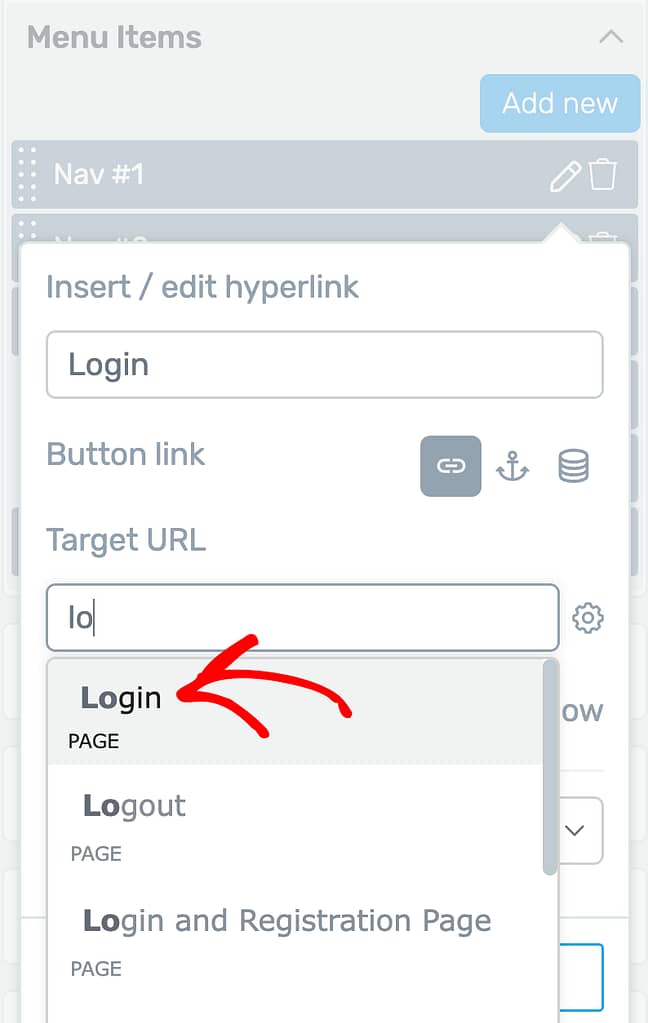
After entering the menu item name, continue adding a static link to it and start typing the title of the Login page in the Target URL field.
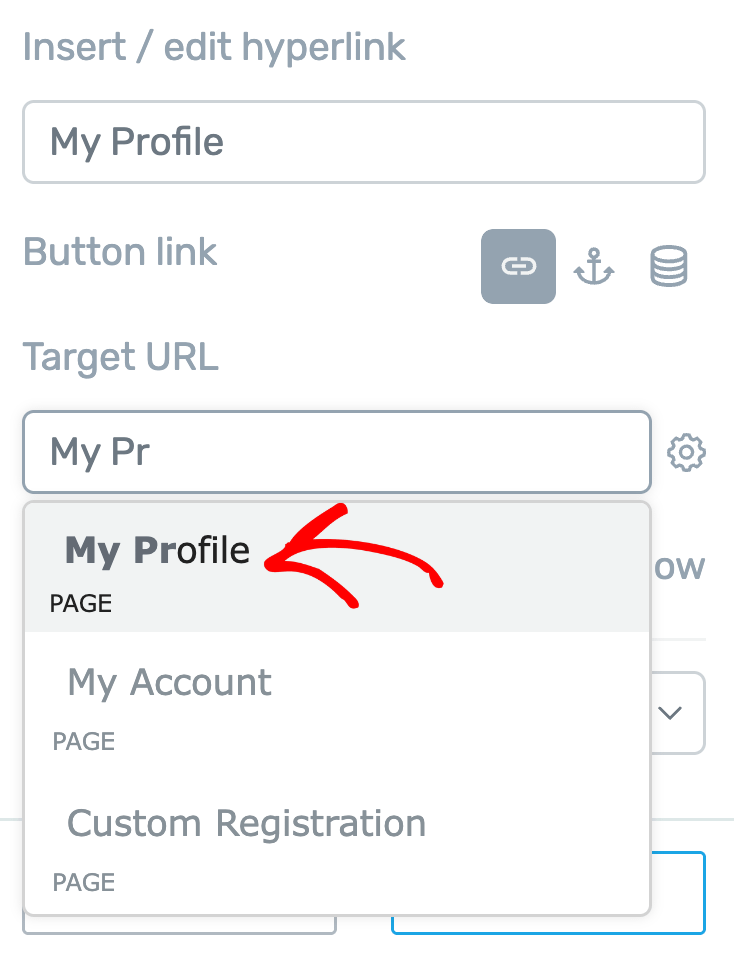
While you are typing the page title, you’ll see a list of pages that you can select from.
This means that the user will be redirected to the Login page when he clicks on the Login menu item.
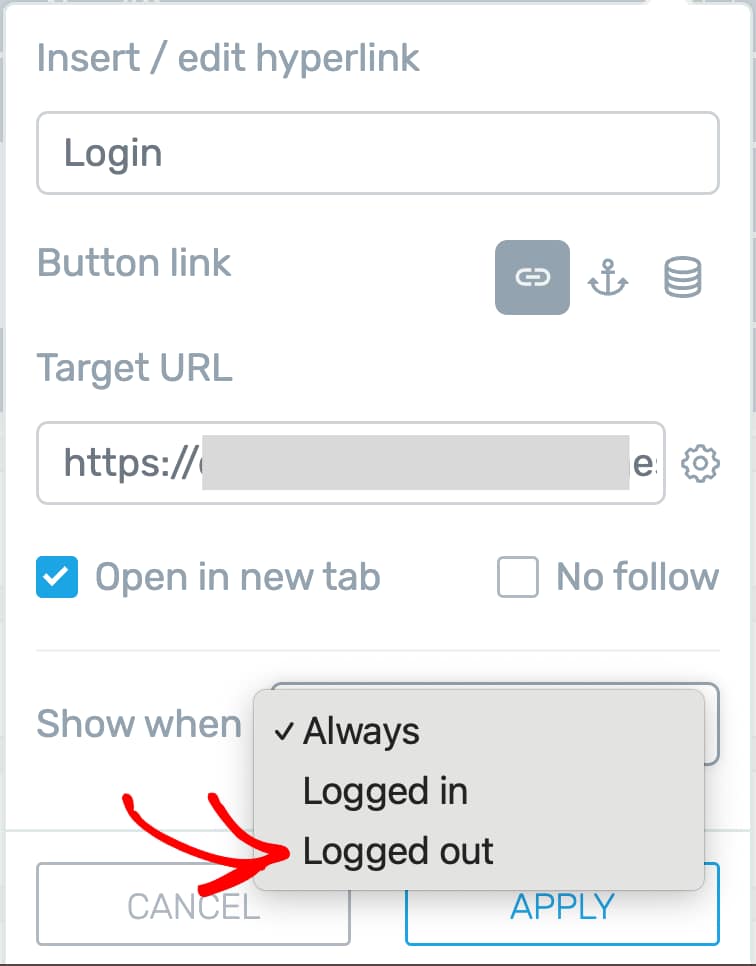
When you select the Login page as the Target URL, the next step is to select when you want this Login menu item to be seen in the menu.
In the dropdown beside Seen when, select Logged out.
This will ensure that the Login menu item will be seen only when the user has logged out of his account.
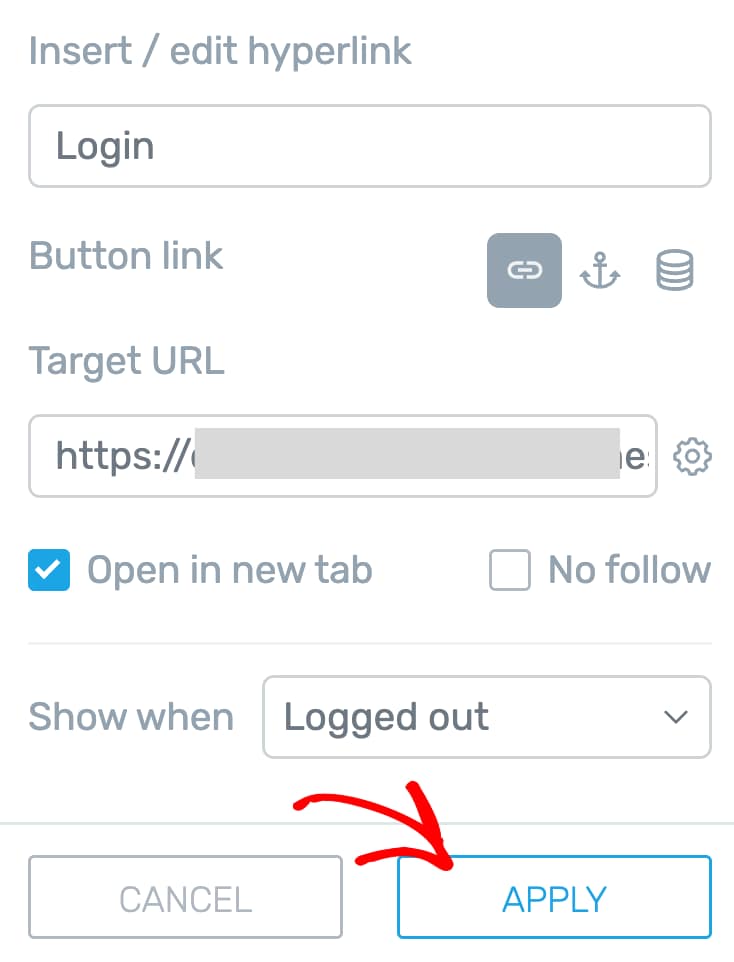
Once you select when to display the Login menu item, click the Apply button.
After you’ve applied the Login menu item to the custom menu, you can customize the menu with items you want to show only the logged in users.
Adding a Logout Link to the Menu
To add a logout link to the menu, you’ll have to edit the menu items.
In the left column, click to open the Menu items in the custom menu.
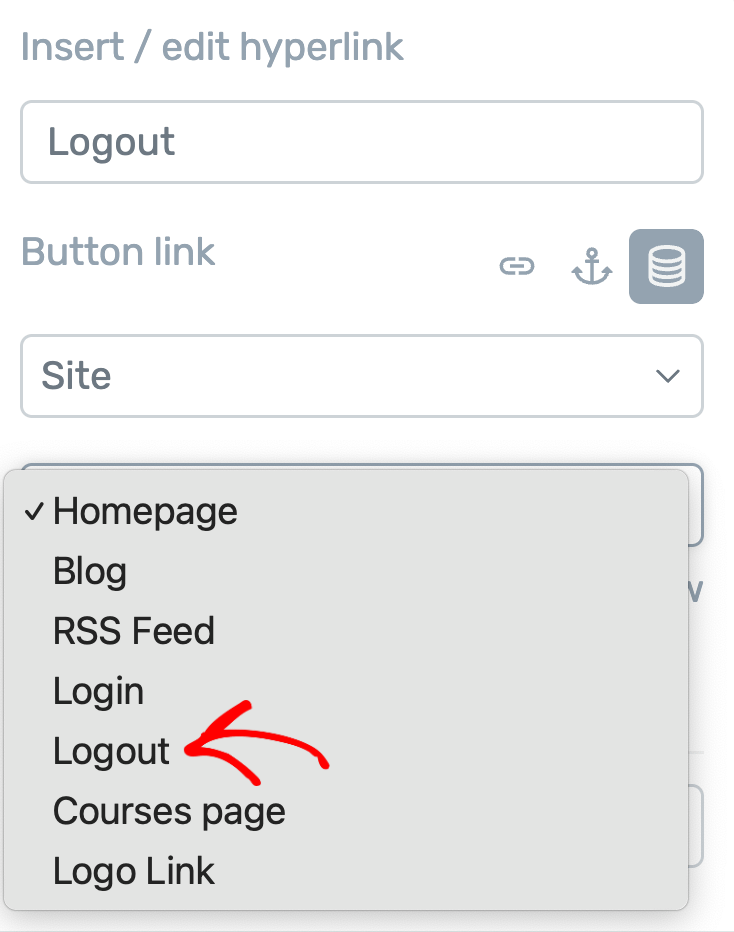
In the Menu items list, click on the pen icon beside the item you want to change. In this example, we’ll edit the second menu item.
In the menu item options enter the menu item name as Logout.
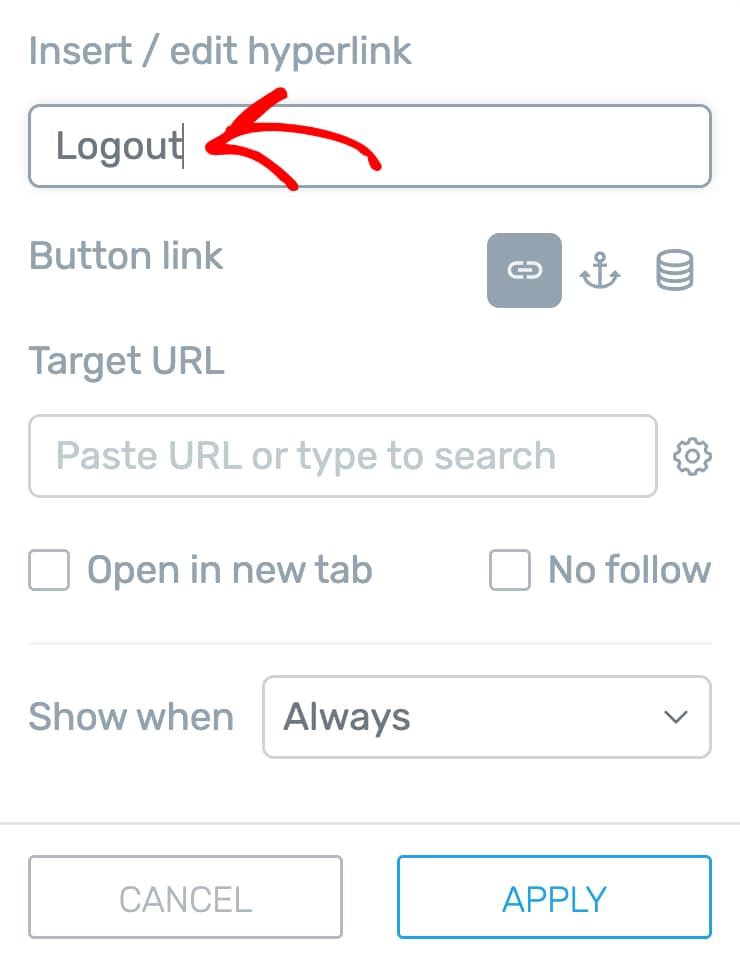
After adding the menu item name, click to add a dynamic link to the button.
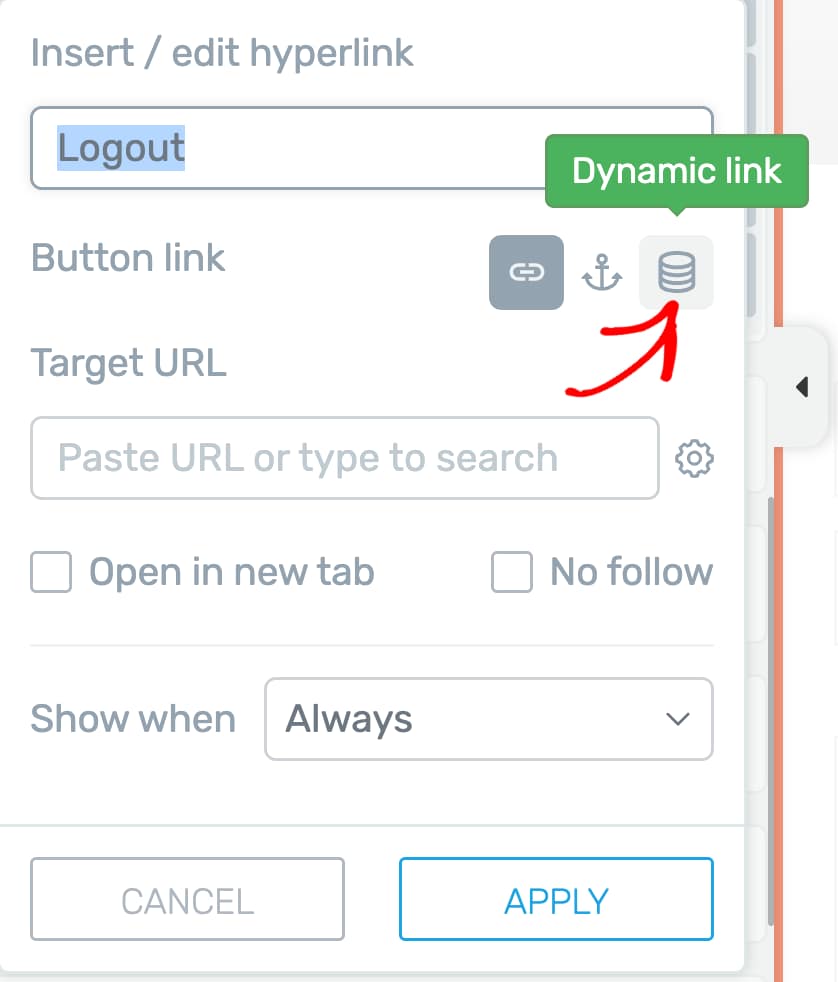
When you click to enable a Dynamic Link, click to open the first dropdown and select Site.
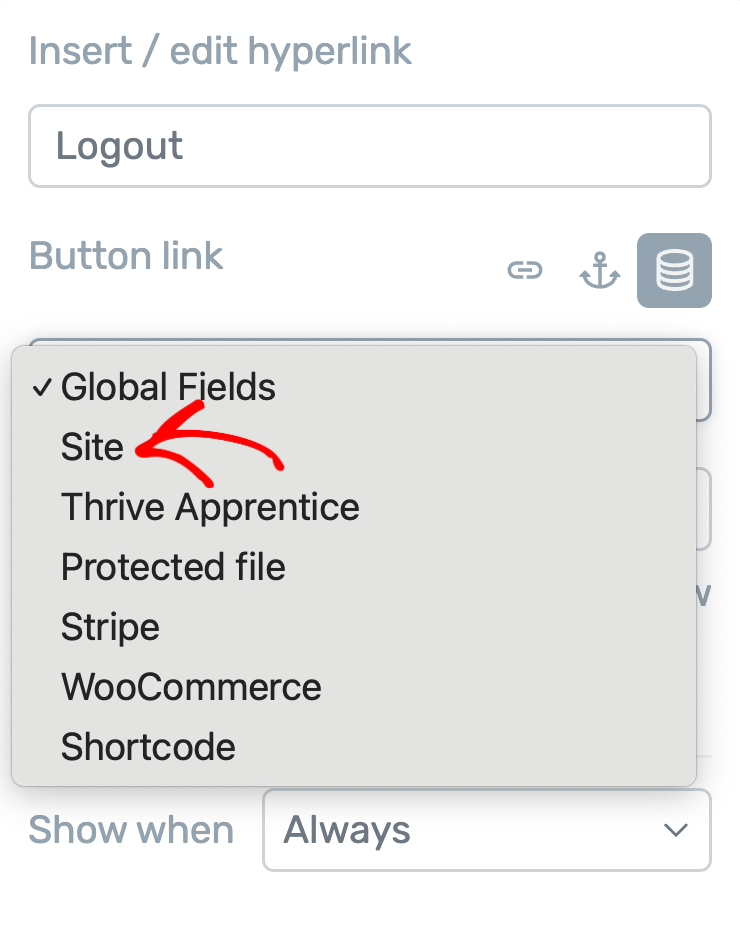
After selecting Site in the first dropdown, select Logout in the second dropdown.
Once you finish the dynamic link settings for the Logout menu item, you can use the other options to decide whether the link should open in a new tab, whether it should be a no-follow, or whether you want to redirect the user after successful logout.
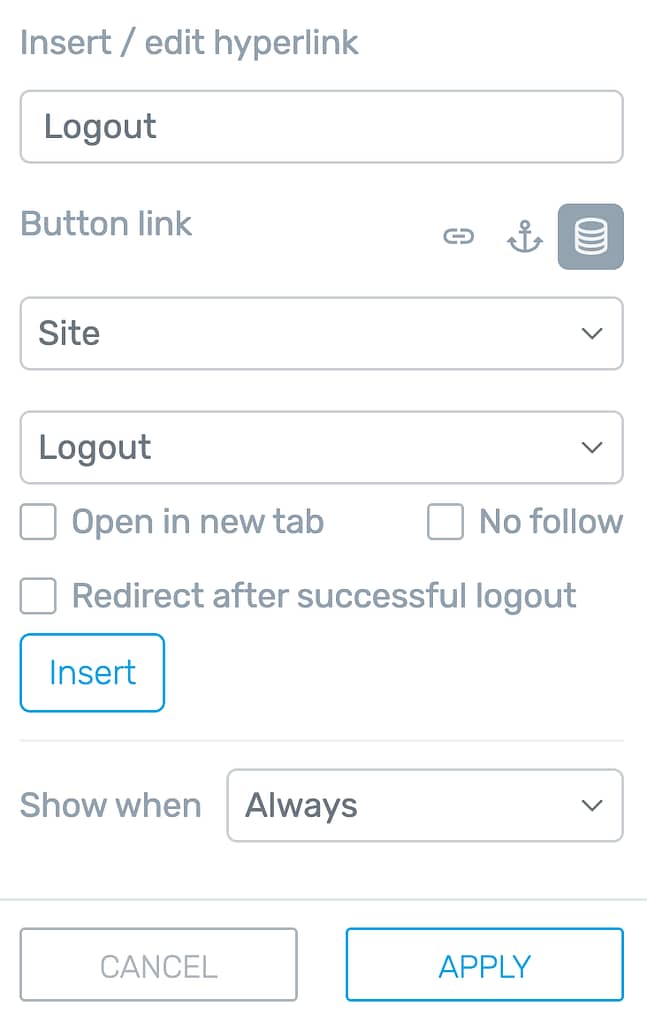
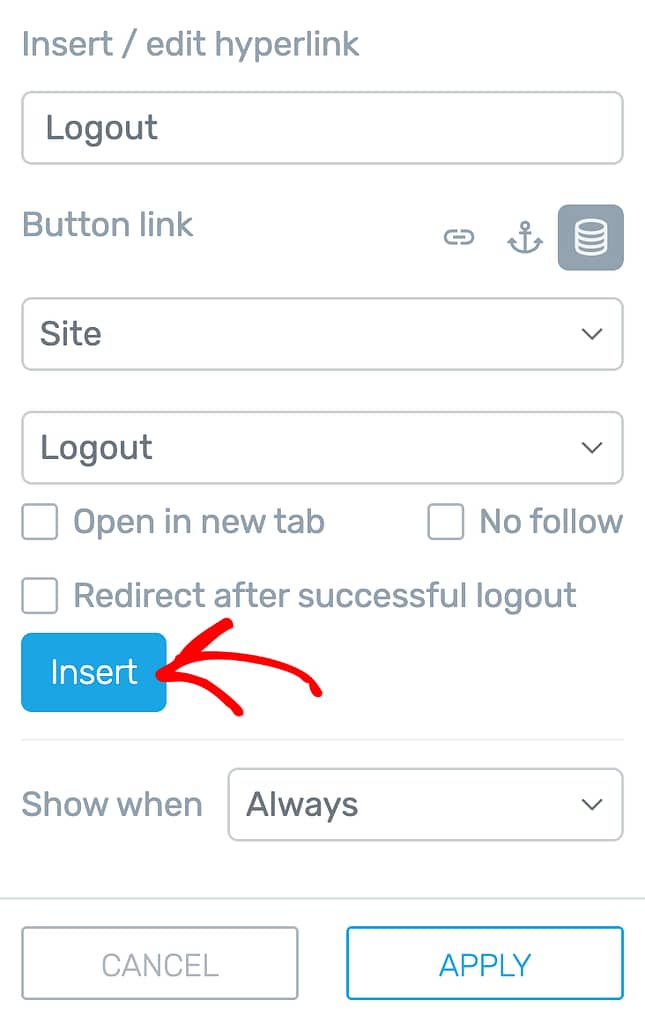
After you finish setting them, click the Insert button.
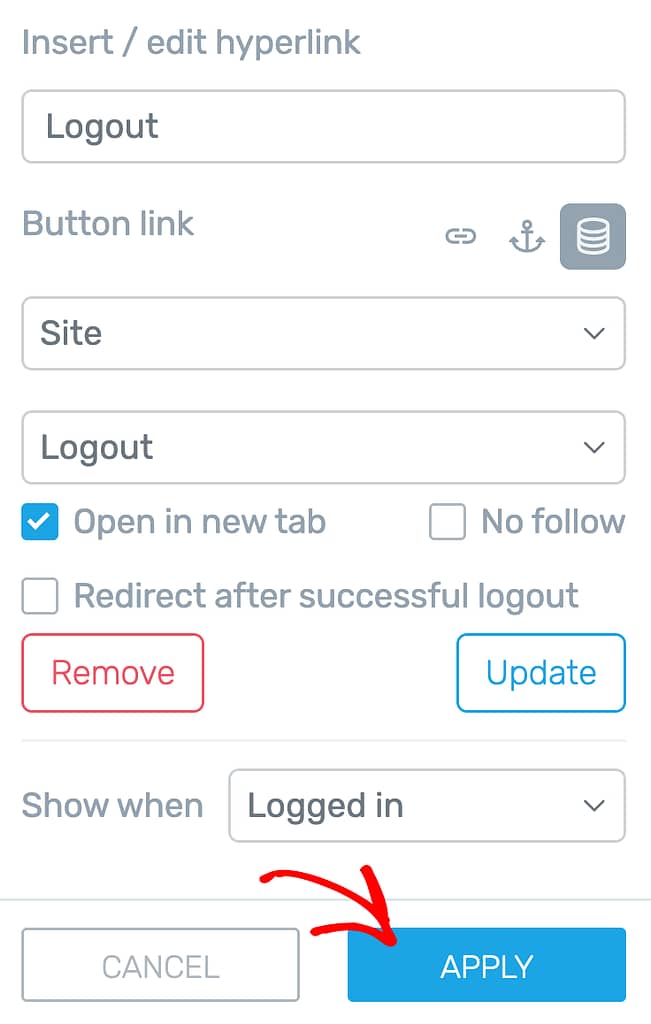
The next step is to select when you want this Login menu item to be seen in the menu.
In the dropdown beside Seen when, select Logged in.
This will ensure that the Logout menu item will be seen only when the user has logged into his account.

Once you select when to display the Logout menu item, click the Apply button.
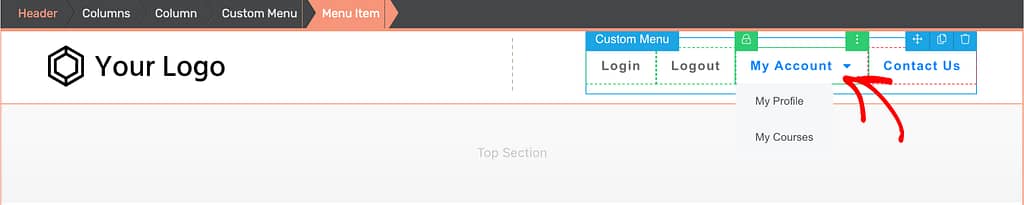
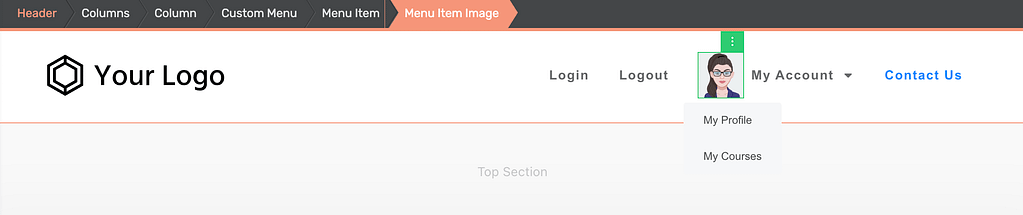
Adding a My Account to the Menu
In this section we’ll see how you can add My Account as a top-level menu item in the custom menu.
So, for this example, we’ll create a top-level menu item called My Account, which when clicked will show up two sub menus – My Profile and My Courses.
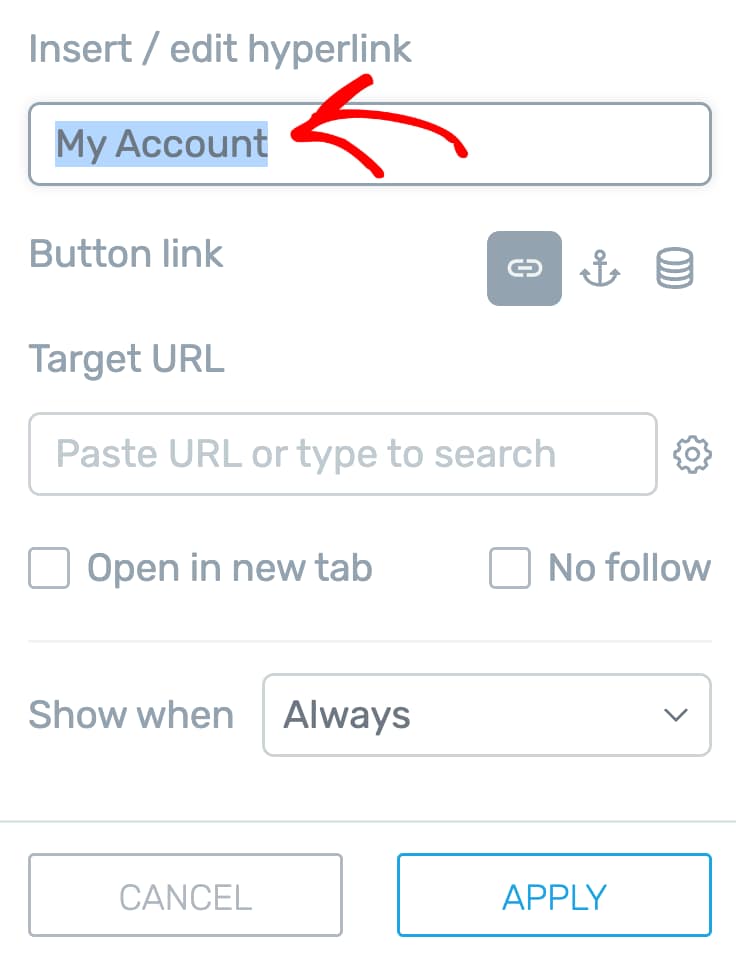
To add My Account to the menu, in the left column, under the Menu items list, click on the pen icon beside the third menu item.
When the menu item dropbox opens, enter the menu item name My Account.
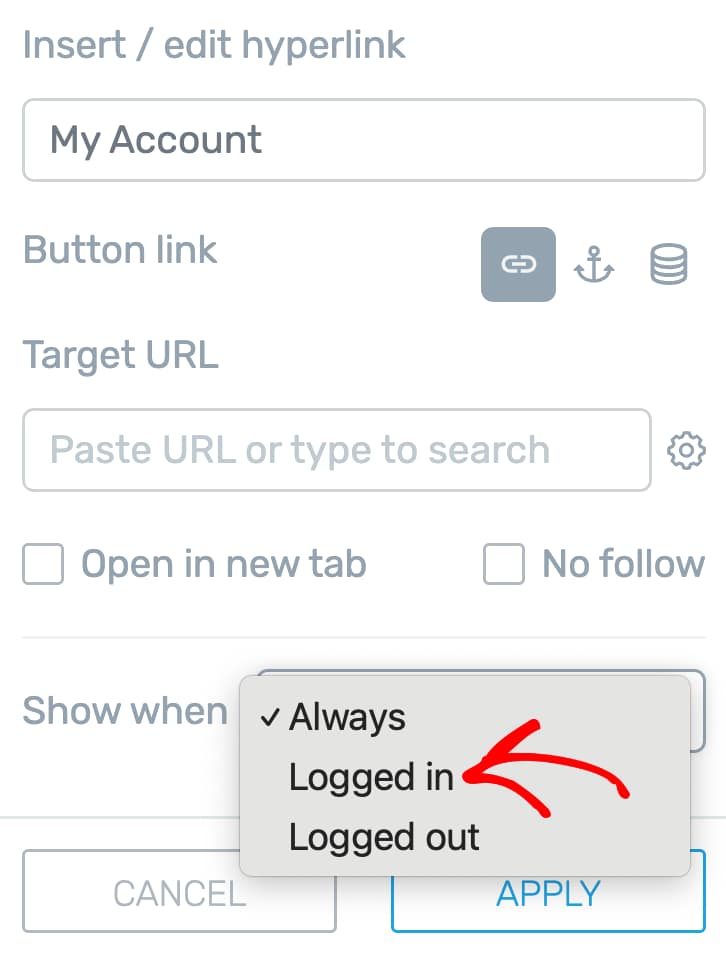
After naming the menu item, the next step is to decide when you want the My Account menu item to show up.
To do so, click on the dropdown beside Show when and select Logged in.
This will ensure the My Account menu item will be shown only when a user has logged into his account.
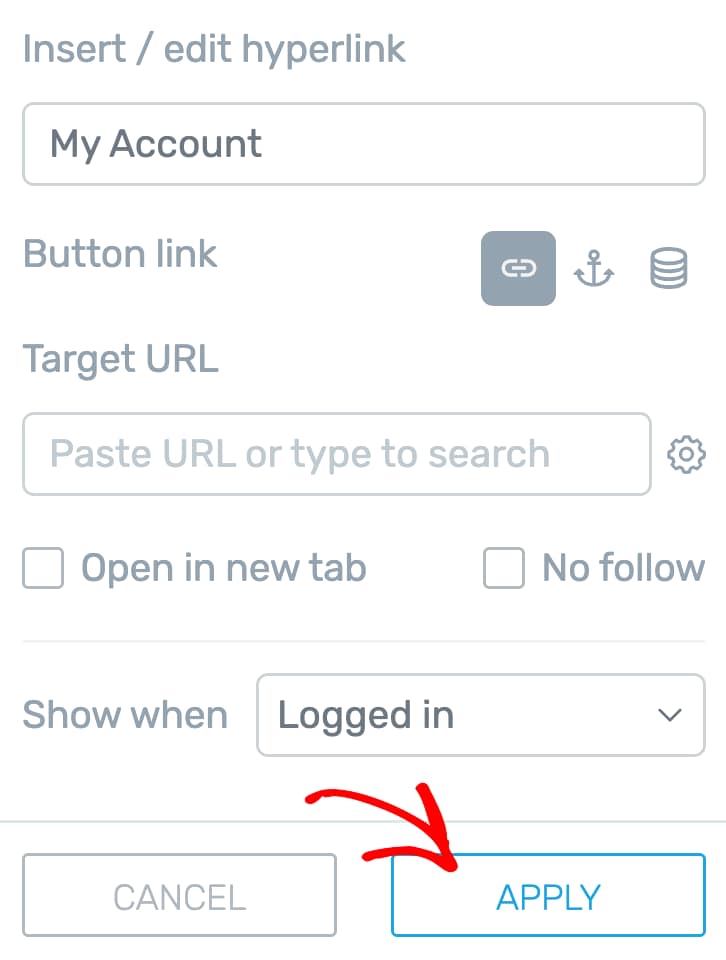
Once you select when to display the My Account menu item, click the Apply button.
Adding My Profile as Sub-menu
After you’ve created a My Account top-level menu, let’s add the My Profile sub-menu under it. If you don’t know how to place a sub-menu take a look at how you can rearrange and reorder menu items.
To add a My Profile sub-menu, in the Custom menu left column, open the Menu items, and click on the pen icon to edit a sub-menu.

After clicking to edit the menu item, enter the menu item name as My Profile.
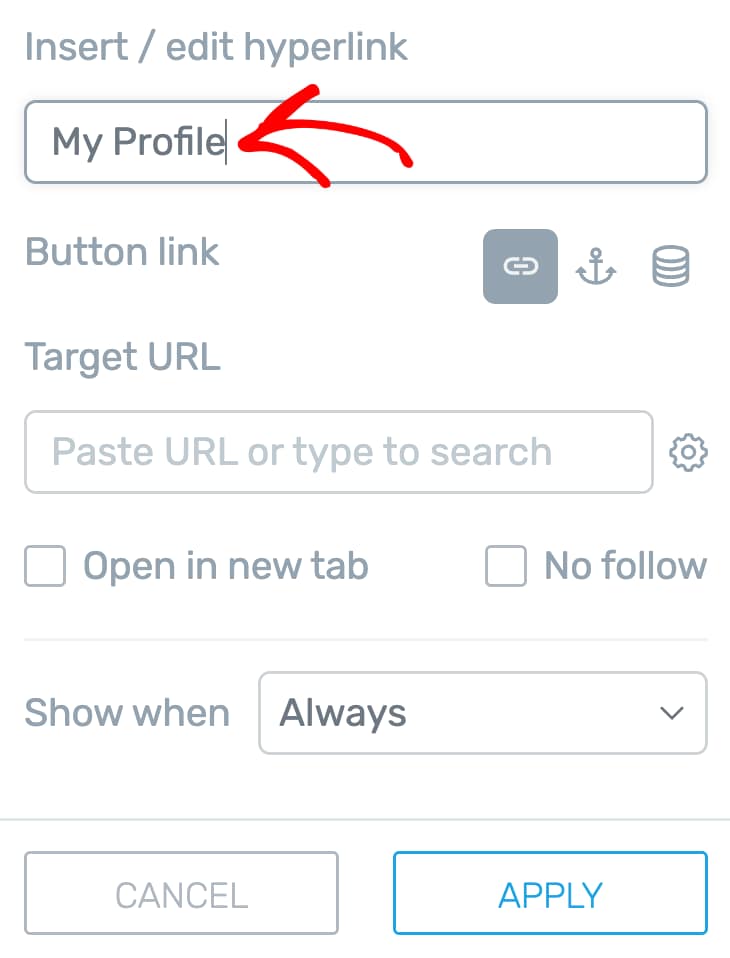
Once you add the menu item, proceed to add a static link to this menu item. In the Target URL field, start typing the page title you want to link to and select it from the list of pages that appear.
In this example, you’ll have to link to the student’s profile page. If you haven’t created a profile page, here’s our document that will help you do so.
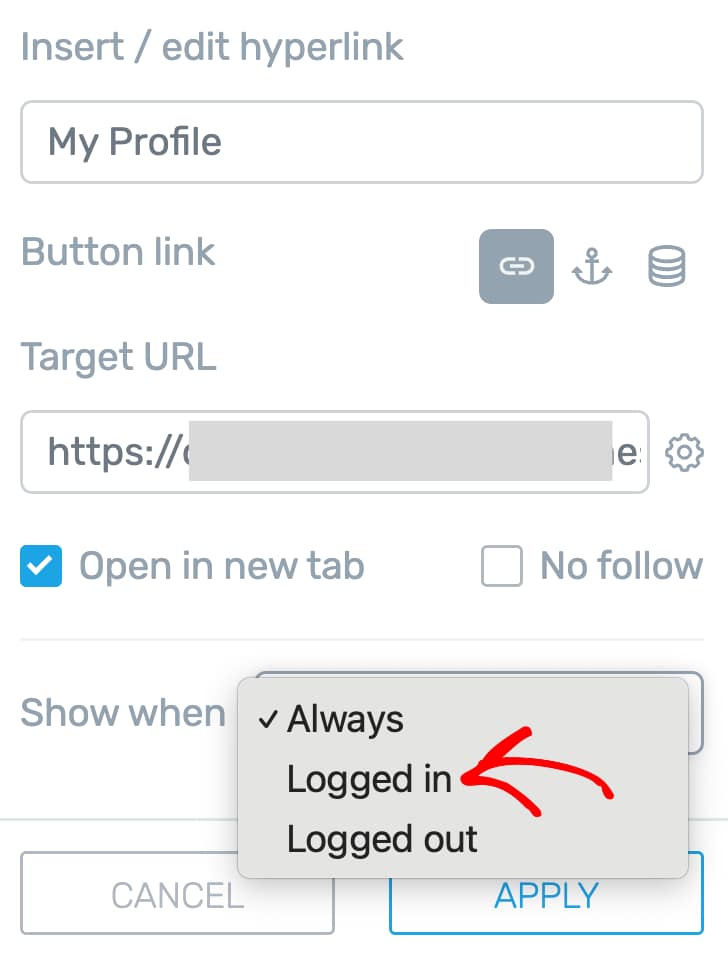
After you select the Target URL, the next step is to decide when you want this menu item to show up.
To do so, click on the dropdown beside Show when and select Logged in.
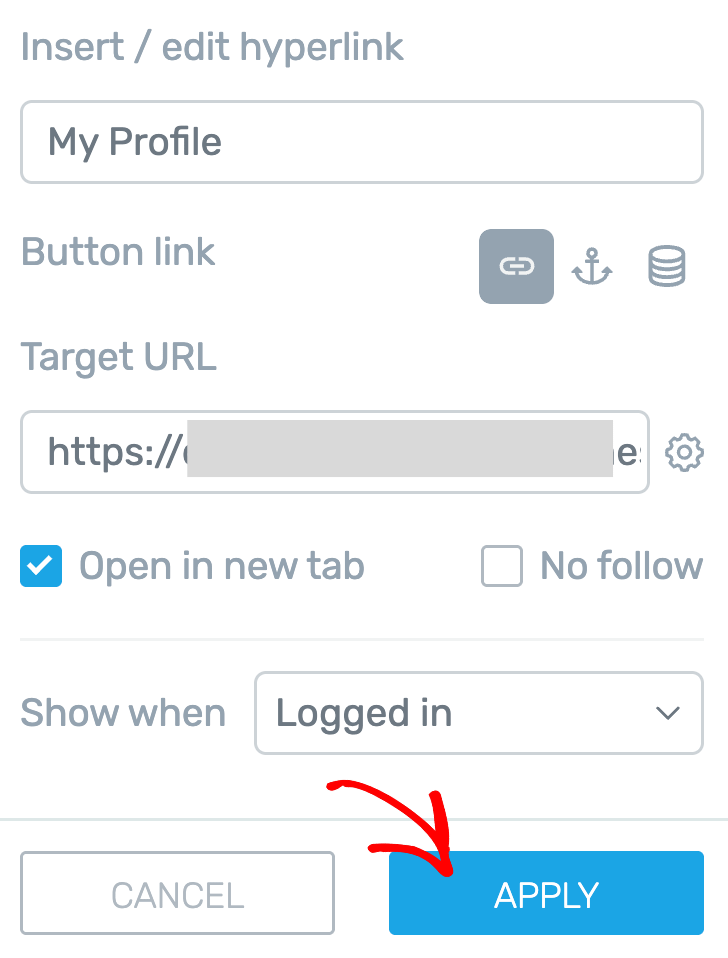
This will ensure that the My Profile menu item will be shown up only when a user has logged in to his account on your website.
To save this menu item and the changes applied to it, click the Apply button.
Adding My Courses as Sub-menu
To add a My Courses sub-menu, in the Custom menu left column, open the Menu items, and click on the pen icon to edit a sub-menu.
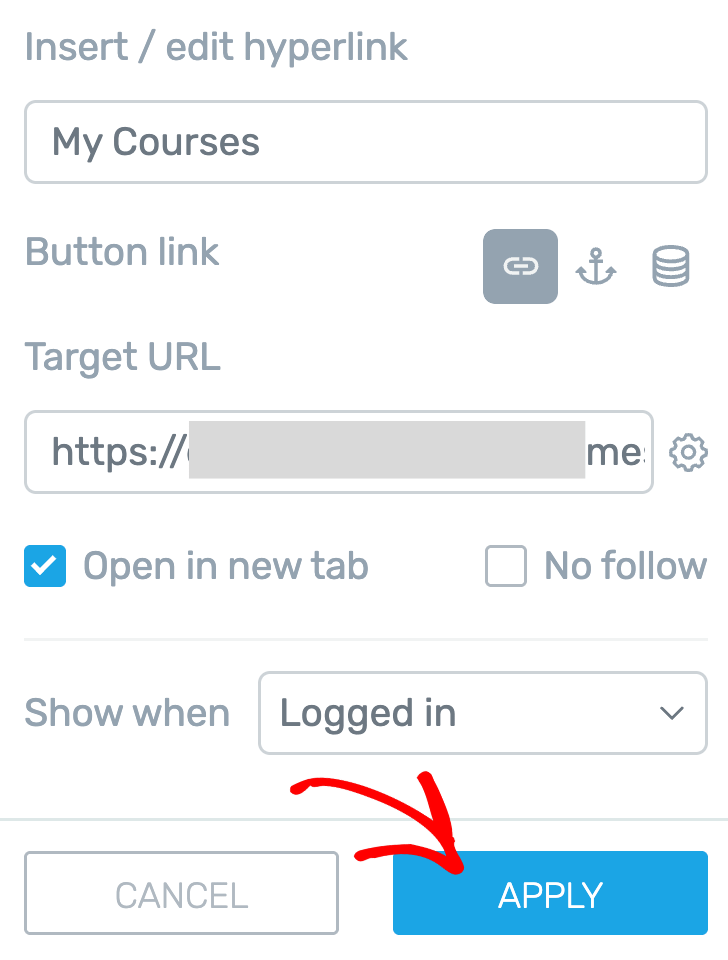
After clicking to edit the menu item, enter the menu item name as My Courses.
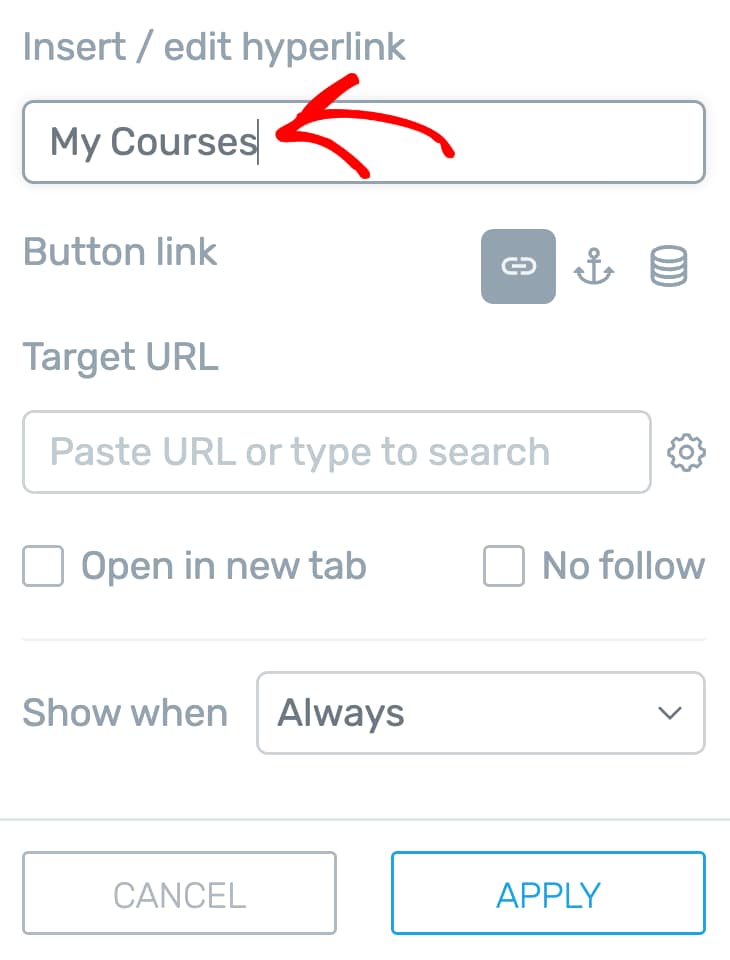
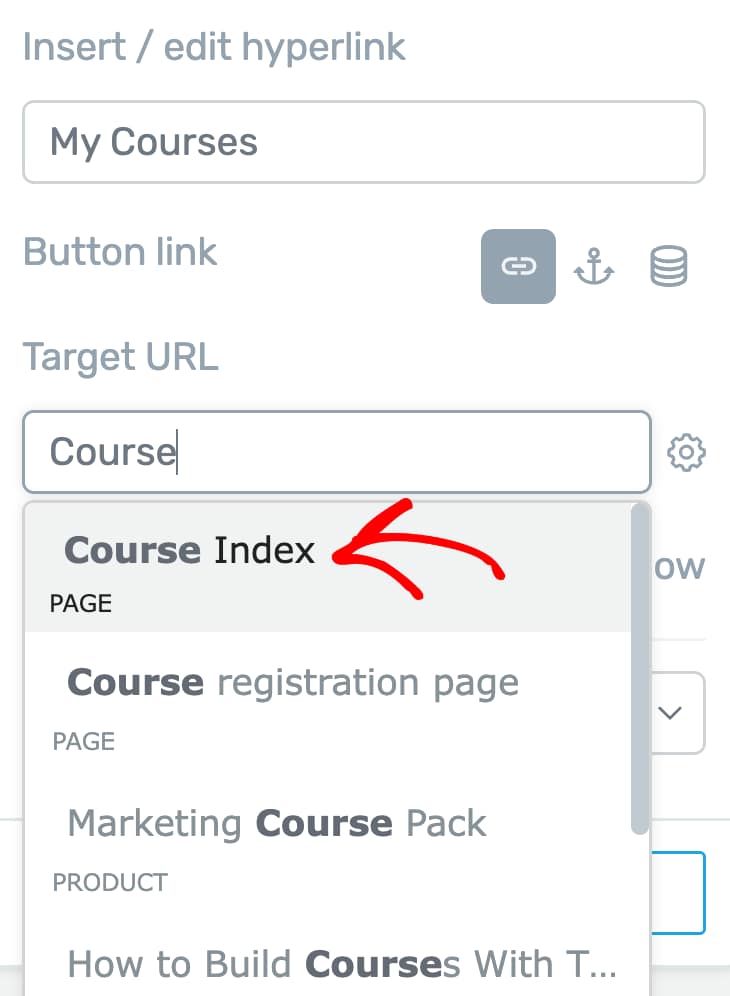
Once you add the menu item, proceed to add a static link to this menu item. In the Target URL field, start typing the page title you want to link to and select it from the list of pages that appear.
In this example, you’ll have to link to the courses accessible to a student.
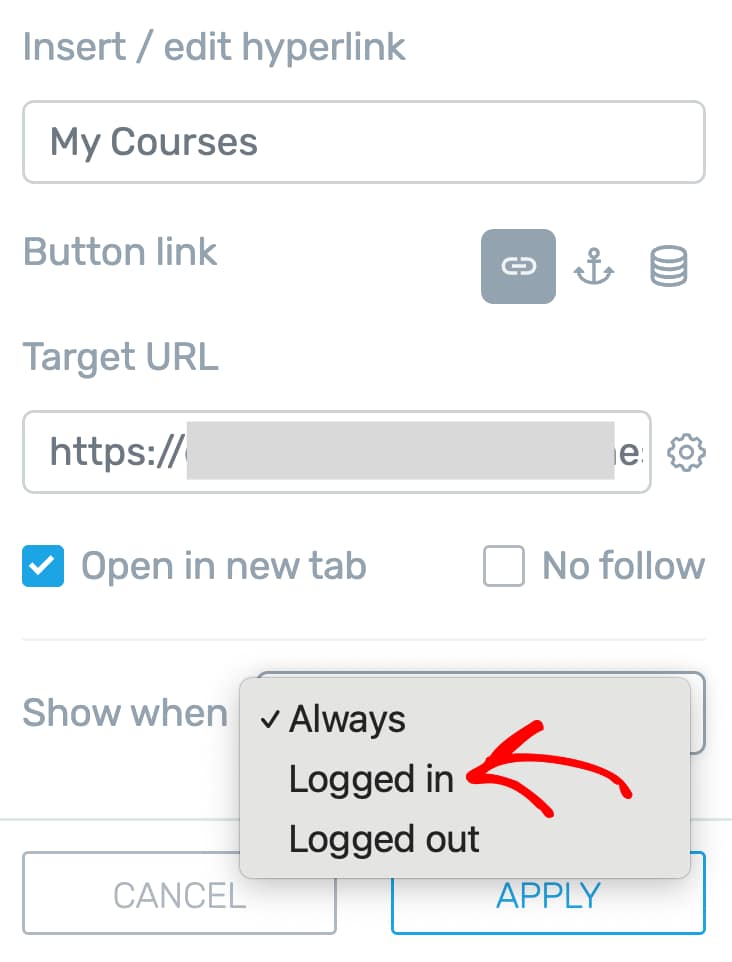
After you select the Target URL, the next step is to decide when you want this menu item to show up.
To do so, click on the dropdown beside Show when and select Logged in.
This will ensure that the My Courses menu item will be shown up only when a user has logged in to his account on your website.
To save this menu item and the changes applied to it, click the Apply button.
Displaying User Profile Image and Name in the Menu
Note: The steps listed here will let you add an image to a menu item. But, if you want more depth and understanding of the different settings for it, we’d recommend you to read our document here.
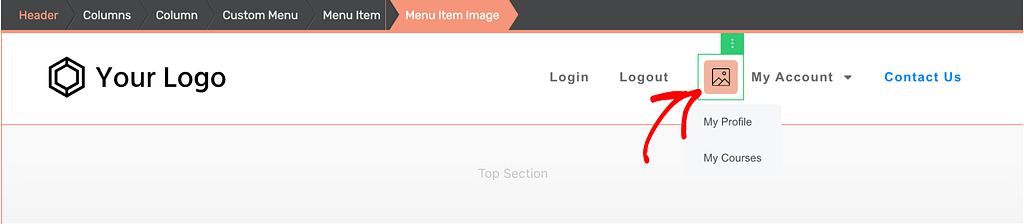
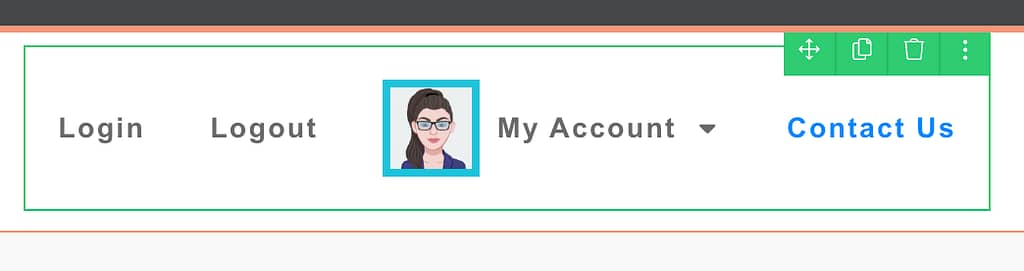
For the purpose of this article, we’ll add the user image to the My Account menu item.
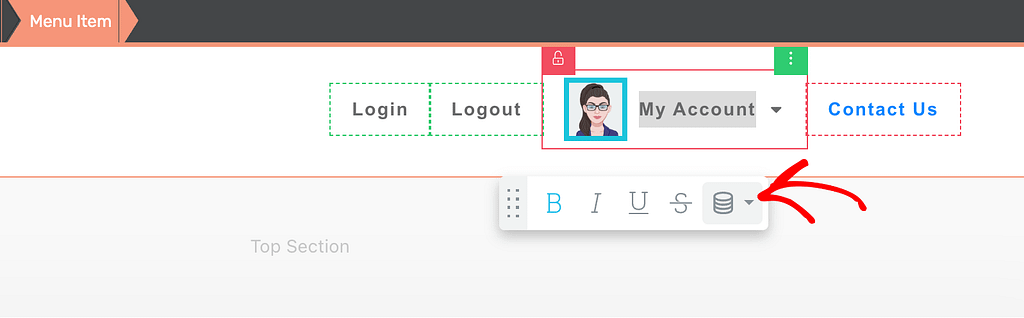
Before you start doing that, you need to ensure you’ve unlinked the menu item from the grouped styling feature. To do so, while in the edit mode, click on the My Account menu item in the custom menu.
When you click the My Account menu item, click the green lock icon seen on its border. This will unlink this menu item from grouped styling.
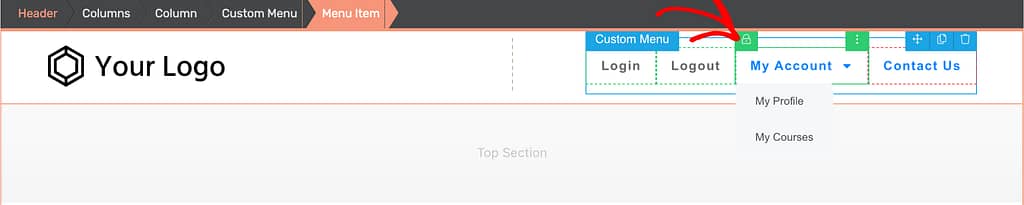
Clicking the green lock icon, will turn it to a red lock icon showing that the element is unlinked from the grouped styling feature.

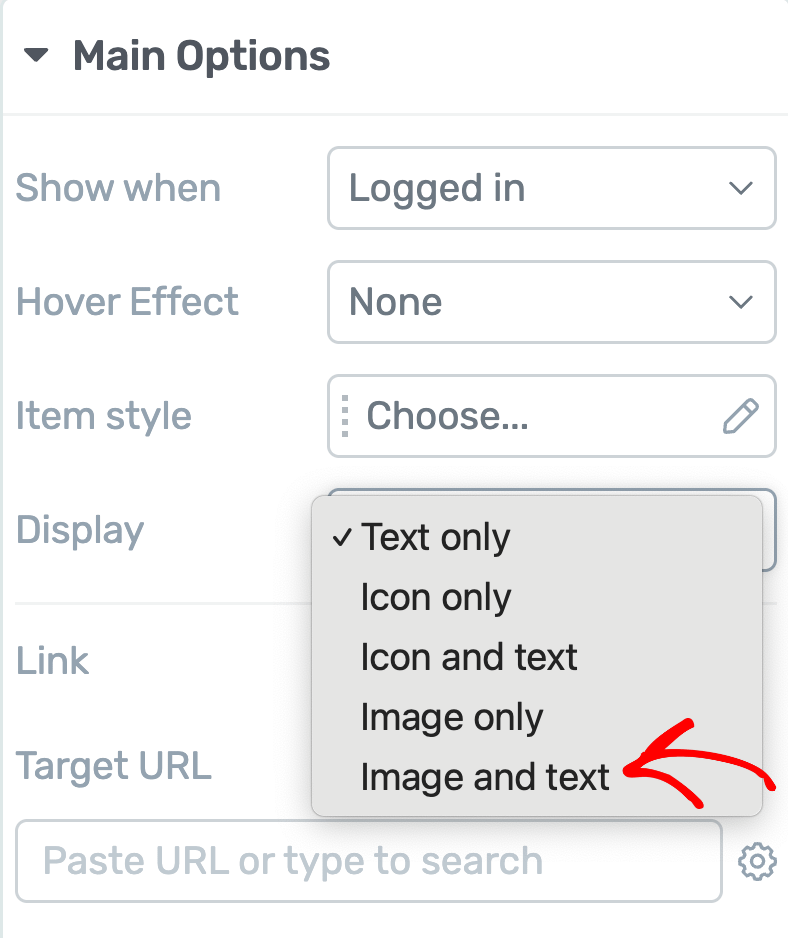
Once unlinked, open the selected Menu item’s Main Options in the left column, and click on the dropdown beside Display.
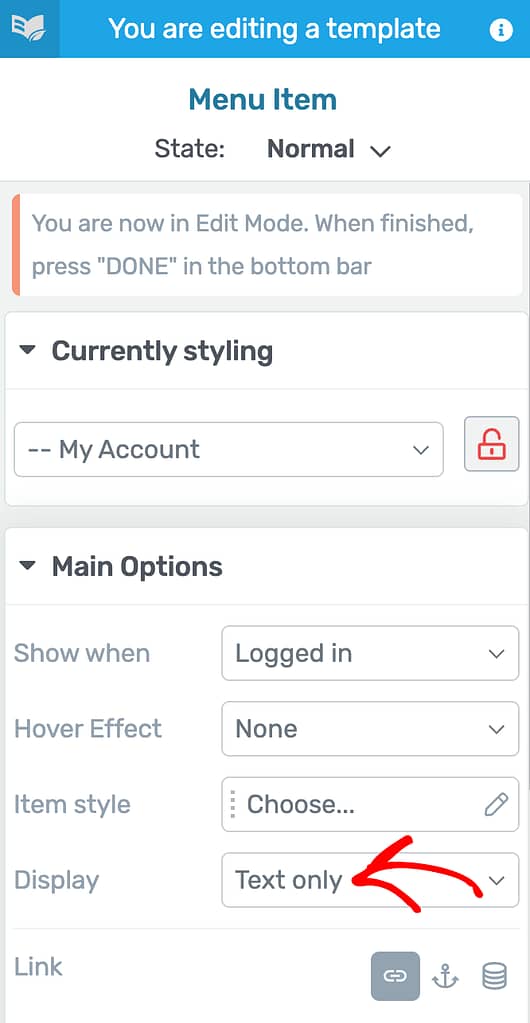
In this dropdown, select what you want to display in this menu item. The available options are as listed below.
- Text only
- Icon only
- Icon and text
- Image only
- Image and text
In this example, we’ll show you how you can add an Image and text to the menu item.
To proceed, select Image and text.
When you choose to add an image and text in a menu item, you’ll have to individually set the image and text you want to add here.
Setting an Image Source for a Menu Item
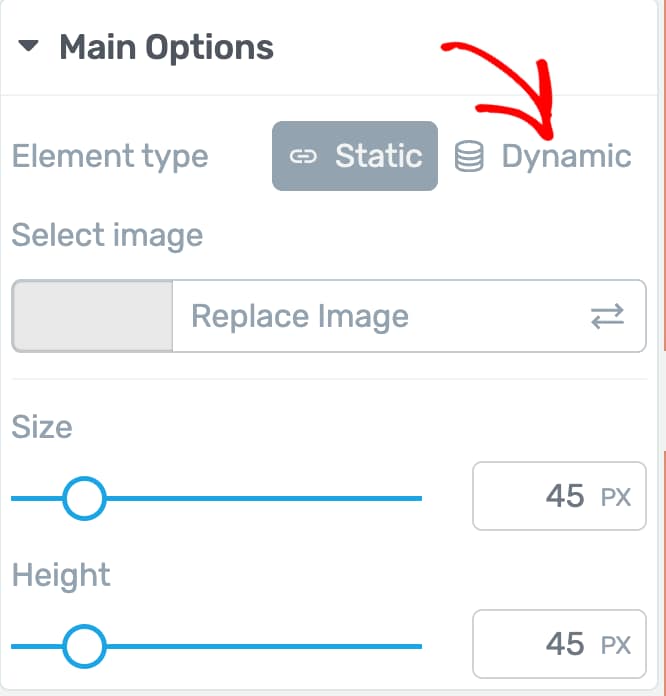
To set an image in a menu item, click the image in the menu item and see its options open in the left column.
In the left column, under Main Options select the Element type as Dynamic.
After you select a dynamic element type, click on the dropdown to select a Dynamic source.
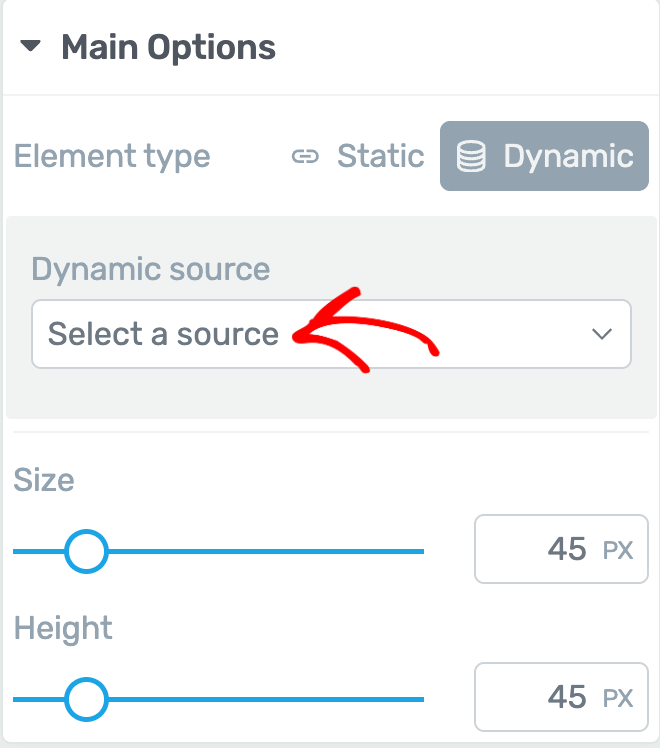
In the dropdown options, select User image.
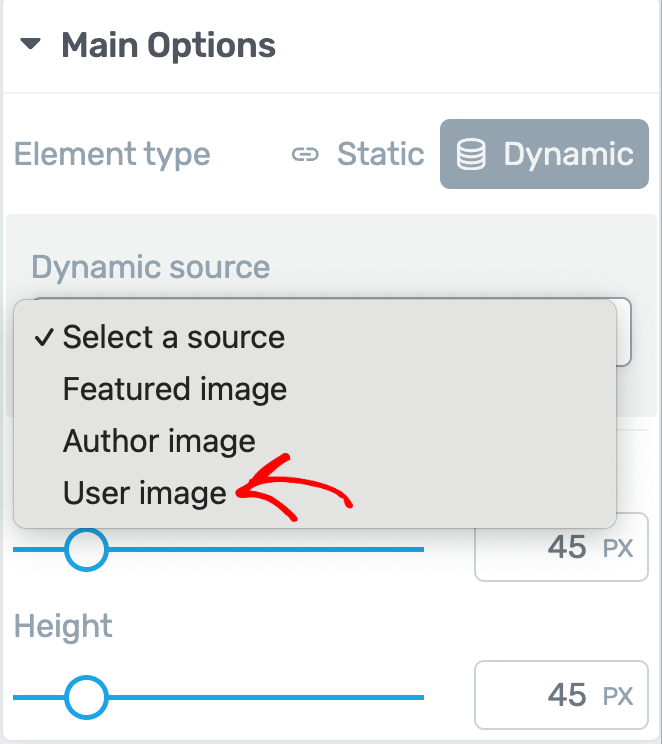
When you select the image in the menu to be dynamic and select the dynamic source as User image, you’ll see an image added to the menu.
Just like the other image elements, you can customize this image by customizing the layout and position, borders and corners, adding shadows, etc.
Setting a Text Source for a Menu Item
To set a text in a menu item, select the text you want to edit.

Selecting the text will open a floating panel that’ll let you customize the text.
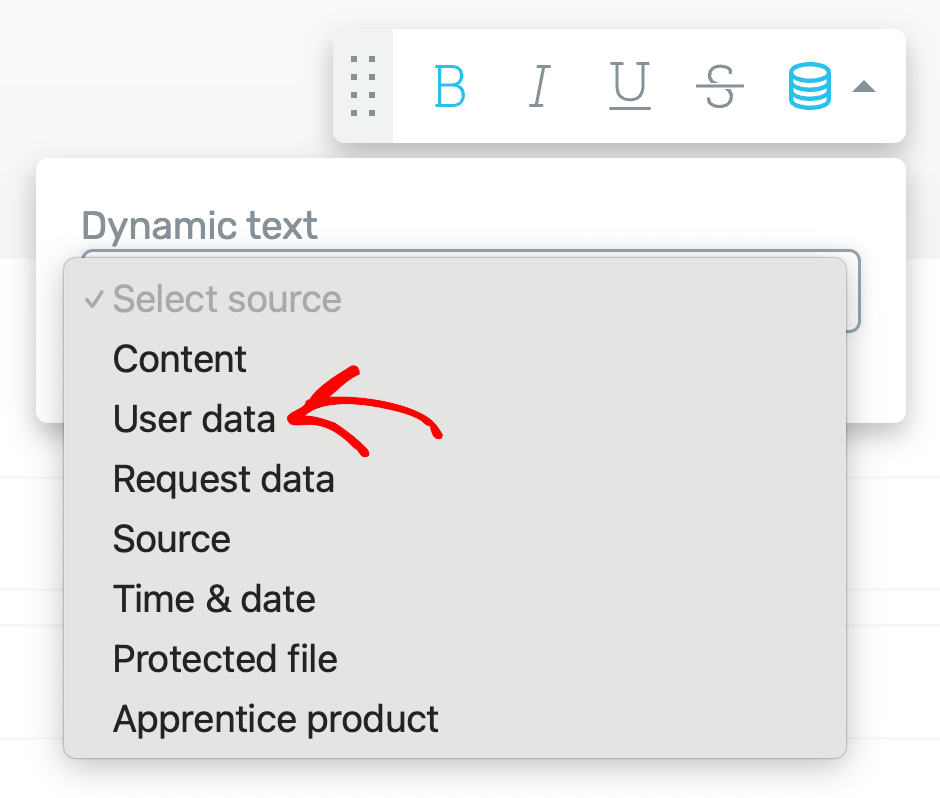
In this floating panel, click the drum icon to open Dynamic text settings.
In the dynamic text options, click the dropdown to select the dynamic text source.

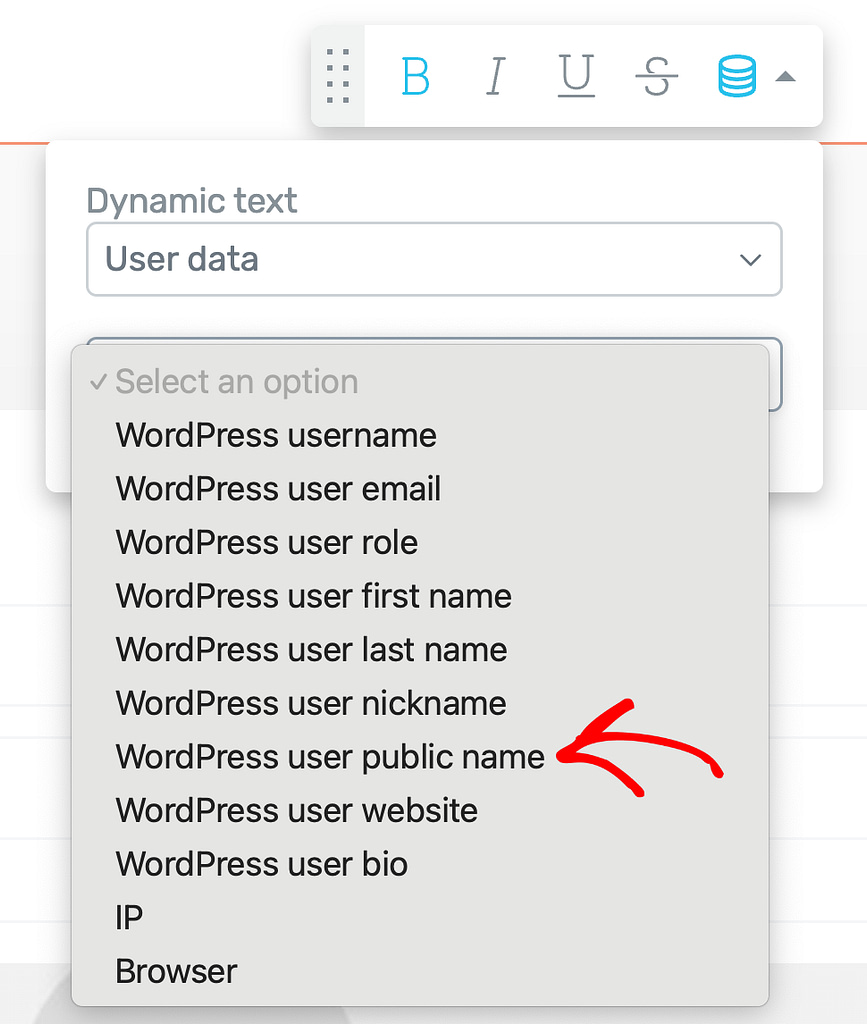
In the dropdown, select the Dynamic source as User data.
Selecting the source as User data will open the second dropdown where you select WordPress user public name.
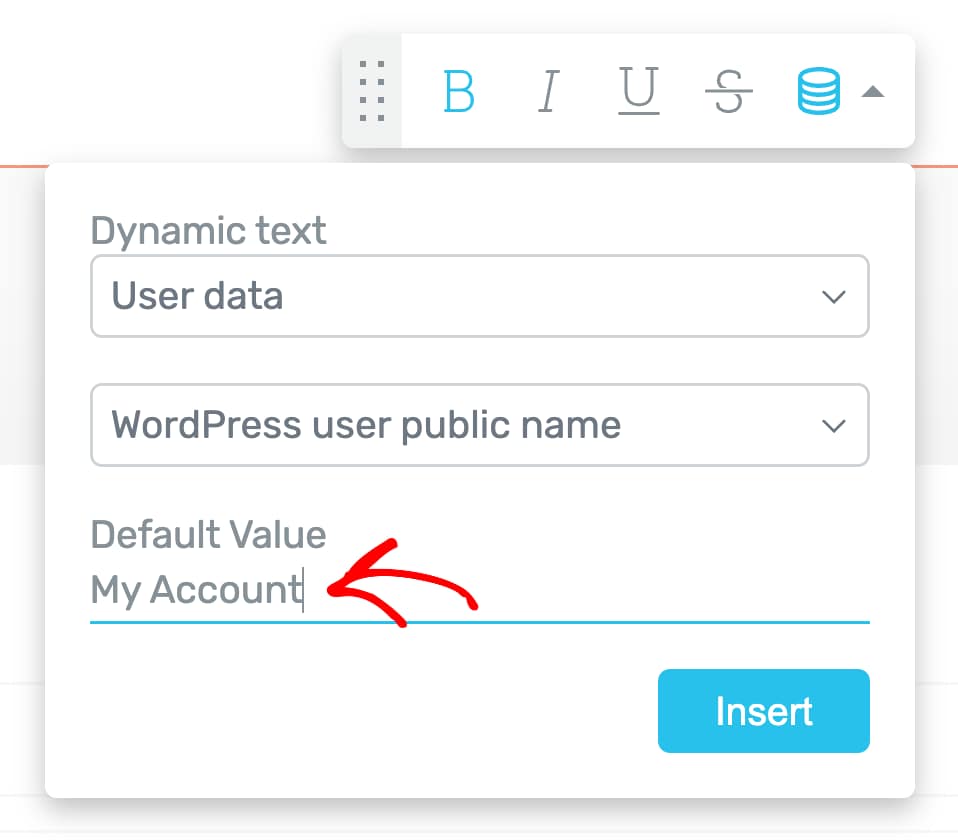
After you select to display the WordPress user public name as the menu item text, you’ll see another field named Default value.
The Default value field lets you enter a text that will be displayed if a user’s public name is not found. In this field, enter a valid value.
When you finish setting up these fields, click the Insert button.
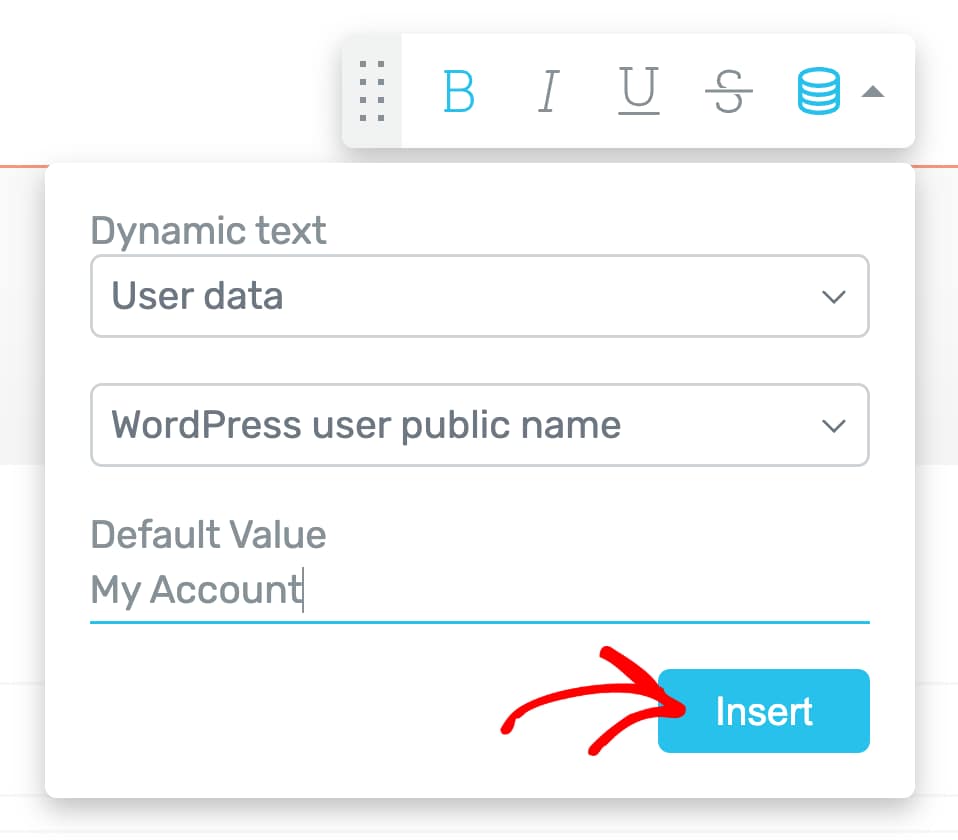
Since this is also a dynamic value, the user’s public name will be displayed in the menu.

We’ve just seen how you can personalize a menu to display a Login and Logout link in the menu based on whether a user is logged in or not, letting users access their profile and courses from the menu, and display a user image and public name in the menu.
Next, do you want to display a call-to-action to users who haven’t logged into your website? Here’s our document that will help you set things up.