Do you want to protect certain content on your website and offer exclusive access only to registered users? Creating pages or posts that are available to logged-in users only allows you to control who can view your content and provide a personalized experience for your audience.
In this article, we’ll show you how you can protect a page or post on your website using Thrive Apprentice.
Thrive Apprentice allows you to create products to contain courses, pages, posts and other forms of content that you want to sell or protect from non-logged in users. So, we recommend using Thrive Apprentice to protect a page or post.
- Creating a Product and Page or Post in Thrive Apprentice
- Setting the Access Requirements for the Product
Creating a Product in Thrive Apprentice
To create a product in Thrive Apprentice, first open your WordPress admin area, navigate to Thrive Dashboard >> Thrive Apprentice, and click on Products in the left panel.

On the Products page, click the Add new button to add a new product.

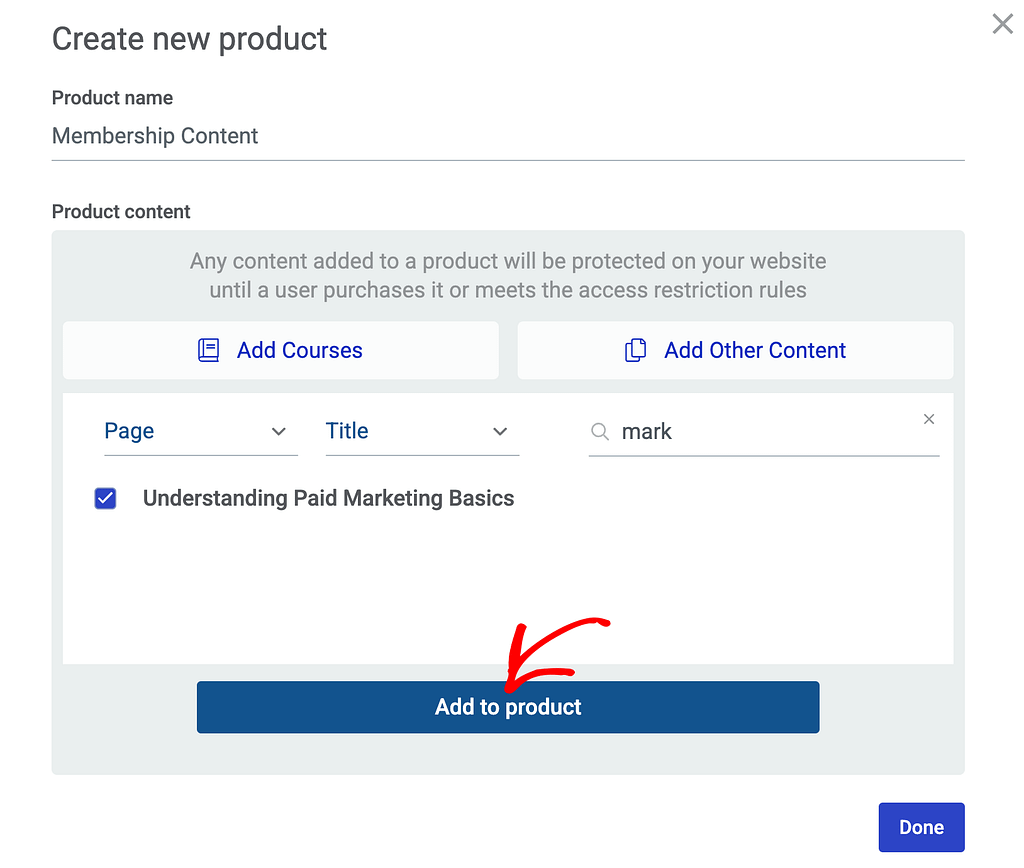
When you click the button to add a new product, you’ll see a popup where you enter the product name and click on Add Other Content.

After clicking to add other content, click on Choose content type to select what content you want to add to the product.

When you click to choose the content type, click on the page or post (what you want to add under the product). In this example, we’ll select a Page.

Once you select the content type, in the next field select the field or the taxonomy that you want to use to proceed. Here, we select the Page Title.

When you select the field, you’ll see a search field where you can start typing the page title and see it listed below. In the list, select the page you want to add to the product and click Add to product.

After you’ve added the page to the product, click the Done button.

Clicking Done will take you to the new product page and you’ll see the page added in there.

Setting the Access Requirements for the Product
Once you finish creating a product and adding a page to it, the next step is to manage the access requirements for the product.
To do so, first, open the individual product page.

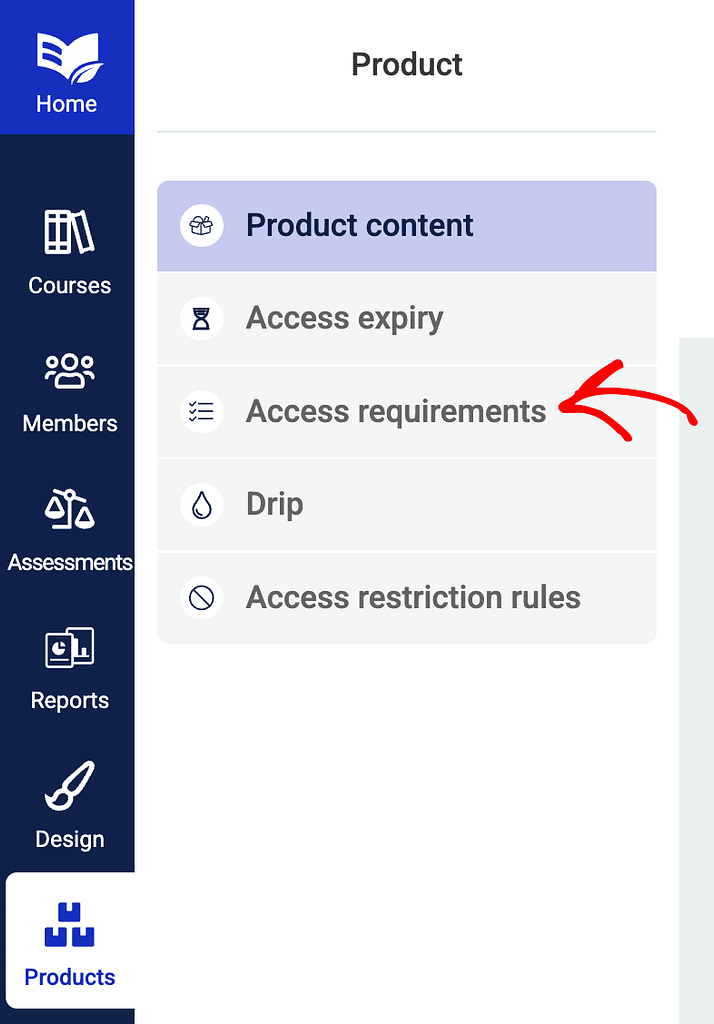
On the individual product page, in the left column, click on Access requirements.

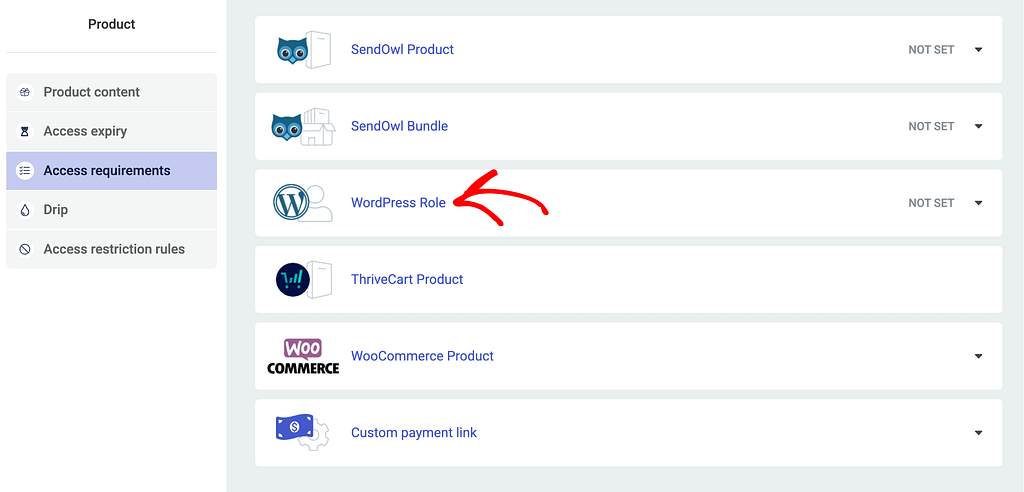
On the access requirements page, click on WordPress Role.

Under WordPress Role, select the user role or user roles you want the page to be accessible to.

After you select the user role, click on the Save button.

Once done, all the content within the product will be accessible to only those users who have the selected user roles. This means that users will have to be logged in so their user role can be identified and they can access this page.
Next, do you want to use the Login and Access Restriction Settings in Thrive Apprentice? Here’s a document that will help.