Would you like your email service to tag people automatically based on how they did on your quiz?
In this guide, we’ll walk you through adding the Apply email tag action to a quiz trigger in Thrive Quiz Builder. All you need is a quiz on the Quiz Triggers dashboard and a connected email service that supports tags.
- Picking the Apply Email Tag Action
- Choosing the Email Service and List
- Adding the Tags
- Saving the Action
- When the Tag Is Applied
- Frequently Asked Questions
The action is added to a score range or an outcome. If your quiz has neither yet, see our guides on score ranges and quiz outcomes.
Before you get started, make sure Thrive Quiz Builder is installed and activated on your WordPress site.
Requirements: Quiz Triggers need Thrive Quiz Builder 11.4 or newer. You also need an email service that supports tags connected under Thrive Dashboard » API Connections.
Picking the Apply Email Tag Action
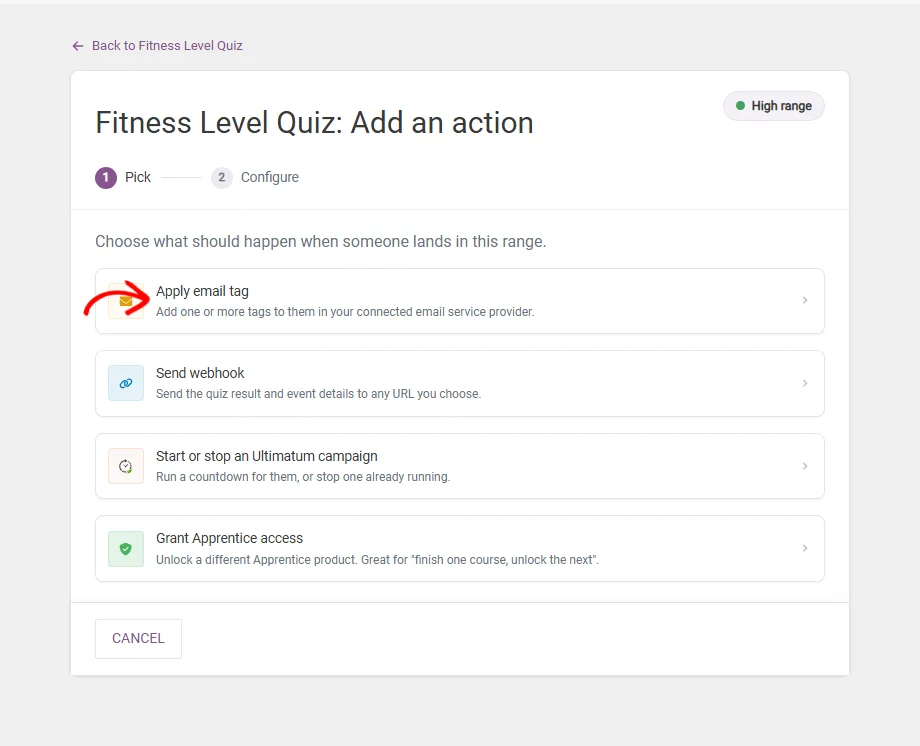
To get started, we’ll open the action picker for the range or outcome you want to tag. On the quiz’s setup screen, click Add action on that range or outcome card.

The Add an action page opens. The label next to the title shows which range or outcome you’re adding to. Next, click Apply email tag.
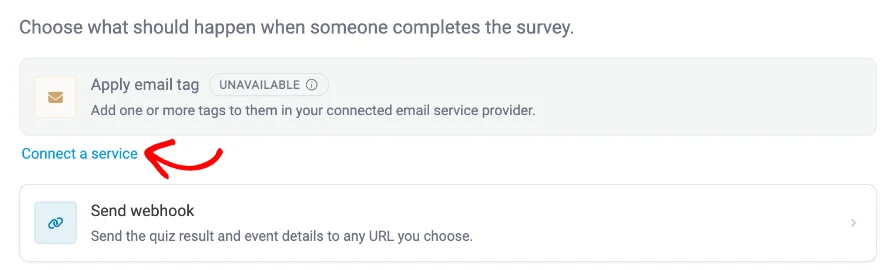
If the action shows Unavailable, no email service that supports tags is connected yet. To connect one, click Connect a service on that row. It opens Thrive Dashboard » API Connections.
For the services you can connect, see the list of supported API connections.
Choosing the Email Service and List
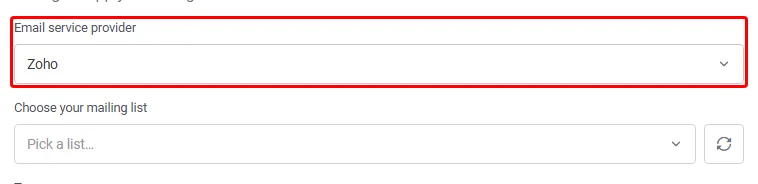
The configure step opens with the action’s settings. First, choose your connected service in the Email service provider dropdown.
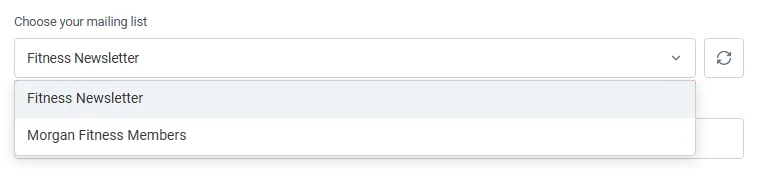
Next, pick a list in the Choose your mailing list dropdown. A list is required, because your email service applies the tag to the contact in that list.
If you just created the list in your email service and don’t see it, click the refresh button next to the dropdown. A “Mailing lists refreshed” message appears.
The lists always come straight from your email service. If the service can’t be reached, a message below the dropdown reads “Couldn’t load the lists from” your service. It asks you to check its connection in API Connections and shows the service’s own error.
Adding the Tags
Tags let your email service start the right follow-up, such as a sequence for high scorers. In the Tags field, type a tag and press Enter or a comma. Repeat this for each tag you need.
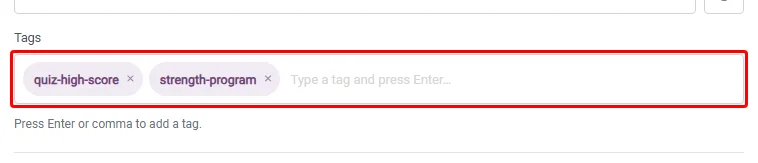
Each tag appears as a chip in the field. To remove one, click the x on its chip. If a tag doesn’t exist in your email service yet, the service decides whether to create it.
Below the tags, Advanced settings lets you delay the action or run it only when a condition matches. That is covered in the delay and condition guide.
Saving the Action
The Add action button stays greyed out until the provider, list, and at least one tag are set. Hovering over it shows what’s still missing. When everything is filled in, click Add action.
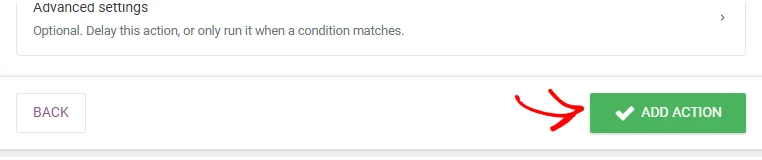
An “Action saved” message appears, and you’re back on the quiz’s setup screen. The action shows on the card with its provider and tags.
The action isn’t live yet. At the bottom of the screen, click Save triggers.
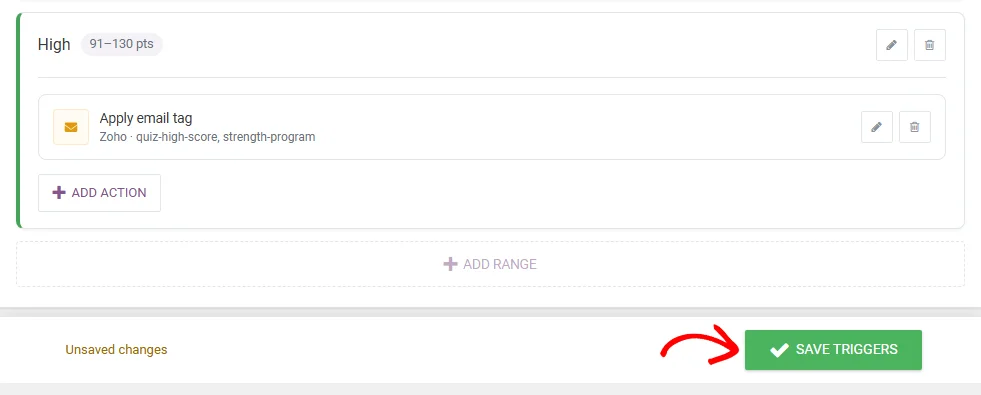
To change the action later, click its pencil icon. To remove it, click its trash icon and confirm. You can undo a removal for 5 seconds.
When the Tag Is Applied
When someone completes the quiz and lands in this range or outcome, the tags are applied to their email address. For a logged-in visitor, that is the email they typed in the quiz’s opt-in form, or their account email if they typed none. For a guest, it’s the email they typed.
The action needs an email address. If the person didn’t give one, the action doesn’t run, and the execution log records it as Failed.
The action also follows the profiling setting on the quiz’s opt-in gate page. With profiling turned off for that page, the email address typed on that page isn’t passed to the action, so no tag is applied, unless the visitor is logged in. Then the tag goes to their account email. For more on that setting, see GDPR compliance and user profiling in quizzes.
An email tag action without a delay runs right after the person sees their results. They don’t wait for your email service. On most hosts, the log briefly shows the action as Scheduled before it changes to Fired.
That’s it! You now know how to tag people in your email service when they complete a quiz. Next, learn how to add a delay and a condition to the action.
Frequently Asked Questions
Below, we’ve answered some of the most common questions about the Apply email tag action.
Can I add an email tag and a webhook to the same range?
No. Apply email tag and Send webhook can’t run together for the same range or outcome. The picker marks the second one as Conflicts. To swap, remove the other action first.
How is this different from mapping the quiz result to a custom field?
Mapping sends the result into a custom field when the person submits the opt-in form. The email tag action applies tags after the quiz is completed, based on the range or outcome. For mapping, see connecting quiz data to your email marketing service.
Why did my email tag action fail?
To see the reason, open the quiz’s execution log and expand the Failed row. Common reasons are a missing email address or a disconnected email service.
If the service was disconnected, reconnect it under Thrive Dashboard » API Connections. Failed runs aren’t retried automatically.