The main reason behind changing some aspects of the user interface of the Thrive editor was to make our products even more user-friendly and easy-to-use.
In order to achieve this, there are some major and a few minor changes that have been applied to the user interface of the editor.
Sidebar sweep
One of the biggest and most obvious changes that were applied to the interface is related to the sidebars. Until now, when you started editing a page with Thrive Architect, the elements were in the left sidebar and you had to drag & drop them to the page from there.
Now, to make things easier and more compact, after launching Thrive Architect, you will see that the left sidebar is empty until you add elements to your page:
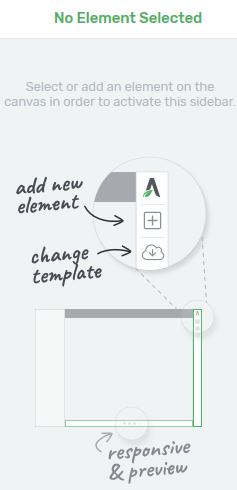
In the new user interface of the Thrive Editor, you can use the right sidebar for adding elements and managing various options related to your page, while the left sidebar is reserved for customizing the elements you add to your page.
Adding Elements
In the right sidebar of the page you can see a plus sign:
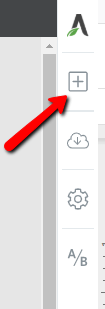
Click on the plus sign to open the list of elements and select the element you would like to add to your page.
You can also use the “Search bar” on the top of the list to search for a specific element that you wish to use.
All you need to do is click on the “Search bar” and type in the name of the element. The first result should be the element that you are looking for:

There are two ways in which you can add an element to your page:
- Click: you can click on the element directly. This way the element will be added as the next content on your page. If you have other elements on the page, then, it will be added directly under them. In case you have an empty page, then, the element you click on will be added as the first one.
- Drag & drop: you can also select the element and drag and drop it to a specific location on your page. For instance, you can drop the element above or next to another element.
Change Template
Changing your landing page template can easily be done. First, click on the second option from the right sidebar:
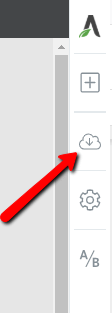
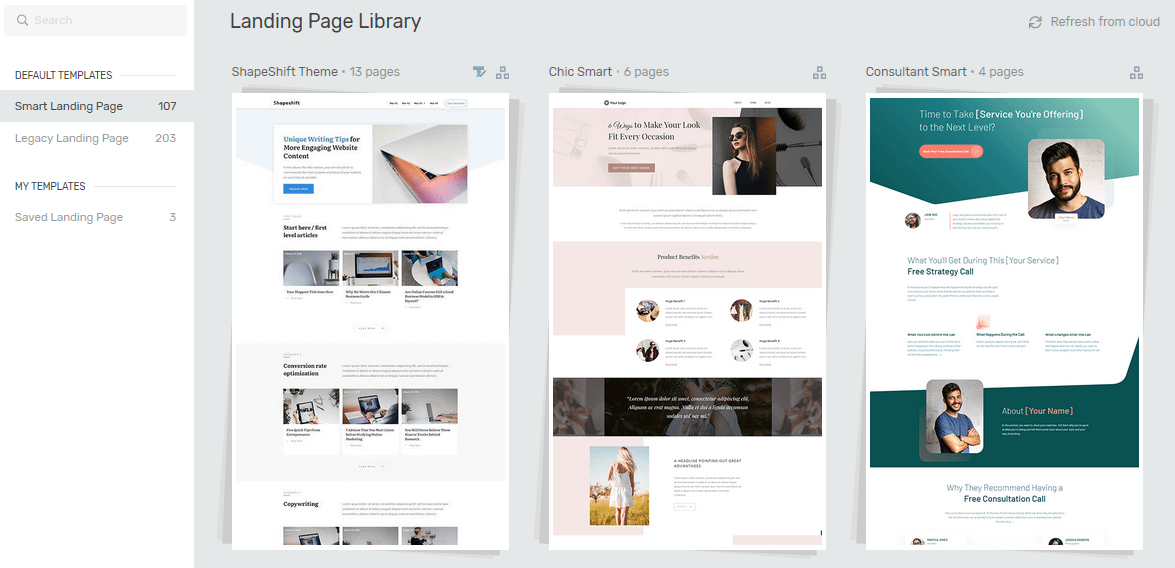
This will open the pop-up window with the various landing page template sets that you can choose from. Then, select the new template that you want to use and click on “Choose Template” to apply it to your page. It is as simple as that!
Settings
The general “Settings” and the “Template Setup” options are now in one place to make them easier to follow and use.
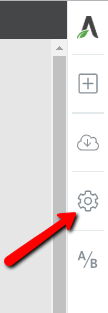
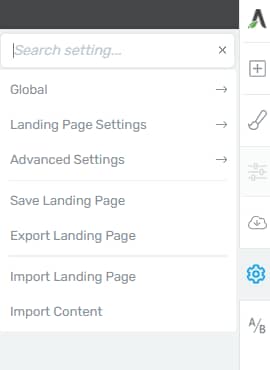
Click on the gear icon from the right sidebar (first image) to open the “Settings” menu (second image):
Tip: With the help of the search icon from the top right corner of the menu you can open the search bar and look for something in “Settings”.
You can see that the first three options can be opened separately since they are more complex:
Global Settings:
You can manage the fonts, the headers, and the footers using the “Global settings” option. If you click on “Global”, you will be able to access these options:
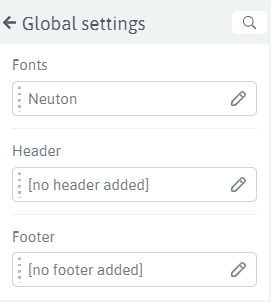
With the help of the “Fonts” section, you can customize the texts that will appear on your website. After you click on this section, a pop-up window will be opened and you can use the various customization options to personalize the different text types on your website.
The “Header” and the “Footer” sections allow you to add new headers and footers to your page or insert previously created ones. You just have to click on the respective sections and follow the steps given.
You can find more information on how to further edit your headers and footers here.
Landing Page Settings:
If you click on the “Landing Page Settings” option from the “Setting” menu:
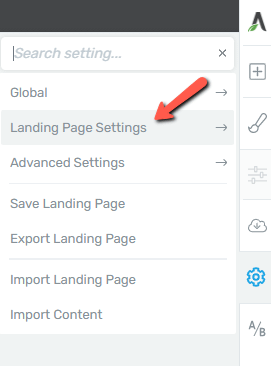
Then, the options will open in two places. Left sidebar: The “Landing Page” settings will open in the left sidebar:
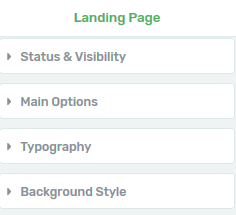
You can choose how you want to further customize your page with the aid of the four main sections: “Status & Visbility”, “Main Options“, “Typography” and “Background Style”.
If you want to find out more about how to customize your Landing Page settings, you can read this article.
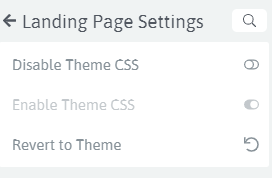
Right sidebar: The “Landing Page Settings” from the right sidebar will let you disable or enable the theme’s CSS, as well as Revert the page to the Theme:
Important!
If you choose to revert the landing page to the theme page, you will lose the custom content that you have added to it.
Advanced Settings:
This section was created to have the various CSS and HTML options of your website in one place, along with a few other options. If you click on “Advanced Settings” you will access the following options:
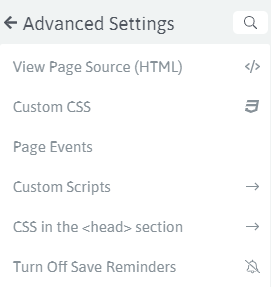
- View Page Source (HTML)Here you can find the page source, meaning the HTML code of your page. This code can be managed directly in the editor that opens when you click on the option.
- Custom CSS
Similar to the previous option, the Custom CSS will also open a window/an editor. Here you can add a custom CSS code to your page.
- Page Events
This option allows you to set up page events in order to make sure your offers/promotions will reach your visitors. Watch this tutorial, if you want to learn more about page events.
- Custom Scripts
Here you can add custom scripts either to the header, the body, or the footer section of your page. The scripts that you insert here will appear in the corresponding sections of your page. You can learn more about this feature in this article.
- CSS in the <head> section
You can disable the “Strip CSS from <head>” option from here by ticking the checkbox that appears after you click on this section. However, please keep in mind that doing this might prevent some landing page settings from working properly.
- Turn Off Save Reminders
While editing your page with Thrive Architect, you will receive periodical reminders to save your work. These reminders disappear after a few seconds, however, if you wish you can turn them off by clicking on “Turn Off Save Reminders”.
Furthermore, with the last three “Setting” options you can save, export, or import a landing page directly from the “Settings” menu.
All you have to do is click on one of these options and follow the steps given:
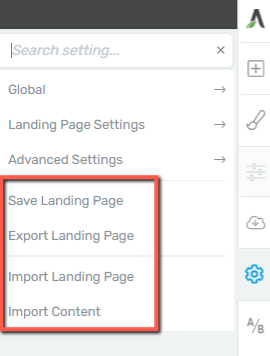
Save Landing Page
You have the possibility to save the page that you created as a “template”. This way, you will be able to use it again for any other page on your site. Click on the “Save Landing Page” option and then, follow the steps given. If you wish to find out more about this process, please click here.
Export Landing Page
This option lets you easily export a landing page. Click on the “Export Landing Page” option to open it. Then, you will have to complete the steps of the exporting process.
Import Landing Page
You can also import landing pages by clicking on the last option from the menu, the “Import Landing Page” option.
Important!
Keep in mind that importing another landing page will overwrite the content of your current page.
In case you need detailed information about the exporting and importing of landing pages in Thrive Architect, please check out this article.
Import Content
With this option you are able to import content saved from another page (might be even a page build with Thrive Theme Builder).
Check out this article if you want to read more about this option.
Start A/B Test
The last option that can be found in the right sidebar is the option of starting an “A/B Test”. This will only be available if you have activated the Thrive Optimize plugin:
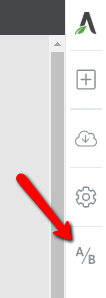
You can use it to start testing your current page against another one of your pages and see which one performs better. Find more info on this by reading this article.
Responsive View
Another change applied to the user interface of the Thrive editor has to do with the “Responsive View” option. Until now, you had to go through more steps to edit your site in mobile view.
The new interface makes this editing a lot easier. You can now access the “Responsive View” option directly from your page. There are three icons on the bottom part of the page, in the center.
If you simply click on the tablet or the mobile phone icon, you will see how your page currently looks like on the respective devices and you will be able to edit it in this view, to make it mobile-friendly:

After you are done, you can click on the monitor icon to turn back to editing the page in normal view.
Preview
The location of the “Preview” option has also changed. Now, you can preview your page directly from the bottom center part of the editor.
All you have to do, to preview any modification/customization that you made, is to click on the eye icon next to the “Responsive View” icons. This will open the page in preview mode, in a new tab, showing how your website will look like for your website’s visitors:

Undo, Redo and Revision Manager
These options are now easier to access. They are located in the bottom left corner of the editor, just as before, but you don’t have to open “More Options” to see them.
You can use either one of the above mentioned three options, directly from here. You just have to click on the respective icons: clock (Revision Manager), back arrow (Undo), or the redo arrow (Redo):

Save and Exit
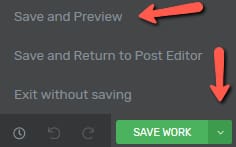
The saving process has remained the same. You can click on the bottom left “Save Work” button to save your page.
However, if you click on the arrow next to the “Save Work” button, you will notice several other available options from which you can choose: “Save and Preview”, “Save and Return to Post Editor” and “Exit without saving”.
Just as their name says, you can click on one of these options and decide how you want to exit the page:
Panel Options – Text Elements
Whenever you add a text element to your page, besides the “Sidebar Options”, you also have a few “Panel Options” that you can use to customize your texts, headings, etc.
The new user interface of the editor lets you drag the panel from the upper center part of the editor and place it wherever it is more suitable for you in the editor:

Simply click on the dotted left side of the panel and then, drag and drop it to the desired position. After you have done this, the panel will remain in the place that you have dragged it to.
This means that whenever you add a new text element or want to access the options to edit the already existing ones, the panel will appear again, where you have previously placed it.
You can change the position of the panel anytime, with the drag & drop technique.
All of these changes/updates will make the process of building websites with Thrive Architect a lot easier and more time-saving.
Important!
If you have created your website using regular WordPress pages and not landing pages, then, not every above-mentioned option is available in the user interface of the Thrive editor.
This happens because when you use regular pages, some of the customization options (like the Font Settings for instance) will be handled from the theme that you use.
If you need details about how the various elements in Thrive Architect work, check out our tutorials.
Hopefully, this article was useful for you. If so, please reward our efforts with a smile below 🙂