When setting up your Thrive Theme Builder templates, you can easily add a newsletter opt-in in the sidebar. Keep reading this article if you want to find out how.
We have a more comprehensive general article that explains how to add an opt-in form into a Thrive Theme Builder theme, which you can follow for more detailed explanations.
This article will show you the steps that you need to take in the specific situation of adding a newsletter opt-in into a sidebar.
1. Create a Widget Type of Opt-in Form
You should keep in mind that, if you want to add an opt-in form in the sidebar of a template, this should be a “Widget” type of opt-in form:
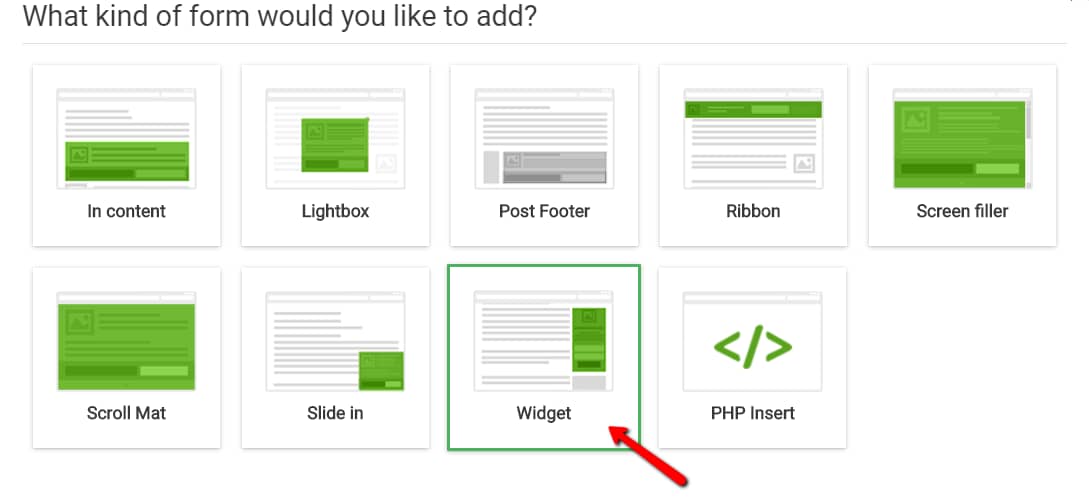
If you need a guide with all the steps to be taken in order to add a new “Widget” type of opt-in form, please check out this section of the general article.
As an example, I have created a new “Widget” type of opt-in form in a new Lead Group, and I have chosen a suitable template for it.
2. Set the Display Settings of the Lead Group
An important step, after creating a new lead group and/or a new form inside it, is to make sure that the Display Settings are well set. This is because, if you skip this step, the opt-in form might not show on your template.
Again, you can find detailed instructions here. What’s important to do here is:
-
set the display logic to choose where the form should appear;
-
enable the “Display on Desktop”/“Display on mobile” settings, whichever is needed;
-
place the Lead Group above any other Lead Group that contains another “Widget” type of form, so that it has the highest priority.

3. Add the Thrive Leads Group to a Widget Area
Moving on, the Lead Group that you’ve placed the newsletter form into has to be added to a Widget Area.
The steps in which you can do that are described here. The main idea is that you have to access the Widgets section of your WordPress admin dashboard (Appearance -> Widgets):
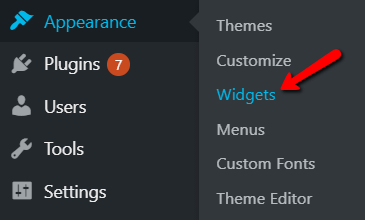
Then, in the “Widgets” page, look for the “Thrive Leads Widgets” one, and add it to the Widget Area of choice:
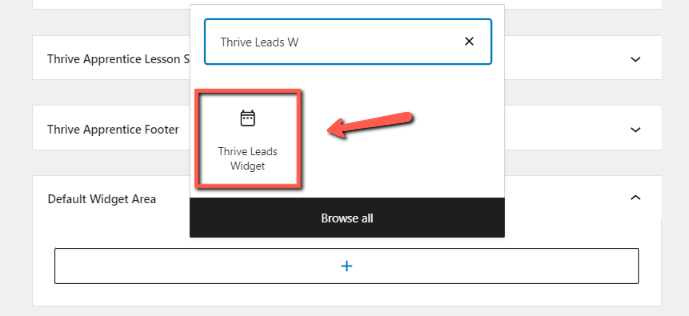
After this, go to the respective Widget Area, choose the Lead Group in which the newsletter opt-in form has been inserted:
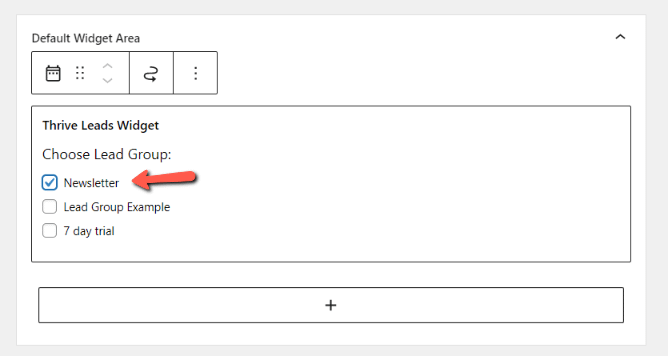
Go ahead and click on the “Update” button from the top right side of the page:

After this, you can go to the Thrive Theme Builder template to which you want to add the opt-in to and open it using Thrive Theme Builder.
4. Add a Widget Area Element to the Template
Again, you can find the detailed steps here. It is important that, in order to add an opt-in to a template, you have to use the “Widget Area” element.
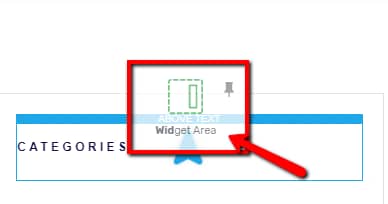
Once you open the template in the Thrive Theme Builder editor, click on the plus sign from the right sidebar and look for the “Widget Area” element. Then, drag and drop it in the sidebar of the template:
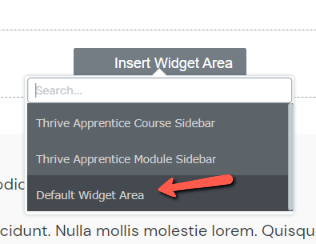
A small drop-down will appear. This is where you have to choose the Widget Area where you have previously added your form into. In this case, I have to choose “TTB Widget Area”:
The opt-in will then be added, but you will not be able to see it unless you preview the template. First of all, save the changes using the green “Save Work” option:

After that, preview the page by clicking on the “Preview” option from the bottom side of the editor:

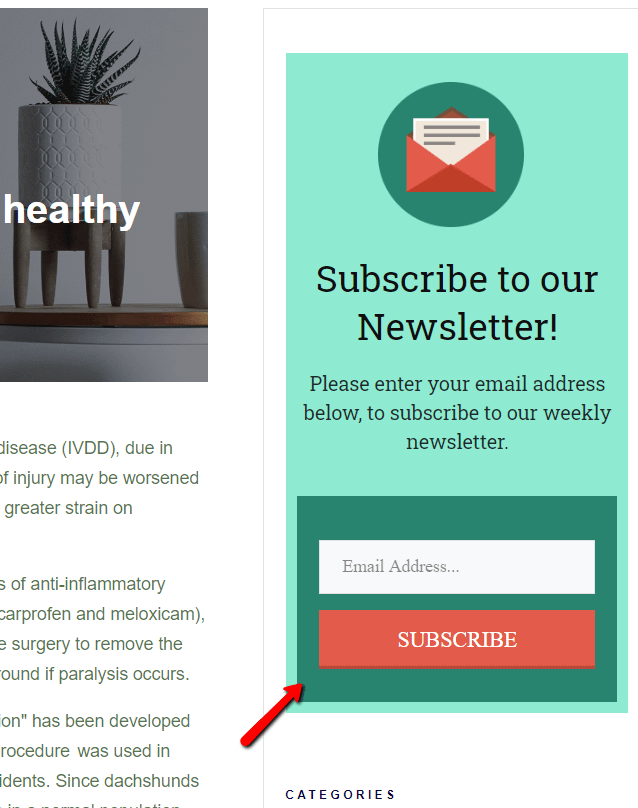
In the preview, you will be able to see the newsletter opt-in:
These were the steps in which you can add a newsletter opt-in in the sidebar of a Thrive Theme Builder template.
If you need more information about various Thrive Theme Builder features, make sure to check out our tutorials.
I hope this article was helpful. If so, please rate it with a smile below 🙂