It may happen that you encounter the ‘Custom Fields Unavailable’ error while trying to add custom fields to a “Lead Generation” element you are setting up on one of your pages/posts. There are a few basic troubleshooting steps you can take, in order to try to solve this error.
- Add an API connection
- Make sure the autoresponder is supported
- Refresh the connection
- Try deleting and reconnecting the API
- Make sure you set up a Text field for field mapping in your autoresponder
- Clear website and browser cache
1. Add an API connection
Having an API connection set up for the “Lead Generation” element is essential for this process. This is the way you connect the element to your autoresponder/email marketing service.
If there is no autoresponder connected to your “Lead Generation” element yet, then the custom fields will be unavailable, when you try to add new fields to the element. This is why you need to make sure that you add an API connection, with a suitable autoresponder, to your element, before being able to add the custom field.
If you have not added an API connection yet, then click on the “Lead Generation” element to select it. Then, use the “Add Connection” button of its “Send Leads to” option, which appears in the left sidebar:

If you need detailed information on how to add the API connection, take a look at this tutorial.
2. Make sure the autoresponder is supported
Having an API connection set up for the element is not enough. You need to make sure that the autoresponder you connect the element with, through this API connection, is one of the autoresponders that Thrive Themes has a custom field integration with.
These are the autoresponder services we currently support/have a custom field integration with:
- MailChimp
- Active Campaign
- Get Response
- AWeber
- Infusionsoft
- ConvertKit
- MailerLite
- Campaign Monitor
- Brevo, formerly known as SendinBlue
Check to see if the autoresponder you connected to the “Lead generation” element is one of these ones. If it is not, then, unfortunately, the custom fields will be unavailable, so you will not be able to add custom fields to your “Lead Generation” element with that autoresponder.
If this is the case, try to connect the “Lead Generation” element with a different autoresponder, for which the custom field integration is available.
3. Refresh the connection
If you have connected a supported autoresponder and the custom fields are still unavailable, you should try refreshing the API connection. You can do this by clicking on the “Edit” option (pencil icon) next to the connection:
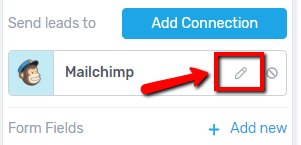
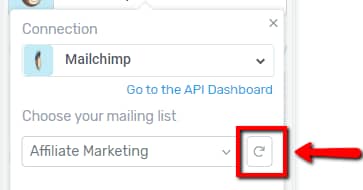
Then clicking on the “Refresh” button, that appears in the Mailing List section of the drop-down that opens:
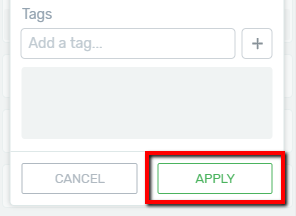
After the connection is refreshed, complete the necessary info in the drop-down and click on the “Apply” button, once you are done:
Then try to add the custom field to the “Lead Generation” element again. If this refresh solved the error, the custom fields will be available now and you can add them to your element.
4. Try deleting and reconnecting the API
a.) If the refresh did not solve the issue, you can also try to delete the API connection with the respective autoresponder from the “Lead Generation” element, and then reconnect it again.
To do this, click on the “Delete” option next to the API connection:
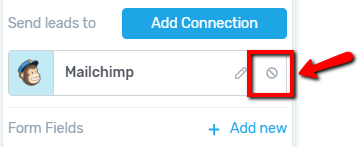
Then, add the API connection with the supported autoresponder again, using the “Add Connection” button, as described above.
Once you have reconnected the “Lead Generation” element with the autoresponder, try adding the custom fields again, to see if the error was solved or not.
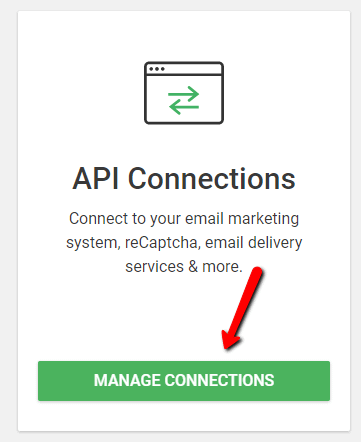
b.) Moreover, if this did not work, you can also try deleting the actual API connection to the autoresponder from the Thrive Dashboard. For this, go to the “API Connections” card of the Thrive dashboard and click on the “Manage Connections” button from it:
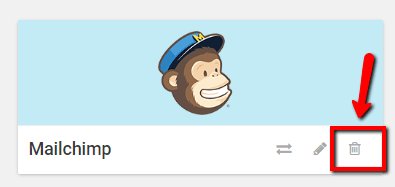
Then, look for the connection you are using and delete it with the “Remove” option (little trash icon):
Next, go to your autoresponder to generate a new key. Then come back to managing the “API Connections” in your Thrive Dashboard and connect the autoresponder again, using the new key.
After you do this, go back to editing the page/post with the “Lead Generation” element and try adding the custom fields again, to see if the error was solved.
5. Make sure you have set up a Text field for field mapping in your autoresponder
It may happen that the cause of the “Custom Fields Unavailable” error is not the autoresponder, but the field you have created (or did not create) in it, for field mapping purposes.
In order for the custom fields to work properly, before starting to set them up in your “Lead Generation” element, you had to create a new Text field in your autoresponder, so that you will have a dedicated field to connect your custom field to (where to transfer the data from the custom field).
If you did not create a new field in your autoresponder with this purpose yet, create one now, following the steps from here.
Also, it is important that the field you create here is a “Text” type of field because this field type is the one that the custom field integration supports/can map. Thus, you should make sure that the new field you create is a “Text” field.
In case you have previously added a field with a different type for field mapping, change the type of the field, or delete it, and add a new one that is a “Text” field.
Once you do that, go back to the “Lead Generation” element and try to add the custom field to it again.
If the error is solved, you will be able to add the custom field and choose the “Text” field you have created in your autoresponder for field mapping.
6. Clear website and browser cache
If none of the previous steps worked, you can try to clear the cache to see if that is the cause of the error.
To do this, clear/purge the cache of the caching plugins (if you have caching plugins) on your website, as well as clear the cache of the browser you are using. You can find detailed information on how to do that here.
If the error still persists, after you have tried all of the above troubleshooting steps, then, please contact our support team, by opening a support conversation. They will look into the matter and try to help you solve it as fast as possible.
Tip: For an even faster debugging process, it is also helpful, if you add FTP details to your ticket, as described here. This way, developers can get to the bottom of the problem more quickly.
Moreover, you can also add login details to your autoresponder, so the support team can have a look at the setup sooner, and figure out whether or not the issue comes from there.
Hopefully, this article was useful for you. If so, please reward it with a smile below 🙂