Do you want to strengthen your brand identity and make your website’s login experience more professional? The WordPress Login Screen Branding feature allows you to customize your login page with your own logo, colors, and style for a cohesive and branded appearance.
In this article, we’ll show you how you can enable and customize a WordPress Login Screen in Thrive Themes.
- Activating the WordPress Login Screen Branding
- Customizing the WordPress Login Screen
- Resetting or Changing the WordPress Login Screen Template
Activating the WordPress Login Screen Branding
To activate WordPress Login Screen Branding in Thrive Themes, first open your WordPress admin area, navigate to Thrive Dashboard >> Thrive Dashboard, scroll down to WordPress Login Screen Branding and click the Manage Login Screen button.
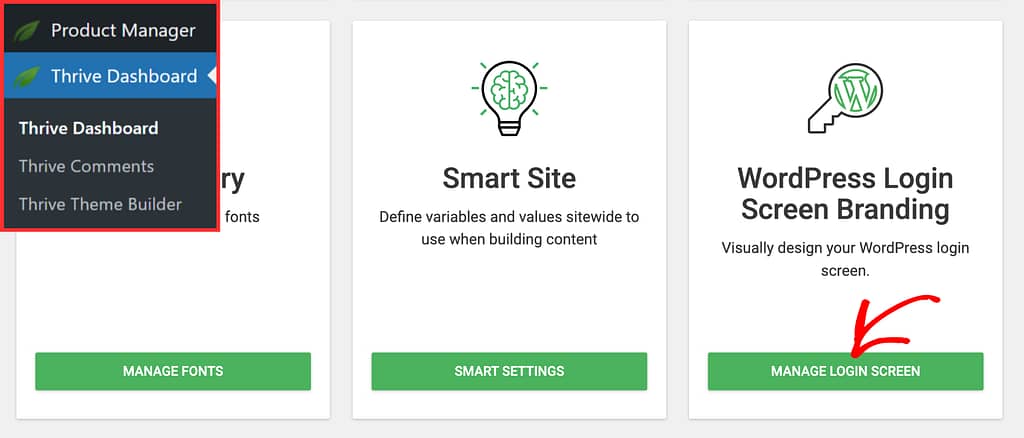
When you click on Manage Login Screen, you’ll be taken to a page where you’ll see the default WordPress login form and a block beside it where you can activate the login screen branding.
To activate the WordPress Login Screen Branding on your website, click the toggle button beside Active.

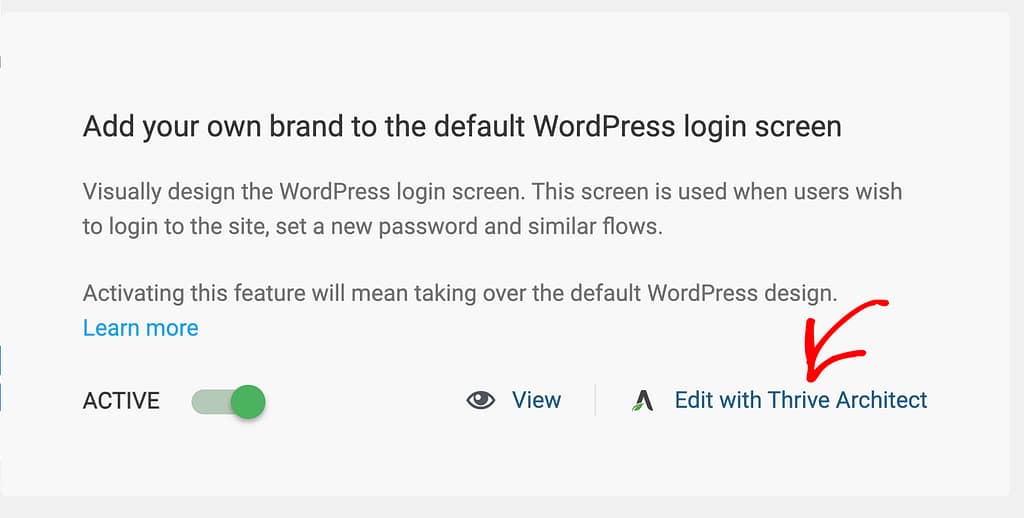
After you activate WordPress Login Screen Branding on your website, you’ll see two options on this page.
- View: That will open the current login page design.
- Edit with Thrive Architect: That will open the WordPress Login Page in the Thrive Architect editor.

Customizing the WordPress Login Screen
After activating the WordPress Login Screen Branding, click on Edit with Thrive Architect to open the page in the Thrive Architect editor so you can customize it.
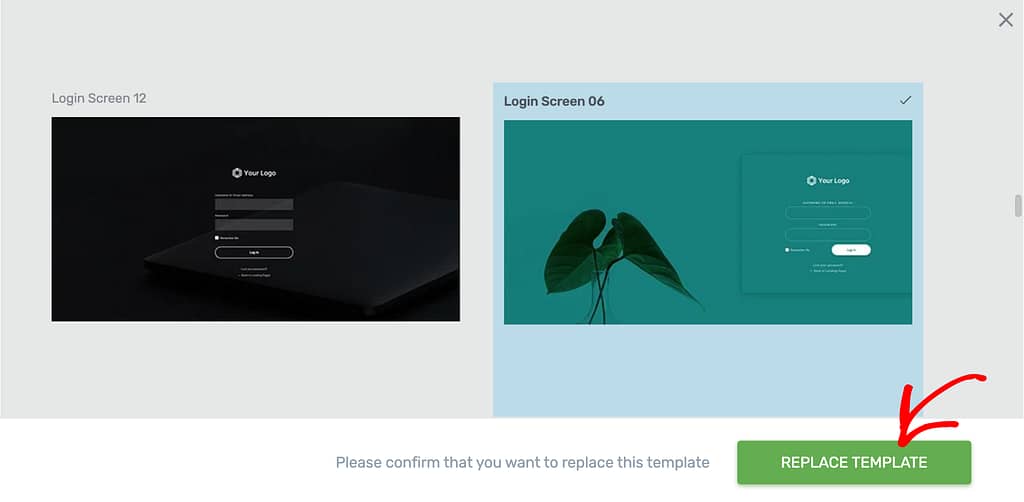
When you click to edit the Login page with Thrive Architect, you’ll see it open in the editor and a popup where you select the Login page template you want to use.
In this popup, select the login screen template and click the Replace Template button.
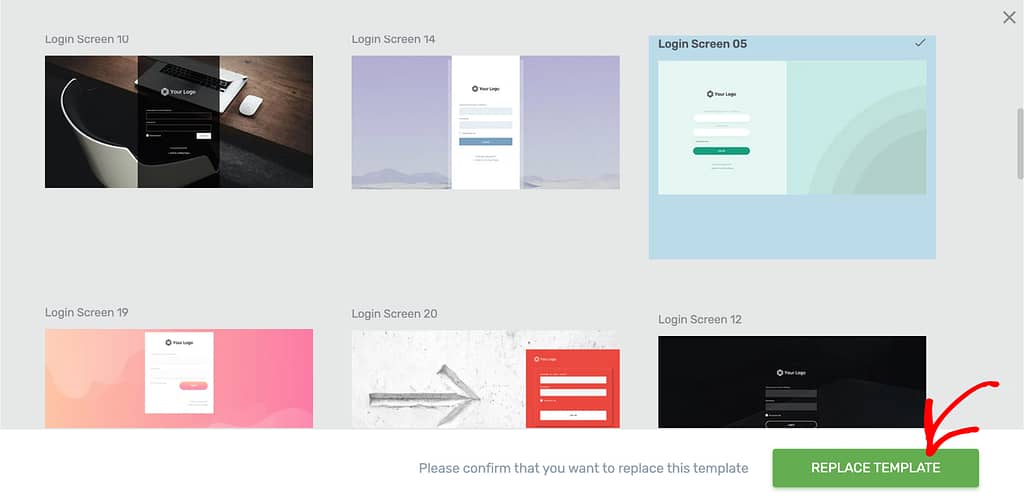
When you click to replace the template, you’ll see it added to the page in the editor.
In the Thrive Architect editor, you can manage the following.
- Customizing the WordPress Login Page
- Customizing the Login Form
- Customizing the Form Wrapper
- Customizing the Form Links
Customizing the WordPress Login Page
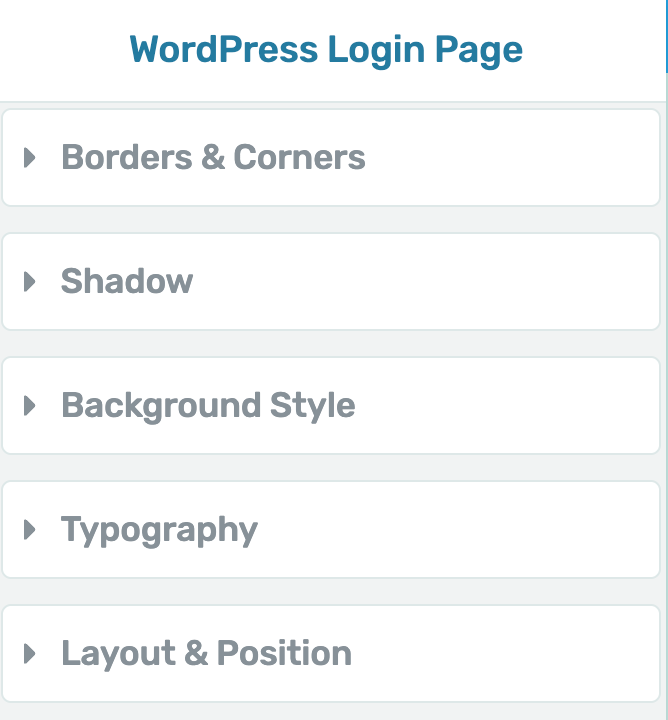
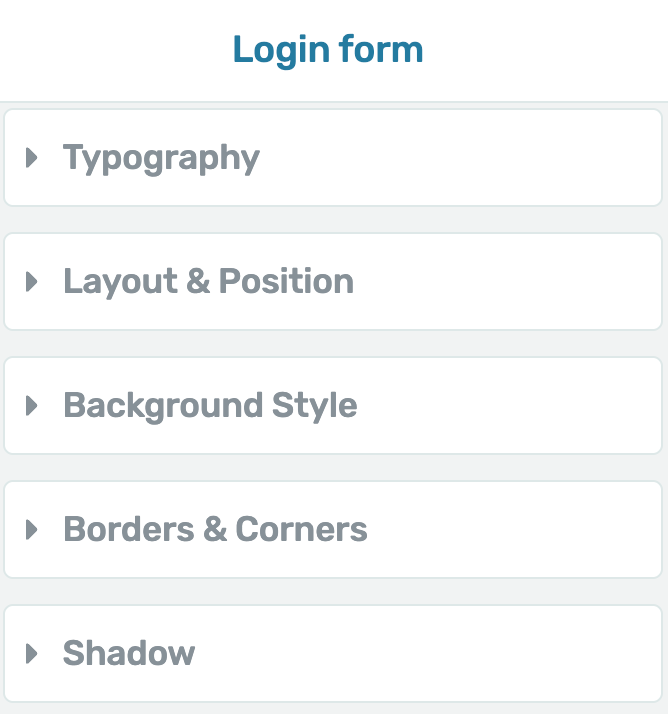
Once the template is added to the Login page, you’ll see it open in the Thrive Architect editor with its settings open in the left column.

In the left column, you’ll see different settings that you can use to customize the login page.
- Setting Borders and Corners
- Adding Shadows
- Managing Background Style
- Managing the Typography
- Managing the Layout and Position
Customizing the Login Form
To edit the login form, first open the WordPress login screen in the Thrive Architect editor.
In the Thrive Architect editor, click on the Login Form on the page and see its settings open in the left column.
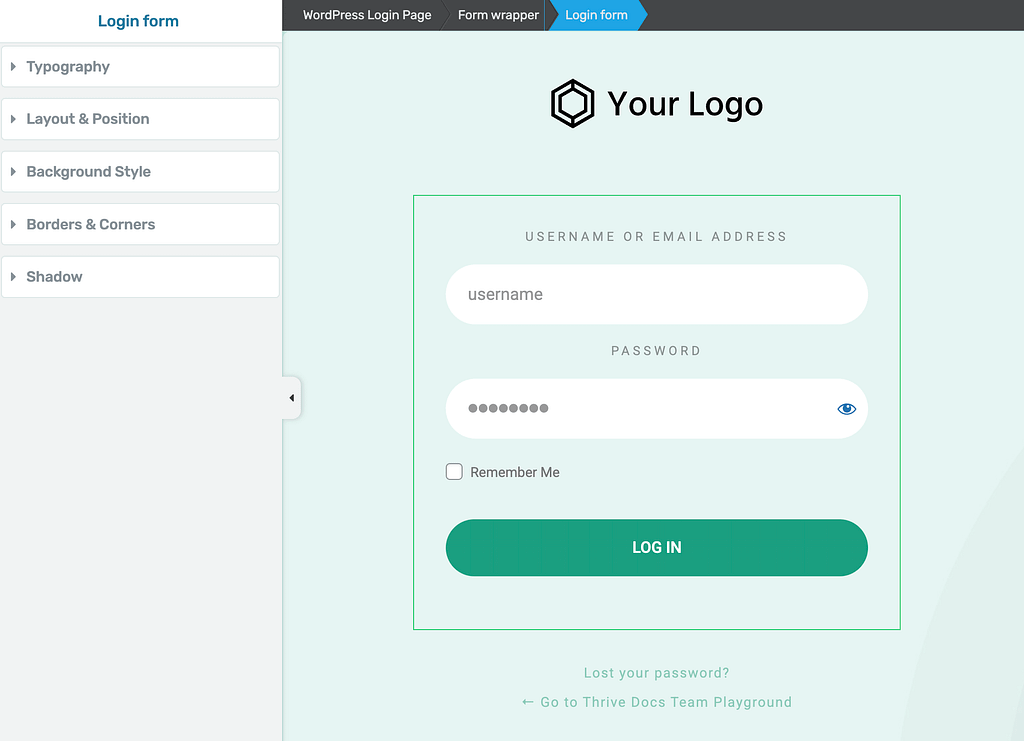
In the left column, you’ll see different settings that you can use to customize the login form.
- Setting Borders and Corners
- Adding Shadows
- Managing Background Style
- Managing the Typography
- Managing the Layout and Position
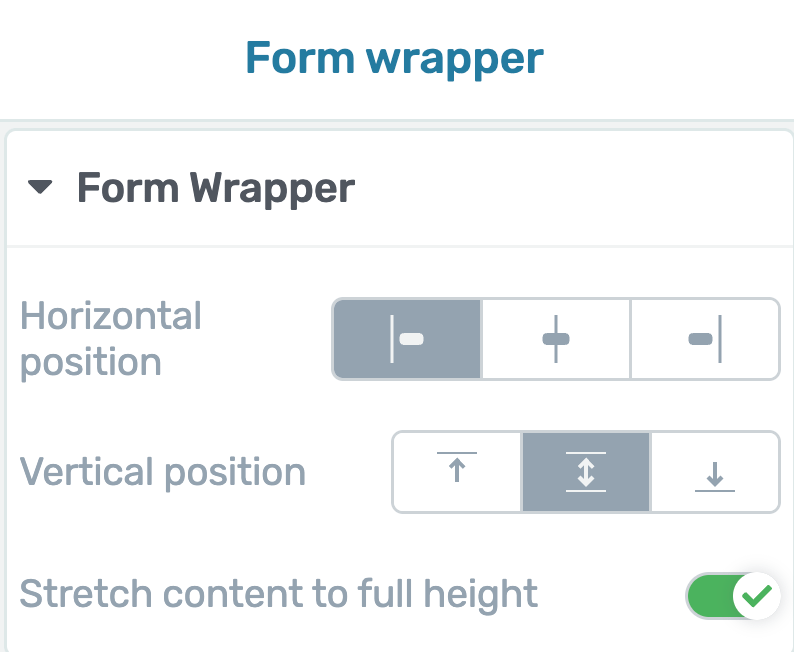
Customizing the Form Wrapper
Form wrapper is the space around the login form that you see on the page. To edit the form wrapper on a WordPress Login page, open it in the Thrive Architect editor, and click on the Form Wrapper to open its settings in the left column.

In the left column, you’ll see the settings that’ll help you customize the form wrapper.
- Setting Borders and Corners
- Adding Shadows
- Managing Background Style
- Managing the Layout and Position
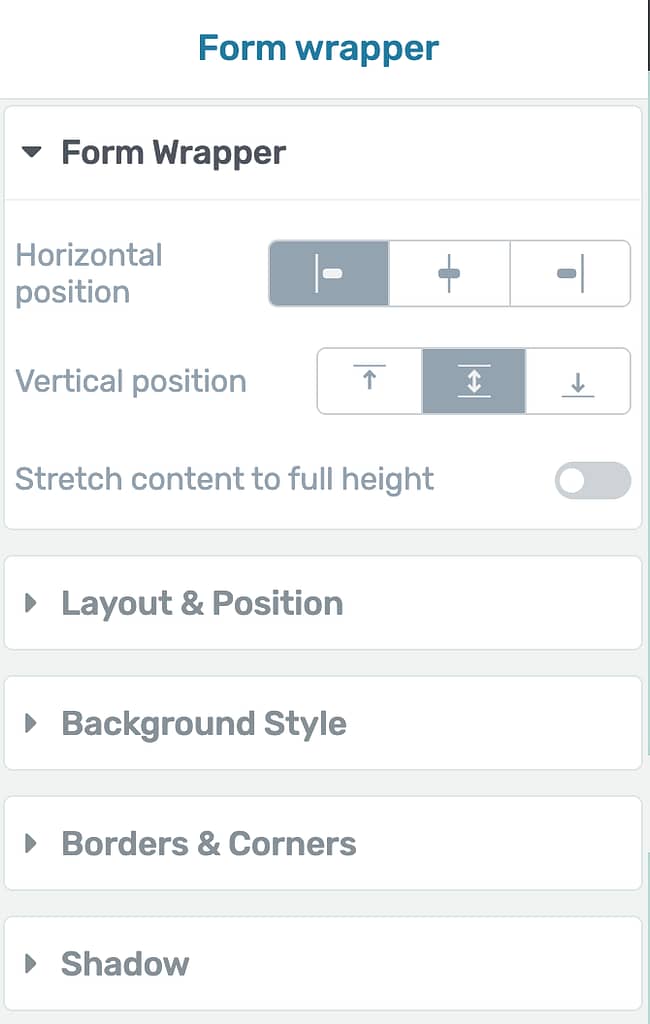
Apart from the common settings mentioned above, the Form Wrapper has a Form Wrapper section where you can customize the following:
- Horizontal position of the frame wrapper
- Vertical position of the frame wrapper
- Stretch form wrapper content to full height
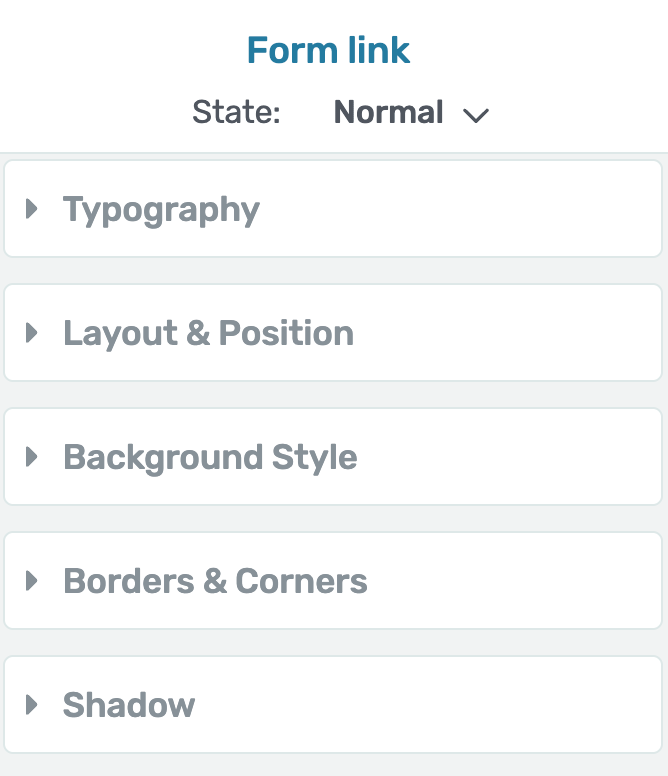
Customizing the Form Links
Form links are the links you add under the login form. To edit and customize these links, while in the editor, click on the links to open their settings in the left column.
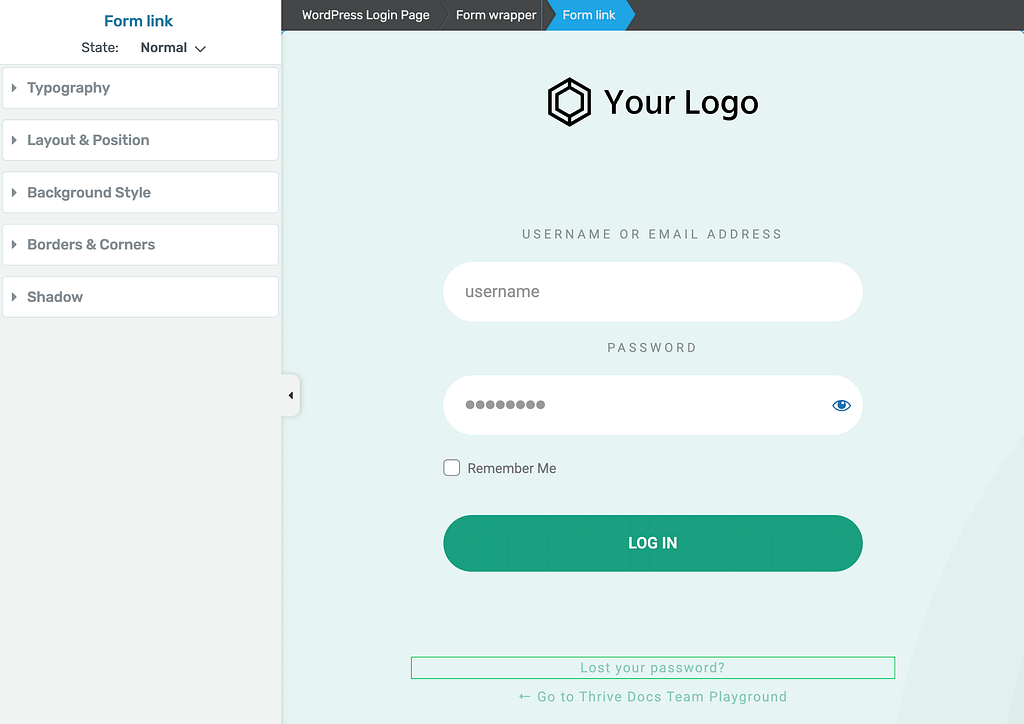
In the left column, you’ll see different settings that you can use to customize the login page.
- Setting Borders and Corners
- Adding Shadows
- Managing Background Style
- Managing the Typography
- Managing the Layout and Position
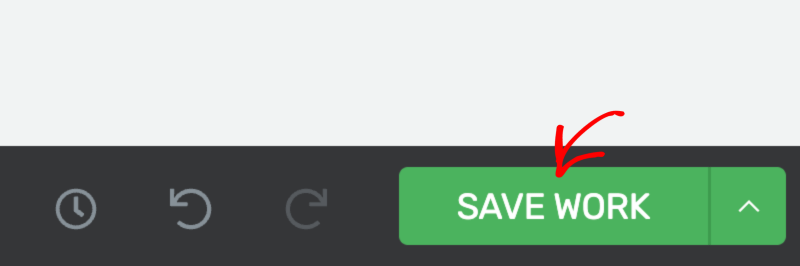
After you finish customizing the WordPress Login page, click on the Save Work button in the bottom left to save all the changes on the page.
Resetting or Changing the WordPress Login Screen Template
Sometimes you may want to reset the WordPress Login Screen template or change it to use another one.
To reset the template, while in the Thrive Architect editor, click on the Reset icon in the right panel.
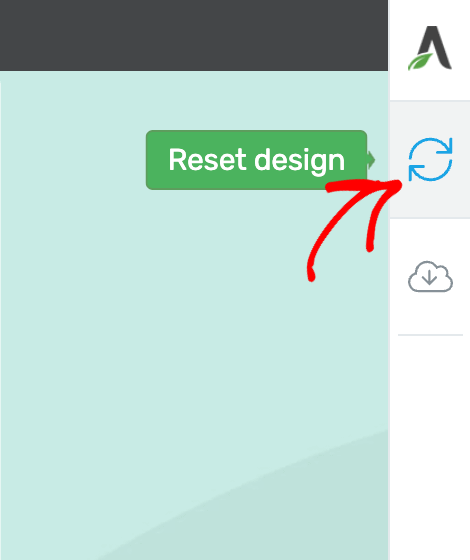
Clicking the reset icon will open a popup asking you to confirm whether you want to reset the current WordPress Login Screen template.
To proceed, click the Reset Design button on the popup.
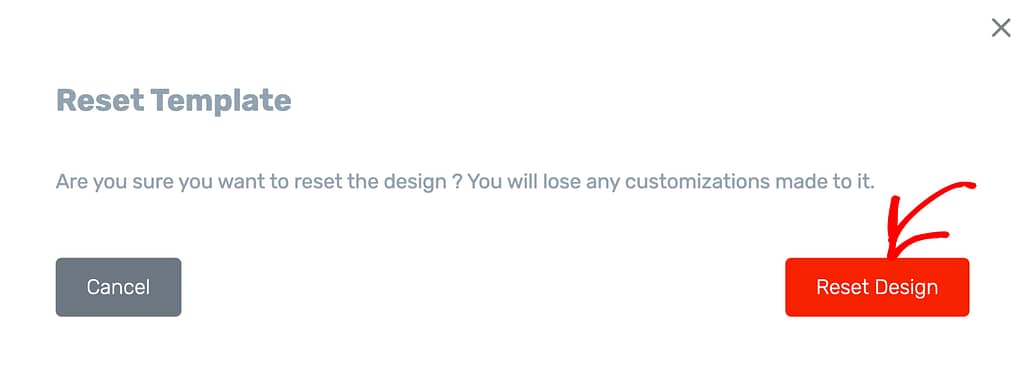
Resetting a design will take you back to the default and original WordPress Login Screen.
To change the selected WordPress Login screen template, while in the Thrive Architect editor, click on the cloud icon in the right panel.
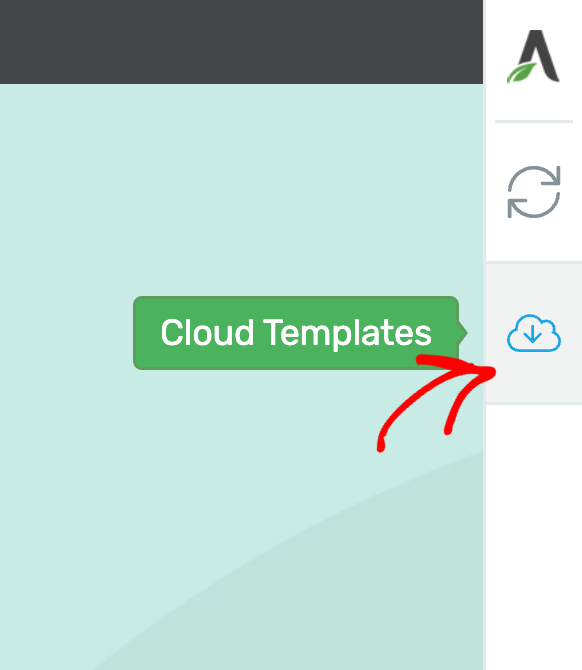
When you click the icon to change the template, you’ll see a popup where you select the template you want to use and click the Replace Template button.
This will replace the current WordPress Login Screen template with the one you’ve selected so you can customize it further.
We’ve just seen how you can add a different WordPress Login Screen to your website and customize it to match your brand. Here’s a video that you can watch too.
Next, do you want to show the registration option on a WordPress Login Screen? Here’s our document that will help.