Do you want to show or hide content in Thrive Architect depending on your users’ WP Fusion tags? With WP Fusion’s deep integration capabilities, you can easily create personalized user experiences by displaying content conditionally based on CRM or email marketing tags – perfect for membership sites, courses, and more.
In this article, we’ll show you how you can use the Conditional Display feature in Thrive Architect to display a particular section to users with the specified WP Fusion tags only.
Setting Up WP Fusion on Your Website
To be able to add the conditional display feature based on WP Fusion tags, you’ll first need to install, activate and set up the WP Fusion plugin on your website. To do so, refer to this article here.
After you’ve installed and activated the WP Fusion plugin, and configured the integration with a CRM you want to use, the next step is to add tags or lists you want the contacts to be sent to.
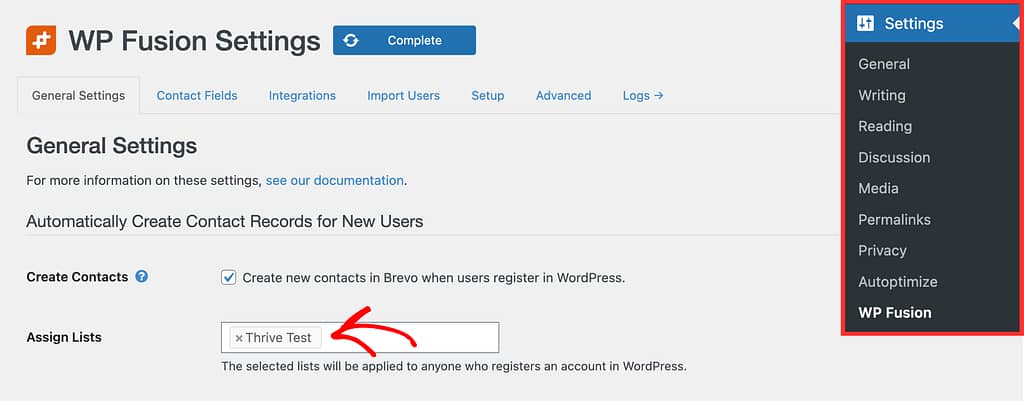
In this example, we’ve connected WP Fusion with a Brevo account that uses the term List instead of tags.
To select the list or lists in WP Fusion, open your WordPress admin area, navigate to Settings >> WP Fusion, open the General Settings tab, and select the list or lists in the field beside Assign Lists.
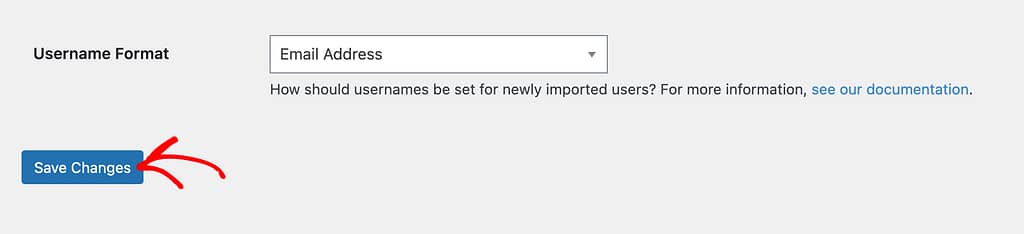
After you complete the general settings in WP Fusion, scroll down the page and click the Save changes button.
Setting Up the Conditional Display
Now that you’ve connected WP Fusion with a CRM and added lists or tags you want the contacts to be added to, the next step is to customize a section on the page that’ll be shown only to users who’ve been added to those lists or tags.
To do so, create a container section (that has the Conditional Display option) on a page using Thrive Architect.
In this example, we’ll create a section that will display a call-to-action to users added to the list selected in WP Fusion General Settings.
To begin, open the page in the Thrive Architect editor.
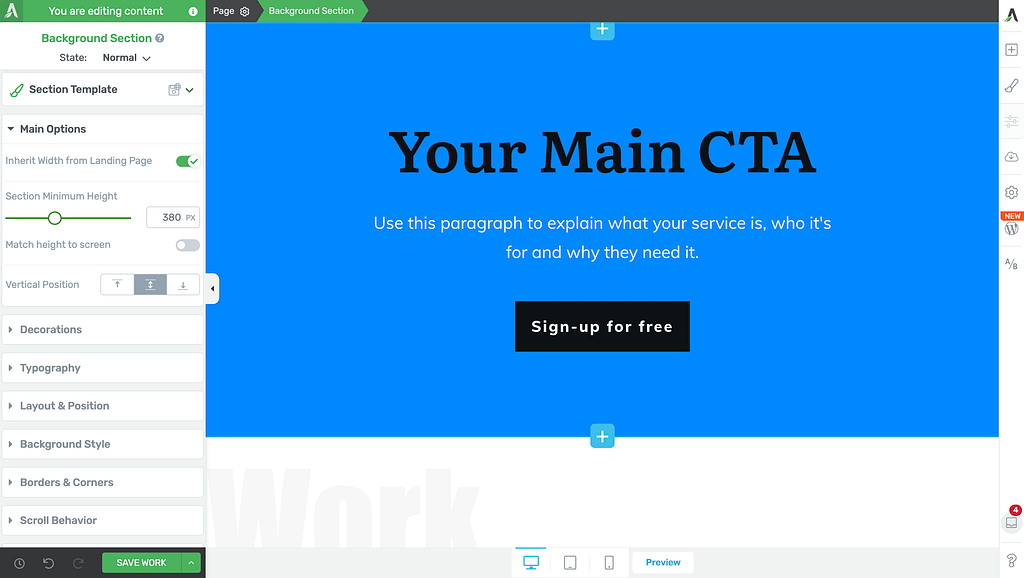
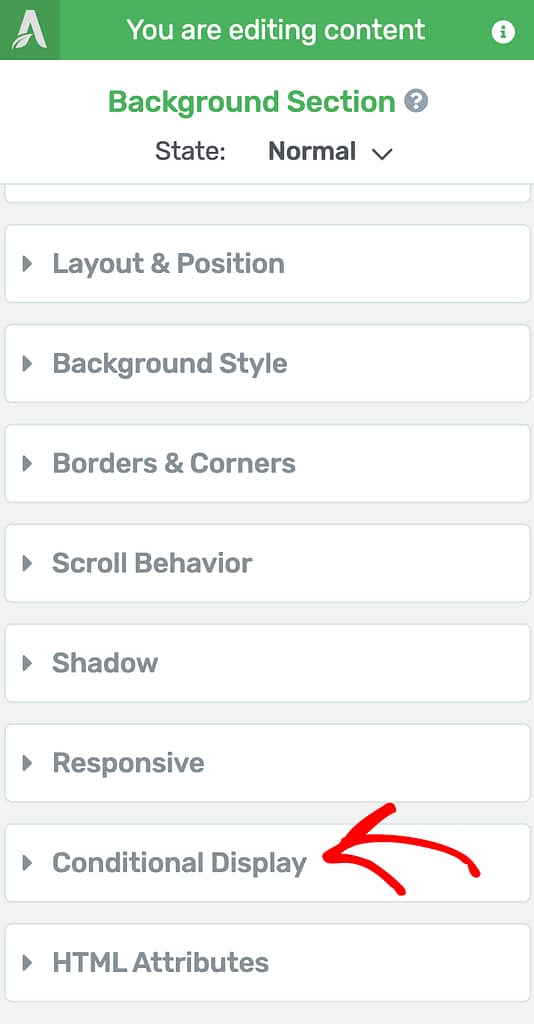
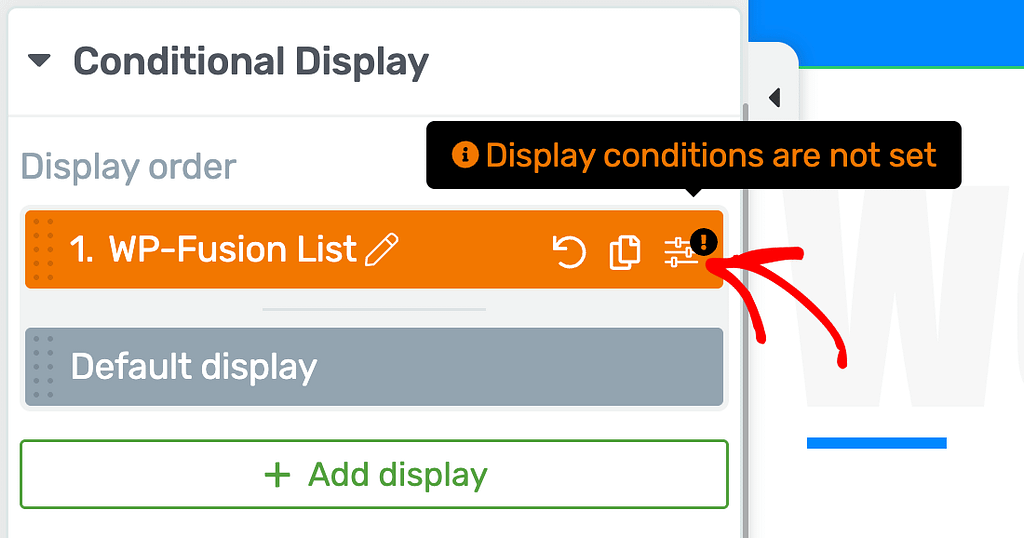
When the page is in the editor, click on the element – in this case the Background Section that contains the call-to-action, in the left column, click to open the Conditional Display settings.
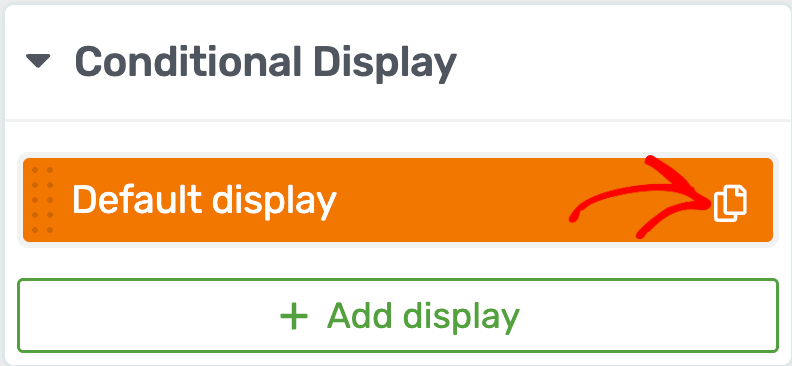
Under Conditional Display, hover on the Default Display and click the duplicate icon to create a duplicate display.
When the duplicate display is created, hover on it and click the pen icon.
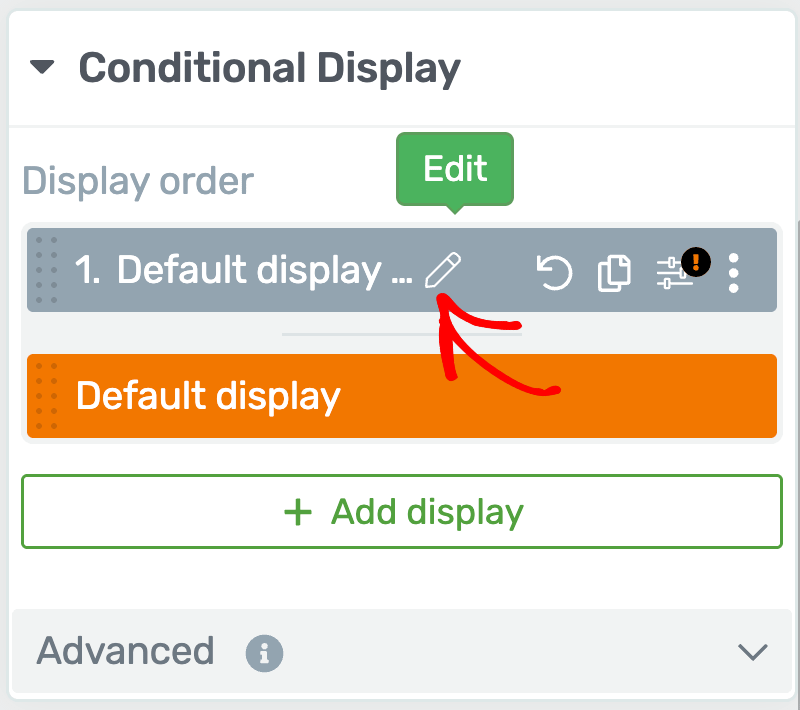
After clicking the pen icon, enter a name for the new display and click the Apply button.
When you rename the display, click on it to open it in the editor.
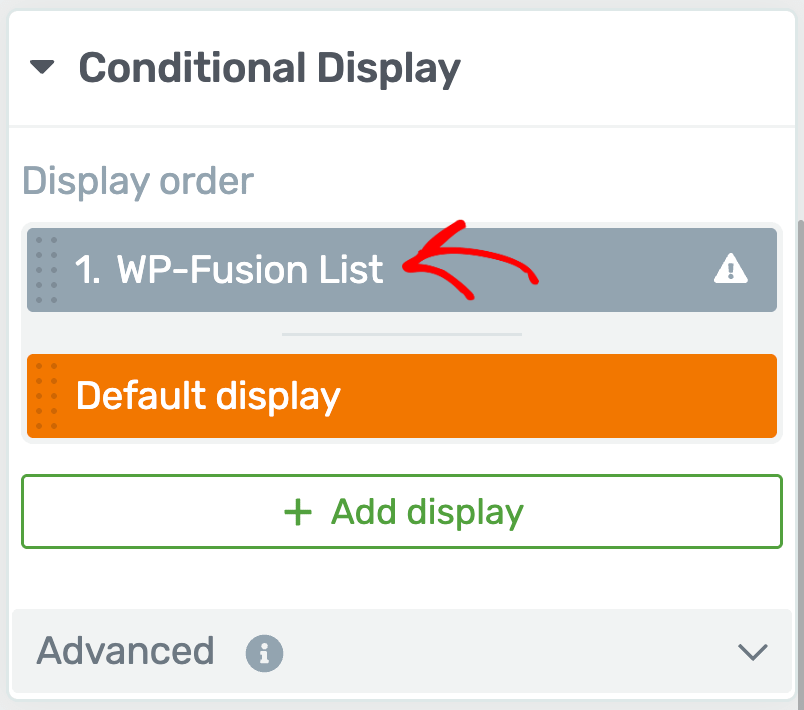
This will open the new display you’ve created in the page editor.
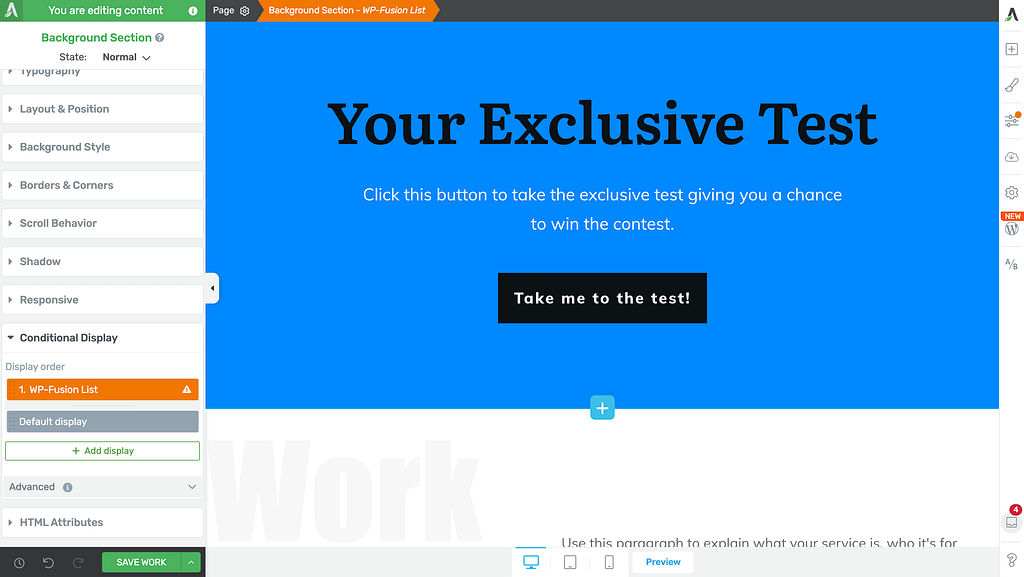
To add a display condition to this duplicate display, under Conditional Display settings, hover on the WP Fusion List display and click the filter icon.
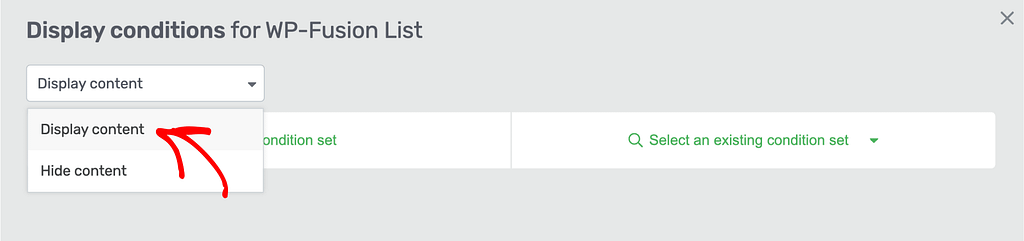
In the Conditional Display popup that appears, click the first dropdown and select Display content. This means that the content will be displayed when the following conditions are met.
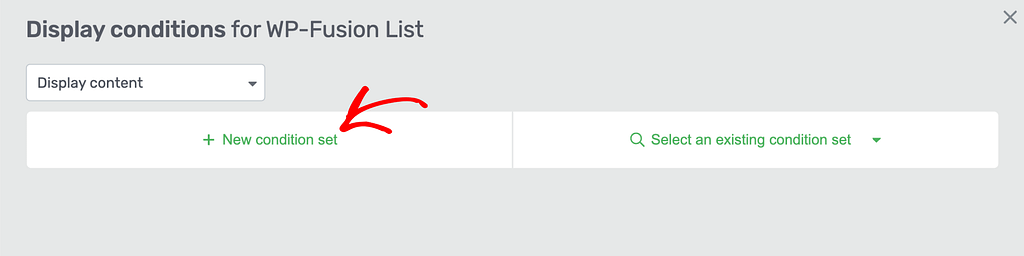
After you select Display content, click on +New condition set.
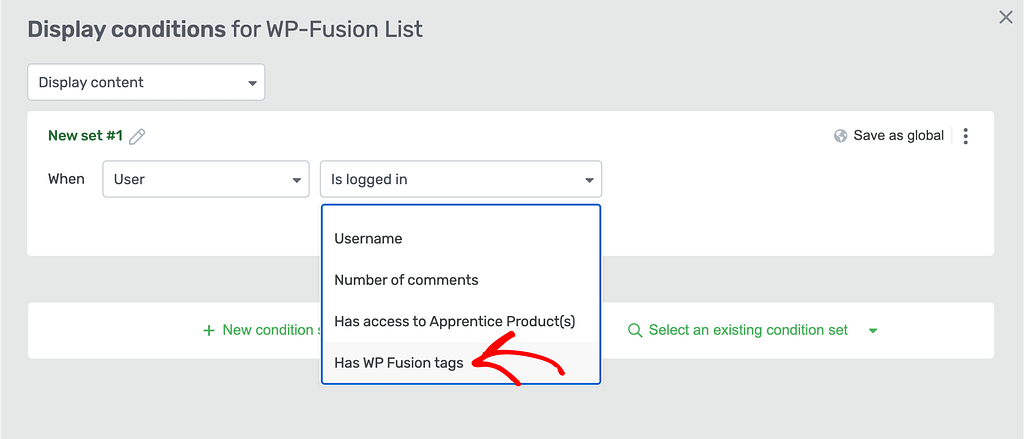
When you click to add a new condition set, select the entity User in the dropdown box.
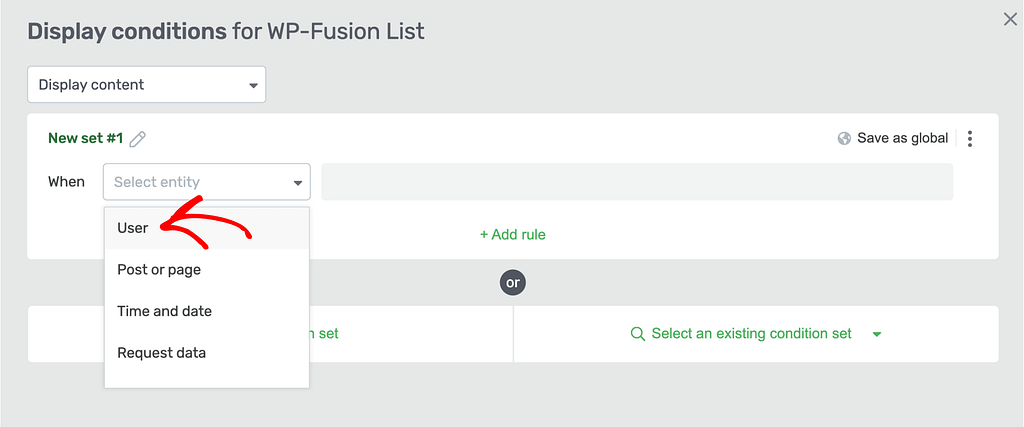
Once you select the entity as User, in the next dropdown select Has WP Fusion tags.
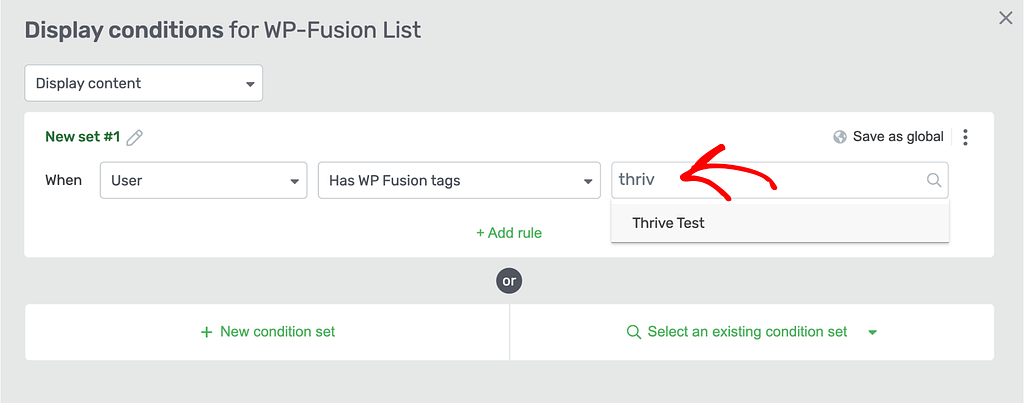
After selecting the field, in the next field, start typing the tag name (in this example – the list name) you want to use, and select the list or lists from the available options.
When you select the tag/tags or list/lists in the field, click the Save conditions button.
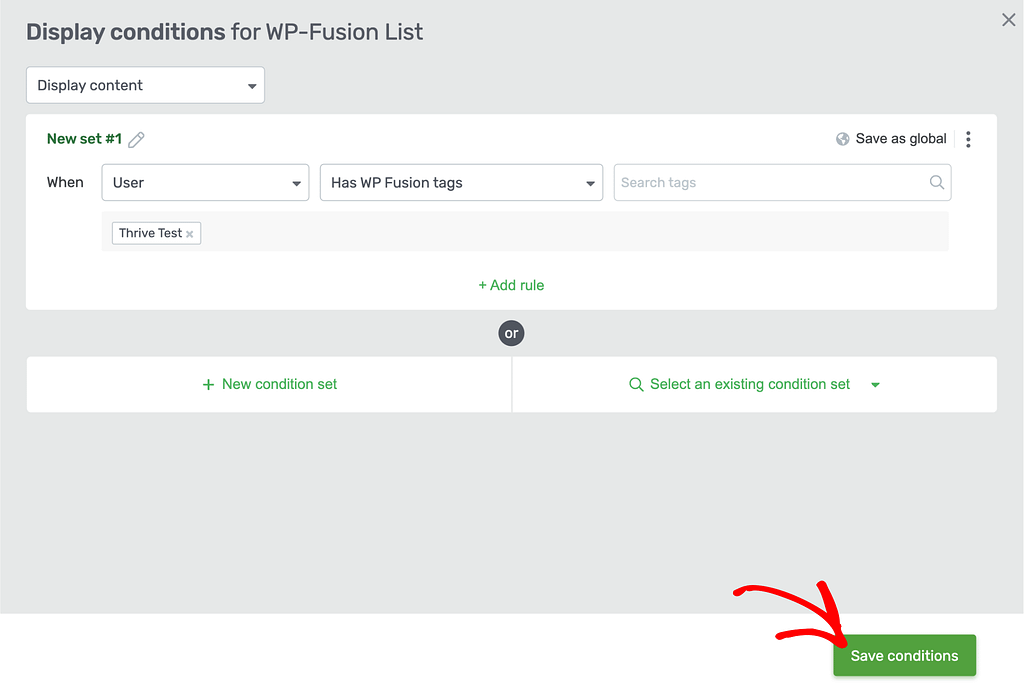
Saving this condition will mean that the new background section will be shown when a user is added to the selected WP Fusion list.
Next, are you looking for different applications of the conditional display feature in Thrive Architect? Here are a few documents that you can refer to.