Next, you'll get to choose layouts for each of your pages:
- Scroll down the left-hand side menu of WordPress
- Click "Thrive Dashboard"
- Select "Thrive Theme Builder"
- Select the "Site Wizard" in the top left corner of the page
- Scroll down the side menu until you see the "WooCommerce" section
"Shop Header"
> Option 1: Choose your default site header, shown and used for the rest of
your website
> Option 2: Choose a specific header (photo / graphic / logo) that will
be shown only on your shop pages.
(Applies to this particular example)
> Click on the dropdown menu in the upper right-hand corner
> Select from one of the multiple "E-Commerce Headers" options
> Click the "Choose and Continue" button
#FunFact
It's important to remember that when you choose a header using the Site Wizard, that header will be used across all of your WooCommerce pages ("Shop", "Cart", "Checkout" and "My Account"). Changing a header on a particular WooCommerce page is absolutely possible and we'll show you how to do this once we start customizing the pages.
"Shop Footer"
> Option 1: Choose a specific footer (photo / graphic / logo) that will be
shown only on your WooCommerce pages.
> Option 2: Choose your default site footer, shown and used for the rest of your
website
> Click the "Choose my default footer"
(Applies to this particular example)
"Shop Homepage Layout"
> Click on the dropdown menu in the upper right-hand corner
> Select one of the various layouts
> Click the "Choose and Continue" button
"Single Product"
> Click on the dropdown menu in the upper right-hand corner
> Choose one of the various single page layouts
> Click the "Choose and Continue" button
"Cart"
> Click on the "WooCommerce Cart" dropdown menu in the upper right-hand
corner
> Choose one of the different page layouts
> Click the "Choose and Continue" button
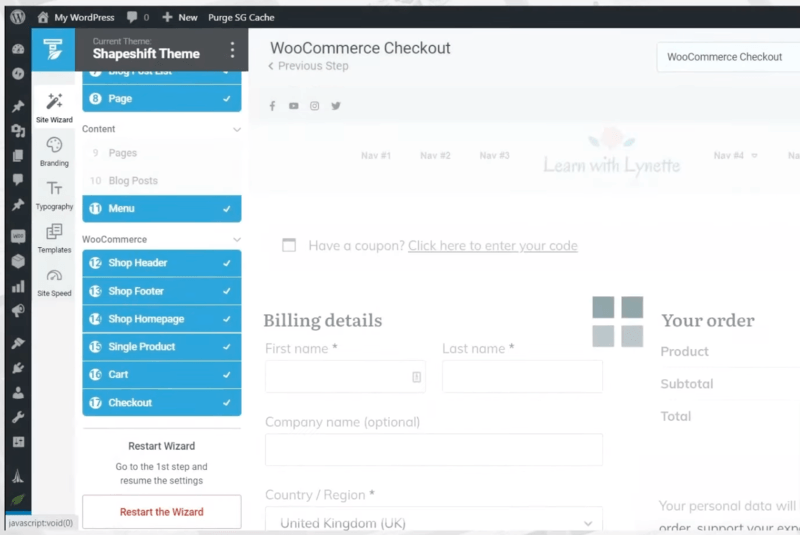
"Checkout"
> Click on the "WooCommerce Checkout" dropdown menu in the upper right-
hand corner
> Choose one of the different page layouts
> Click the "Choose and Continue" button

The process of choosing layouts for each page, using Thrive Theme Builder, is a straight-forward one.
Now that we've chosen our layouts, let's move on to adding categories and products to our shop. Continue with Lesson 3.