In this lesson, you'll be configuring your WooCommerce settings. Let’s get started.
Products Tab
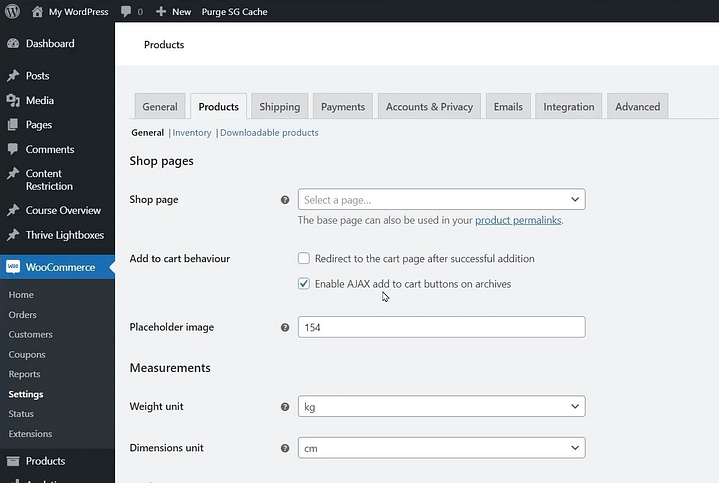
If you want to display a Shop page for your courses, this is where you'll specify it.
Since we're not setting up a typical eCommerce shop in this example, you can also just leave the Shop page blank.
Under Add to cart behavior, you'll want to make sure the Redirect to the cart page after successful addition is not checked, and that the Enable AJAX add to cart buttons on archives is checked.

Be sure to tick or enable the correct settings for a hassle-free workflow.
From here, make sure to save any changes you’ve made and click the Accounts & Privacy tab to continue.
Accounts & Privacy Tab
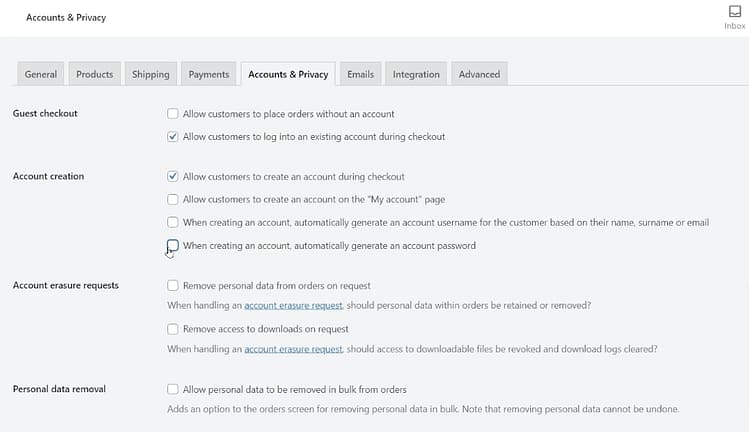
Inside the Accounts & Privacy tab, find the Guest checkout setting and:
- Disable the Allow customers to place orders without an account option, as you’ll need people to have an account to access the course
- Enable Allow customers to log into an existing account during checkout

Allowing customers to create an account during checkout is a vital function - be sure to enable that option under the Account creation settings.
In the Account creation setting, we recommend you enable the Allow customers to create an account during checkout option.
As for the next 3 options in this setting, you can set them to your personal preference.
Advanced Tab
Inside the Advanced tab, assign your WooCommerce pages by selecting Cart from the Cart page dropdown menu, Checkout from the Checkout page dropdown menu and — you guessed it — the My Account from the My Accounts page.
If these WordPress pages don’t exist on your site yet, you’ll need to create and publish them in your WordPress backend first before you can assign them in the WooCommerce dashboard Advanced tab.
Now that your basic settings are all set up, you’re ready to dive into the next lesson.
