Take a look at sites like HuffPost, Entertainment Weekly, Rolling Stone, Yahoo Finance, and other top publishing sites — they all use this clever little trick. That video that follows you as you scroll through their articles? It's not just there to look fancy. These major publishers have figured out that keeping videos in view while readers dive into their content leads to more engaged audiences.
And it's called the floating video.
Here's what's interesting:
When viewers can keep watching while they explore your content, they tend to stick around longer. Think about it - no more choosing between reading comments and watching the video, or having to scroll back up to catch what you missed. It's just a smoother experience all around.
Now, if you're running a WordPress site and thinking "That sounds complicated," I've got good news. Adding a floating video player to your site is actually pretty straightforward. You don't need to be a coding wizard or hire a developer - we'll walk through it together, step by step.
Ready to make your videos follow your readers around like the big publishers do? Let's dive in.
Do Floating Videos Still Work in 2025?
Yes.
Here's what makes floating videos particularly powerful — they don't just keep eyes on content, they create opportunities to guide viewers toward specific actions. Major publishers and brands have already figured this out, and they're using it in clever ways.
Take HuffPost, for example. Looking at their Grammy coverage, you'll notice how their interview video starts at the top of the article.

Main video at the top of the article
As you scroll through the story, that video smoothly transitions into a compact player that follows along, keeping the interview in view while readers digest the full story.

Floating video appears as you scroll through the article.
Rolling Stone takes a particularly strategic approach with their music coverage. When you land on one of their articles, a floating video will appear with a related performance – encouraging readers to spend more time on the page.

Rolling Stone takes it a step further by adding an ad or 2 to the video, to drive readers to take action and check out one of their partner products.

So, you see? This seemingly “small” addition to your page can make a big difference to your page engagement, lead generation – and even sales. And these publications understand that.
But why do these major publications stick with this format? Because it works. Here's what the data shows:
The key is understanding that captured attention is only valuable if you can direct it somewhere meaningful. By keeping your video visible while strategically placing calls-to-action, you're not just holding attention — you're creating a clear path to conversion.
How to Add a Floating Video to Your Pages and Posts (the Easiest Way)
Before we dive in, let me save you some time and potential headaches. While there are several ways to add floating videos to WordPress, I'm going to show you the most straightforward method that gives you the most control over your results.
You've seen how major publications like HuffPost, Rolling Stone, and other major sites use floating videos to keep viewers engaged. We'll achieve the same professional results, just without their enterprise-level development teams. I'll walk you through this using Thrive Architect, but the concepts apply to most modern page builders.
Ready to add your first floating video? Let's get started.
Step 1: Picking Your Tool
When it comes to finding a plugin to add floating video to your WordPress website, you have options.
You could search for one specific “Floating Video” plugin and add it to your current stack – but I wouldn’t recommend that.
I've been down that rabbit hole of installing a different plugin for every little thing I want to do on a page. Before you know it, your WordPress dashboard looks like a junk drawer full of digital tools that don't play nice together.
That's exactly why I'm a huge advocate for using a solid page builder instead. Think about it: you're already using one to design your pages, so why complicate things with yet another plugin just to make your videos float?
For this tutorial, I’m using Thrive Architect. It's my go-to because it handles everything in one place — no plugin juggling required. Plus, when you're tweaking how your video interacts with other elements on your page (trust me, you'll want to), you'll be glad everything's under one roof.
Not using a page builder yet? I get it — it's an investment. For now, plugins like Video Embed & Thumbnail Generator will get you started.
But if you're serious about creating engaging pages that convert, consider this your sign to make the switch. Your future self will thank you.
Step 2: Create or Open Your Page of Choice
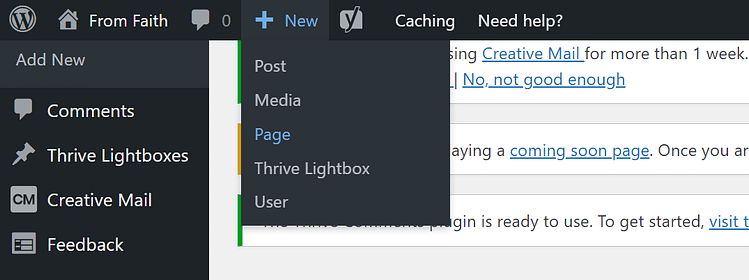
In the WordPress Dashboard, select the "+ New" button at the top of the page and select "Page".
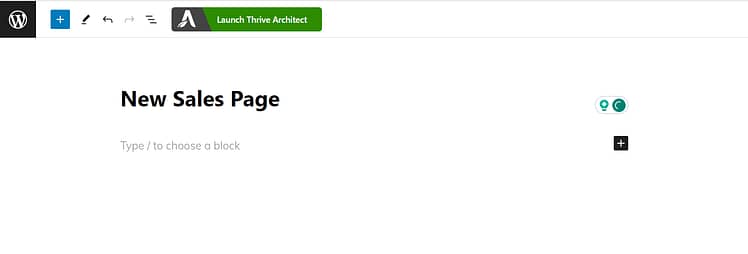
When taken to the next screen, name your page and select the bright green "Launch Thrive Architect" button.
After you launch Thrive Architect, a menu will pop up with four options:
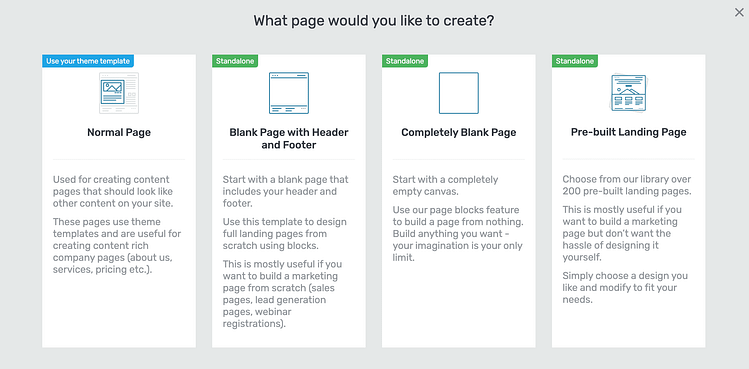
1. Normal Page
2. Blank Page with Header and Footer
3. Completely Blank Page
4. Pre-built Landing Pages
For easier and faster building, I recommend choosing the “Pre-built landing page” option. This is my typical choice because Thrive Architect gives you a variety of high-quality page templates to get started with.
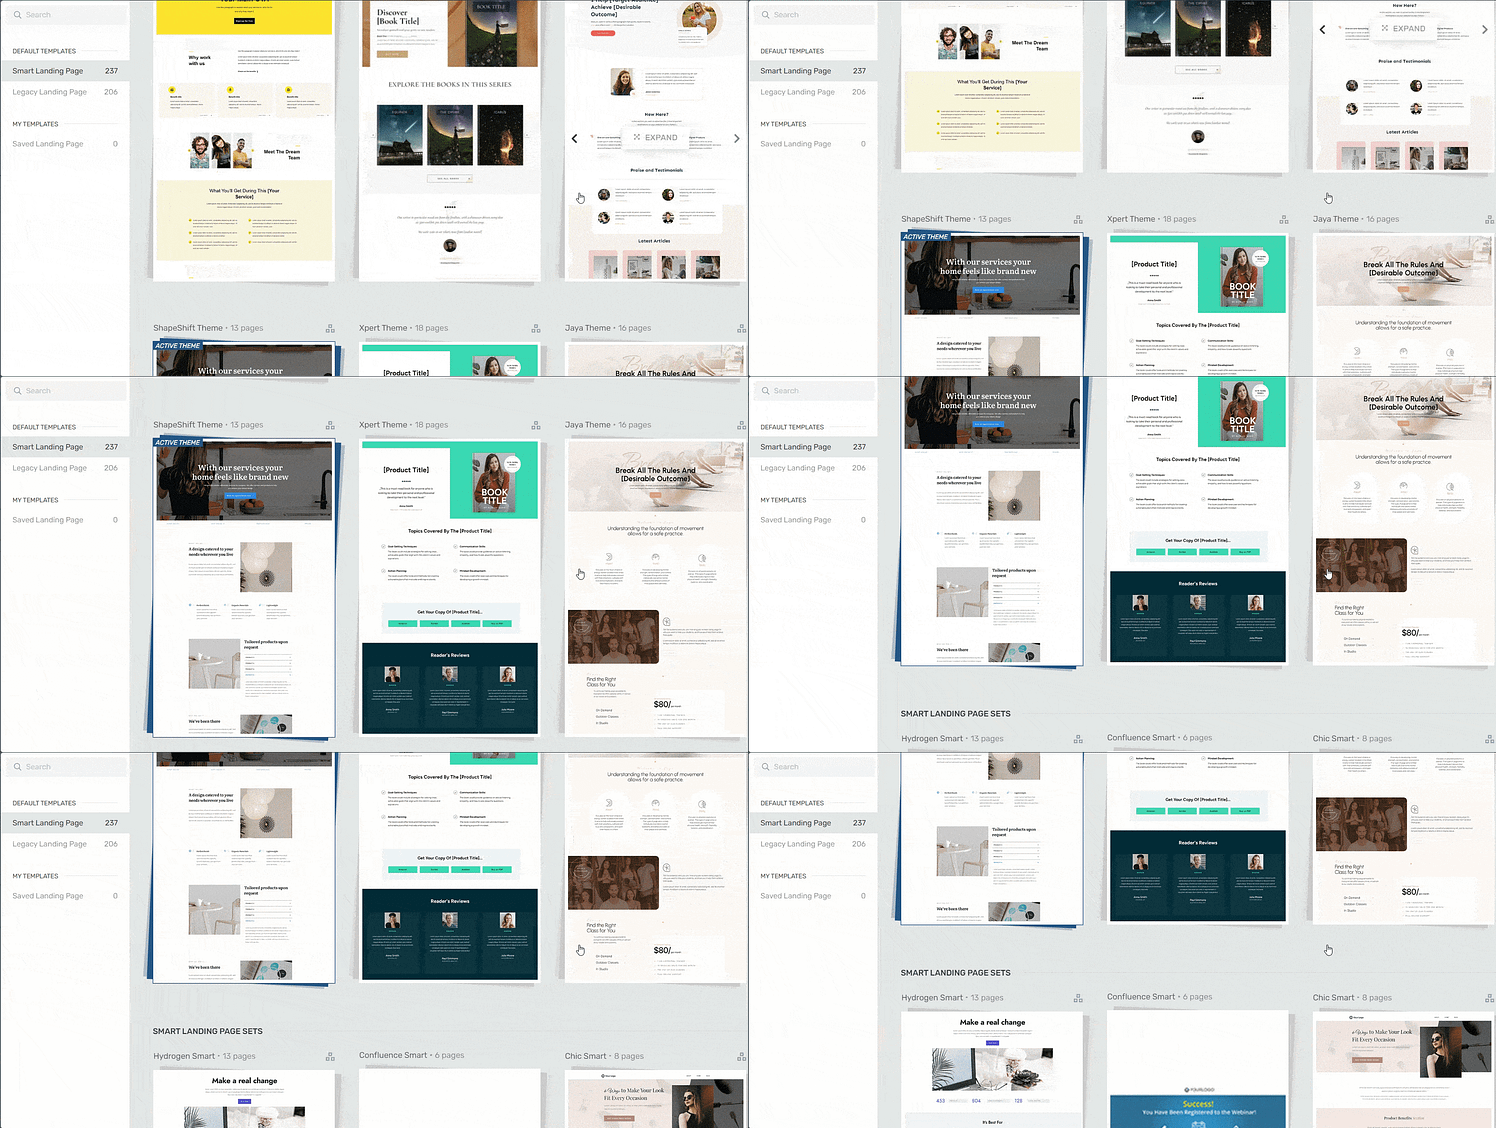
Landing page template sets in Thrive Architect
This helps you jump right into designing your page instead of spending hours trying to figure out where to start.
When you’ve found the right template, click on it and it should load.
Step 3: Add Your Video to Your Page or Post
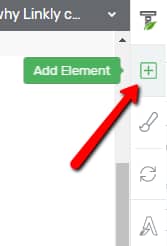
Now comes the most important part: adding your sales video to your landing page. To do this in Thrive Architect, click on the plus sign from the right sidebar.
This is where you can add a new element:
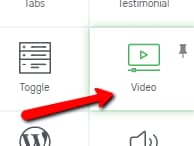
Look for the “Video” element or search for it in the search bar. Drag and drop it on your page wherever you desire:
You will now notice that you have all the available options that you can apply to the video on the left sidebar:
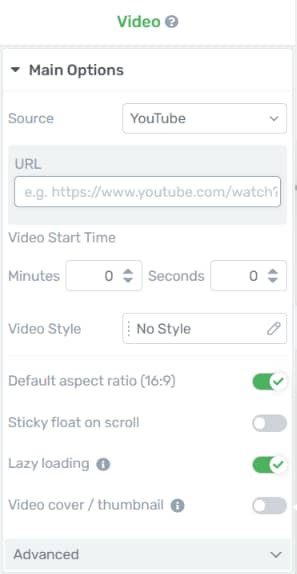
Under the "Main Options" section of the left sidebar, you will be able to find some ways to quickly customize your "Video" element.
Once you insert the "Video" element to your editor, you will see that, under the "Main Options" section, the first thing that you can change is the "Source" of the video.
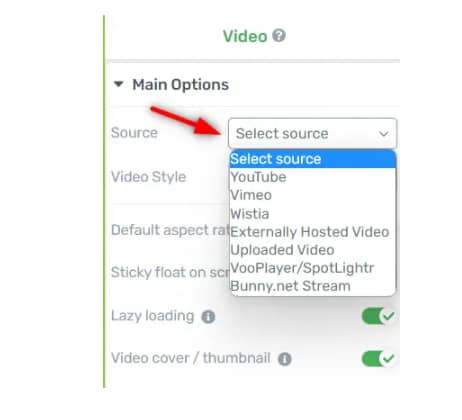
There are a few available video platforms that you can choose from when using the "Source" option, or you can upload the video from your PC. To select a source, click on the field next to the "Source" option.
From the small drop-down menu that opens, simply click on the source that you want to use.
Now, it’s time to set up the “Floating” video part – and it’s extremely straightforward.
In the left sidebar, you should see a “Sticky float on scroll” option.

Hit the toggle to enable this function and more options will appear.
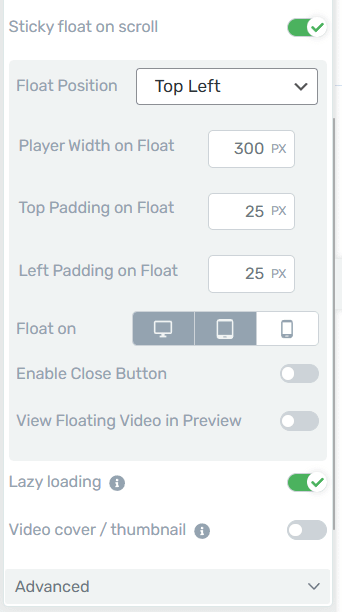
Here, you can modify your video’s appearance, enable a “Close” button (which I recommend), choose which devices the floating video should appear on, and more.
No need to add additional code or get overly technical – with a few clicks, you can easily add a floating video to your pages or post.
Just like this:

Take Your Floating Video to the Next Level: 4 Strategic Conversion Ideas
Let's move beyond just making videos float and talk about turning this feature into a conversion tool. Here are four proven strategies I've seen work well:
Remember: The goal isn't just to keep people watching — it's to guide them toward taking action while they watch.
Pro Tips: How to Use Sticky Floating Videos Correctly
Now that you know how to add floating videos to your site, let's make sure you're using them effectively. Just like major publications have mastered this feature, you can too — but it takes a bit of strategic thinking. Here's your recipe for success:
Remember, floating videos are meant to improve the user experience, not hijack it. When done right, they're like having a helpful assistant who knows exactly when to chime in.
Your Turn to Rock the Float
So there you have it — floating videos aren't just for the HuffPosts and Rolling Stones of the world anymore. With what you've learned here, you can add this sleek feature to your own WordPress site and make your content work harder for you.
Start small. Pick one of your key pages — maybe that product demo or course preview you've been wanting to improve. Give it a try, see how your audience responds, and tweak things until they feel just right.
Want to make this happen on your site? Thrive Architect makes it simple. It's the same tool I use to build high-converting pages (floating videos and all), and it's my go-to recommendation for WordPress users who want to create content that keeps visitors engaged.
Already playing around with floating videos on your site? Drop a link in the comments — I'd love to see what you're creating!



It doesn’t work for my Pressive. Do you think it’s because I’ve created a standard blog post with video instead of video blog post ? Thank you
Hi Stéphane,
This is not a theme option in Pressive (it is in the new Theme Builder).
You can still use it though if you build your blog posts with Thrive Architect, in that case, you can select the video you add to the blog post and make it float (just like we did on this post).
But it will not work with the video that you insert in a video blog post template if you’re using the Pressive theme.
I’ve been looking forward to having this floating video feature right in TA for quite some time. So glad it is finally here! Awesome.
Thank You Hanne
It will be very effective..
I can see a huge benefit having this feature. Any “explainer”, “trainer” or “how-to” post/page will be lifted to a new dimension with this. Well done!
Very nice this thrive theme is