After a decade of blogging and digital marketing, I've learned that the most successful WordPress sites share one key trait: they're driven by solid analytics.
If you're serious about growing your online presence, you need to know exactly how visitors interact with your content. Whether you're chasing more subscribers, sales, or engagement, flying blind isn't an option – and basic traffic numbers barely scratch the surface.
But setting up WordPress analytics the wrong way can leave you with misleading data – or worse, no meaningful insights at all. I've seen it happen too often.
That's why I've created this guide to walk you through the process, step by step, and help you start measuring what truly matters.
Why Should You Track Analytics on Your Website?
Running a website without analytics is like steering a ship without navigation tools. You might stay afloat, but you'll never really know if you're heading in the right direction.
When properly set up, analytics transform raw data into actionable insights. They reveal the story behind your traffic patterns, showing you exactly how visitors interact with your content and where opportunities lie.
Here's what proper analytics tracking can help you achieve:
The right analytics setup turns guesswork into strategy. It gives you the insights needed to make data-driven decisions that actually move the needle for your business goals. No more wondering what works – you'll know.
How to Set Up Google Analytics in WordPress Using a Plugin (Step-by-Step Guide)
My go-to choice for tracking website performance is Google Analytics 4 (GA4). I've tried other tools over the years but I keep coming back to GA4 because it simply works – showing you exactly how visitors use your site, which content grabs their attention, and where you might be losing them.
Now, I understand that using the out-of-the box GA4 platform could be overwhelming -- especially for beginners -- but don't worry.
I've found that using a WordPress analytics plugin makes everything much simpler. That's exactly what I'll show you how to set up today.
Step 1: Download and Install MonsterInsights
I've tried just about every analytics plugin out there, but MonsterInsights is hands-down my favorite for WordPress sites. Here's why I love it and recommend it:
It makes setting up Google Analytics so much easier – you won't have to touch a single line of code. Just install, connect, and you're ready to track your site's performance.
And instead of jumping between different tabs and tools, you get all your important stats right in your WordPress dashboard, presented in a way that actually makes sense.
Want to track your online store's performance? Monitor form submissions? See exactly how people find and move through your site? It handles all of that beautifully. Plus, it saves you from wrestling with Google Analytics' sometimes confusing interface.
The plugin comes in both free and premium versions, but even the free version packs enough features to get you started with solid tracking. If you're serious about understanding your audience and growing your site, MonsterInsights makes it surprisingly simple.
Installing MonsterInsights
To install MonsterInsights, log into your WordPress dashboard and install and activate the MonsterInsights WordPress plugin.
Start by heading to Plugins » Add New, and search for ‘MonsterInsights.’
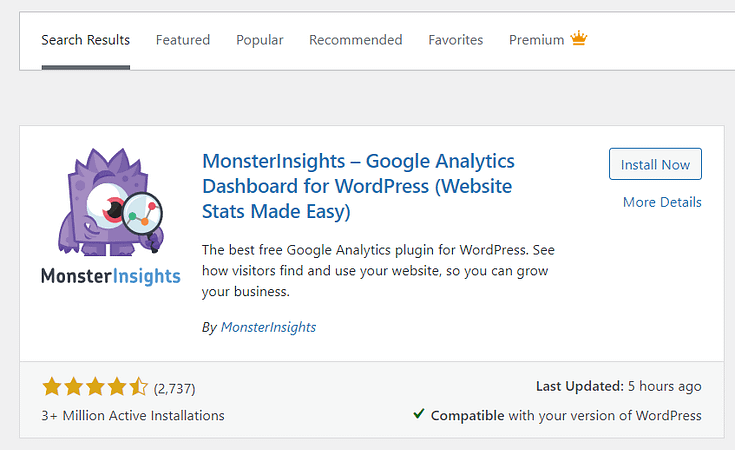
MonsterInsights in WordPress Plugin Directory
Select “Install” and activate the plugin once done. Leave the plugin for now, as you need to configure your Google Analytics account.
Step 2: Connect Your Google Analytics Account to MonsterInsights
To set up GA4 in WordPress, you’ll first need a Google account. If you don’t already have one, you can create one for free.
Sign into Your Google Account
Head to the Google Analytics website and click the “Sign in to Analytics” button in the top right corner.

Create a Google Analytics Property
After you’ve signed into your Google Account, you’ll be directed to an account creation page. This is where you’ll create an Analytics account to collect and organize your site’s data.
First, you’ll need to add an account name.
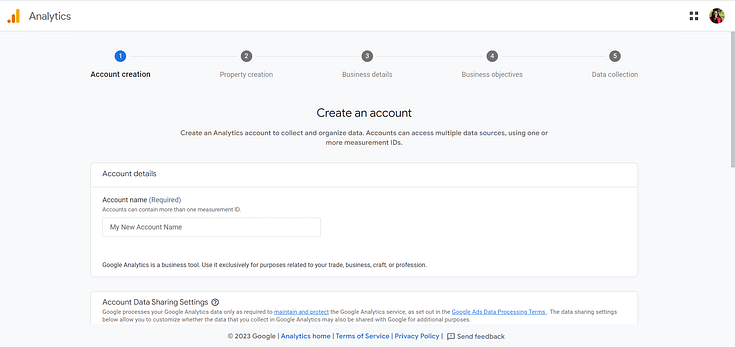
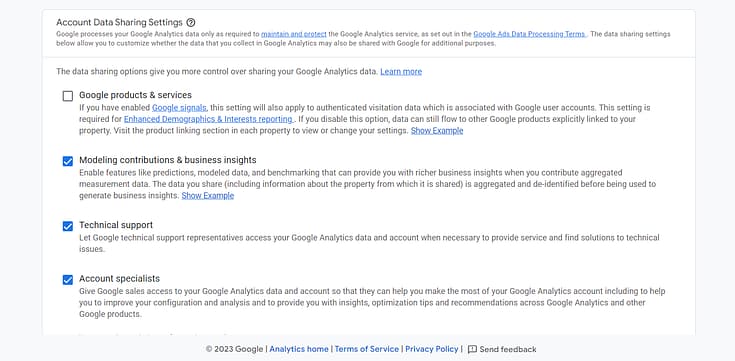
You’ll also have a chance to customize a variety of data-sharing settings.
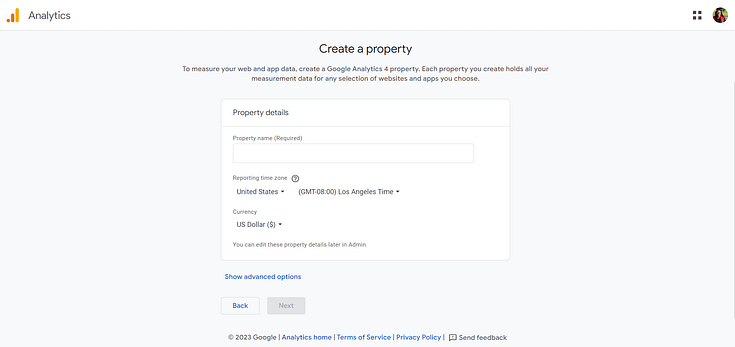
Next, you’ll be directed to a new screen where you’ll create your GA4 property. Give the property a name and confirm details like your timezone and currency.
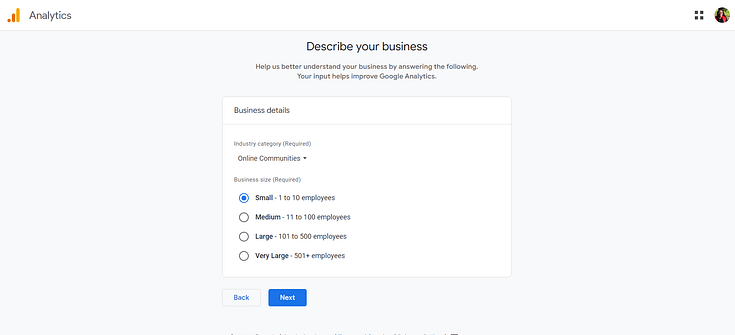
In the next screen, you’ll need to fill details about your company. Select the industry your business falls under, as well as the size of your business.
Once that’s done, you’ll need to select a few business objectives so you can get personalized reports.
If you’re not sure what to select, we recommend choosing the “Get Baseline Reports” option to get all GA4 reports in your account.
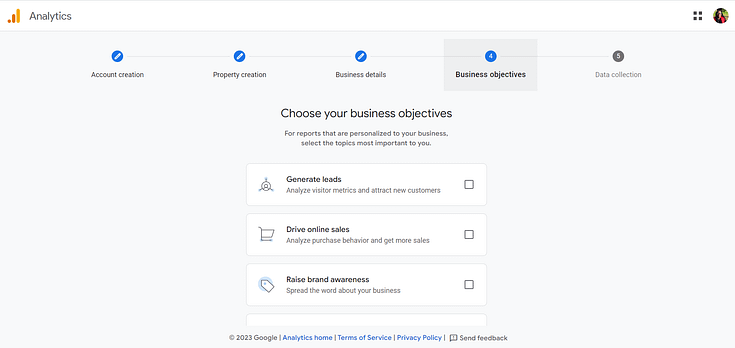
Once you’re happy with what you’ve selected, click “Continue” and agree to the Google Analytics Terms of Service Agreement popup.
You’ll then be directed to a screen that requires you to choose where you’ll collect data. Choose the “Web” option.
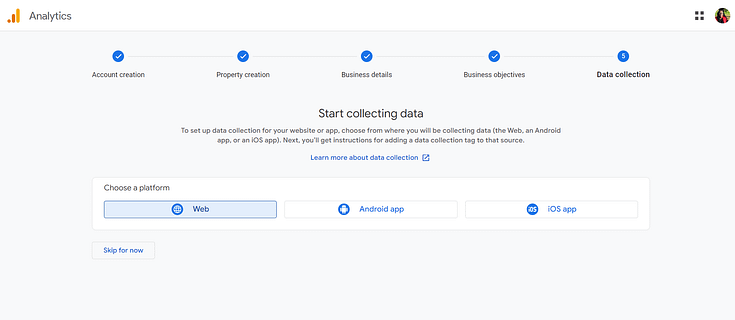
Next, set up your website’s data stream by entering your site’s URL and name.
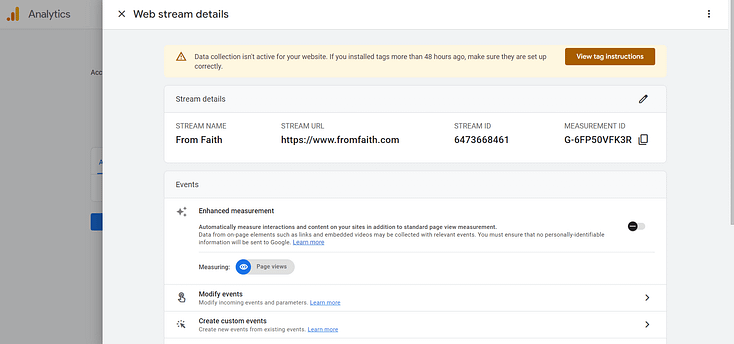
Now, click the switch to turn off Enhanced Measurement. Because we’ll be using MonsterInsights later in this guide, turning this option off avoids duplicate data streams.
Click the Create Stream button to finish setting up your Google Analytics property.
You’ll now see your property information, which includes your tracking ID, stream name, and measurement ID.
It will also show different methods for adding Google Analytics to your website, such as using Global Site Tag, HTML, and more. However, with MonsterInsights, you can do this easily without touching any code.
Step 3: Complete the MonsterInsights Setup Guide
Return to MonsterInsights in your WordPress dashboard and launch the Setup Wizard.
Choose a category that best represents your business. There are three options – Business Website, Publisher, and eCommerce.
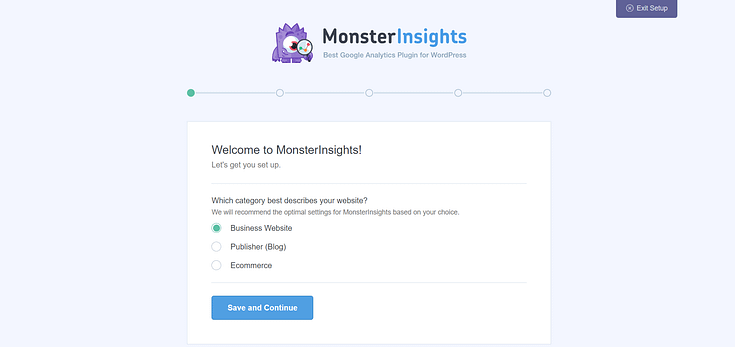
After you’ve chosen a category, hit “Save and Continue”.
If you’re using the free version of MonsterInsights, your next step is to click “Connect MonsterInsights”.
If you’re a Pro user, this is where you’ll enter your license key to access MonsterInsight’s premium features. You can find your key in your MonsterInsights account, in the Downloads section.
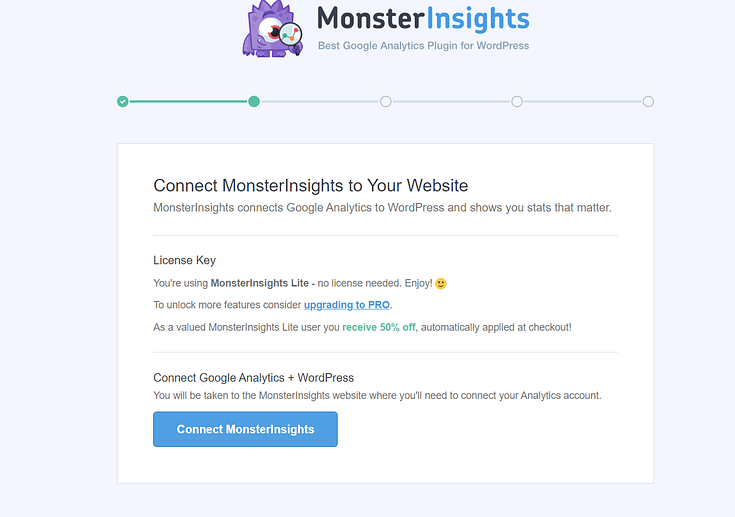
Next, you’ll need to log in to your Gmail account to connect Google Analytics to your WordPress website. Assign the right permissions to MonsterInsights and hit “Continue”.
You’ll return to MonsterInsights, where you’ll need to pick a property for our site. Click on the drop-down menu and select the right one.
Once that’s done, you’ll be taken back to the setup wizard. Here, you can enable a variety of the plugin’s settings. Some are already enabled by default – Events Tracking, Enhanced Link Attribution, and File Download Tracking.
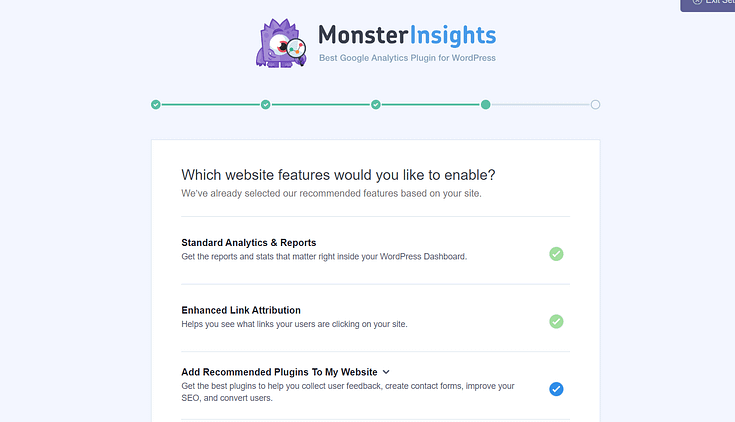
Powerful Add-ons in MonsterInsights
Pro
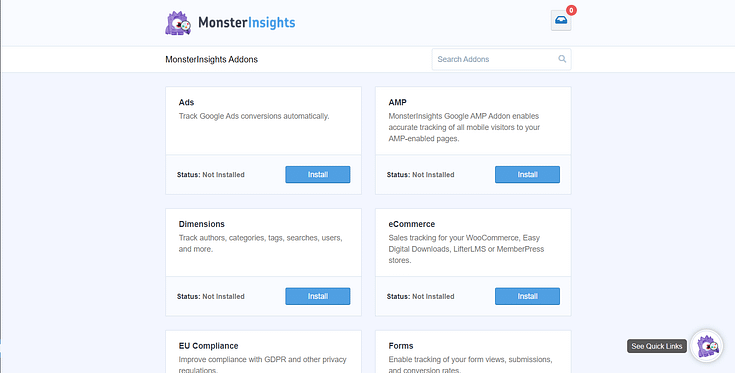
MonsterInsights users get access to a set of powerful features to enhance their analytics and ensure they have all the info they need to make strategic, data-driven decisions.
Some of these add-ons include:
- Google Ads Tracking
- eCommerce tracking for WooCommerce, Easy Digital Downloads, MemberPress and other stores.
- GDPR compliant tracking
- Integration with Google Search Console
- In-depth form tracking
- User Journey – see the exact steps (and for how long) each customer took before making a purchase
- …and many more
You’ll have a chance to enable some of these add-ons in the MonsterInsights:
Once you’re happy with your settings, click “Finish Setup & Exit Wizard” and return to your WordPress Admin Dashboard.
Step 4: View Your Google Analytics Data
If you’re new to using MonsterInsights, it will take a few hours to start recording data.
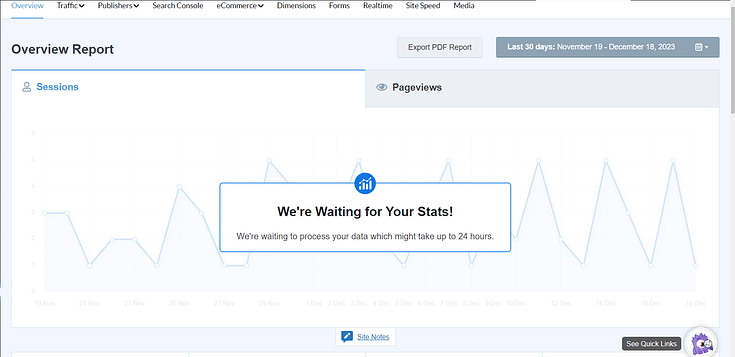
But once it starts, you’ll be able to see your Google Analytics data reports in real-time – right from your WordPress dashboard.
This removes the need to visit the official Google Analytics dashboard, where the data can confuse beginners.
For more detailed reports, visit Insights » Reports from your admin.
The first one you’ll see is the Overview report, which has basic tracking info, such as Sessions, Page Views, Session Duration, Source (email, social media, etc.) Bounce Rate, and Total Users.
How to Set Up Analytics on WordPress: FAQs
Q: Does WordPress have built-in analytics?
A: No, WordPress does not come with built-in analytics. But, you can integrate analytics tools like Google Analytics through a plugin like MonsterInsights.
Q: How do I add an analytics dashboard to WordPress?
A: You can add an analytics dashboard to track your WordPress site’s metrics in a few ways:
Integrating GA4 with a reliable analytics plugin like MonsterInsights (this is the easiest way)
Using Google Tag Manager
Adding a code snippet that includes a Google Analytics tracking code to your WordPress theme file (through the header.php file). If your site has a child theme, you’ll need to update this too.
Q: What is the best analytics tool for WordPress?
A: We recommend MonsterInsights.
How to Set Up Analytics: Final Words
An analytics plugin is only as effective as the quality of your website.
Your website hosts all your blog posts and provides a first impression to your site visitors.
If your site doesn't look good or function well, you’ll lose a lot of potential customers -- tanking your web analytics.
Here are four free tutorials to show you what a good business website should look like:
And if you feel like it’s time to make a change to your website, so you can finally reach your business goals, you should consider buying Thrive Suite.
Thrive Suite is an all-in-one toolkit that contains plugins to help you build impressive landing pages, quizzes, online courses, and even conduct a/b testing to make informed improvements.
If you've been thinking about building your own independent business and want to use high-quality tools for a crazy reasonable price - Thrive Suite could be for you.


