Working with images is an inescapable part of running a successful business website: opt-in offers, product images, personal brand headshots, social media posts... images are everywhere.
So how can you save time and money designing and optimizing your images, without sinking hours into becoming a professional designer?
By cheating, of course!
And these 7 free online image tools will help you cheat your way towards stunning images to showcase your brand, product and blog — without breaking the bank.
You can start using them immediately to speed up your workflow, and create professional, enticing images for your audience.
By the way, we also have a post to help you find free images to use on your website.
More...
1. Photopea
Adobe Photoshop is an amazing program. So much so that its name is now synonymous with editing or enhancing digital images.
What’s not so amazing is the $250 USD price tag that only lasts 1 year.
Wouldn’t it be great if there was an online alternative that packed most of the familiar features and UI of Photoshop?
Wouldn’t it be great if that was free?
Meet Photopea.
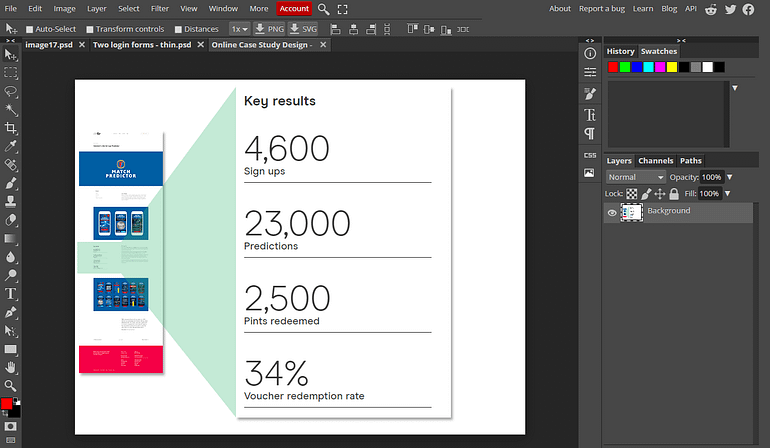
Photopea is an excellent Photoshop alternative with a familiar UI.
The interface, tools, language and workflow give you the feeling of working with Photoshop, without the nagging feeling that someone just nicked your wallet.
Photopea fully supports layers, channels, paths, layer styles and adjustments, masks, and even uses the same hotkeys as Photoshop.
For most people, you probably won’t even realise you’re not using Photoshop after a while!
Once you’re ready to export your work, you can save it as any standard format (PNG, JPG, SVG etc.) or even as a fully layered Photoshop-compatible format (PSD or PSB).
Photopea also comes with tons of free-to-use stock images, thanks to its integration with PixaBay.com – just search for what you want, and drag it onto the canvas.
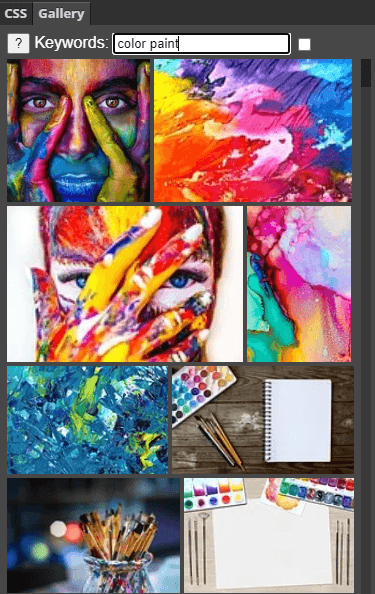
Pixabay integration with Photopea.
With the money you save from this, you can buy all the conversion-focused tools in Thrive Suite for a single price, and still have enough left over to treat yourself.
2. Canva
If you're not a natural designer, or you just prefer to put your time into other areas of your business, then Canva will become a firm favorite in your image creation toolbox.
Canva gives you a big head start with all kinds of online images:
- Social media graphics for Facebook, Instagram, Twitter etc.
- YouTube Channel Art
- LinkedIn Banners
- Business stationary and letterheads
- Logos
- Worksheets and certificates (perfect for course creators!)
- Brochures and ebooks (perfect for opt-in offers!)
...and we’re just scratching the surface here. Whatever you want to create, chances are that Canva has some gorgeous templates for you to customize and use on your business website.
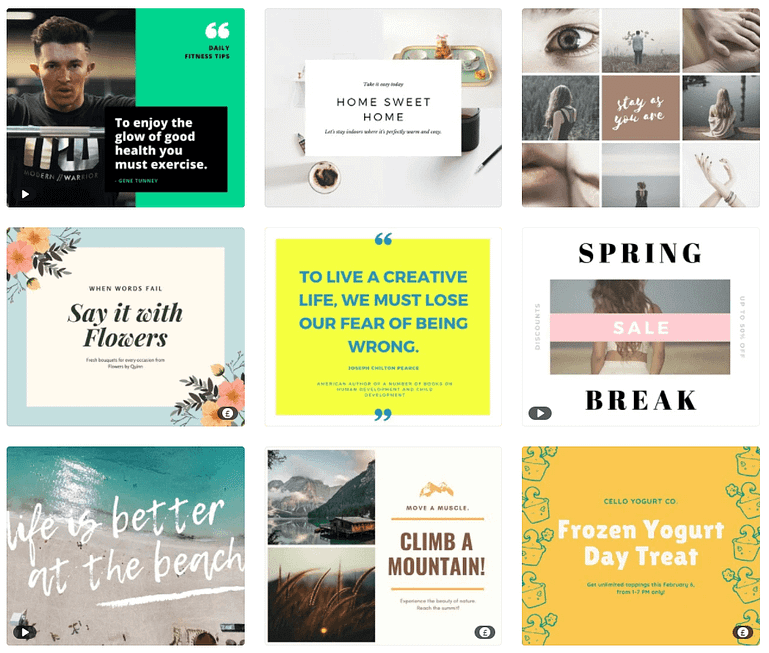
Choosing a template in Canva... watch out for the cost icons in the corners.
Once you’ve chosen a starting template (yes, you can start with a blank one if you want), you’ll be able to customise every element – including the colors, text, images, and icons.
You can also browse Canva’s media element library to find the perfect photo or graphic to add to your image.
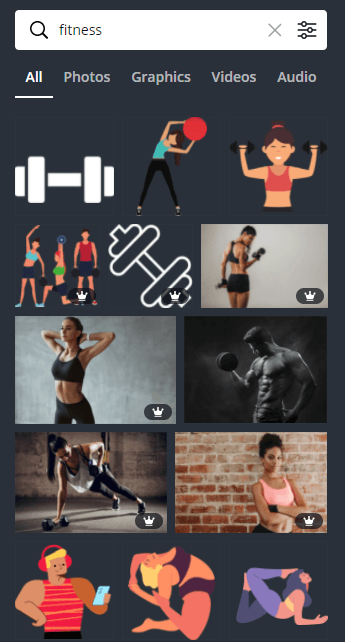
Adding elements to your Canva design.
Note how some have a crown icon? Those will cost around $1 to use.
Of course, you’re welcome to stick to the free elements too, making it entirely possible to use Canva totally free.
Here’s a quick banner for the Thrive Themes Official Facebook Group that took me 2 minutes to customize in Canva...
3. remove.bg
Do you need to add a professional photo to your landing page, funnel or personal brand homepage?
Chances are you don’t want the background too, whether it’s your office chair, your hallway, or your messy kitchen.
Now you could spend half an hour in Photoshop, carefully cutting around the part you want to keep.
...or you could just let remove.bg do the work for you.
This handy tool automatically identifies and removes the background from photos.
I say “photo” and not “image”, because remove.bg is designed to work on real-life photographs taken with a camera... so people, cars, everyday objects.
Let’s see just how well remove.bg works.
Here’s a quick photo taken on my smartphone camera. I’ve chosen a neutral background, but there’s still the door, a radiator, and some typical shadows of my ears on the wall behind.

Taken on a standard smartphone. Note the shadows that will be automatically removed.
And here’s the result after using remove.bg to replace the background with transparency:

The resulting transparent PNG from remove.bg
This is mightily impressive for a free, automatic tool!
Sometimes the tool doesn’t quite get it right, especially if your photo has a very busy background, or your hair is frizzy, but it usually does a pretty good job. You can use Photoshop or Photopea to finish the job if there’s just a few leftover artifacts.
It’s well worth giving remove.bg a go before you try to remove the background manually — it could save you a ton of time if you need a web-ready image for your website.
4. ezGIF
Don’t let the overzealous use of advertising banners fool you, ezGIF is a massive collection of helpful, free online tools to edit and optimize your images and videos.
Since we’re focusing on images only today, let’s look at what you can do with ezGIF...
First, ezGIF allows you to convert your images between the major file formats. It includes options to choose your level of compression to achieve a given file size or quality, and supports transparency where appropriate.
Second, ezGIF provides customizable image optimization tools so you can reduce the file size without losing too much visual quality.
Some formats support lossless optimization – a smaller file size with no loss of quality at all.
Third, and true to its name, ezGIF lets you do a host of amazing things with animated GIFs:
- Convert videos to animated GIFs
- Resize, rotate, crop, split and reverse animated GIFs
- Add effects like color filters, change the speed, censoring, and looping
- Add an overlay like a logo or watermark
- Add text to your animated GIFs
5. Kraken.io
Properly optimizing images for the web requires some knowledge about file formats, compression types, dithering, and color palettes.
Ain’t no one got time for that!
If you’d prefer to optimize your images automatically, then Kraken is the tool for you.
Simply drag-and-drop your images into Kraken, and you can expect to reduce file sizes by around 50% with no noticeable loss of quality.
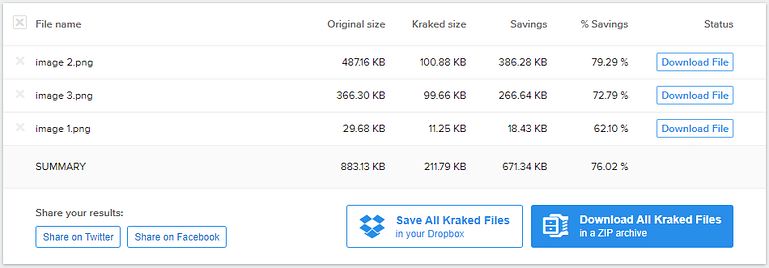
Kraken offers huge size savings simply by dragging and dropping your files.
You can see that Kraken has reduced my images above by a whopping 76%, and I honestly can’t see any difference in visual fidelity. It does this by applying a complex optimization algorithm which I like to think of as ‘magic’.
See for yourself with the image comparison below...
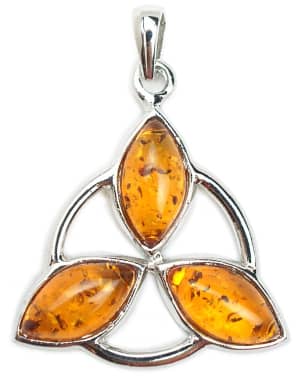
Before optimizing with Kraken
108KB
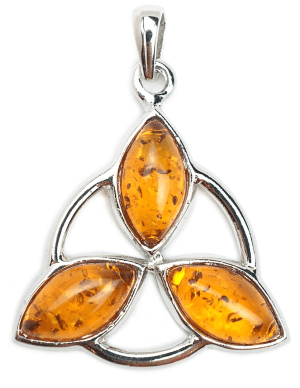
After optimizing with Kraken
38KB ... saving 65%!
You can use Kraken for free on images smaller than 1MB, so it’s perfect for optimizing 90% of web graphics.
They also offer a great WordPress plugin that lets you optimize each image in your media library. You can optimize 100MB of images before you need to pay (and the maximum size is increased to 32MB), so again it’s great for small websites or just to test the service.
Given the huge impact that large images have on your page load speed and potentially SEO performance, there really is no reason not to use Kraken before uploading images to your WordPress site.
6. Muzli - Color Palette Generator
Muzli’s Color Palette Generator is a neat color pairing tool that helps you lock down a color scheme for your brand materials in minutes.
Maintaining a consistent color scheme for your website and social media platforms makes it much easier for customers to recognize your business in an instance.
But if you don’t have design experience, or any knowledge of color theory, you’ll find it hard to find the right set of colors.
Enter, Muzli.
In one compact overview, Muzli’s Palette Generator shows you different color palettes based on color theory AND how those colors could be deployed on an example user interface.
You can also test these colors out on your posters, banners, mock-ups, and landing pages, by saving each color's individual code and applying it in your design tool. This is what the code looks like:
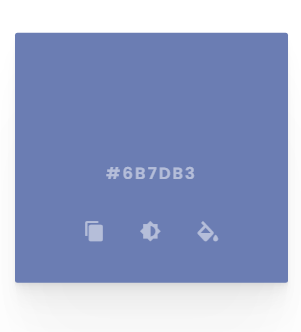
Hover any of the colors on your selected palette and note down the 6-character code.
Once you've go your code, you can search for it in a tool like Canva, or even Photoshop, like this:
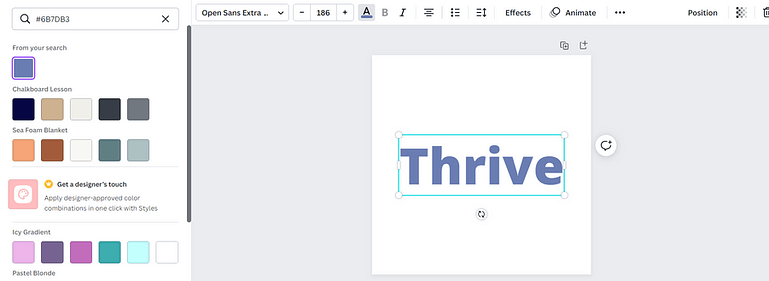
Use the color search tool in Canva, or any other design tool, to find the colors in your chosen palette from Muzli.
With this tool, you don't have to waste time coming up with the right colors for your designs. Simply use the palettes you've generated, or create new ones, to keep your visual content fresh and appealing.
Another good thing about this tool? You don't need an account to access it or download a palette, making it super easy to jump in, generate a color scheme, and hop right out.
Stop the press!
Did you know that we implemented Smart Color Technology in both Thrive Theme Builder and Thrive Architect Smart landing pages.
All you have to do is pick your main brand color and Smart Color Technology automatically creates a professional color palette to go with it so you can focus on getting your business set right up.
With this tool, you can create a professional website, with stunning landing pages to match.
Check out these great landing pages templates to see what picking the right colors for your brand can do for your website. They're all included as part of Thrive Suite.
7. Placeholder.com
Do you want to build the layout of your landing pages and funnels quickly without getting distracted trying to find the perfect images?
Want to avoid bloating your WordPress media library with temporary placeholder images?
Then you’ll love this tool...
Placeholder.com allows you to instantly create images using just a URL!
Like this...
https://via.placeholder.com/300x150
Simply add the URL to the image field in the Thrive Visual Editor, like this...
If you want to add text, just use this...
https://via.placeholder.com/300x200?text=Team+Photo
By default, the placeholder image is light grey and the text is slightly darker. If you prefer to use a different set of colors (perhaps to contrast better as you build your page), you can add the color hex codes just after the dimensions...
https://via.placeholder.com/200x280/93E3C0/454545?text=Ebook+Cover
Now I know it’s hard to get excited about rectangles, but the ability to instantly create images with just a URL can really speed up your design workflow. It means less time spent faffing around looking for images, uploading them, and deleting them later.
If you need to add a particular image format to test your design, you’ll find that placeholder.com supports GIF, JPG, PNG and even WEBP extensions, as well as forcing HTTP or HTTPS. You won’t need to use this in 99% of cases, but it’s handy if you have a specific need.
- https://via.placeholder.com/300x120.gif
- https://via.placeholder.com/300x120.jpg
- https://via.placeholder.com/300x120.png
- https://via.placeholder.com/300x120.webp
- http://via.placeholder.com/300x120
- https://via.placeholder.com/300x120
Share Your Best Free Image Tools
So now you have 7 free online tools to help you create amazing images for your website!
You could bookmark each one, but it’s probably easier to just bookmark this page now using Ctrl+D (or ⌘+D if you’re on a Mac). Plus, we’d love to see you here again in the comments.
Speaking of comments...
Do you use any free online tools to design images for your business?
Share them below for everyone to discover.


Good list. I’ve been using ezGIF for some time, it’s very powerful. I do most of my image editing on Windows 10 using the free Photoshop clone Paint.net (terrible name) from https://getpaint.net
Great recommendation, Jacob. Thanks for sharing.
Thanks for this detailed article.
It’s really helpful.
I’m glad it was useful for you!
Is Kraken better for optimizing images than Smush, which is linked inside Thrive Theme Builder?
I wouldn’t say better. Both Kraken and Smush use similar techniques and scripts to optimize images. There might be minor differences, but the important thing is that you are optimizing your images.
Personally, I like the web interface of Kraken.
If you already have a good workflow, that’s great. It’s just good to have alternatives if you need them.
Hi
Grat article!
I’m curious about the plugin version of Kraken for WordPress. It has not been updated in 2 years.. Any other great alternatives to optimize already uploaded images? Thanks:)
Smush it or Optimole 🙂
Brilliant! Just Brilliant! Thanks again for more workable and practical input. Appreciate all that you do. 🙂
Thanks Geoff. We appreciate the positive feedback 🙂
For basic image editing, the free version of BeFunky works nicely. The paid version offers more tools, but for quick and dirty resizing, cropping, adjustments, the free version isn’t bad. https://www.befunky.com/
Thanks for sharing, Rick. I’ve used BeFunky in the past for some great collages.
I will be using ezGif and Kraken.io to help create ads. I am currently using Adobe Spark. I Have been for the past year. Since then they have consistently upgraded features. Like removing backgrounds, saving projects as a template, design assets and improving templates. You can also collaborate with a team. It’s not free but has a 30 day free trial.
Hey Jon. Thanks for recommending Adobe Spark! I’ll check it out.
Great list David. I recently discovered vectorization.org which is great for turning png or jpeg logos into vectors. I do find it works best with a single color but you can add color back in after you convert it.
Also, while not free, Adobe does offer it’s Photography plan for $10/mo and it includes Photoshop, Lightroom, and Adobe Spark. It also has 20GB of cloud photo storage
Great additions, thanks Stephen. $10/month is much more affordable.
Incredible stuff… Thanks for sharing!
No problem, I’m glad it was valuable.
This is a very useful post!
I only wish that during the website build livestreams that ThriveThemes does from time to time, you wouldn’t skip over such important parts of designing a visually stunning site.
Show the entire process from editing the images, to compressing the images, to mixing up the images and finally designing the site.
So many of the site design demos the end result looks so unprofessional because you guys don’t focus on the importance of professional looking images for the site.
Thanks for the suggestion Christopher
It’s true that during livestreams we don’t focus on those mainly because of time concerns, but as you can see on the demo websites we made sure to use consistent images which make the templates look good so that you can imagine how it will look on your own site with your own images.
That’s my point exactly… you see the demo site and the visual potential of ThriveThemes but because most small business owners are not web/graphic designers their images are severely lacking.
By incorporating the process and tools used to take simple images and turn them into more polished images would be a tremendous help for your customer base. If not on the live streams then maybe in the members only courses.
Great post thanks David.
You might want to note that remove.bg is now inbuilt to Canva. So you can remove the background inside Canva without having to leave.
So great!
That is news to me! You’re absolutely right, Kat, Canva aquired remove.bg earlier this year… here’s the announcement post. Thanks for adding this.
You’re welcome! Since we use remove.bg in our business constantly, it’s been a total gamechanger. Now you can remove the background, add text and resize all in the one place 🙂
Thanks for sharing Kat that’s a valuable time saver!
I’ve used MyEcoverMaker for several years. You go a long way creating covers etc. with the free version, even though I prefer the features in the paid one. I also use Visme for infographics.
Thanks for sharing those, Ingela. I’ll check them out!
Thanks for this list, guys. I love remove.gb and ezgif. I used tinypng for image compression, but I think ezgif can squeeze those images even more.
For photo editing, graphics etc., I use Gimp, which is also free and has the same functionality as Photopea/Photoshop.
Great recommendation! TinyPNG is a good tool too. I think their free plan supports images up to 5MB, so it will work for images too large for Kraken. Thanks for sharing.
Excellent list. I recommend the Pro version of Canva. It is easily worth it. Also, I often use pixlr.com. It is a cloud-based lite version of Photoshop. It loads faster than Photopea to make quick work of resizing images.
Thanks for adding your recommendations, Barney. Yes, Pixlr is a great tool too.
I was looking for the best way to make illustrations and finally discovered Figma (https://www.figma.com/), and now use the Story Set by Freepik plugin to achieve a uniform style of illustrations (also available here https://storyset.com/), I just change the main colour and leave the rest (much like TTB). Game changer for me!
I was also hoping you could clarify something though..
Optimisation is discussed above, but Optimole is recommended in the TTB setup. So I’m confused what’s best (or simplest) practise here..
Do I need to optimise before uploading? Can I just upload whatever and let Optimole ‘fix it’? Or should I upload something not so big, and let Optimole optimise further?
And I always want to upload a large / 1080p image, even for a thumbnail, as I’m not sure where I might want to use it later. Is there a more efficient way around this?
And now I think of it, can you zoom into an image without cropping it? I find I have multiple versions of the one image to suit different placements, where 1 image and framing it differently would be useful
Thanks!
any help on these questions please?
If you’re using Optimole, no need to optimize before uploading (it’s one of the reasons we integrated with them).
With Thrive Architect, you can manipulate images on the canvas (such as showing a different part of the image) or inside WP you can also edit images (but then it would be cropping).
Thankyou Hanne!
Have been a fan of https://clippingmagic.com/
Like Remove.BG, (new to me), it takes a subscription to use it often.
Thanks Mark.
My best image discovery in the past year is Sirv.com. This is a CDN, super fast. But it also has a lot of other features. You can watermark. You can resize and reformat the images with the URL adjustments. There is a plugin for WP too. So, your entire media library gets co-located there. A free version was used for a couple of years, but now we do it with many sites.
Good support so that we can use our own domain.
https://CDN.SwimISCA.org
You can’t see much when surfing this site, as to its power. Get your own account.
https://my.sirv.com/#/signup?ref=gonholle
I’m using Sirv.com and a booster website we built, https://Web.SwimISCA.org to share our association and event logos with others in our network.
Sirv.com also saved me by delivering our PDFs on meet weeks as my ISP was going to ding us an extra $100 for bandwidth. Plus, Sirv.com images were delivered much faster.
Brilliant addition, thanks Mark!
The Canva utility is sweet. PLUS, as a NONPROFIT, it is even better! They’ve got a WONDERFUL nonprofit package that allows 10 users, sets up your colors and fonts. If you are a nonprofit like us, International Swim Coaches Association, then search for the application process within Canva.
Lastly, I’ll have to learn how to knock out the backgrounds with the clipping utility in Canva. Thanks for that pointer too.
Photopea looks a lot like Afinity Photo which I use and love. AP isn’t free but it’s a one time cost of less than $50 bucks. When you utilize all you can do with AP it’s actually better than free as it can save you mucho moola… LOL > I use it to manipulate images, resize, compress, create logos, and a cool little hack regarding EXIF data. Actually it’s not a little hack, because it can give you heavy hitter results when applied right…
Thanks Ritter. Tell us more about the EXIF trick.
I’ll be creating a Course using Thrive Apprentice detailing the process and the tools I use to gain an advantage with Image Data… I’ll reply here or email you at Thrive when it’s ready to roll and give you access to gain your valuable feedback.
Sound like a fair trade?
Brilliant and super helpful as always!
David thanks for all of these options. I look forward to trying these out. The only one I knew on the list was Canva (I agree a great option if you struggle with design or don’t have time to create).
Some other software that folks may want to check out:
Affinity Photo (https://affinity.serif.com/en-us/photo) – it is comparable to Photoshop and is a one time license instead of an annual subscription (at least last I checked). I believe Shane has suggested this in the past. They also offer a suite of editing tools (video, layout, image) that are integrated similar to what Adobe does.
Gravit Designer (https://www.designer.io) is an excellent tool either online or download that has a free and premium version. If you like designing from a blank slate, this is a great option and has built in image sizes for social media images like banners and posts. It can also create vector/svg files. I use this pretty regularly for quick image editing and when I need an offline option.
Another free online editor that I have used in the past is, Pixlr X Photo Editor (https://pixlr.com). It is similar to BeFunky mentioned by Rick Z. If you need quick color fills, erasing, or color replacement, it works pretty well.
Thanks Jennifer! These are great additions to the list 🙂
Thank you!! Very helpful!! So glad to have read this – going to save me time researching for the tools.
Thanks for this article! I use Canva and it is really great. I wanna create videos and I am not sure which (free) editor to use. Can you recommend one? (I know it is not exactly the topic here).
Free video tools would be another great post idea!
For short 5-minute screencasts, you can use Loom.
OpenShot and Move Maker 10 are good all round video editing tools to get started.
Later, if you find yourself making lots of videos and you’re generating revenue, it’s worth paying for something like Camtasia.
It is excellent information you have shared. I will be able to work with the tools you have provided. Thanks, David
The free background remover tool available on DepositPhotos website is better than remove.bg as their isn’t a pixel size limit
Thanks for sharing, Andrew!
A great way to create new color schemes for your website is https://colormind.io/ You can create/adjust schemes and they are immediately shown on a website or dashboard, whatever you’re looking for. Also works great for creating a color scheme from image upload.
Thanks Victor! This is another great tool to add the list.
Affinity photo is my application to go and it is just €55 lifetime, without discount. I use also their designer and publisher. Great software and lots of great tutorials they have. No need for anything else.