Want to learn how to use conditional display to make your landing pages work harder and smarter?
You’ve come to the right tutorial.
Conditional display is a really useful tool for business owners who want to be strategic with their marketing. Why spend hours designing 3 - 4 different landing pages, when you can just use one?
Sounds too good to be true? It isn’t. I’ve seen this feature in action and trust me, it works.
And in this tutorial, I’ll show you how to set it up the right way.
Let’s dive in.
More...
What is Conditional Display?
The concept of Conditional Display is simple: Show specific content based on certain display criteria.
It allows you to customize your website's appearance and messaging in real-time, tailoring the user experience to match each visitor's characteristics or behavior.
This tech works by using information about your visitors - like where they're from, what device they're using, or how they found your site - to show them tailored content. This could mean changing images, text, offers, or even entire sections of your page to better match what each visitor is likely looking for.
For example, if someone comes to your site from a Facebook ad about a specific product, conditional display could make sure that product is front and center when they land on your page. Or if a visitor is browsing from their phone, you might show a simpler, mobile-friendly version of your site.
Key Benefits of Using Conditional Display
Conditional display isn't just a fancy tech trick - it can seriously boost your website's performance. Here are the main reasons why it's worth your time:
Personalized User Experience: When people feel like your content speaks directly to them, they're more likely to engage and stick around. This personal touch can turn casual browsers into loyal customers.
Higher Conversion Rates: When you show visitors exactly what they're interested in, you're making it easier for them to say "yes." Whether you want them to buy a product, sign up for a newsletter, or request a demo, tailored content can smooth the path to conversion.
More Efficient Marketing: Instead of creating dozens of different landing pages for various campaigns or audiences, you can use conditional display to make one page work harder.
Setting Up Conditional Display on Your Website
The best part about this tech is the fact that it’s actually really straightforward to setup. You don’t need to be a tech expert to get it done – and I’ll show you how.
For this tutorial, you’ll need to already know the audience segments you want to target. Who do you want to create a different display for and how do you want this display to be activated on your site? Keep that in mind as you go through this guide.
Thrive Tip
Conditional Display is a feature that’s available when you use the Thrive Visual Editor.
This means it’s available inside our Thrive Architect page builder plugin, but you can also use the exact same steps shown in the video when customizing templates in Thrive Theme Builder or when building content for your online courses in Thrive Apprentice!
For this tutorial, we’ll focus on using this feature in Thrive Architect.
Step 1: Download and Install Thrive Architect
When I first heard about conditional display, I thought it would be difficult to set up, so I avoided the feature. But then I started working for Thrive Themes and had to try out the feature on my own.
I was blown away by how easy it was to set up. And that’s why I recommend Thrive Architect, not just for conditional display but for building all your landing pages, too.Ease of Use/Setup
Getting started with Thrive Architect is simple.
Purchase your subscription, install your plugin, and activate it. Once it’s live on your site, head to the posts or pages tab and select “Create New”. In the WordPress Block Editor, you’ll see a new option at the top of your screen: a green button with white text that says “Launch Thrive Architect”.
You'll be taken to the Thrive Architect Editor where you can start editing your pages.
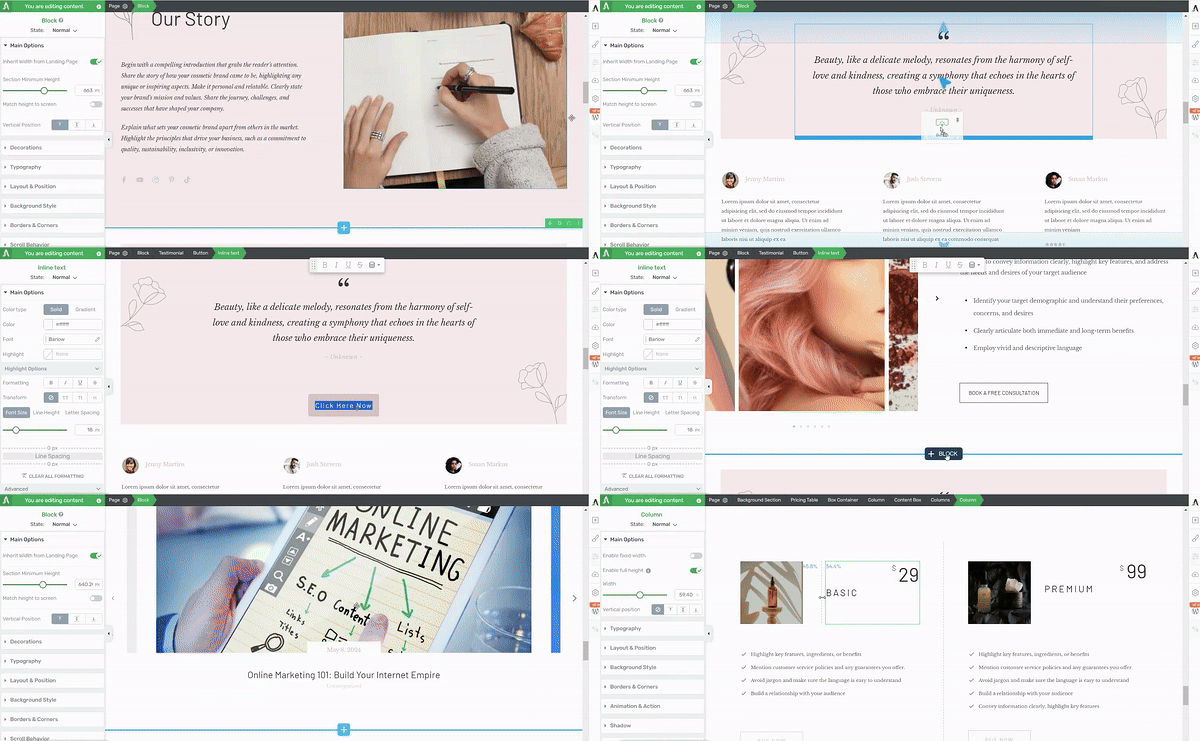
Thrive Architect in action
Tailored Landing Page Templates for Quick Creating
Starting from scratch can be intimidating. That's why Thrive Architect offers a variety of templates designed to make your life much easier. Whether you're creating a landing page for a digital product, physical product, service, or even a membership site, you'll find templates that fit your needs.
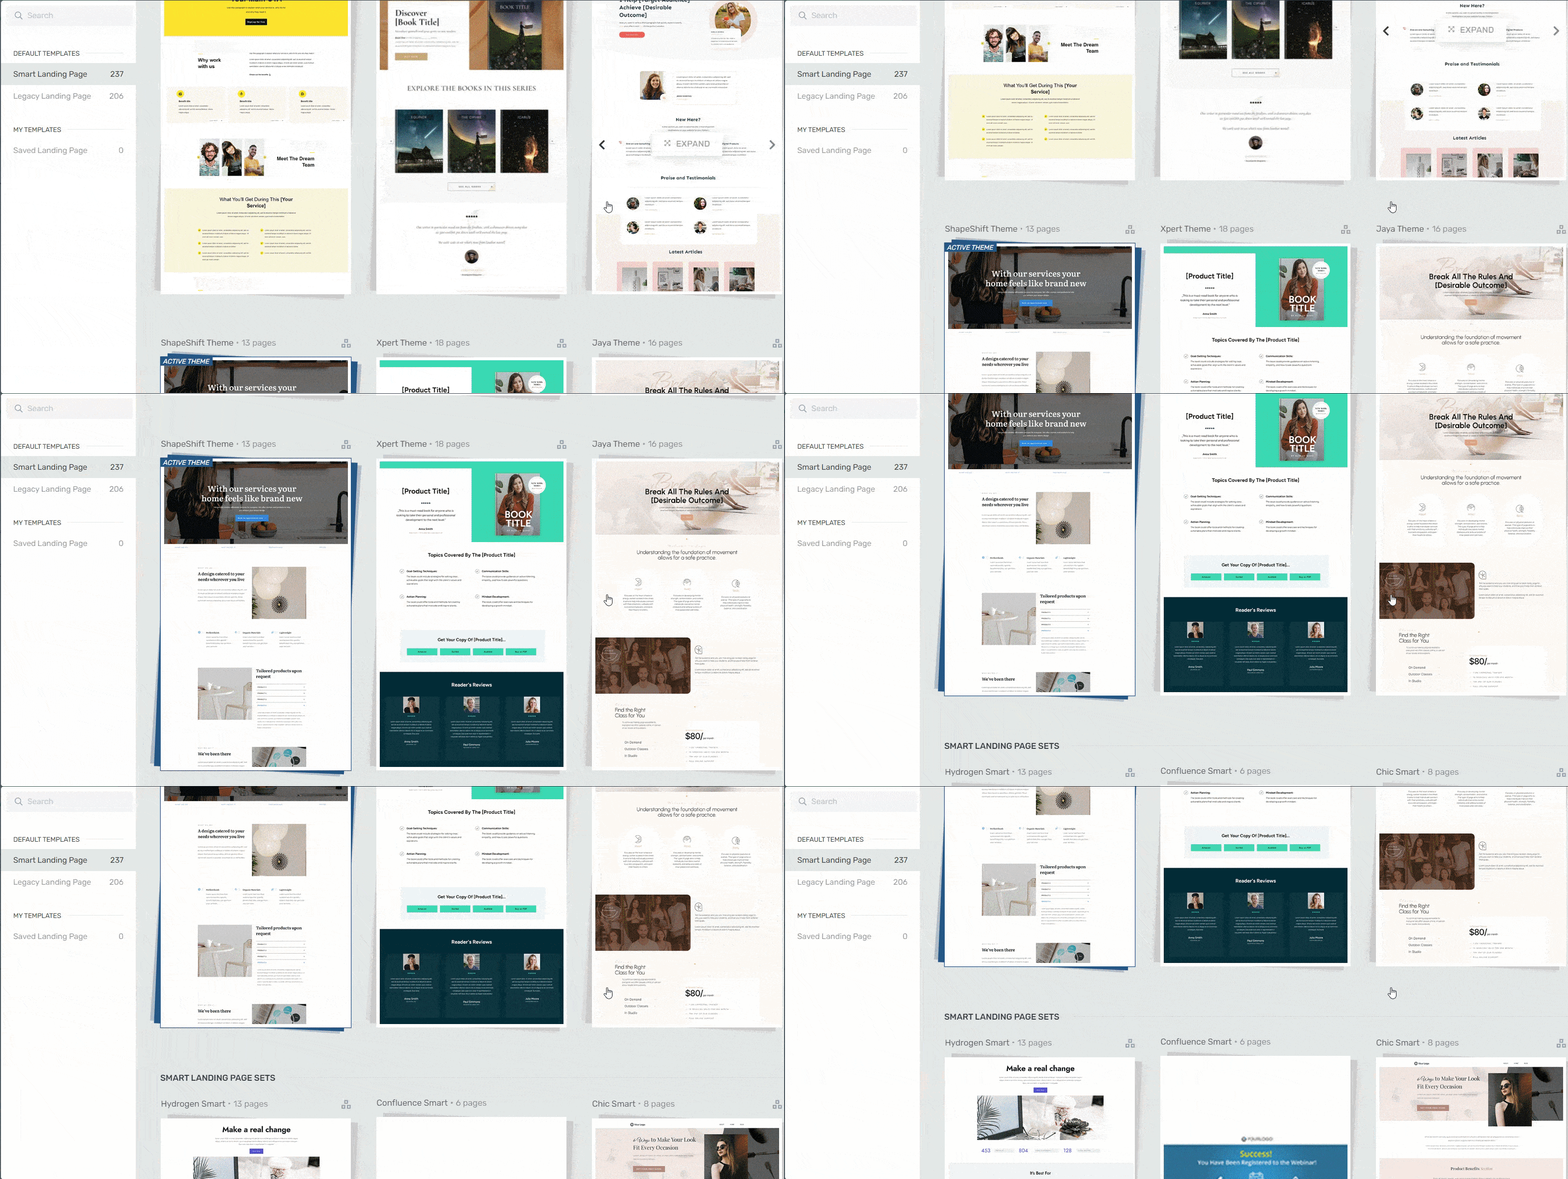
Landing page template sets in Thrive Architect
There are templates for every part of your funnel.
Powerful Conditional Display
When it comes to conditional display, Thrive Architect really shines. It offers advanced targeting options that let you personalize content based on various factors like visitor location, device type, or browsing history. This means you can show different headlines, images, or offers to different segments of your audience, all from a single page.
A Tool for All WordPress Users
What I appreciate about this plugin is how it meets you at your level of experience. If you’re a WordPress beginner who doesn’t want to build from scratch, simply choose from the library of page templates and replace the placeholder images and text with your own.
And if you’re a more experienced WordPress user who wants a tool that offers a lot of customization options and allows you to design without needing to code – this tool is right up your lane.
Thrive Architect puts you in the driving seat. You get to build your pages on your terms, without the hassle of needing to learn HTML or CSS.
Step 2: Create or Open Your Landing Page
After you’ve installed Thrive Architect, head to the Pages section in the WordPress dashboard.
For an easier intro to this tool, I would recommend first using conditional display on an existing landing page.
So, pick a page and open it in the WordPress Block Editor. Next, click the Green “Launch Thrive Architect” button.
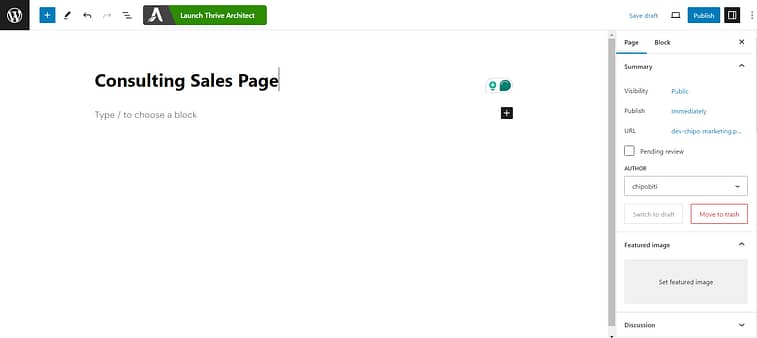
You’ll be directed to the Thrive Architect page editor.
Step 4: Create Your Different Displays
You’re about to see how easy it is to set up conditional display on your pages. It’s so straightforward, you’ll find yourself saying, “Really? Just like that?”
First select a section of your landing page. In Thrive Architect, these sections are known as “Blocks”.
I’ve chosen to edit my hero section, since this is one of the key places to modify for different audiences.
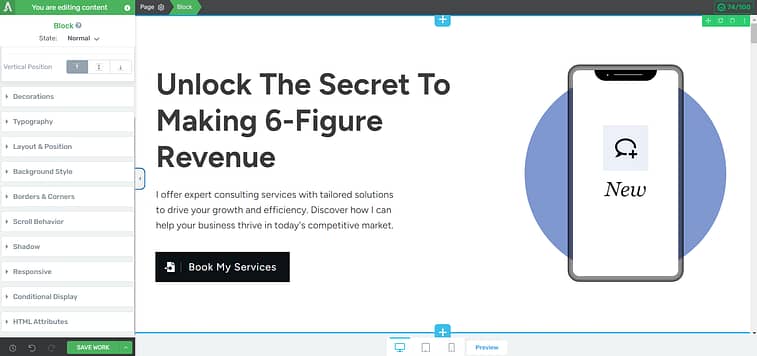
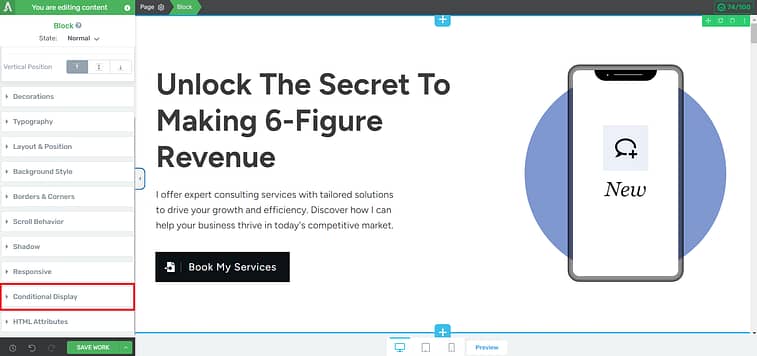
After you’ve selected your block, take a look at the left sidebar and find the “Conditional Display” tab. Click the tab to expand it.
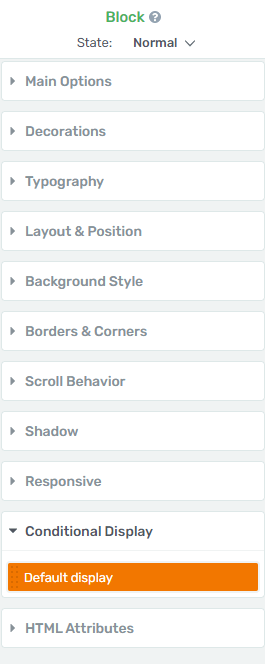
The first thing you’ll see is the “Default display” tab, which is simply what’s on your page.
Create a New Display
Hover over the orange tab until a “Duplicate” option opens. Click it to create a second variation of your current display.

The duplicated version will appear above the original one, like this:
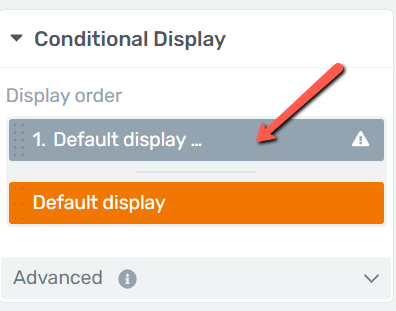
I changed the name of my second variation to make it easy to find. Just hover over the tab and click the pencil icon that appears to edit it.
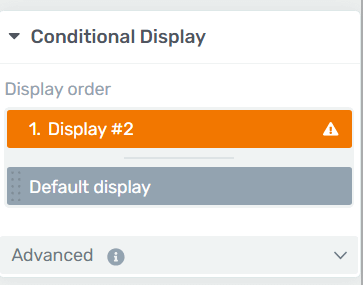
Make sure to click the duplicated tab before you start editing your content. Next, start working on your block.
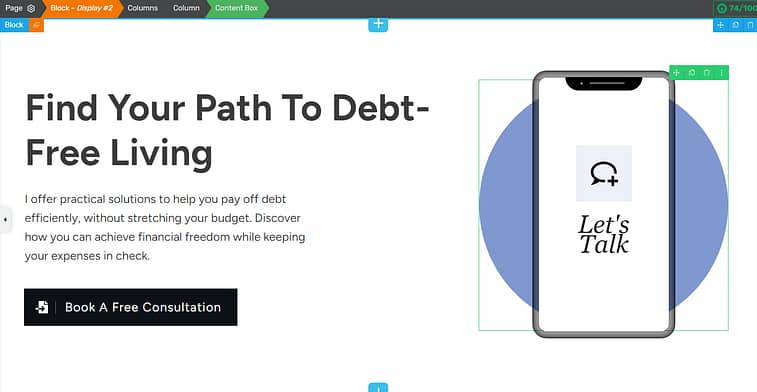
I want my second display to advertise a different offer to an audience that will click on a specific ad on becoming debt free.
Take a look at the changes I’ve made to my hero section:
Set Conditions for Your Display
After you’ve made your changes, you need to configure your display conditions. These conditions determine which version of your page will appear when your visitors land on your site.
My default version will be shown to anyone landing on the page, while my second version will appear after someone’s clicked a specific link.
Head back to the duplicate tab in the left sidebar and hover over it to find more settings.
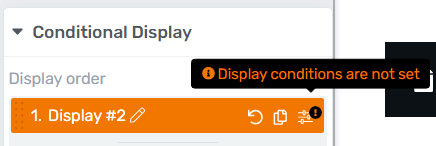
Click the option with a little exclamation point over it, this is where you set your display conditions.
A pop-up will appear where you can set your condition rules:
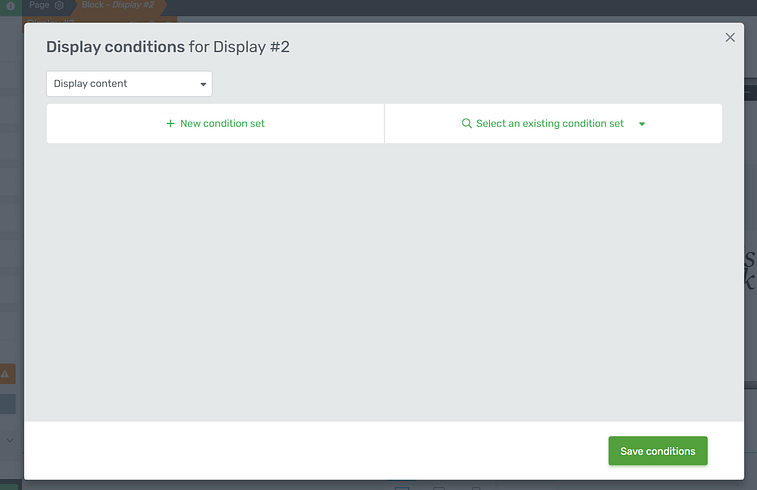
You can set a condition based on displaying or hiding content.
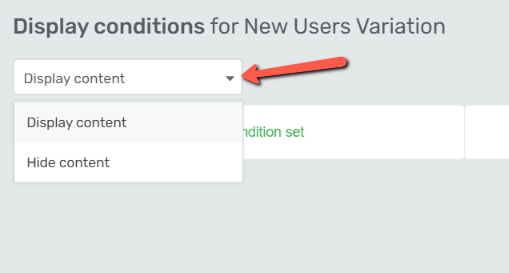
To set a new condition, click the “ + New condition set” option. Name your condition to avoid confusion.

The first dropdown lets you choose the first part of your condition. You can base it on a user, post/page, referral source, time and date, request data, or other.
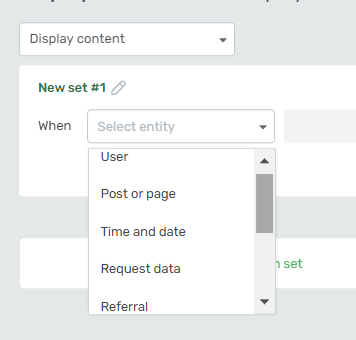
Since mine will come from a specific URL, I chose “Referral”.

In the next option I selected “URL” and the last step is where I would add my link.
Save your condition and you’re good to go.
If you have more conditions to set, repeat the condition creating process. It’s as simple as that.
Key Landing Page Areas for Conditional Display
Thrive Architect’s Conditional Display feature works for specific areas – Blocks, Text Elements, Background Sections, Content Boxes, and Custom Menu elements.
This may sound limiting but it actually isn’t. You can choose from editing whole sections of your page, to minor details. Here are a few page elements you should think of modifying, when using this tool:
- Headlines: Change your main title to grab attention. Use words that your specific audience will connect with. For example, "Busy Moms, Meet Your New Time-Saver" for a parent audience.
- Hero Image: Pick a picture that are relevant to your offer and target audience. Example: If you're selling to young professionals, show someone in that age group using your product
- Call-to-Action (CTA) sections: Use words that encourage clicking. "Start Your Free Trial" might work for some, while "Get Your Discount" could be better for bargain hunters.
- Testimonials: If available, add product-specific testimonials to your new display.
- Product Features: If your second display is promoting a different product, make sure to change your features and benefits sections, otherwise they’ll look out of place.
- Pricing Tables: Adjust pricing tiers or packages to suit different segments. For example, you could have different pricing for members and non-members
Thrive Architect Conditional Display Use Cases
In this next section, we've broken down a few easy ways you can use conditional display to improve your marketing and land more conversions.
Use Case #1: Special Pricing for Existing Customers
You can use Conditional Display to create a discount on a new (or current) product for existing customers.
First, create a default pricing table that has regular, standard pricing for your products:

Set a default display for your standard pricing.
And then create a pricing table variation with discount pricing that can only be seen if the user meets certain display criteria.

VIP Pricing display variation for existing customers, which shows discounted pricing.
This is a great way to boost conversions with your current customers — and make them feel special, because who doesn’t love a good discount?
Use Case #2 - Time-Constrained Content
You can also use Conditional Display to display specific content during business hours, and different content during non-business hours.
Let’s say your business doesn’t operate on weekends. You can create a display that communicates your business is closed if someone views your website over the weekend. To ensure you don’t lose the opportunity to capture new leads, include a Contact Form in your weekend Conditional Display variation that a visitor can fill in and submit, so you can contact them when your business resumes operations on Monday.

A “Weekend” or “Out of Office” display can be an effective way to capture leads outside of business hours.
Now, It’s Your Turn! Give Conditional Display a Try
So, you've learned about conditional display and how it can make your landing pages work better. Why not give it a shot?
Start small. Pick one thing on your page to change up, like the main headline. Try making two versions - one for new visitors and another for people who've been to your site before. As you get the hang of it, you can try changing other parts of your page too.
If you're wondering how to get started, Thrive Architect is a great choice. It's got easy-to-use design tools that make setting up conditional display pretty straightforward, even if you're not a tech whiz.
And you get to create impressive landing pages to generate more conversions, too.
But don't just take my word for it.


