TL;DR: Why a Free Mini-Course Is the Smartest Lead Magnet You’ll Ever Create
A free mini-course as a lead magnet doesn’t just grow your email list — it filters for the right people.
Instead of handing out PDFs that get lost in inboxes, you invite your audience to experience your expertise.
They learn, apply, and see real results — which builds trust long before the sales conversation starts.
In this guide, you’ll learn how to:
Design a short, outcome-driven course that makes people want more of your help.
Build the entire funnel on WordPress using Thrive Suite — no tech headaches required.
Turn your free course into a seamless pre-sell for your paid offers.
By the end, you’ll know exactly how to turn your knowledge into an evergreen client-attracting system that runs quietly in the background while you focus on your business.
I used to think a free PDF was enough to attract the right kind of leads.
It worked — for a while. Then came the familiar pattern: downloads spiked, engagement dropped, and my inbox filled with names that never turned into clients.
Everything changed when I built my first free course.
It wasn’t fancy — three short lessons, a couple of templates, and a quick video recorded on my phone. But it did something no lead magnet ever had before: it showed people what it actually feels like to work with me. They didn’t just read my ideas; they experienced them.
That’s the difference.
A well-designed free course turns casual subscribers into qualified leads because they’ve already spent time learning from you, applying your methods, and seeing results. They trust you before you ever make an offer.
In this guide, I’ll show you how to create a mini-course that attracts those kinds of leads — the serious ones who finish lessons, reply to your emails, and actually want to work with you.
You won’t need a funnel that looks like an engineering project or a pile of tools that refuse to talk to each other. I’ll walk you through how to design, launch, and deliver your free course — the same way I do it — using Thrive Suite to keep everything beautifully simple and fully under your control.
If you’re still relying on static PDFs, you’ll love this breakdown of how to design irresistible lead magnets that actually convert — not just collect emails. Read No More Lame Freebies! This is How to Get Lead Magnets Right →
Course Lead Magnets > PDFs: Here's Why
Every marketer talks about “value,” but few actually show it.
That’s why I stopped giving away PDFs and started giving people a real taste of what working with me feels like.
A course is where theory meets proof. It says: I don’t just know this stuff — I can help you use it.
And that’s what changes everything. Suddenly, your audience isn’t cold traffic; they’re warm, informed, and already halfway through your funnel before you ever make an offer.
It’s not magic. It’s structure.
And once you know how to build it, you’ll never go back to random freebies again.
Course as a Lead Magnet: How to Get Started the Right Way
Most businesses rush into creating a free course without a clear strategy, ending up with content that attracts tire-kickers rather than qualified leads. The key to success isn't just delivering good content - it's building a strategic pathway that guides the right people toward becoming clients. Here's how to create a course that not only attracts leads but converts them into paying clients...
1. Understand Why a Free Course Outperforms Other Lead Magnets
Most lead magnets promise quick wins — a checklist, a template, or a PDF that disappears into download folders. A free course, on the other hand, delivers transformation.
When someone takes your course, they experience your value in action. They see your teaching style, apply your ideas, and achieve a real result — all before spending a cent. That level of trust-building can’t be replicated by static downloads.
Here’s why free courses consistently outperform traditional lead magnets:
- Higher perceived value: People associate “courses” with real learning and results.
- Built-in engagement: Multi-day or multi-lesson formats keep prospects interacting with your brand longer.
- Stronger qualification: Those willing to invest time are more likely to invest money.
Think of your free course as a “try before you buy” experience that builds confidence in your expertise. When designed strategically, it becomes the first stage of your sales funnel — pre-selling your paid offer while delivering genuine value.
2. Design Your “Appetizer” Course for Maximum Impact
The goal of your free course isn’t to teach everything you know — it’s to help students achieve one meaningful win that naturally leads to your paid offer.
This is your appetizer course: short, actionable, and outcome-driven.
Follow the “What, Not How” Principle
Teach the what — the strategy, mindset, or framework behind success — but save the in-depth how for your paid product. This keeps your free course valuable but incomplete enough to create curiosity and demand.
This “teach the what, not the how” framework is also key to creating irresistible courses. Learn more in How to Teach Online: A Complete Guide for Beginners.
Keep It Compact and Focused
The sweet spot for a free course is 3–5 short lessons, ideally under 15 minutes each.
Each lesson should include:
- One clear takeaway or micro-outcome
- A simple worksheet or checklist
- A next-step teaser that connects to the next lesson
Example:
Instead of “Build Your Entire Marketing Funnel,” offer “How to Create a One-Page Lead Funnel in 3 Days.” Small, specific wins convert better.
Choosing Your Format — Email Drip vs. Mini-Video Course
- Email drip course:
Ideal if you want to keep production light. Each day’s lesson arrives in your subscriber’s inbox, building a daily habit and improving open rates. Great for writers, consultants, and coaches. - Mini-video course:
Perfect when you want to show personality and create visual connection. Video builds trust faster and increases perceived value. You can even repurpose old webinars or training recordings to save time.
The Efficiency Hack — Repurpose What You Already Have
If you’ve ever written a high-performing blog post, hosted a workshop, or built a paid course — you already have 80% of your mini-course content.
Repurpose what’s working:
- Turn a top blog series into a 3-day challenge.
- Extract one module from your main course as a free “starter series.”
- Use snippets from webinars or YouTube tutorials as bite-sized lessons.
Repurposing saves hours and helps maintain consistency between your free and paid material — making your lead magnet feel like a seamless part of your ecosystem.
3. Build Your Course Funnel in WordPress (with Thrive Suite)
I’ve tested plenty of ways to host and deliver a free course — from external platforms to patch-together plugin combos — and the truth is, most of them create more friction than freedom.
That’s why I keep coming back to Thrive Suite.
If you’re already running your site on WordPress, Thrive Suite gives you everything you need to create, launch, and manage your entire mini-course funnel without ever leaving your site. No subscriptions to juggle, no complicated workarounds. Just one connected system built for people who care about conversions.
Here’s what that looks like in practice:
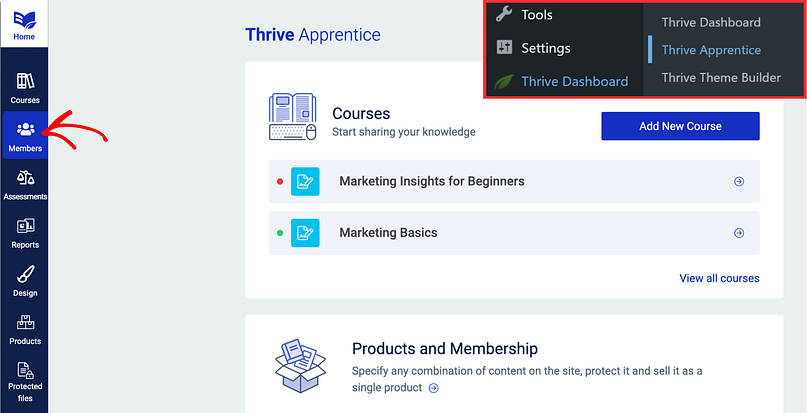
Step 1: Create and Protect Your Course with Thrive Apprentice
Thrive Apprentice is where your course lives. You can upload lessons, structure them into clear modules, and restrict access to registered students — all through an intuitive drag-and-drop interface.
I love that it feels like a premium learning experience even when the course is free. You can add progress tracking, lesson previews, or drip release schedules in minutes.

Want to see exactly how Thrive Apprentice performs in real life? Don’t miss our hands-on Thrive Apprentice Review: I Tested It Like a First-Time Buyer.
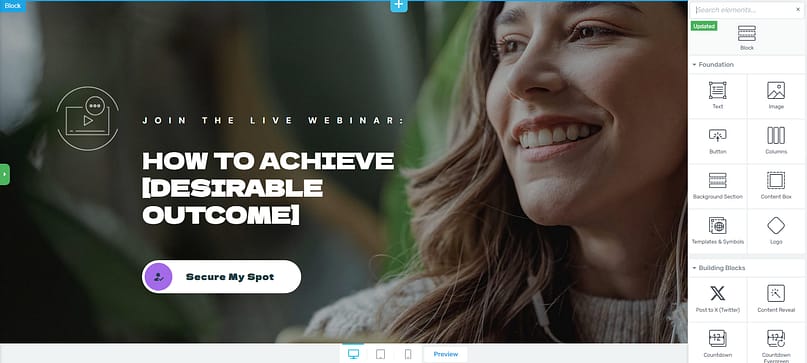
Step 2: Design a Landing Page That Sells the Experience (Thrive Architect)
Your landing page isn’t just a form — it’s your first impression.
Thrive Architect makes it easy to build a page that actually converts: bold headline, clear transformation, one call-to-action.
I usually start with one of their course templates, swap in my brand colors, and it already looks polished.
Add a testimonial or short video invite, and you’ve got a page that makes people want to sign up.

Thrive Tip: This section is just the start. To create a super impressive online course landing page, check out this step-by-step guide.
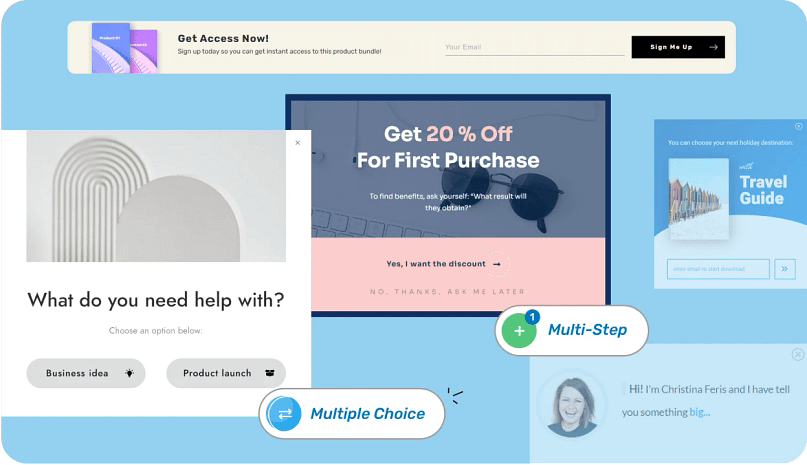
Step 3: Capture and Tag New Leads (Thrive Leads)
Here’s where everything connects.
When someone joins your free course, you can automatically add them to your email list, tag them as “engaged,” and start your follow-up sequence.
Thrive Leads integrates with all the big email platforms — ConvertKit, ActiveCampaign, Drip — so you can track engagement and segment students easily.

What I like most about Thrive Suite is that it’s built for creators who want to move fast and look professional.
You’re not stuck renting space on someone else’s platform — you own everything: the brand experience, the leads, the course.
If you’re serious about turning your expertise into a consistent lead engine, this setup just works.
Once you’ve set up your lead capture, make sure your opt-in forms actually convert. Here’s how: How to Improve Your Opt-In Form Conversion Rates.
4. Upsell Naturally to Your Paid Course
Once your students complete the free course, they’ve already experienced results with your methods — making them your warmest, most qualified leads.
Now it’s time to guide them toward the next step: your paid offer.
Add a clear next-step CTA at the end of the final lesson. Example: “Ready to take this further? Join the full program where we dive deeper into [result].”
Use behavioral email follow-ups. If a student finishes the course, trigger an automated message inviting them to your sales page or a live session.
Show social proof. Include short testimonials or results from students who upgraded from your free course to the full one.
The key is continuity: your free course should feel like the natural prologue to your main program. When the value progression is clear, the sale feels like the next logical move — not a pitch.
When you’re ready to turn that momentum into revenue, these guides will help:
5. Launch, Track & Optimize
Don’t wait for perfection before going live. Your first version is a test — and that’s a good thing.
Start small:
Share your course with existing subscribers or social followers.
Collect feedback after each lesson using a short survey form.
Track engagement metrics: lesson completion, quiz participation, and click-through rates on your final CTA.
Then, iterate:
If most people drop off after lesson two, shorten the video or simplify the exercise.
If engagement is high but conversions are low, strengthen your upsell messaging.
Keep tweaking — small improvements compound fast.
💡Want a proven roadmap for every step of your course launch? Grab The Ultimate Online Course Launch Checklist — it walks you through validation, setup, and promotion in one place.
Next Steps: Turning Your Course Idea Into Reality
The best course is the one you actually create. Start with these actions this week:
- Tomorrow: Write down the one specific problem your course will solve. Be ruthless about keeping it focused.
- Day Two: Outline your three core lessons. Don't overthink it - what are the essential steps your students need?
- Day Three: Record a simple welcome video and your first lesson. Use your phone if needed - perfect video isn't required.
- Day Four: Create your landing page and first three emails.
- End of Week: Share with five people who fit your ideal client profile. Their feedback will be invaluable.
The key is momentum. Don't get caught up in making everything perfect. Launch your minimal viable course, then improve based on real student feedback. Remember, every successful course creator started with version 1.0.
For more guidance on creating the perfect online course (and release schedule) take a look at this super guide: The Ultimate Online Course Launch Checklist: Everything You Need to Know.
FAQ: How to Use a Free Mini-Course as a Lead Magnet
A free mini-course lead magnet is a short, high-value online course that helps you attract and qualify leads by teaching something actionable.
Instead of offering a simple download, you invite people to experience your expertise — building trust through transformation.
When students complete your mini-course, they’ve already interacted with your content, applied your advice, and seen results — which makes them far more likely to become paying clients.
Keep your mini-course short and focused — typically three to five lessons that take less than a week to complete. Each lesson should deliver one clear result, such as writing a sales email, creating a landing page, or improving a key skill. Short, outcome-driven courses build momentum and higher engagement than longer programs.
Both can convert beautifully.
Video mini-course: Higher perceived value and stronger personal connection; ideal for coaches and experts who teach visually.
Email mini-course: Low-tech, fast to create, and excellent for nurturing habits and improving open rates.
Choose the format that best fits your teaching style and your audience’s preferences.
Start with your warm audience: existing subscribers, social followers, and community groups. Then:
Create a dedicated landing page with Thrive Architect that clearly explains your course promise.
Use Thrive Leads to place opt-in forms or ribbons across your website.
Share your course in relevant blog posts, YouTube videos, or podcast episodes.
Mention it in your email signature and social bios for continuous visibility.
These small, consistent placements compound your reach and sign-ups over time.
A simple, repeatable structure keeps students engaged:
One teaching point (video or written lesson)
One quick win or action step
One supporting resource — checklist, template, or worksheet
End with a short teaser or reflection that naturally leads to the next lesson. This format reinforces progress and retention.
Your free course should feel like the first chapter of your paid program.
In your final lesson, introduce the next step — for example, “You’ve learned the basics. In the full course, we go deeper into building your complete funnel.”
You can also follow up with an automated email inviting them to your sales page or a limited-time offer. The goal is continuity, not pressure.
If your website runs on WordPress, Thrive Suite gives you everything you need:
Thrive Apprentice to create and host your course content
Thrive Architect to design high-converting landing pages
Thrive Leads to capture and tag new subscribers
All three tools integrate seamlessly, letting you build your entire mini-course funnel without external platforms or coding.
Yes — that’s why they work so well. A free mini-course requires time investment, so the people who sign up are already motivated and interested in your topic. By the time they finish your lessons, they’ve seen proof of your method and trust your process. That combination makes them far more likely to invest in your next offer.
Track engagement and conversion metrics such as:
Sign-up rate on your landing page
Lesson completion and video watch time (via Thrive Apprentice analytics)
Email open and click-through rates
Conversions from course graduates to paid offers
This data helps you refine your lessons, adjust timing, and improve your funnel performance over time.
Online Course as a Lead Magnet: Wrapping Up
You now have the blueprint for creating a course that not only attracts leads but converts them into clients. Remember, the goal isn't perfection - it's creating something valuable that connects with your ideal clients. Start small, focus on delivering real results, and refine as you go.
Ready to build your course?
Thrive Suite gives you everything you need to create and launch effectively.
It includes both Thrive Apprentice for professional course delivery and Thrive Architect for building high-converting pages - plus all their other conversion tools for one affordable price. Instead of cobbling together different solutions, you get a complete system that works seamlessly together.
Check out Thrive Suite and turn your expertise into a client-attracting course today.
💡And if you want to go even deeper into turning your free mini-course into a powerful sales funnel, read How to Use a Free Course Funnel to Sell Premium Programs.


