Ever notice how you check Amazon reviews before buying even a $10 phone charger? We're wired to trust other people's experiences more than a company's promises. I learned this the hard way when I first started my web design business — my portfolio looked great, but potential clients would still hesitate. They wanted to know what others thought about working with me.
This is where a review slider comes in. Not the generic kind that screams "I copied this from another website," but one that builds genuine trust. Think of it as your website's equivalent of a friend saying, "Oh yeah, I worked with them; they're legit."
Today, I'll show you how to add a review slider to your WordPress site that actually makes visitors think, "These are real people with real experiences," rather than "Nice template reviews."
Your Site Visitors Are Looking for Reasons to Trust You
Let's be honest - people land on your website with a healthy dose of skepticism. Every time they open a new tab, they're silently asking: "Is this the real deal or another disappointment waiting to happen?"
I tracked my own website behavior for a week and noticed something interesting. Before making any purchase, I'd scroll past the fancy headers and product descriptions, hunting for that one section - customer reviews. Why? Because marketing copy tells you what a company wants you to hear. Reviews tell you what actually happened.
Here's what visitors want to know before they commit:
A thoughtfully designed review slider answers these questions naturally. It's like having previous clients stand in your virtual lobby, sharing their stories with new visitors. Not in a pushy "look how great we are" way, but through genuine experiences that paint the real picture.
And here's something most people miss: negative reviews (or less-than-perfect ones) can actually build trust. A mix of 4.2 to 4.8-star ratings often comes across more authentic than a wall of perfect 5-star reviews. It shows you're running a real business with real humans, not a facade.
Option 1: Add a Review Slider Using a WordPress Testimonial Plugin
Before we dive into the technical steps, a quick note about WordPress plugins. The WordPress repository houses dozens of testimonial plugins, and while many are good, I've landed on Thrive Ovation after years of testing different options.
Why Thrive Ovation? It's created by Thrive Themes, which means it's built for conversion and not just display. Unlike simpler plugins that just show static testimonials, Thrive Ovation lets you capture, manage, and display reviews in ways that actually help turn visitors into customers.
Today I'll show you how to use Thrive Ovation to build a review slider. If you're not using Thrive Ovation yet, you'll need a license - but I think you'll find it's worth the investment for the control and flexibility it offers.
Why Thrive Ovation?
For websites and small businesses that consistently receive testimonials, managing and displaying them effectively becomes a real challenge. Thrive Ovation solves this by offering a central hub where you can collect testimonials from multiple sources, including blog comments and custom forms on your website.
I particularly like how it gathers reviews automatically through capture forms. Being able to tag and categorize testimonials means I can quickly find the right review for the right page, and the customizable templates make everything look like it belongs on my site.
The real advantage is flexibility - you can use these testimonials across your entire website, from sales pages to blog posts, popups, and widgets. Having all your social proof in one organized place makes it simple to add credibility wherever you need it.
While it might offer more features than what a complete beginner needs, it's perfect for growing businesses who want to turn customer feedback into a trustworthy showcase of their work. I've found it saves hours of copying and pasting reviews from emails and social media messages.
Step 1: Collect or Select Your Testimonials
First things first: you need testimonials to display. Thrive Ovation gives you two main ways to gather these.
The first is manual addition. You can copy-paste glowing feedback from customer emails, screenshot social media mentions, or input feedback you received during phone calls or meetings. This works great for adding historical testimonials from your archives too.
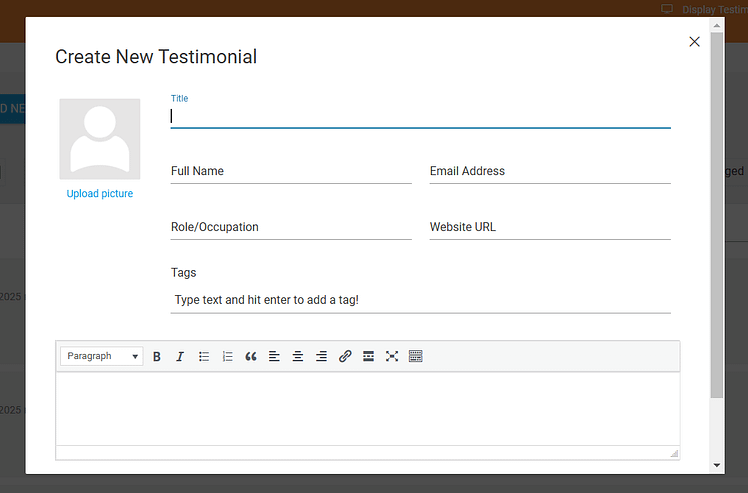
Manually adding reviews in Thrive Ovation
The second method lets your customers submit testimonials directly. You can send them a simple submission link or add a testimonial form to your website. Thrive Ovation even captures comments from your blog posts and lets you import praise from social media platforms.
I prefer using a mix of both methods. Manual entry gives me control over formatting and presentation, while the submission form makes it easy for happy customers to share their experience right after we've worked together.
Pro tip
If you're wondering about the tricky part - actually asking for testimonials without sounding desperate or pushy - check out our guide on How to Ask for Testimonials Without Feeling Awkward.
Step 2: Choose Where to Display Your Review Slider
Thrive Ovation makes adding your slider straightforward. You can either use a shortcode in the Gutenberg editor (which you can learn more about here), or add it through Thrive Architect, which is what I use for all my pages.
I'm going with the Thrive Architect method because it gives me more visual control and real-time preview of how the slider will look. Plus, since I build all my pages with Thrive Architect anyway, it keeps my workflow consistent.
If you're using Gutenberg, don't worry - the shortcode method works just as well. But for this tutorial, I'll show you how to add your slider using Thrive Architect, where you can drag, drop, and customize everything visually.
Have You Met Thrive Architect?
If you're serious about building pages that sell, Thrive Architect is worth your attention. It's more than just a page builder - it's a conversion-focused design tool that comes with professionally designed templates you can actually use without a designer's eye.
I like that it includes elements specifically made for getting visitors to take action - like customizable buttons, countdown timers, and lead generation forms. These aren't just pretty design elements; they're built to help turn visitors into customers.
The best part? You can drag, drop, and edit elements while seeing exactly how your page will look to visitors. The templates are designed with clear conversion goals in mind, making it perfect for businesses focused on results.
Step 3: Add Your WordPress Review Slider to Your Landing Page
First, open your existing page or create a new landing page in Thrive Architect (learn more about creating landing pages here).
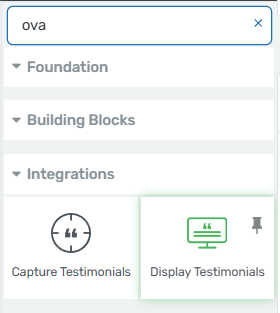
Once you're in the editor, look at the right sidebar and search for "display testimonials" in the elements menu. Found it? Now just drag and drop it onto your page where you want the slider to appear.
A popup will appear asking you to choose a display style. Select "carousel" and browse through the templates until you find one that matches your site's look and feel.

Here's where it gets interesting - Thrive Ovation will ask if you want to manually pick specific testimonials or display them based on tags. Tags are handy if you want to show industry-specific testimonials or feedback about particular services.
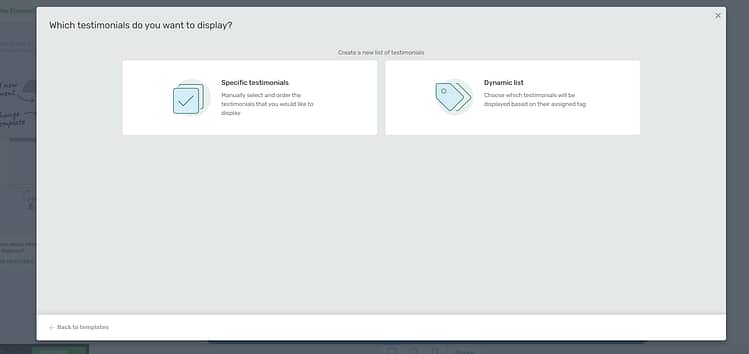
A quick tip about testimonial order: I like to mix things up a bit. While it's tempting to showcase only your glowing 5-star reviews, including some 4-star reviews with constructive feedback actually builds more trust. People are more likely to believe your testimonials when they see a natural variety of experiences.
Once you've configured how you want your testimonials to appear, you'll have the option to save your settings and your new review slider will appear on your page like this:
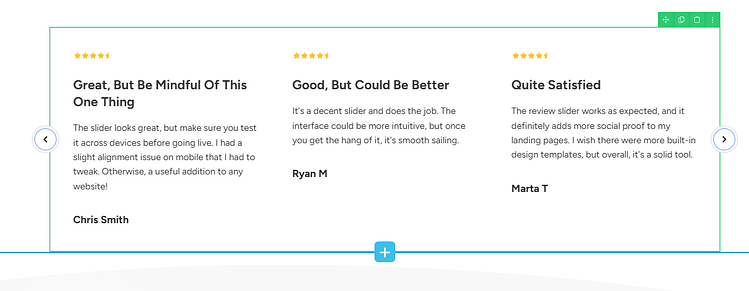
If you want to customize your slider's appearance, take a look at the left sidebar in Thrive Architect and you'll be able to modify its color, font sizes, number of reviews appearing, and so much more.
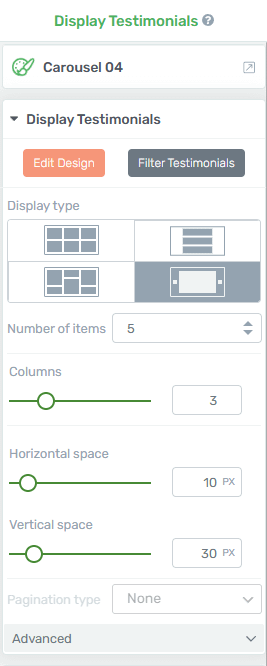
And voila! See how easy that was? Thrive Ovation makes it really easy to add trust indicators like reviews to your landing pages.
But, what if you use a platform like Yelp or Google Reviews for your testimonials? This might not be the best way to do it.
And that takes us to option 2.
Option 2: Use Smash Balloon to Display Your Yelp or Google Reviews
Not everyone keeps their testimonials in WordPress. Maybe your happy customers leave their feedback on Google, Yelp, or Facebook. If that's you, collecting these reviews manually would be a huge hassle - copying, pasting, and keeping everything updated as new reviews come in.
This is where Smash Balloon comes in. It's a plugin that connects your WordPress site directly to your external review platforms, pulling in your reviews automatically. Think of it as a live window into your brand's reputation across the web.
I like how it keeps things fresh without any work on my part. When someone leaves a new 5-star review on Google or shares their experience on Yelp, it shows up on your website automatically. Plus, you can showcase reviews alongside your social media posts (check out our guide on adding social feeds here) to give visitors a complete picture of your brand's online presence.
The best part? You don't need to touch any code or worry about design - Smash Balloon handles the styling to match your website. Your reviews just fit in, looking like they were always meant to be there.
Step 1: Download and Install the Smash Balloon Reviews Feed Plugin
To get started, you’ll need to download the Reviews Feed Pro plugin. This is Smash Balloon’s dedicated plugin for displaying reviews from external platforms.

You can purchase this plugin individually or as a part of the All Access Bundle, where you get access to all feed types – TikTok, Facebook, Instagram, and more.
Purchase the Reviews Feed Pro plugin, set up your account, and keep your license key close by.
Step 2: Set Up Your Reviews Plugin in WordPress
Next, install your new plugin and open it in your WordPress dashboard. You’ll find the plugin in the left sidebar.
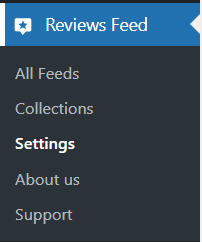
Select the “Settings” option and add your license key to activate your subscription.

Step 3: Create Your First Feed
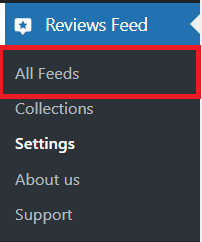
Once your subscription is active, select the “All Feeds” option in the left sidebar.
Select "Add New," and you'll be taken to a screen that says "Create a Review Feed."
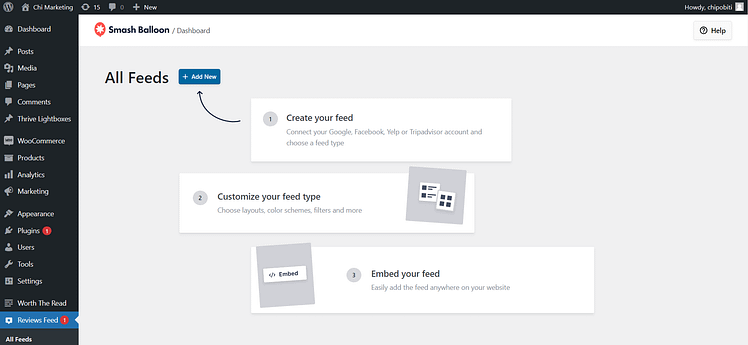
Click "Add Source." A screen will pop up with several platforms to choose from.
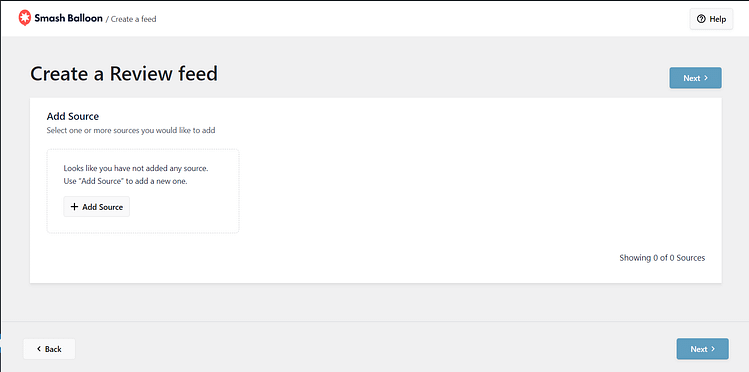
You can display reviews from a variety of platforms – Google Reviews, Yelp, TrustPilot, TripAdvisor, etc.
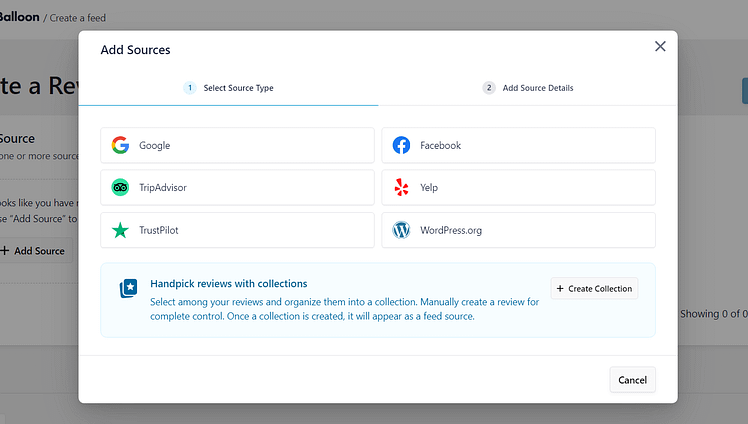
I'm going to choose Google Reviews since I have a couple of reviews there.
Pro tip
Heads up: connecting your Google reviews feed to your WordPress website can get a little technical, but I've already outlined all the steps (and included screenshots) in this tutorial right here.
Choose Your Feed’s Design
Now you can choose a display template for your reviews.
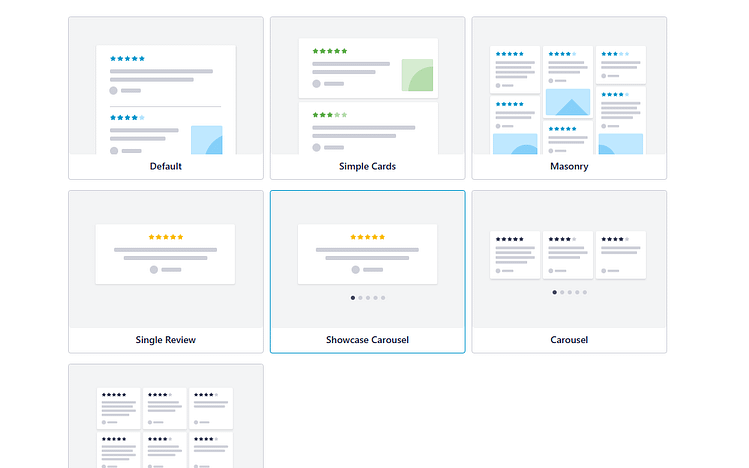
You have several options – Default, Simple Cards, Masonry, Single Review, Showcase Carousel, Carousel, Grid Carousel.
Since we're trying to create a Reviews Slider, I'll go with the "Showcase Carousel" option.
In the next screen, you’ll see a preview of how your reviews will be displayed on your landing page.

Smash Balloon also provides a sidebar and a few simple options to help you customize your feed's appearance, some of these settings include:
- Sort your reviews by date or rating (e.g. show the highest-rated first)
- Filter reviews by star rating or by words (e.g. don’t show reviews containing a specific word)
- Moderate your reviews manually in the “Moderation” tab
Step 4: Add Your Feed to Your Landing Page
Now it’s time to embed your reviews feed on your WordPress page.
To get started, click on the Embed button in the top right corner.

There are three ways to add your new reviews feed to your homepage or other landing pages:
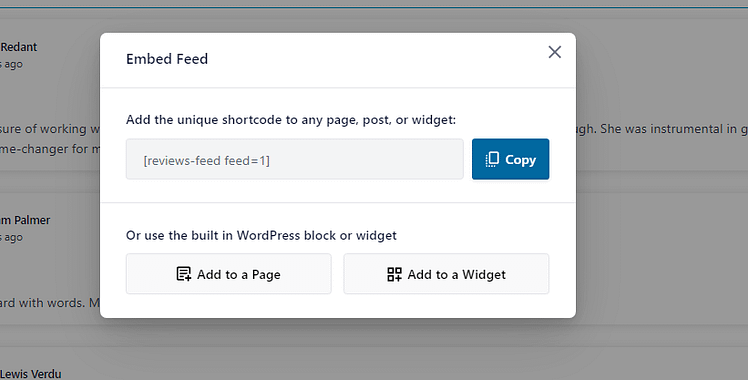
WordPress Block Editor
If you're using the WordPress Block editor (Gutenberg), look for the specific Smash Balloon block, add it to your page or post, and select the feed you want to display.
Widget
Go to Appearance > Widgets in your WordPress dashboard, add the Smash Balloon Reviews widget to your sidebar, footer, or any area that allows widgets
Shortcode
You can copy the shortcode provided and paste it into the content area of any post or page. If you’re using a landing page builder, this is the option you’ll have to go with.
Here’s how to add a reviews feed in Thrive Architect:
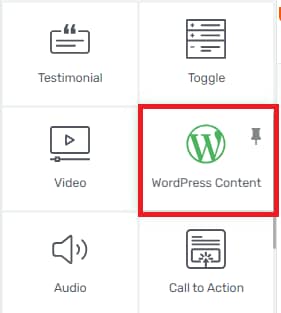
1. Open your page in the Thrive Architect editor and look for the “WordPress Content” design element in the right sidebar. Drag and drop it into the desired space on your page.
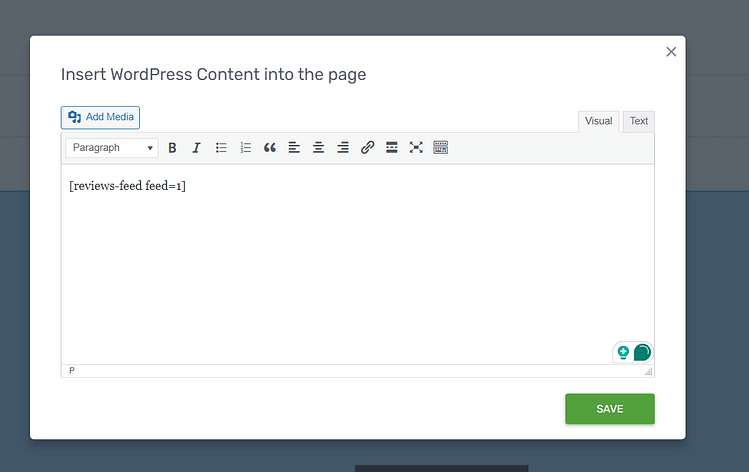
2. Paste your shortcode into the provided area and hit save.
3. Save and refresh your landing page. Then click the “Preview” button at the bottom of the editor.

Voilà! Your new reviews feed is live on your landing page.

Bonus: A Creative Way to Make Your Landing Pages More Interesting (and Trustworthy)
Adding reviews to your landing page is just the start. What really makes a page connect with visitors is how you present your overall story. After testing dozens of different approaches on my own landing pages, I've found one method that consistently helps build trust and keeps visitors engaged.
This isn't a complicated trick that requires special skills or expensive tools. It's a practical approach you can implement today to make your landing pages more compelling:
Turn Numbers Into Stories: Instead of just stating "10 years of experience" or "500+ clients served," share a brief story about a specific challenge you solved. For example, on your services page you could have something like this: "When Sarah's yoga studio needed to move classes online in 2020, we built her a membership site in 72 hours. She kept 80% of her students and added new ones from different cities." This kind of specific example hits harder than any generic statistic.
I've found this approach works especially well when placed near related services or features. If you're describing your quick turnaround time, pair it with a story about meeting a tight deadline. If you're highlighting your expertise in a specific industry, share a specific problem you solved in that field. Just focus on real examples that help your specific audience understand your value better.
Wrapping Up
You know what I've discovered after years of building websites? The most successful pages aren't the ones with the fanciest designs - they're the ones that feel real. A well-placed review slider isn't just another element on your page; it's a window into the experiences of people who've trusted you with their business.
Whether you go with Thrive Ovation to manage direct testimonials or Smash Balloon to showcase your external reviews, what matters is how you use them. I used to think I needed perfect 5-star reviews everywhere. Now I know that mixing in some 4-star feedback and specific stories about challenges we've overcome actually builds more trust than a wall of perfection.
Your visitors want to believe in you - they're just looking for genuine reasons to do so. Give them those reasons by sharing real stories from real people. What changes will you make to your landing pages this week?


