Learning how to maintain a WordPress site probably wasn't on your to-do list when you first started your business online. Like many site owners, you might be discovering the hard way that websites need regular care - maybe your contact form stopped working, your pages are loading slowly, or worse, you've found suspicious code on your site.
I get it - between running your business and serving customers, website maintenance can feel like one more task you don't have time for. But here's the good news: you don't need to be a tech wizard to keep your site healthy.
This guide breaks down the essential maintenance tasks into simple steps that make sense for busy business owners.
Why Regular Maintenance Is Vital for Your WordPress Website
Here's a common story: You set up your WordPress site, add your content, and expect it to just work. I hear this from business owners all the time - until they notice their site loading slowly, contact forms failing, or worse, discover they've been hacked. By then, they've already lost potential customers.
The truth is, a WordPress site needs regular attention to stay healthy. But don't worry - you don't need to be a tech expert. Whether you can spare 15 minutes a day or just an hour a month, you can create a simple maintenance routine that keeps your site secure, fast, and working as it should.
Ready to learn the essential maintenance tasks that protect your online business? Let's get started.
How to Maintain Your WordPress Website: Important Steps
Let's break down WordPress maintenance into manageable pieces. Each step below is something you can tackle on your own schedule - whether that's weekly, monthly, or quarterly. The key is consistency, not perfection.
Remember: you don't need to implement everything at once. Start with the basics like updates and backups, then gradually add more maintenance tasks as you get comfortable.
Step 1: Regularly Update Core, Themes, and Plugins
Let's talk about one of the basics of WordPress maintenance - keeping everything up to date.
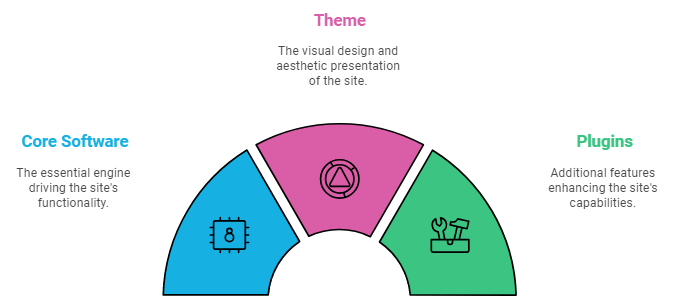
Your WordPress site has three main parts that need regular updates: the core WordPress software (the engine of your site), your theme (how it looks), and your plugins (all those extra features you've added).
Here's something I learned the hard way - skipping updates might seem harmless, but it's like ignoring a leaky pipe. Small issues can turn into bigger problems down the road.
When to Update
I recommend setting a weekly reminder to check for updates. Most updates are small fixes that take just a few minutes. But heads up - when you see a major update (like WordPress jumping from version 6.6 to 6.7), you'll want to take extra care and definitely back up your site first.
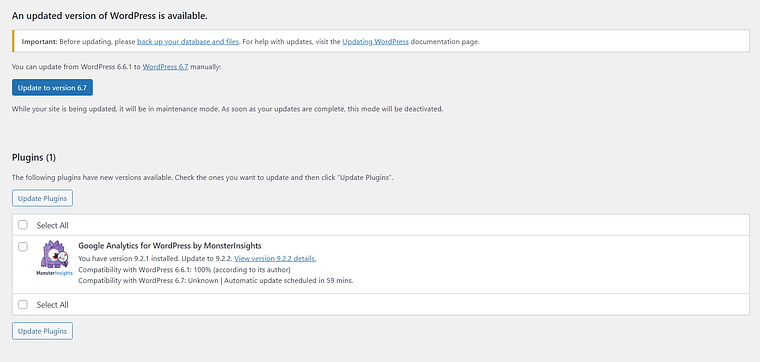
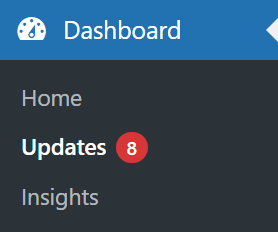
You’ll find any update notifications in the “Updates” section of the WordPress dashboard.
What About Auto-Updates?
WordPress lets you turn on auto-updates – to automatically update your plugins and themes – and while this might sound tempting, I strongly suggest being selective about it.
Auto-updates work well for minor security patches, but for major updates, you'll want to be in control. Why? Because sometimes updates can conflict with your themes or plugins, and you'll want to test things first.
How to Update Safely
- Back up your site (seriously, don't skip this) #tk jump link to part 2
- Check if your plugins and theme work with the new WordPress version
- Pick a quiet time when fewer people visit your site
- Take a quick look around your site after updating
A Word About Plugins and Themes
Here's a tip that will make your life easier: instead of juggling lots of different plugins, consider using an all-in-one solution like Thrive Suite. Or if you're keeping things simple, the combo of Thrive Theme Builder and Thrive Architect works great. These tools work well together which means fewer update headaches for you.
Quick Update Tips From Experience:
- Those update notifications might be annoying, but they're important - don't ignore them
- If an update breaks something, don't panic - that backup you made will save the day
- Got a bigger site? Test updates on a staging site first (think of it as a rehearsal before the real show)
Step 2: Perform Regular Backups
Let's be honest - nobody thinks about backups until something goes wrong. But good backups are like a safety net for your website. They're your "undo" button when things don't go as planned.
The best times to back up your site are before making any big changes - like updating WordPress or redesigning your site. For most business websites, a weekly backup works well. If your site doesn't change much, monthly backups are fine.
You don't need anything fancy - a plugin like Duplicator Pro does the job well.
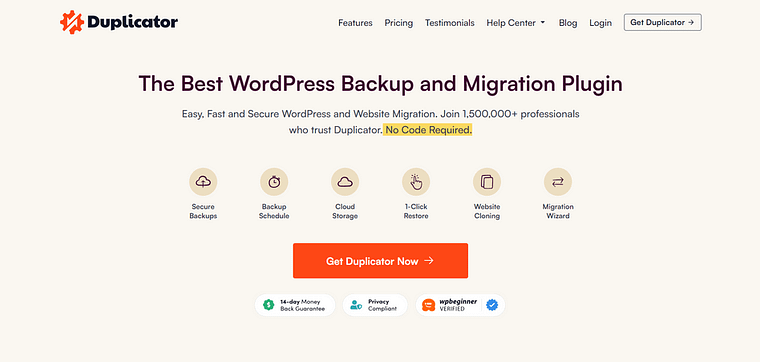
It creates a complete copy of your site and lets you move it to a new host if needed. The free version works great for most website owners. But the premium version gives you additional features like scheduled backups, recovery points, server to server imports and more.
Thrive Tip: Want to learn how to back up your website? Get started with this tutorial right here.
Step 3: Monitor and Improve Your Website’s Performance
Nobody likes a slow website - including Google. A fast-loading site keeps visitors happy and helps your search rankings. Here's what you need to know:
Site Speed Checks: Use Google PageSpeed Insights monthly to check your homepage and key pages. Don't worry about understanding every technical detail - just focus on the main suggestions it gives you.
Image Optimization: Most slow sites come down to large images. Use a tool like TinyPNG to compress images before uploading them. Aim to keep most images under 200KB - your visitors won't notice any quality difference. (Not sure how to optimize your images for WordPress? Learn from this tutorial).
Caching Setup: Think of caching as your site's memory - it remembers parts of your pages so they load faster for returning visitors. Ask your hosting provider which caching plugin they recommend for their servers (or try a couple of these recommendations).
Hosting Quality: If your site takes more than 3 seconds to load or slows down during busy hours, consider upgrading your hosting plan. Good hosting costs a bit more but makes a real difference in performance. (Need a few recommendations? Check out this guide).
Plugin Cleanup: Every few months, remove plugins you're not actively using. Each plugin adds code to your site, and too many will slow things down. Only keep what you actually need.
Pro tip
These are just a few quick tips, but I recommend using this detailed guide to make sure you’re on top of optimizing your website’s site speed.
Step 4: Optimize Your Website for SEO
SEO doesn't need to be complicated. It's really about helping Google understand your content and making sure your website is easy to navigate. But, your website also needs to be a great experience for your readers too.
With the right approach, you can improve your rankings without getting lost in technical details.
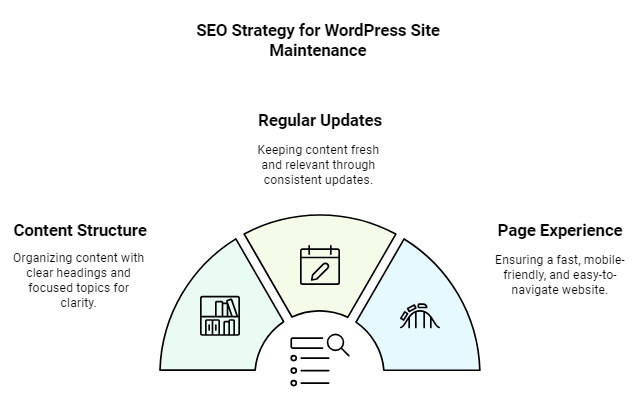
Content Structure: Break up your content with clear headings (H1, H2, H3) and short paragraphs. This helps both readers and search engines understand your main points. Each page should focus on one main topic.
Update Regularly: Google notices when you actively maintain your content. Even small updates to your important pages can help, whether it's adding new information or improving the writing.
Page Experience Matters: Focus on making your site enjoyable to use. This means fast loading times, working well on mobile phones, and having clear navigation. Google pays attention to all these factors.
Remember, SEO is a long-term effort. Focus on creating genuinely helpful content and making your site easy to use. The rankings will follow.
And if you need more tips on how to make great page content for people and search engines – take a look at this detailed guide.
Making SEO Easier with All In One SEO
If you want to simplify your SEO work, I recommend using All In One SEO. The free version handles the basics like optimizing titles and descriptions, while the pro version adds helpful features like schema markup and social media optimization.
It guides you through the optimization process and helps catch issues you might miss on your own. We use it on the Thrive Themes website and it’s helped us stay on top of our on-page SEO.
Step 5: Regularly Update Your Blog Post Content
Old content doesn't mean outdated content.
Your existing blog posts are valuable assets – they just need a refresh now and then. Posts that worked well in the past often just need a quick update to become relevant again. The key is knowing which posts to update and how to do it without losing what made them successful in the first place.
Start by looking at your older posts every few months, especially ones that used to bring in traffic but have dropped off. These posts often have good bones - they just need some modernizing. Look for outdated information, broken links, and old statistics. Sometimes adding new examples, current screenshots, or recent developments in your field can breathe new life into a post.
This process is known as refreshing decayed content on your site, so it still remains relevant to your audience – and search engines.
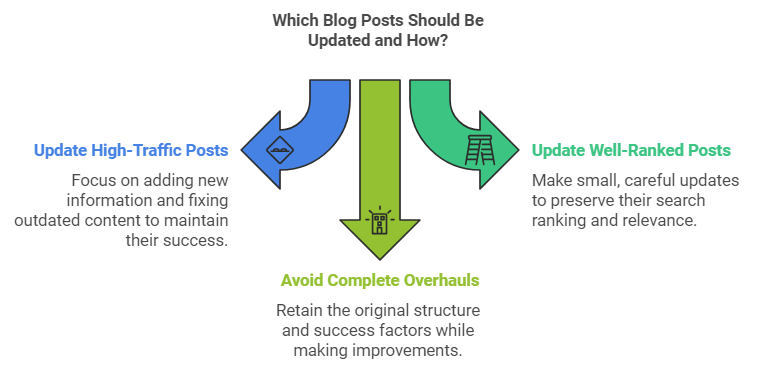
When updating, be careful with posts that still rank well in search results. Focus on improving and adding information rather than completely rewriting them. Small, careful updates often work better than complete overhauls. Think of it like renovating a house - you want to improve it without destroying its foundation.
Remember to show readers that you're maintaining your content. Add a simple "Last updated: [date]" note at the top of revised posts. This small detail tells both readers and Google that your content is current and maintained.
Step 6: Strengthen Your Site Security
Website security might sound intimidating, but you don't need to be a tech expert to protect your site.
Think of it like locking your house - a few basic habits go a long way. Many website owners worry about complicated security measures, but most attacks actually happen through simple oversights, like weak passwords or outdated software. The good news? These basic problems have straightforward solutions.
Strong Passwords Matter: Use unique passwords for your WordPress admin account and hosting. A password manager helps you create and remember complex passwords without the headache of memorizing them.
Two-Factor Authentication: Set this up for your WordPress login. It's like adding a deadbolt to your door - even if someone gets your password, they still can't get in without the second verification step.
Regular User Cleanup: Check your user list every few months. Remove accounts for people who no longer need access, and make sure everyone has the right permission level for their role.
Security With Thrive Themes
Good news if you're using Thrive Themes for your website - it works smoothly with popular security plugins like Wordfence, Sucuri and other premium options. You won't have to worry about security features conflicting with your site builder or slowing down your pages. Thrive Suite also receives regular security updates to stay protected against new threats.
A final tip: Write down your security steps somewhere safe. Include your backup locations, security plugin settings, and emergency contact info for your host. If something ever goes wrong, you'll be glad to have this information handy.
Step 7: Analyze and Track Website Health
Numbers tell stories about your website - which pages people love, where they get stuck, and what makes them leave. By keeping an eye on these patterns, you can spot problems early and make smart improvements.
Basic Metrics That Matter: Google Analytics shows you three key numbers - how many people visit your site, how long they stay, and which pages they visit most. Check these monthly to spot unusual changes that might need your attention. And I recommend using MonsterInsights to install Google Analytics on your website. It’s really easy to set up – check out this guide here to see for yourself.
Watch Your Bounce Rate: This shows how many people leave after viewing just one page. If it's high on certain pages, those might need better content or clearer navigation. A high bounce rate isn't always bad - it depends on the page's purpose.
Mobile vs Desktop: Look at how your site performs on different devices. If mobile users leave quickly but desktop users stay longer, your mobile experience might need work.
Page Load Trends: Google Analytics can show if your site is getting slower over time. Sometimes a rising bounce rate is simply because pages are taking too long to load.
Don't get overwhelmed by all the data. Focus on trends rather than exact numbers. If something changes dramatically, that's when you should dig deeper.
Step 8: Clean Up Unused Files and Plugins
Think of this as digital decluttering. Just like a messy desk can slow down your work, unnecessary files and plugins can bog down your website. A regular cleanup keeps things running smoothly. The trick is to find the balance - you want enough plugins to make your site work well, but not so many that they slow things down. Every plugin you add is like adding weight to your website, making it work harder to load and potentially creating security gaps.
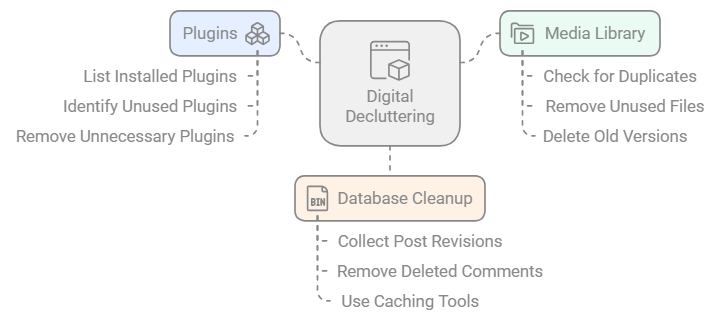
First, list out all your plugins and what each one does. You might be surprised to find plugins you installed for one-time tasks or features you no longer use. If you haven't used a plugin in three months, you probably don't need it.
Next, take a look through your media library for duplicate images or files you uploaded but never used. Also remove any old versions of documents or PDFs that you've since updated.
Over time, your database collects things like post revisions and deleted comments. Most good caching plugins include database cleanup tools - run them every few months.
A quick tip: Before removing anything, do a quick backup. While it's rare, sometimes removing plugins can affect your site's layout or features. A backup lets you restore things quickly if needed.
Need Help With Maintaining Your WordPress Website? Check Out Thrive’s Pro Services
For busy business owners who have limited time, maintaining a WordPress website can feel like a part-time job. Between updates, security checks, backups, and optimization, you're spending hours every month on technical tasks instead of focusing on your business. And there's always that nagging worry that you might miss something important.
We have a solution that could help you save time and keep your website up to date. Let our expert team handle the technical heavy lifting while you focus on what you do best - running your business and serving your customers.
Thrive Website Care gives you peace of mind and a better-performing website without the technical headaches. Our service handles everything we've covered:
- Plugin and theme updates
- Routine cloud backups
- Security monitoring and fixes
- Uptime monitoring
You get a dedicated team of WordPress experts who know exactly what your site needs to perform at its best. Plus, as a Thrive Website Care customer, you'll get priority support whenever questions come up.
Ready to take website maintenance off your plate? Visit our Thrive Website Care page to see how we can keep your site running smoothly while you focus on what matters - growing your business.
How to Maintain a WordPress Site: Wrapping Up
Website maintenance might feel like a lot to take in at first, but you don't have to master everything overnight. Start with the basics - regular updates, backups, and security checks. As you get comfortable with these tasks, you can gradually tackle more advanced maintenance work.
If you find yourself struggling to keep up with these tasks, or if you'd rather focus on running your business, consider getting expert help. Our Thrive Website Care service handles all these maintenance tasks for you, giving you peace of mind and more time to focus on what matters - growing your business.



Amazing summary Chipo – I find myself running a weekly ‘IT’ update across my assets, however the Quarterly Maintenance suggestion is something I can certainly implement to keep things fresh.
Thanks, Michael! Sounds like you’re on the right track there with your weekly updates, and I’m glad you found something in this article that you’d like to implement 🙂
Thanks, very helpful
Thank you, Wolf! I’m glad you found this to be helpful!
Thanks for sharing this valuable information.
Thank you Elizabeth 🙂