Your pricing page is where decisions happen. When someone lands there, they’re not looking for long explanations — they’re scanning for clarity, confidence, and the option that feels right. A strong pricing table creates that moment. It organizes your offers side by side, highlights the value behind each one, and nudges buyers toward action.
There are two ways to bring a pricing table into WordPress:
A standalone plugin — simple setup, fine for the basics.
A page builder — full design control, seamless integration, and built-in conversion power.
Plugins cover the surface. Page builders unlock the experience. If your goal is growth, conversions, and a polished brand presence, a page builder puts you in control.
That’s why I recommend Thrive Architect. In this guide, I’ll show you both methods, then walk you step by step through building a pricing table that doesn’t just display numbers — it sells your offer.
2 Effective Methods for Creating a WordPress Pricing Table
When you want to add a pricing table, you’ve really got two clear choices. I’ll give you a quick overview here before we dive deeper:
1. Standalone Pricing Table Plugins
These are lightweight WordPress plugins built for one job — dropping a ready-made table into your page. They’re handy if you just need something quick and functional. Think of tools like Easy Pricing Tables or Otter Blocks: install, configure, publish. Done.
The trade-off? You’ll often hit a wall with customization, styling, or integrating them into a polished sales funnel. Great for testing or temporary use — not so great when your business relies on conversions.
2. Page Builders (Recommended)
This is where things level up. A page builder like Thrive Architect gives you drag-and-drop control, professional templates, and conversion-focused design baked in. Instead of wrestling with code or accepting “good enough,” you shape a pricing experience that matches your brand and guides buyers straight to checkout.
That’s the path I’ll focus on in this guide — because if you’re building sales pages that actually need to perform, you want the flexibility and psychology-driven design a page builder provides.
👉 Want to see how a full pricing page comes together? Check out our guide on building the perfect pricing page for examples you can model.
Option 1: How to Add a Beautiful Pricing Table to Your Landing Pages Using Thrive Architect
I’ve built pricing tables the hard way before — piecing together shortcodes, tweaking CSS, and fighting with the Block Editor. It’s messy, time-consuming, and the end result rarely feels polished.
That’s why I always recommend using a page builder. You skip the technical headaches and jump straight to designing a table that actually looks good and converts.
In the steps below, I’ll show you exactly how to build a professional, high-converting pricing table with Thrive Architect — my go-to tool for creating sales pages that perform.
Step 1: Download & Install Thrive Architect
First things first — you’ll need Thrive Architect installed on your site. This is the page builder I use whenever I’m building a sales page or pricing layout, because it saves hours of trial-and-error design work.
Once you’ve purchased Thrive Architect, head to your Thrive Themes account dashboard, download the plugin file, and upload it to your WordPress site like you would with any other plugin. After activation, you’re ready to start designing.

What I love about Thrive Architect is how quickly you can get something professional on the page. You don’t need to wrestle with code or settle for generic layouts. Instead, you start with conversion-focused templates built by marketers who understand what actually drives clicks and sales.
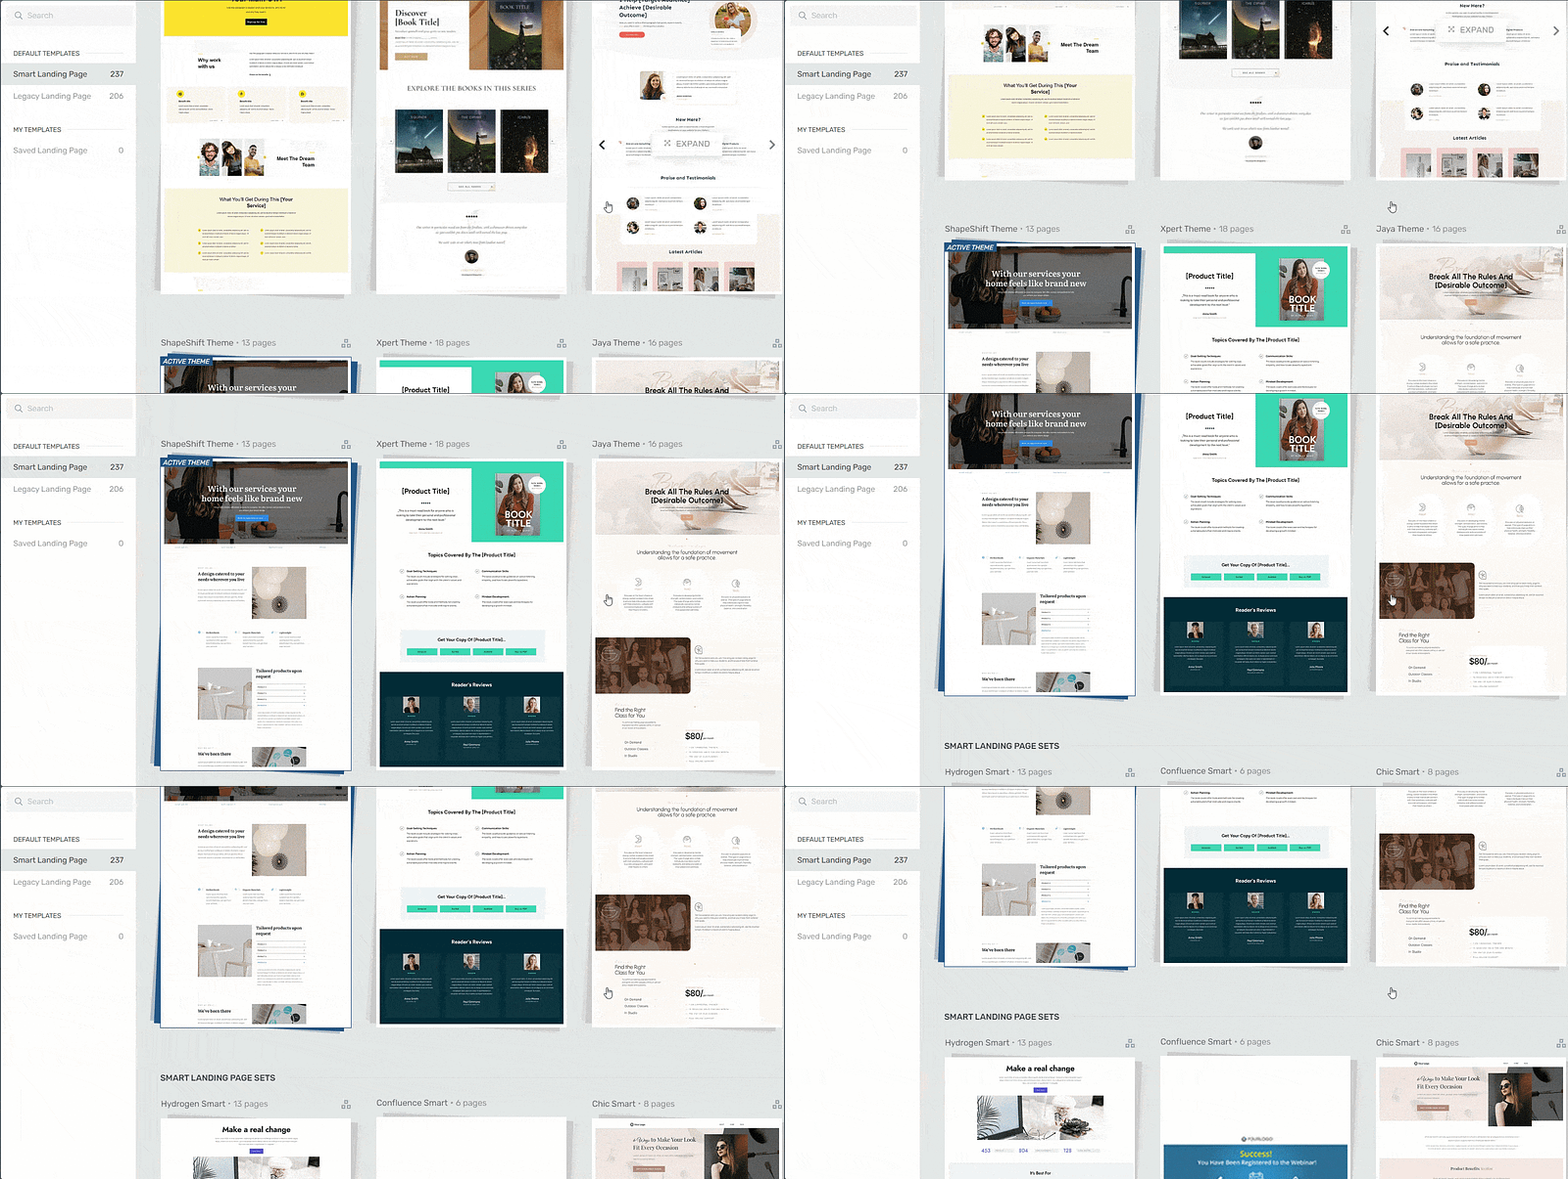
Landing page template sets in Thrive Architect
Every page template was built with conversion generation in mind, so you’ll find all the crucial elements you need to guide your site visitors to buy or sign up.
Want to make changes to a template or build a page from scratch? No problem.
Ideal for WordPress beginners, the Thrive Architect editor comes drag-and-drop functionality and a large selection of block templates and design elements you can easily add to your pages to create a custom design.
👉 In the next step, we’ll open up a new page in WordPress and get Thrive Architect running so you can start building your pricing table.
Step 2: Open Your Page in Thrive Architect
Creating a new WordPress page for your website is super straightforward.
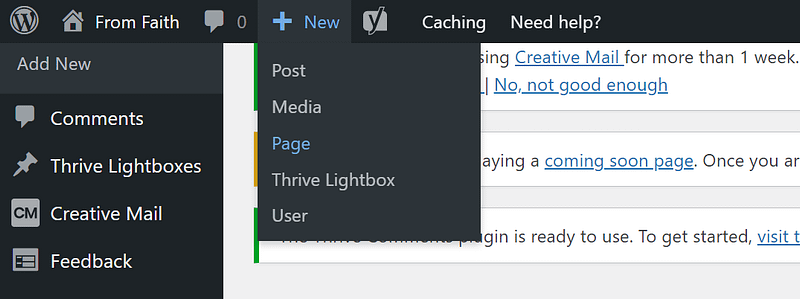
In the WordPress Dashboard, select “ Add New” (+New) in the top drop-down menu and choose “Page”
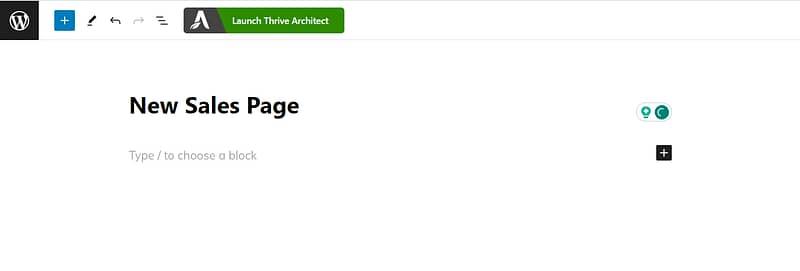
In the Classic Editor, name your page and click the “Launch Thrive Architect” button.
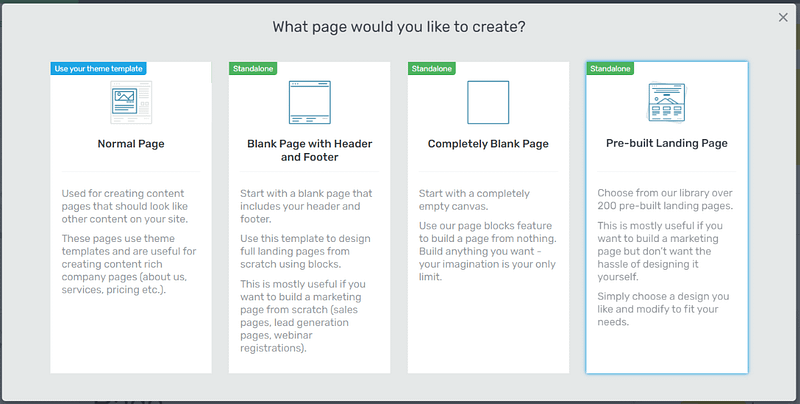
Thrive Architect will give you four options:
1. Normal Page
2. Blank Page with Header and Footer
3. Completely Blank Page
4. Pre-built Landing Pages
If you’re short on time or want a page that’s already conversion-focused, go with Pre-Built Landing Pages. Thrive’s library has hundreds of templates designed specifically for sales, pricing, webinars, and more — so instead of starting with a blank screen, you’re starting from a polished layout that already works.
When you’ve found the right template, click on it and it should load.
Step 3: Choose a Pricing Table Template
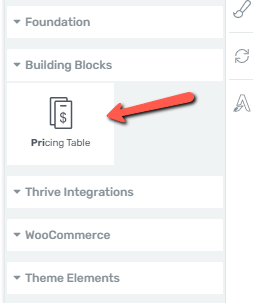
Here’s where things get fun. In the Thrive sidebar, search for “Pricing Table.” Drag and drop it right onto your page where you want it to appear.
A gallery of 30+ pricing table designs will pop up. You’ll see layouts for digital products, memberships, events, eBooks, and even physical products. Scroll through until you spot one that matches your offer.
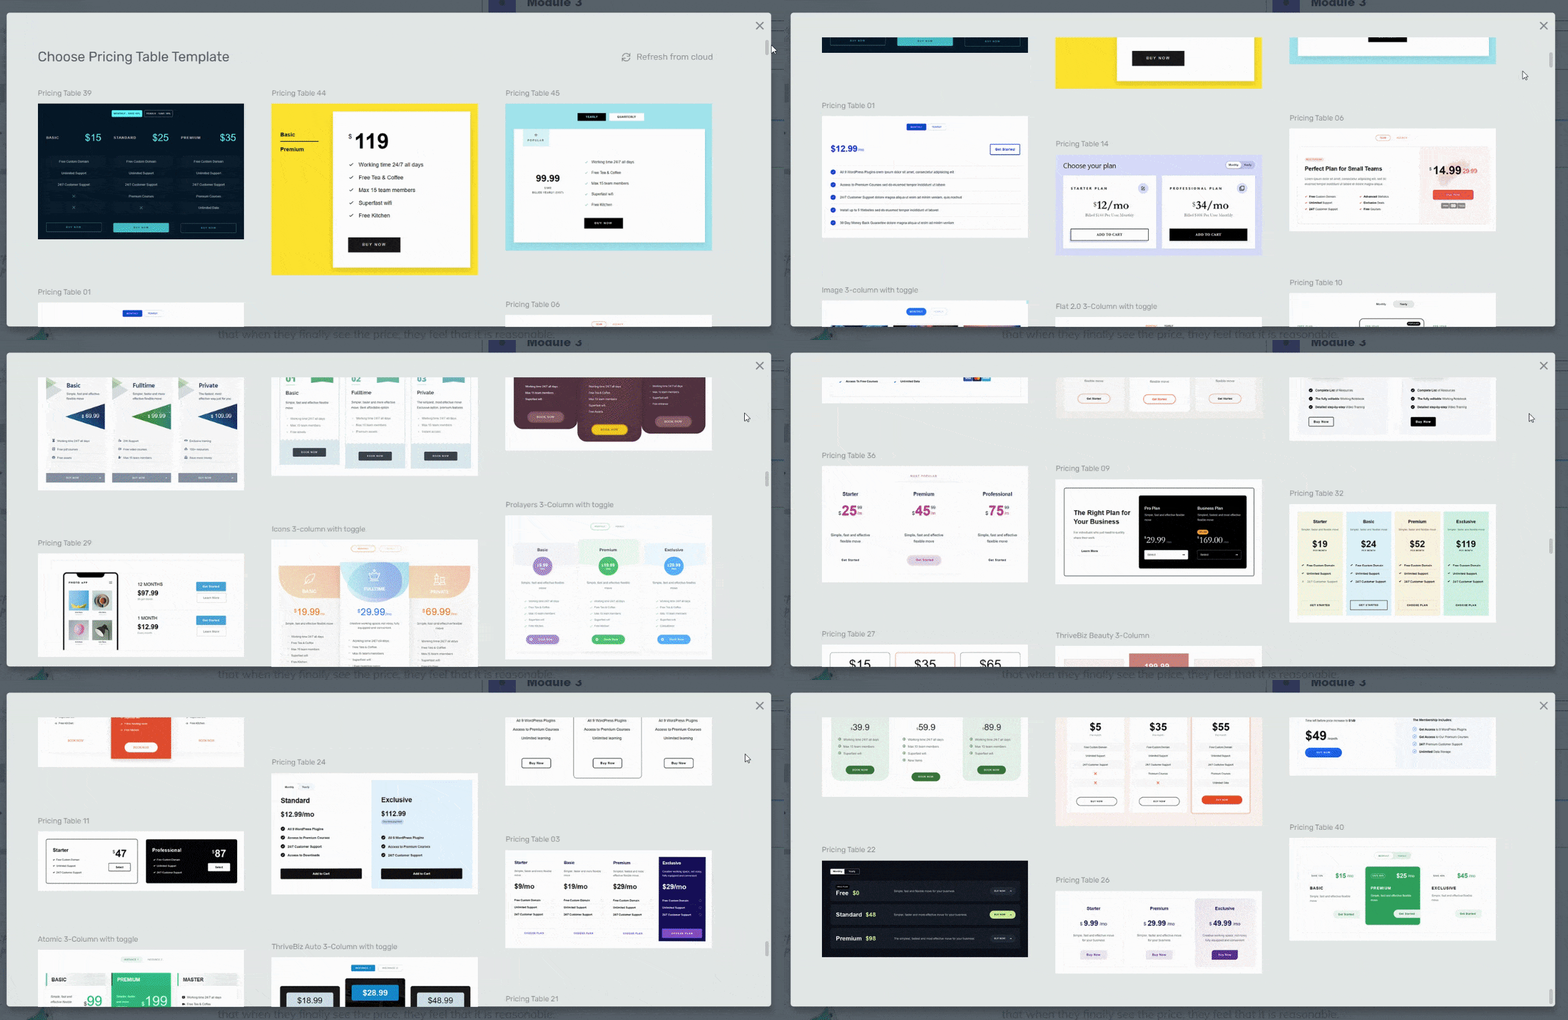
Don’t stress too much about picking the “perfect” one — they’re all fully customizable. Just choose a starting point that feels close to your brand.
Step 4: Customize Your Pricing Table
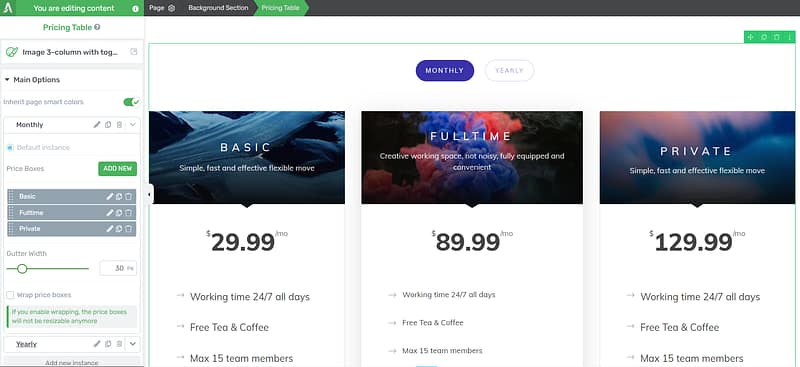
Once your table is on the page, it’s yours to shape. Every element can be tweaked with Thrive’s drag-and-drop editor. Want to change colors, adjust column widths, or add plan highlights? Just click and edit.
One feature I love is Smart Color Technology. If your sales page is built with a Thrive smart template, the pricing table automatically matches your page’s colors and fonts. That means your design stays consistent without extra effort.
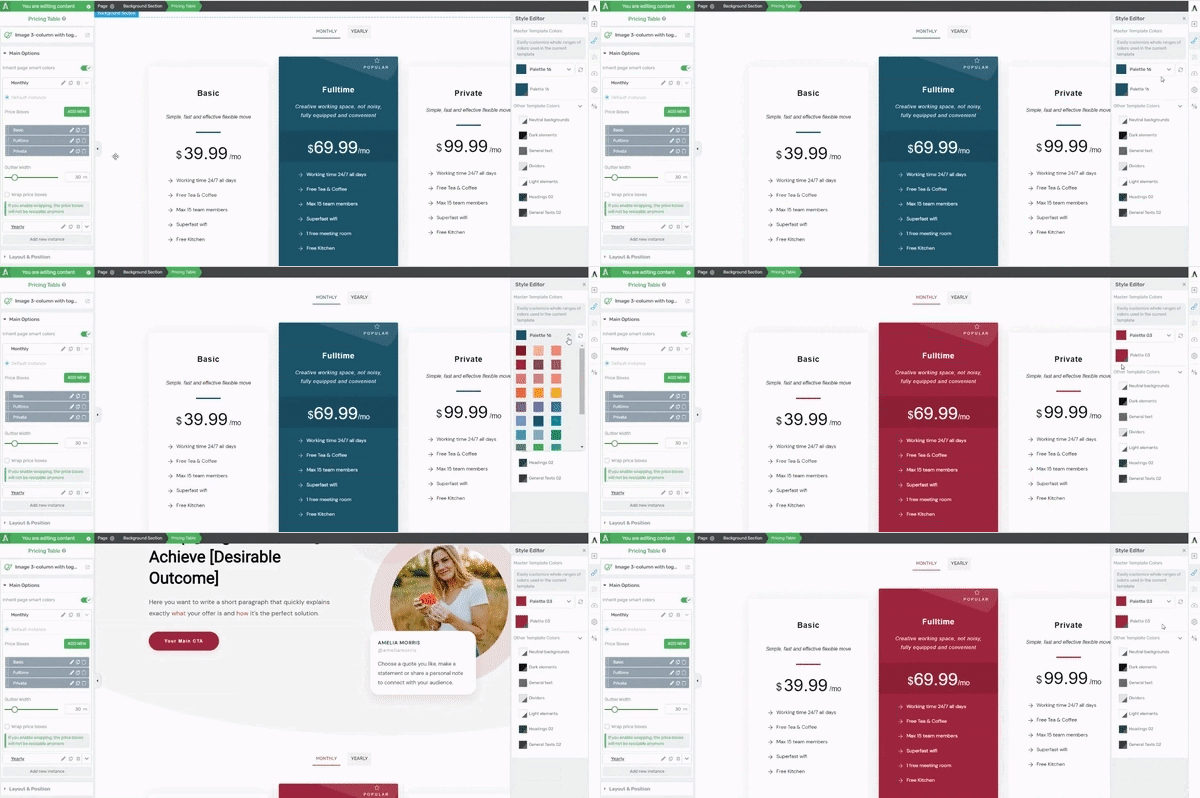
To customize your
pricing tables, use the options in the left sidebar to change elements like your table’s background color, opacity, column options and more.
Bonus Step: Connecting Your Pricing Table to Your WooCommerce Store
If you’re selling through WooCommerce, linking your pricing table buttons directly to your products takes things to the next level.
Here’s how:
Create or select the product in WooCommerce you want to sell.
Open your pricing page in Thrive Architect and click the button inside your pricing table.
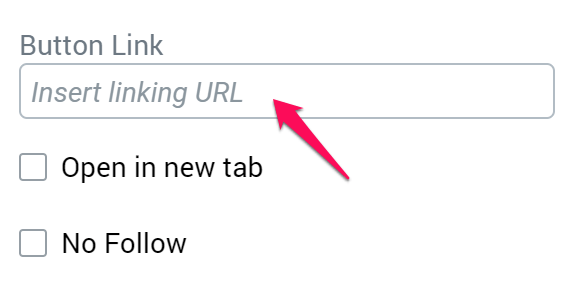
In the Button Link field, paste this format:
https://yourdomain.com/cart/?add-to-cart=ID
- Instead of yourdomain.com type in the actual URL of your WordPress site
- Instead of ID, type in the ID of your WooCommerce product
- You can then click on "Save", and you're done!
Now, when a visitor will click on that button, the product will be added to his shopping cart and he will be sent to a checkout page.
Option 2: Using a Separate Pricing TableWordPress Plugin
If you don’t want to dive into a page builder yet, there are plenty of standalone plugins that let you drop a pricing table into your WordPress site. Popular options include Easy Pricing Tables, Otter Blocks, and Responsive Pricing Table. They’re quick to set up, usually offer a free version, and work well if you just need a simple way to display plans side by side.
Here’s the quick breakdown:
- ✅ Pros: Fast setup, free or low-cost options, good for simple sites.
- ⚠️ Cons: Limited customization, fewer design choices, harder to integrate into a polished sales funnel.
If you just need something functional for a basic site, these plugins get the job done.
But when your goal is to build a sales page where branding, flow, and conversion strategy really matter, plugins quickly feel restrictive. This is where page builders shine.
With Thrive Architect, you’re not just adding a pricing table — you’re shaping the entire sales experience around it. That’s the difference between a page that looks fine and one that actually converts.
3 Expert Tips for a High-Converting Pricing Table
Dropping a table onto your page isn’t enough — the way you present your plans makes all the difference. Here are three proven tweaks I recommend whenever I’m building or reviewing a client’s pricing page:
These small design choices stack up to create a pricing table that doesn’t just share information — it actively guides visitors toward buying.
And with Thrive Architect, you can add every one of these elements in just a few clicks.
FAQ: WordPress Pricing Tables
There are three main approaches: using a dedicated plugin, using a page builder module, or coding it manually with HTML and CSS. Plugins are easiest for beginners, page builders strike a balance between flexibility and usability, and manual code offers full control for developers.
Free plugins work for basic layouts, but premium versions usually unlock features that impact conversions — like monthly/yearly pricing toggles, advanced styling, analytics, and priority support. If your pricing page is central to sales, the small investment often pays for itself.
Modern plugins and page builders are responsive by default, but the mobile layout matters. You can choose between stacking plans vertically (better for readability) or horizontal scrolling/swiping (better for side-by-side comparisons). Always test on real devices to make sure buttons and text are easy to use.
Stick to essentials: a clear plan name, price, billing cycle, 3–5 key benefits, and a strong call-to-action button. Highlight the plan you want most customers to pick with visual cues like a ribbon, badge, or different background color.
Yes. Most plugins let you link buttons to PayPal or Stripe payment links. For WooCommerce, you can connect each plan’s button directly to a product ID so customers are taken straight into your cart and checkout flow.
Hand-coding offers full control and great performance, but it’s time-intensive and requires ongoing developer support. Non-technical users can’t easily update prices or features. For most businesses, a plugin or page builder provides the right balance of speed, ease, and conversion optimization.
WordPress Pricing Tables: It’s Your Turn Now
For me, the pricing table has always been the make-or-break part of a sales page. It’s where people decide if they trust the offer enough to move forward.
I’ve tested different methods, but the one that gives me the most control and the best results is building with a page builder. That’s why I use Thrive Architect — it lets me design pricing tables that look sharp, match my brand, and guide visitors straight to the checkout.
If you’re ready to see the difference, open Thrive Architect and build your first pricing table today. You’ll be surprised how quickly you can put together something that feels polished and built to convert.


