✅ TL;DR — How to Build a Smart File Upload Form in WordPress
A great file upload form does more than collect documents — it builds trust, boosts conversions, and starts meaningful workflows.
Here’s what you’ll learn in this guide:
- Two ways to build upload forms: No-code plugins or custom HTML/JS
- Step-by-step tutorials for both methods
- Security must-haves to protect your users (and your brand)
- Conversion-boosting features like progress bars, drag-and-drop zones, and smart thank-you pages
- Pro tips for agencies, designers, and high-volume sites
- How to turn your form into a branded funnel entry point with Thrive Architect
📥 Whether you're collecting job applications, onboarding clients, or gathering creative briefs, this guide shows you how to do it right — and make it beautiful.
If you’re still collecting resumes, creative assets, ID documents or client briefs through email attachments? Friend, you need to leave that behind.
Email attachments weren’t designed for modern workflows. They get lost, pile up, and slow everything down — especially when you’re trying to collect files from leads, clients, or collaborators.
What you need is a dedicated file upload form.
And you need a sleek upload form to get the job done.
With the right file upload form, you can easily reduce friction, improve conversions, and elevate the way people experience your brand.
We look at file upload forms the same way we look at any other touchpoint: as part of a smart, conversion-driven system. That’s why this guide isn’t just about how to build one — it’s about how to build it in a way that fits into your bigger business strategy.
We'll walk through two clear paths — the no-code route with WordPress, and the fully custom route with HTML + JavaScript — and show you how to style, secure, and optimize the entire process.
Plus, if you're using Thrive Suite, you’ll see how to turn that form into a beautiful, branded experience that works like part of your funnel.
Let’s break it down.
Frequently Asked Questions About File Upload Forms
The simplest and most reliable method is to use a drag-and-drop form builder plugin like WPForms, Formidable Forms, or Gravity Forms. These tools offer pre-built templates (like “File Upload Form”) that let you add upload fields in seconds — no coding required. You can customize everything from field labels to confirmation messages, and embed the form on your site using a block or shortcode.
⚡️ Tip: If you’re using Thrive Architect, you can easily build your forms to match your brand and funnel layout (no need for a separate form plugin)
Most premium form plugins let you control all of this from the upload field settings. You can:
- Set allowed file types (e.g.
.jpg, .pdf, .docx) - Define a max file size (e.g. 10MB — limited by your hosting environment)
- Choose between classic (single file) or modern (multi-file drag-and-drop) upload styles
Keep in mind: your hosting provider's settings (like PHP upload_max_filesize) may override what you set in the plugin.
By default, uploaded files are saved in your site’s wp-content/uploads/ folder, organized by year and month.
- You can access them via the WordPress Media Library
- For direct file access or bulk downloads, use FTP tools like FileZilla
- Some plugins also let you store uploads in cloud services like Google Drive or Dropbox
The file’s metadata (title, URL, alt text) is stored in your WordPress database for reference and display.
Security is critical. At minimum, you should:
- Allow only specific file types (e.g.
.pdf,.jpg,.png) - Disable PHP execution in the upload folder
- Scan uploads for malware (via security plugins or your host)
- Limit file size and rename files on upload
- Enable HTTPS and CSRF tokens
- Restrict access to sensitive uploads (e.g. via roles or password-protection)
🔒 Reminder: Just because a file “looks” like an image doesn’t mean it is. Always validate server-side.
These are usually server-related, not form-related. Common culprits include:
- Upload size exceeding the host’s limit (
php.ini,.htaccess, orfunctions.php) - Incorrect file permissions on the
uploadsfolder - Plugin conflicts or outdated themes
- Unstable internet or invalid file formatting
Start by checking your plugin settings and hosting configuration. If needed, reach out to your hosting provider — they can often resolve the issue quickly.
This depends on your hosting setup. You can:
- Ask your host to increase
upload_max_filesizeandpost_max_size - Or modify them manually via:
php.ini.htaccess- A code snippet plugin (e.g. WPCode)
Most form builders won’t allow uploads beyond what your server permits, so changes must be made at the hosting level to take effect.
Yes — and you should!
Most form plugins let you set up email notifications that include form details and attach the uploaded file. Just make sure the file size doesn’t exceed your email service’s limits (usually around 25MB).
For larger files, it’s better to send a download link or automatically route the file to cloud storage instead of attaching it directly.
Three Ways to Build a File Upload Form (Pick What Fits)
There’s no single “right” way to add file uploads to your WordPress site — and that’s a good thing. Whether you're after a fast, no-code setup or a hyper-custom solution, you’ve got choices.
In this section, we’ll break it down into three practical paths:
By the end, you’ll know which option suits your tech skills, brand goals, and conversion strategy.
Option 1: Use a WordPress Form Plugin
If you want to get something live fast without code, form plugins like WPForms, Forminator, or Gravity Forms do the job.
You get:
Pros:
✅ Quick to deploy
✅ Easy to configure
✅ Handles backend logic--
Cons:
⚠️ Most upload features require a paid plan
⚠️ Styling often feels generic or off-brand
Option 2: Use Thrive Architect (No Plugin Needed)
If you want a clean, branded file upload experience — without any third-party plugin — Thrive Architect gives you full control.
Using Thrive’s native form element, you can:
Pros:
✅ No external form plugin needed
✅ Fully integrated into your funnel
✅ Beautiful, on-brand design every time
Cons:
⚠️ Doesn’t support advanced dev-level file processing
⚠️ Works best within Thrive’s ecosystem (which is a plus for most users)
🧠 Bonus: Want to turn that upload form into a lead magnet or onboarding flow? With Thrive Suite, it’s built right in.
Option 3: Code It from Scratch (HTML, CSS, JS + Backend)
This is the advanced path. You build your own <form> using raw code, handle uploads with JavaScript + backend logic, and process everything exactly how you want it.
Pros:
✅ 100% custom behavior
✅ No plugin lock-in
✅ Ideal for complex workflows
Cons:
⚠️ Requires development knowledge
⚠️ More time-consuming and harder to maintain
How to Build a File Upload Form in WordPress (Step-by-Step)
Once you’ve picked your method, it’s time to build.
Whether you're using a plugin or Thrive Architect, the goal is the same: create a frictionless upload experience that fits beautifully into your site — not something that feels bolted on or untrustworthy. Below are the two most common (and effective) ways I’ve personally used in client projects.
Method 1: Build with WPForms (or Similar Plugin)
This is your step-by-step if you’re using a plugin like WPForms.
1. Install and Activate WPForms
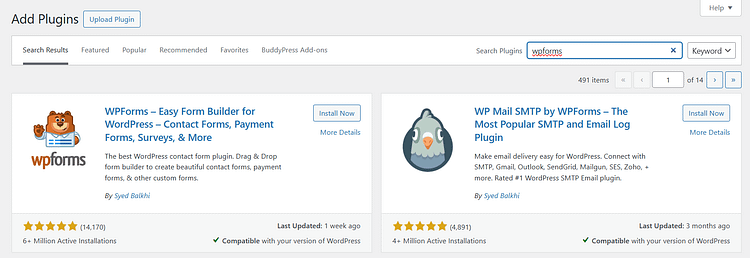
2. Create a New Form
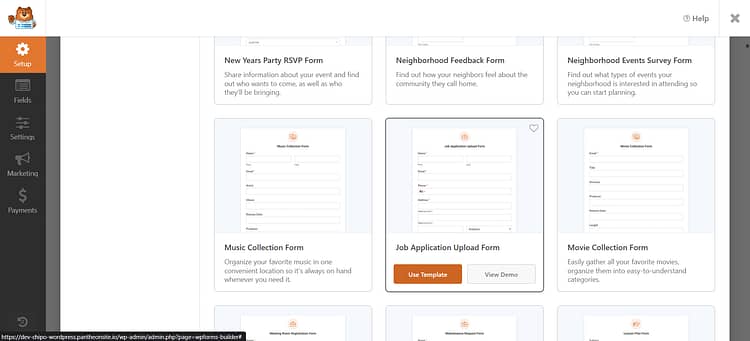
3. Customize the Fields
4. Set Up Notifications & Confirmations
Example:
“Thanks — your file has been received. We’ll review it within 24 hours and follow up via email.”
5. Embed the Form
You can publish your form using:
💡 If you’re using a page builder like Thrive Architect, you can still paste the shortcode into a custom layout to blend design + functionality.
Method 2: Build with Thrive Architect (No Plugin Required)
This is the exact workflow I now use on most of my own projects. It gives me full styling freedom, without needing an extra plugin.
1. Open the Page in Thrive Architect

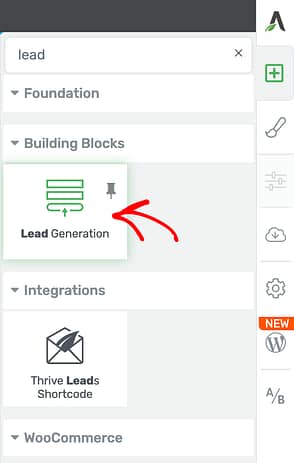
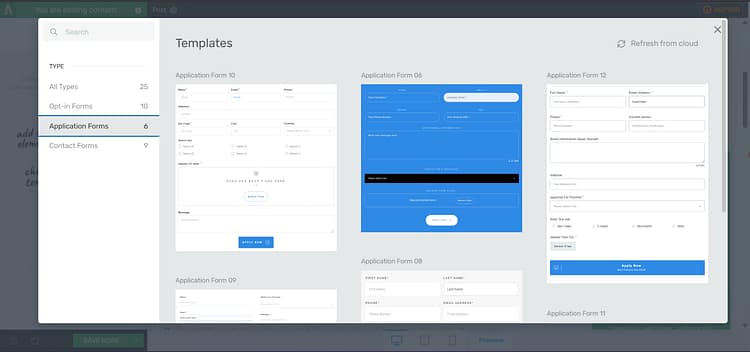
2. Add a Lead Generation or Contact Form Element
4. Customize the Design
This is where Thrive shines.

5. Connect to External Tools
✅ Quick Recap:
How to Build a Custom File Upload Form with HTML + JavaScript
This isn’t the quick route — but if you’re comfortable with code (or stubborn enough to try), building a custom file upload form can give you total control over the user experience, file handling, and security logic.
It’s not for beginners, and definitely not for anyone who just wants something “that works.” But if you’re doing something highly specific — and you’re ready to roll up your sleeves — here’s how to approach it.
We’ll break it down into three key layers:
Front-End: The Basic HTML Form
Start with a standard form and an input field for file selection:
<form id="uploadForm" enctype="multipart/form-data" method="POST" action="/upload">
<label for="fileUpload">Upload your file:</label>
<input type="file" id="fileUpload" name="fileUpload" required>
<button type="submit">Submit</button></form>
This will render a very basic browser-native file selector. It works, but it’s not styled or enhanced in any way — yet.
JavaScript: Add UX Enhancements
Now layer in JavaScript to handle things like:
Example snippet:
document.getElementById('uploadForm').addEventListener('submit', function(e) {
e.preventDefault();
const formData = new FormData();
const fileField = document.getElementById('fileUpload');
formData.append('fileUpload', fileField.files[0]);
fetch('/upload', {
method: 'POST',
body: formData
})
.then(response => {
if (!response.ok) throw new Error('Upload failed');
return response.text();
})
.then(result => alert('Upload complete'))
.catch(error => alert(error.message));});
You can get as fancy as you want here — preview images, restrict file types, show estimated upload time, etc. But the more you add, the more testing you’ll need to do.
Server-Side: Handle the Upload Securely
This is the critical part — and the one most likely to go wrong if you’re not careful.
You’ll need a script (PHP, Node.js, Python, etc.) on your server that:
- Checks for file size, type, and name sanitization
- Stores files safely (outside your public directory, ideally)
- Handles errors gracefully
- Possibly renames or hashes files to avoid overwrites or injection attacks
Example (in PHP):
if ($_FILES['fileUpload']['error'] === UPLOAD_ERR_OK) {
$tmpName = $_FILES['fileUpload']['tmp_name'];
$name = basename($_FILES['fileUpload']['name']['name']);
move_uploaded_file($tmpName, "/secure/folder/$name");} else {
// Handle the error}
Final Thought: Only Go This Route If You Need To
This method gives you full flexibility — but it also opens the door to a lot of risks if you’re not experienced in secure file handling.
If you’re collecting sensitive documents or customer uploads at scale, and you’re not already familiar with:
- MIME type spoofing
- Directory traversal attacks
- Input sanitization
- CSRF protection
then this approach might be more liability than benefit.
That said, if your project truly demands this level of control — now you have a starting point. Just test thoroughly, secure everything, and maybe don’t do it live on your production site the first time.
✅ 7 Features That Make File Upload Forms Convert
Your file upload form shouldn’t just function — it should feel effortless, modern, and trustworthy. These features turn a basic form into a high-performing conversion point:
- Drag-and-Drop Upload Area
Feels modern and intuitive. People expect to drag files — give them that. - Multiple File Uploads
No more one-at-a-time frustration. Let users send everything in one smooth action. - Real-Time Progress Bars
Uploading in silence breeds doubt. Visual feedback builds trust, especially on slow connections. - Instant Error Messages
Validate file size and type the moment a file is added. Avoid surprises at submission. - File Previews or Filenames
Show users what they’ve uploaded. A quick thumbnail or filename goes a long way in reducing anxiety. - Mobile Responsiveness
Make sure it works on phones — not just technically, but with touch-friendly buttons and clear UX. - Confirmation UX That Reassures
After submit, give a confident message:
*“Thanks — your file is in. We’ll review it and follow up within 1 business day.”*
Where File Upload Forms Boost Your Business
A file upload form isn’t just a place to collect PDFs or profile pictures — it’s a moment of operational clarity. One small upgrade that removes friction, saves hours of admin, and positions your brand as organized, thoughtful, and easy to work with.
Let’s walk through a few places where a simple upload form can radically improve your workflow:
Job Applications
Instead of chasing down resumes via email or LinkedIn DMs, use a dedicated upload form to collect:
- Resumes and cover letters
- Portfolios
- Linked candidate info (e.g., LinkedIn or GitHub)

Add conditional fields, confirmations, and even trigger a follow-up email using Thrive Automator to keep the hiring flow tight and conversion-friendly.
Event Registrations
Make your onboarding process smoother by collecting:
- ID documents
- Signed waivers
- Proof of vaccination
- Photos for badges or programs
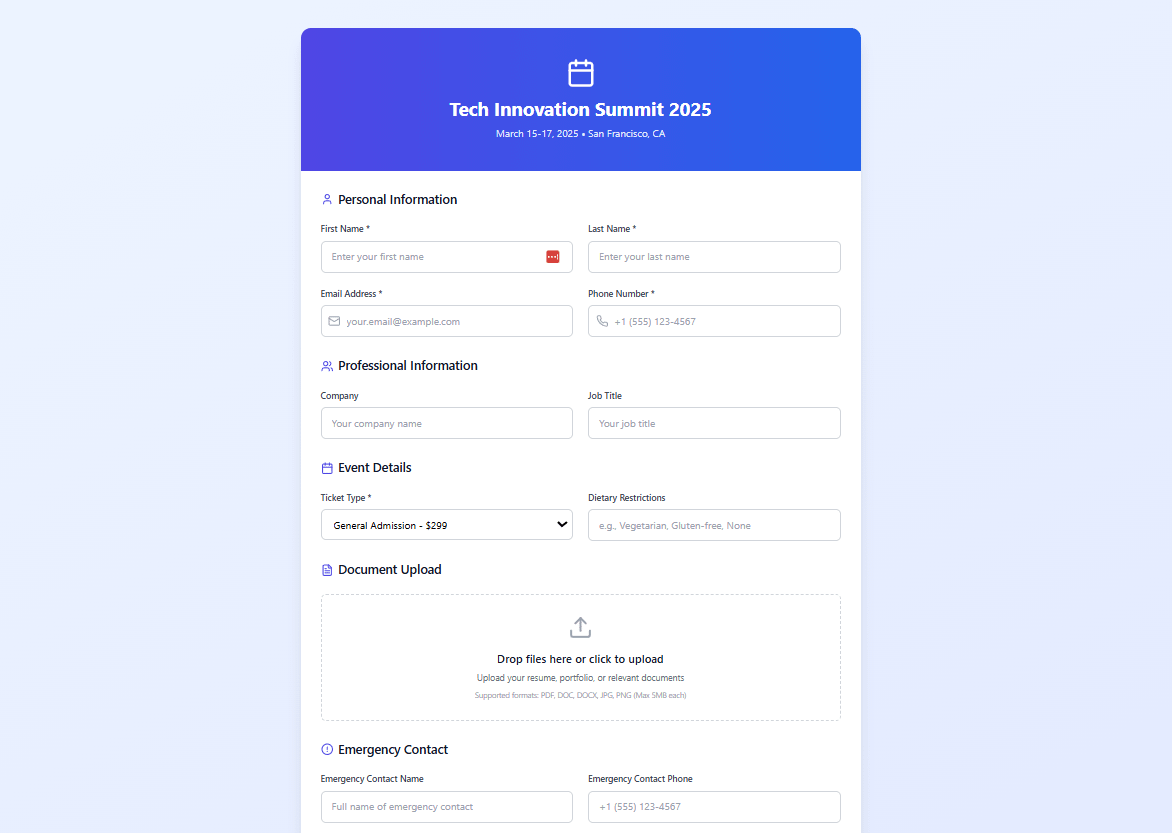
This keeps everything in one place — no digging through inboxes — and helps your team process attendees faster.
Client Onboarding
First impressions matter.
An upload form helps you professionally collect:
- Signed contracts
- Brand guidelines
- Logo files
- Payment confirmations or tax forms
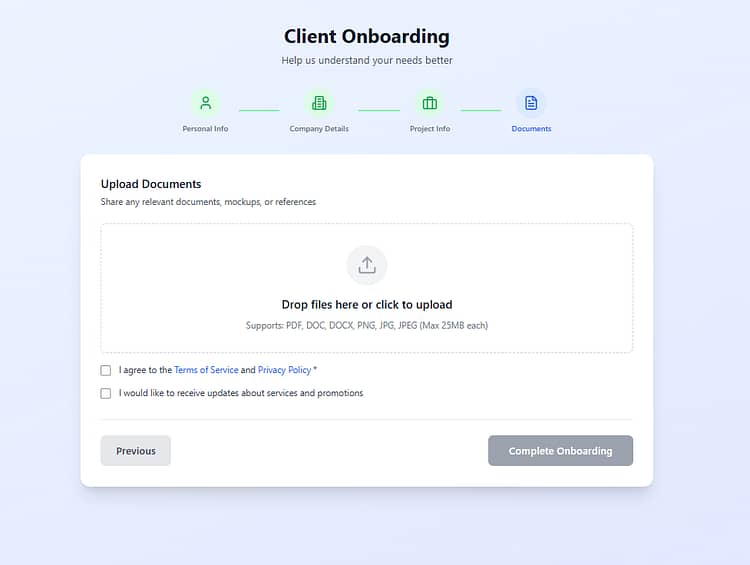
You can even link it to a branded onboarding page, styled with Thrive Architect, to create a beautiful, conversion-optimized handoff.
Customer Support
Need screenshots or log files to diagnose an issue?
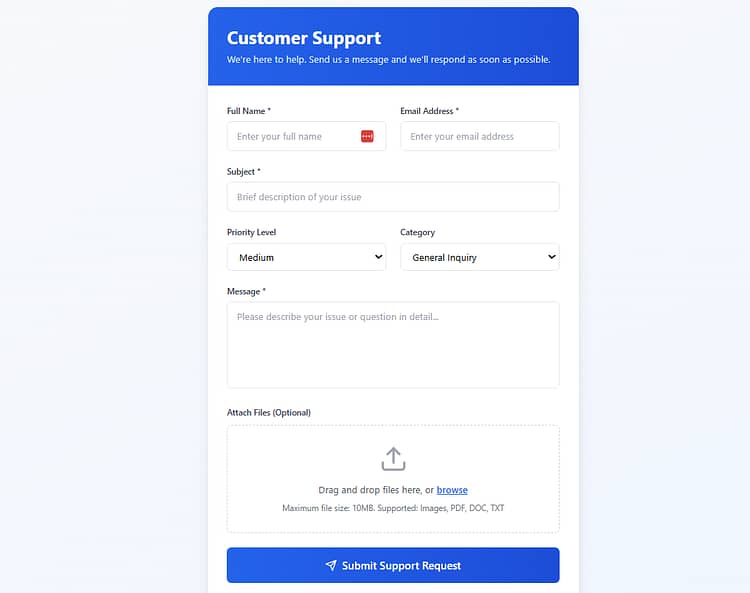
Let your users submit them directly through your support form. This reduces back-and-forth, improves ticket quality, and shortens resolution times — all of which boost satisfaction (and retention).
Education (Assignments & Submissions)
If you run an online course, coaching program, or educational platform, upload forms can help students:
- Submit homework
- Upload projects or presentations
- Turn in feedback forms or reflections
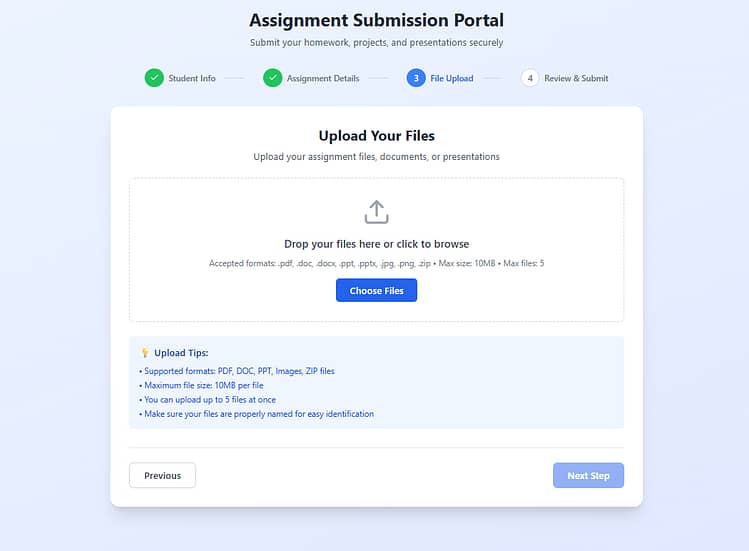
Combine this with auto-responses or access to follow-up material, and you’ve got a seamless teaching loop.
Design Briefs / Asset Collection
Working with clients on creative projects?
File upload forms make it easy to collect:
- Logos, color palettes, reference images
- Creative briefs or copy decks
- Feedback files for revisions
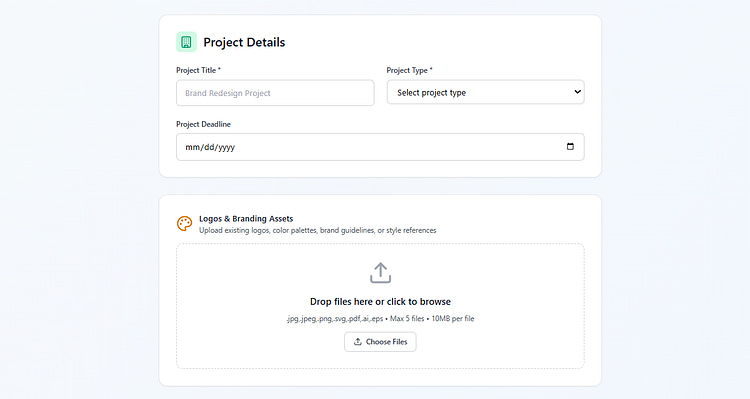
This keeps creative projects moving and positions you as a pro who runs clean, scalable processes.
🧠 The Big Picture:
Wherever there’s friction — email threads, broken links, unclear submissions — there’s an opportunity for a file upload form to take over. It’s not just about collecting files. It’s about giving people a clear next step… and reinforcing that they’re in good hands.
Keep It Secure: 10 Smart File Upload Practices
A file upload form can be a conversion win — or a major vulnerability. If you’re not locking it down, you’re opening doors to malware, spam, and broken trust.
Here’s a secure checklist to follow:
✅ 1. Allow Only Specific File Types
Always whitelist acceptable formats (e.g. .pdf, .jpg, .docx). Never use a blacklist — it's too easy to miss something risky.
✅ 2. Sanitize & Rename Filenames
Users upload unpredictable names — some with harmful intent. Strip dangerous characters and auto-rename files on upload (e.g., with a timestamp or random string).
✅ 3. Limit File Sizes
Keep your server breathing. Add sensible file size caps (like 2MB–10MB depending on the use case), and let the user know the limit upfront.
✅ 4. Store Files Outside the Webroot
Never let uploads live in a public directory (e.g., /uploads/). Store them above the root or use cloud storage integrations like Amazon S3 or Dropbox.
✅ 5. Use CSRF Tokens
Cross-site request forgery is real. Use tokens to confirm that upload requests came from your site — not from a malicious third party.
✅ 6. Enable HTTPS
Uploading without encryption is a dealbreaker. HTTPS protects data in transit — and tells visitors your site is legit.
✅ 7. Auto-Delete Old Uploads
Create cleanup rules. If files are time-sensitive (e.g., job applications), purge them regularly to reduce storage bloat and exposure.
✅ 8. Scan Everything
Use server-side malware scanners (like ClamAV) to check every file before it’s stored or passed to another system. Prevention beats cleanup.
✅ 9. Restrict Upload Access
If the form is sensitive — like client onboarding or internal asset intake — hide it behind login, an opt-in, or even conditional display rules.
💡 Using Thrive Architect?
Gate forms behind lead generation elements or smart display logic with Thrive Suite.
✅ 10. Use Chunking or CDR for Large Files
For bigger uploads, break them into chunks or run them through Content Disarm & Reconstruction (CDR) tools that strip active code but keep usable content.
How to Choose the Right File Upload Setup for Your Site
There’s no “one-size-fits-all” — and that’s a good thing. Whether you’re building your first form or upgrading a complex workflow, here’s how to choose the path that fits your goals, resources, and skill level.
Quick Decision Guide
Your Situation | Recommended Approach | Why It Works |
|---|---|---|
Solo site owner or small business with no dev experience | ✅ WordPress plugin (like WPForms or Forminator) | Fast, user-friendly, and gets the job done with minimal setup |
You need specific behaviors, styling, or security controls | 🔧 Custom HTML + JS form | Offers full flexibility and control — great for dev-savvy users |
You run a high-volume or client-heavy site | 🧠 Plugin + cloud storage + automation | Combines ease-of-use with scalability and backend power |
Don’t Just Collect Files — Start a Funnel
At first glance, a file upload form might seem like a basic utility. Just stick a box on the page, let people drop their docs, done. Right?
Not quite.
If you’re asking someone to upload something — whether it’s a resume, a brand asset, or a signed agreement — you’re not just collecting data. You’re inviting them into your world. It’s one of the earliest moments where trust is either built… or broken.
So when your form looks like an afterthought (hello, grey browser box), it sends the wrong message. But when it’s styled, seamless, and thoughtfully placed — it signals professionalism. Confidence. Care.
And that’s where real conversion starts.
Why Thrive Suite Makes This So Much Easier
I’ve built these kinds of forms multiple ways — with plugins, with code, with duct tape and hope. And I can tell you this: Thrive Suite saves you time, avoids the usual styling headaches, and gives you way more control without feeling overwhelming.
You can:
No extra tools. No plugin bloat. No "how do I make this match my site?" moments.
So if you’ve made it this far and you’re thinking, “Yeah, I want this to work — but I want it to feel good too,” then Thrive Suite is the next logical step.
Ready to create a file upload experience that feels custom, looks polished, and plays nicely with the rest of your funnel?
Try Thrive Suite today — and build smarter from the first click.


