⚡ TL;DR: Physical Product Sales Funnels
If you’re sending traffic straight to a product page, you’re probably wasting money. Visitors click, skim, and leave — and you’re left wondering why your ad spend isn’t paying off.
A physical product sales funnel fixes that by giving your customers a guided path:
• You build trust with clear shipping details and social proof.
• You make the first purchase irresistible with a low-ticket tripwire offer.
• You lift order value with smart bumps, upsells, and downsells.
• You keep them coming back with post-purchase emails, tracking, and loyalty nudges.
Done right, your funnel doesn’t just increase conversions — it helps you turn one-time buyers into long-term customers, and every marketing dollar starts working harder for you.
What happens when you spend big on ads, send people straight to a product page… and most of them bounce?
That’s the trap many physical product businesses fall into. A product page is great for showing features, but it’s not a guided journey. Shoppers hesitate, distractions pull them away, and suddenly your marketing budget is leaking.
A sales funnel changes that. It takes the traffic you’ve already paid for and walks people through a clear path: building trust, making that first purchase easy, and setting up the next one. The result isn’t just more conversions — it’s higher average order value, stronger customer relationships, and growth that compounds.
In this guide, I’ll break down what makes funnels for physical products unique, why the tripwire funnel is the go-to model, and the practical steps you can implement right now to turn traffic into loyal customers.
“If you’re new to funnels in general, I’ve broken down the full structure in our Ultimate Sales Funnel Guide.”
💡 Why Use a Funnel for Physical Products?
Most physical product owners think the job is done once traffic hits the product page. But here’s the problem: sending paid ads or organic traffic straight to a product listing is like pouring water into a bucket full of holes. You’ll spend thousands bringing people in, only to watch most of them leave without buying.
A funnel plugs those holes. It takes the traffic you’ve already paid for and guides it step by step — from interest, to purchase, to repeat order. Without one, you’re not just losing sales; you’re wasting the very marketing budget that got those customers to your site in the first place.
Key Differences: Why Physical Product Funnels Are Unique
I’ve worked with enough e-commerce founders to know this: selling a physical product isn’t the same game as selling a course, a template, or a subscription. The funnel has to do extra heavy lifting — not just to persuade, but to reassure.
Here are the three differences that come up again and again:

That’s why I say: a funnel for physical products isn’t just about conversion copy and shiny buttons. It’s about building trust, closing the tangibility gap, and making sure your offers respect your inventory realities. Nail those three, and your funnel will stop feeling like a gamble and start working like a predictable system.
By the Numbers
Sometimes the data says it better than I can.
One-click post-purchase offers often lift average order value by 10-30% (Emotive).
Clear shipping expectations reduce returns and support-ticket volume significantly (WeSupply Labs).
Product videos and 360° images boost engagement and conversions:
• Interactive product videos doubled conversions and lifted add-to-cart rates by ~60% (Eko).
• 360° product photos increased sales by 14–40% across industries (Practical Ecommerce).
The Tripwire Funnel (Your Core Flow)
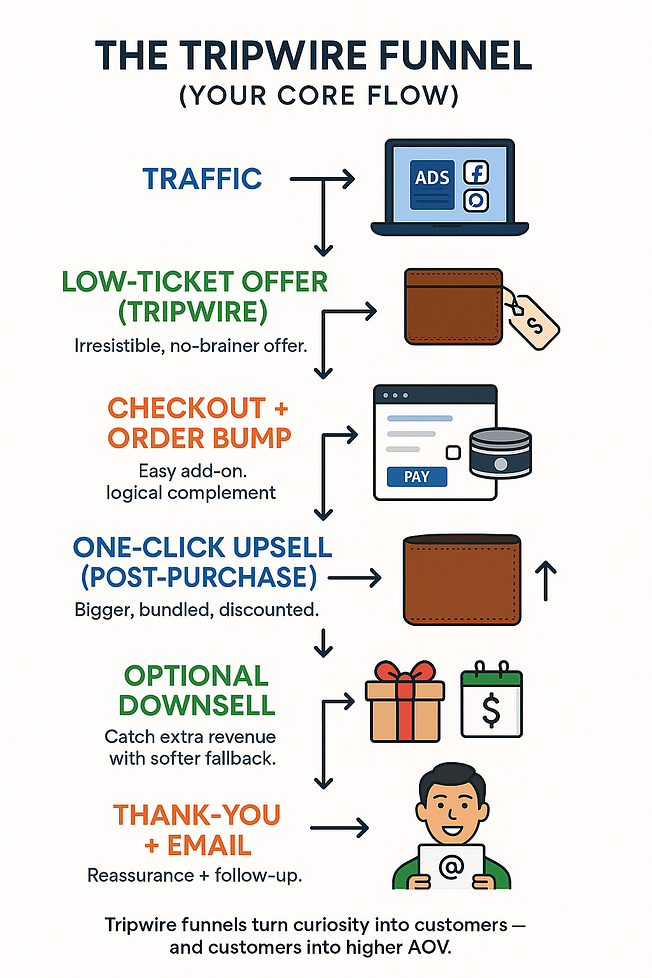
When I talk about funnels for physical products, I almost always start with the tripwire funnel. Why? Because it’s the easiest way to turn a curious visitor into an actual buyer — and that first “yes” changes everything.
Here’s how the flow looks when you strip it down to the essentials:
Traffic → Low-Ticket Offer → Checkout + Order Bump → One-Click Upsell (post-purchase) → Optional Downsell → Thank-You + Email
Simple, right? But each stage has its own role to play.
Why it works: It’s almost always easier to sell more to a brand-new customer than to convince a hesitant visitor to finally check out. The tripwire earns that first yes, and every step after is about lifting average order value without slowing down the buying momentum.
When you structure it this way, the funnel doesn’t feel like a hard sell. It feels like a natural buying journey — helpful, relevant, and almost inevitable.
🚀 Want the step-by-step playbook?
I’ve put together a full breakdown on how to build a tripwire funnel from scratch. You’ll see page flow, copy tips, and real examples you can swipe for your own store.
What is The Perfect Funnel Flow for Selling Physical Products?
Quick Navigation: What You'll Need
Let’s talk about what you’ll need for your sales funnel:
1. Standard Sales Funnel for Initial Offer
Before you get started, you need to have a finished product that’s ready to be sold. This tutorial
functions under the assumption that you’ve done all the necessary steps to create a valuable offer (market research, identified your target market, built your buyer personas, etc.)

You also need to ensure you have a solid amount of stock to ship, before you launch your sales funnel.
This funnel also brings in the potential customers you’ve drawn in through lead-generation – using lead magnets like webinars, special podcast episodes, etc.
You can also use other channels in your marketing strategy to direct traffic to this funnel through social media platforms like LinkedIn and Facebook, or even forums (e.g. Reddit).
In terms of the funnel itself, you’ll need to set up the following:
Sales page to catch your audience’s attention and guide them to purchase your product.
Checkout page to facilitate a simple, streamlined transaction process
Thank You page to express appreciation for your customer’s purchase and provide next steps
Confirmation email that serves as a receipt and provides the customer with all necessary details about their order
2. Upsell/Cross-Sell Offer Page
Upselling involves encouraging a customer to purchase a higher-end product than the one they’re currently considering.
For example, if your initial offer is an educational eBook, you could present a bundle that includes an online course, PDF guide, video, and the same eBook – as an upsell.
A cross-sell works in a similar way. This strategy involves suggesting a related but distinct product that complements the initial purchase.
For example, if a customer buys an eBook on digital marketing, a good cross-selll would be suggesting a social media marketing toolkit or a set of customizable templates for content planning.
Since your customer is already in “buy mode”, they’re more likely to consider additional value.
When Should You Offer an Upsell/Cross-Sell?
There isn’t a standard, set-in-stone “ideal time” to offer an upsell or cross-sell. Let’s consider the pros and cons of presenting an upsell or cross-sell before and after purchase
Keep checkout friction-free. If your audience hesitates, move big offers after the transaction. If they love customization, test one pre-checkout bump. Always A/B test placement (pre vs post) and offer type (quantity upgrade vs accessory vs bundle).
Upselling Before Checkout:
Pros
Cons
Upselling After Checkout:
Pros
Cons
Making the right choice between pre- and post-purchase upselling/cross-selling should be based on your understanding of your customer base and their purchasing behavior.
We recommend running A/B tests to see which upsell timing works best with your customers.
Want more inspiration on what to offer? Check out our in-depth breakdown of upsell strategies that actually convert
3. Downsell Offer
Downselling is a strategy used to offer a more affordable or simpler alternative to a customer who is hesitant about a higher-priced item. It’s a great way to keep potential buyers engaged and not lose a sale completely.
Here are some downsell ideas for physical products:
Smaller product (in quantity or size)
Basic version of the initial offer
Bundle of less popular products
Accessories instead of the main product
Payment plan to make the purchase more manageable
The best time to present a downsell is immediately after the customer declines the initial sales offer – either by clicking “No Thank You” or attempting to exit the page.
You can display this offer through a popup on the same page or a redirection to a separate landing page specifically designed for the downsell offer.
You’ll find more practical examples in our downsell offers guide, including ways to structure payment plans and bundle alternatives
How to How to Create a Sales Funnel for Physical Products (Step-by-Step)
Quick Navigation: How to Create Your Sales Funnel
This tutorial is simple, straightforward, and quick to set up. Follow the steps to create one for your business.
Step 1: Install Thrive Architect (fast, block-based build)
Thrive Architect is the landing page builder you need to design high-converting funnel pages for your upsell/cross-sell and downsell offers.
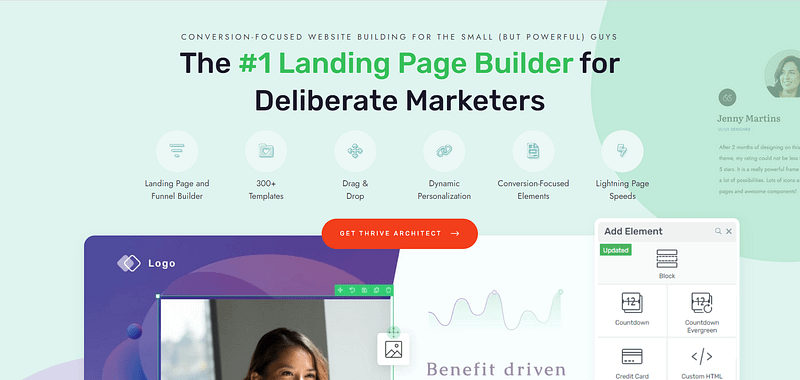
This plugin takes the headache out of web design and provides you with a straightforward path to creating sales funnels that look great and work smoothly.
Everything is drag-and-drop – which means no complex coding. If you want to build a sales page from scratch, you can set one up in minutes using Thrive Architect’s block templates.

We’ve gone 10 steps ahead and compiled block templates that include the main elements each part of your funnel pages will need – from pre-designed hero sections, to features & benefits templates, testimonial blocks, and many call-to-action (CTA) sections.
Think of these templates as your shortcut to a stunning website. No more staring at a blank page, wondering where to start.
All you need to do is click the blue plus section on the page and access the Thrive Architect block library.
But it gets better.
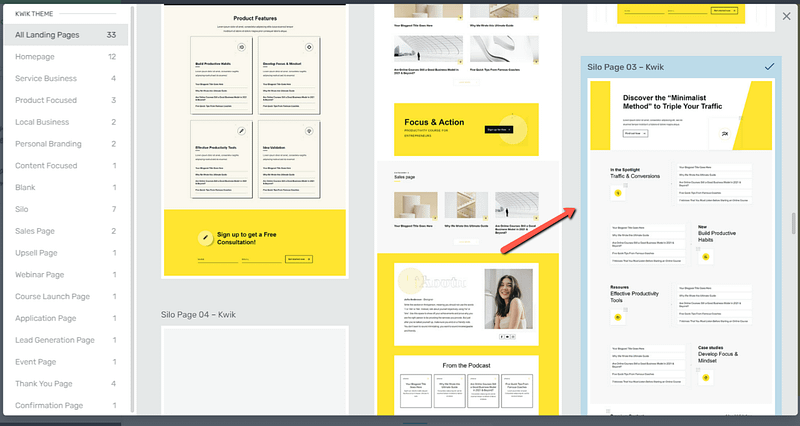
If you want a faster way to build high-quality sales pages – and spend less time fretting over small design decisions – then hop into the landing page template library.

These one-click
templates are more than just visually appealing; they're optimized based on proven conversion principles, meaning they're crafted to get your audience to act.
Thrive Architect is different because every template in our library follows key conversion optimization principles. All you need to do is choose your design, customize the color, add your copy and get started.
In terms of integrations, this plugin works seamlessly with most Google analytics plugins and the best SEO tools to help you track your metrics and optimize your content for search engines.
You can also connect your pages to your email marketing, eCommerce, and automation tools in a few clicks.
Thrive Architect doesn’t have a free version, but this pro plugin offers a 30-day money back guarantee — allowing you to give this tool a try, risk-free.
Additional Tools for Your Funnel
Along with Thrive Architect, you'll need the following tools to build a complete funnel:
- CRM tool: Keeps track of customer interactions and data, helping personalize the sales journey.
- Checkout plugin: Simplifies the buying process, making it easy and secure for customers to purchase your products.
- Email Marketing tool: Allows you to automate communications, send out newsletters, and nurture leads through tailored content and offers.
Step 2: Launch a Proven Sales Page Template (hero → proof → benefits → FAQ → CTA)
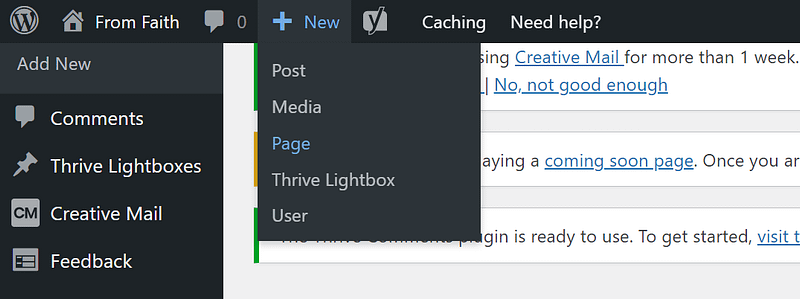
In the WordPress dashboard, click “Add New” and select “Page”.
Name your page and click the green “Launch Thrive Architect” button.
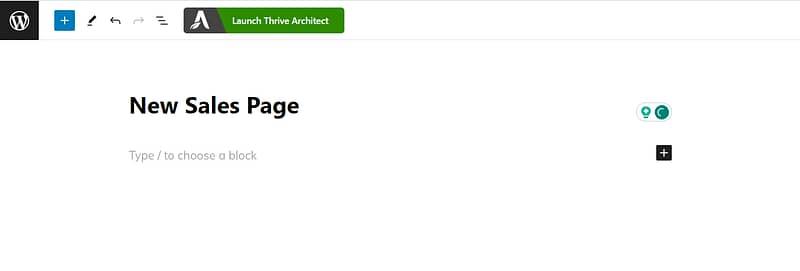
Thrive Architect will provide you with four options:
1. Normal Page
2. Blank Page with Header and Footer
3. Completely Blank Page
4. Pre-built Landing Pages

We recommend choosing the "Pre-built Landing Page" option.
In the Landing Page Library, browse through our template sets and select the one you like most.
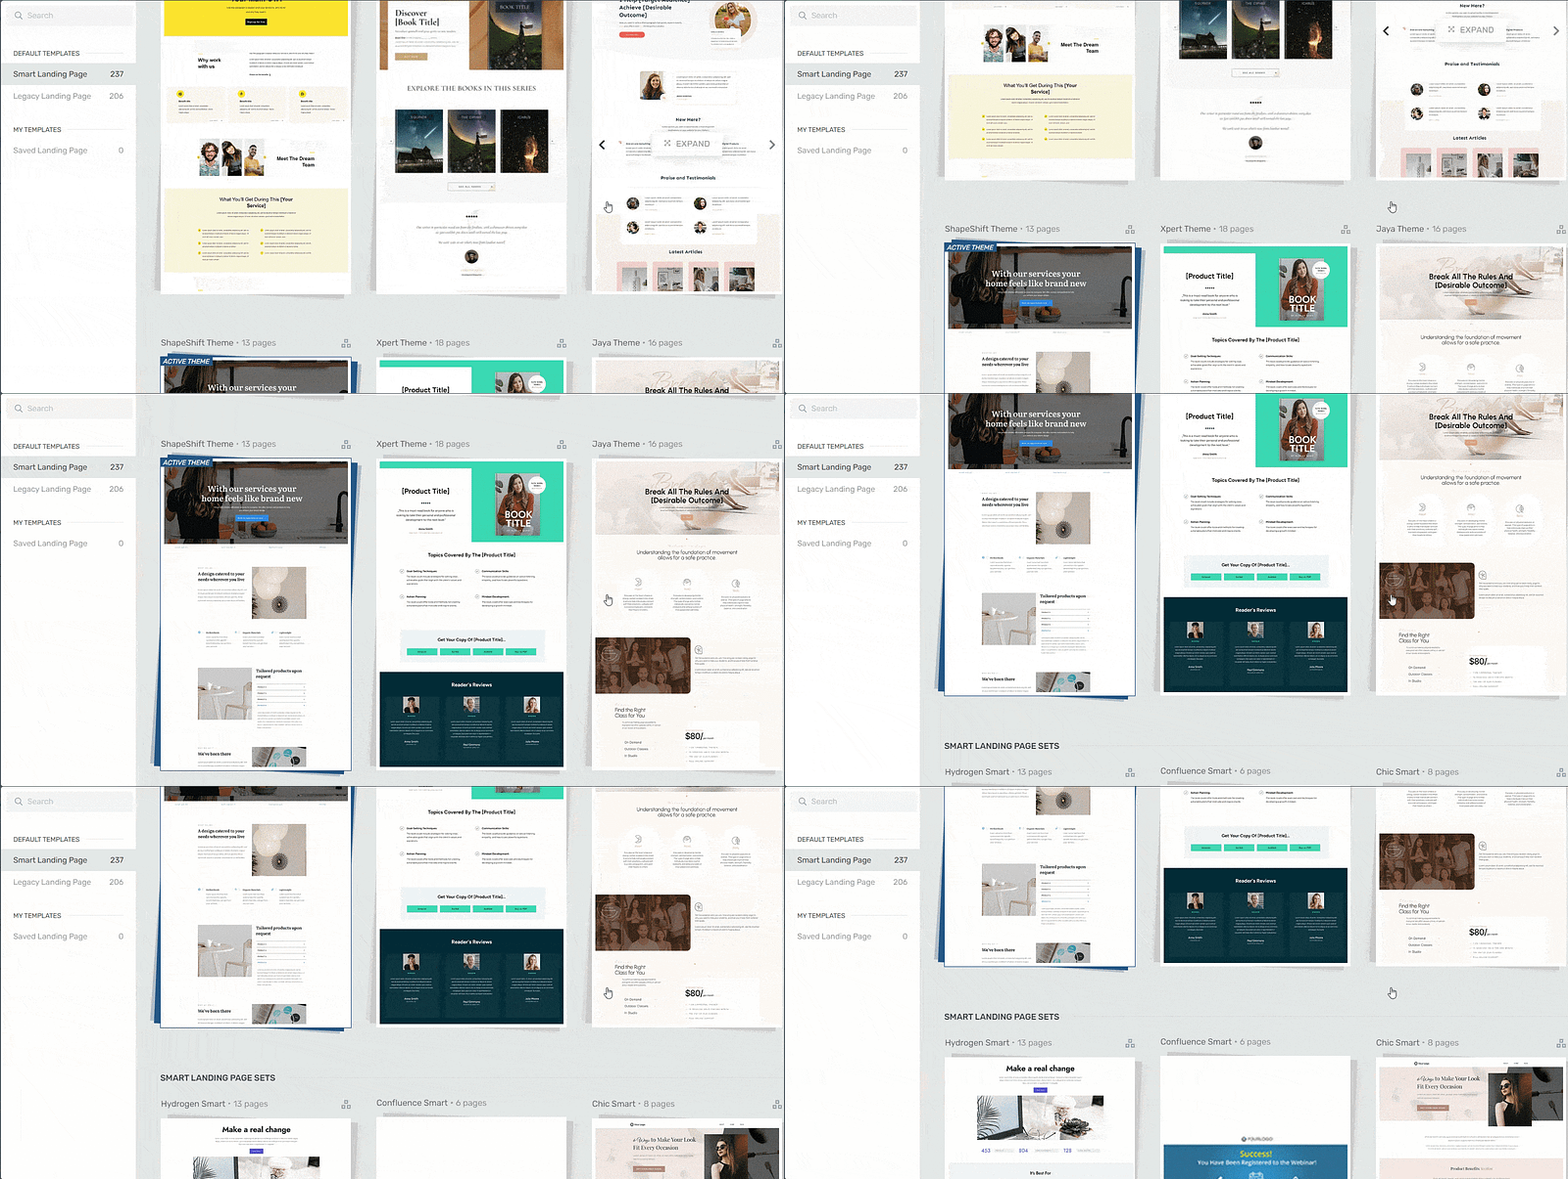
Landing page template sets in Thrive Architect
Each set comes with page templates that serve specific purposes. Find a template that best suits what you’re looking for and click it.
All our landing page templates have everything you need to effectively promote your sales offer:
An attention-grabbing headline and space to add supporting, persuasive copy.

Hero Section
A social proof section to add testimonials, case studies, or success stories from people who love your products and services.

A well-crafted “Benefits” section to give your audience an idea of what to expect from your sales offer.
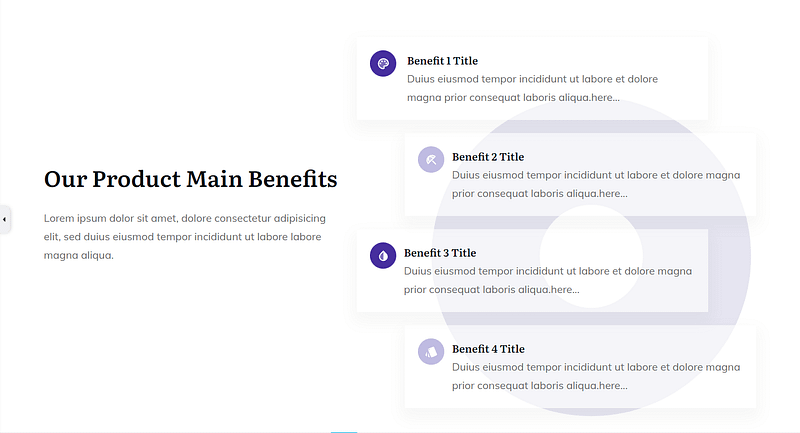
"Benefits" section in a Landing Page Template
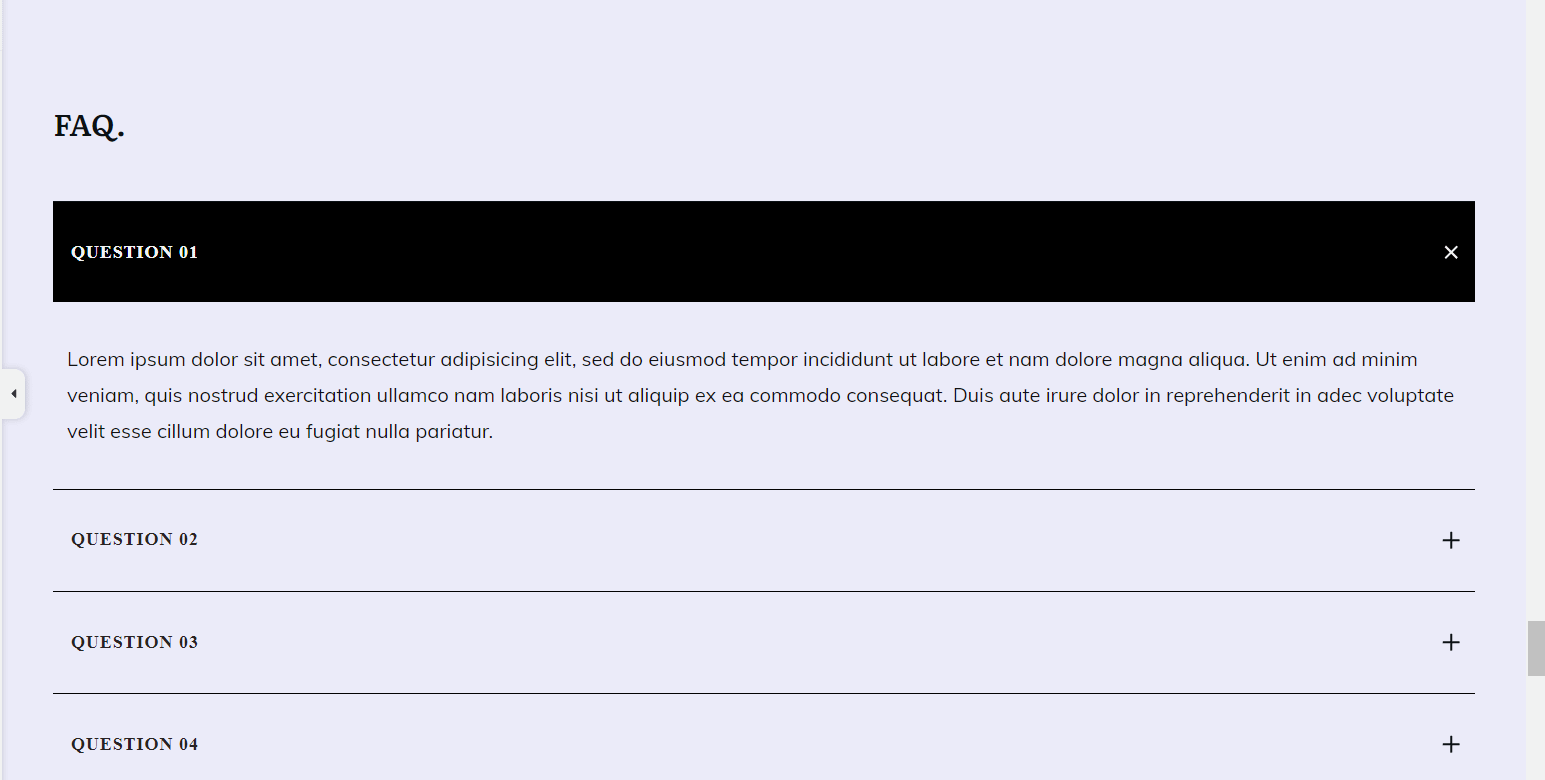
An FAQs section to proactively address your potential customers’ questions about your products or services
Pricing tables to clearly depict what your customer can expect when they purchase a product.
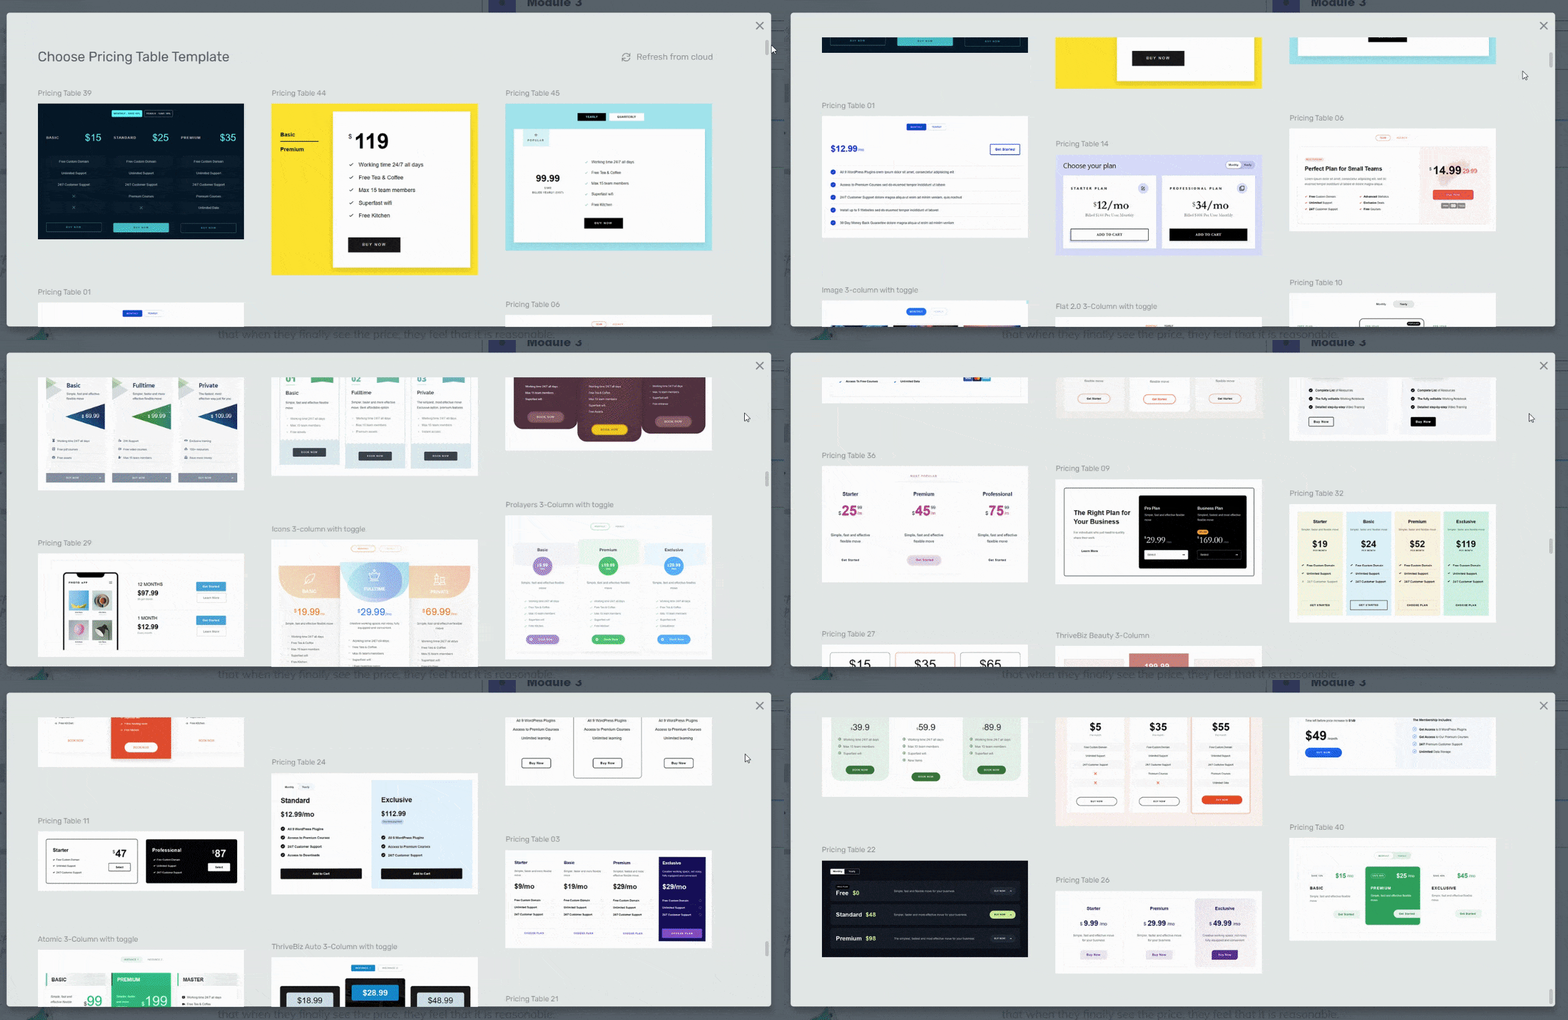
Pricing Table templates in Thrive Architect
Every template comes with helper text, to show you where to add copy and the message it should convey.
So, go through your template and replace the placeholder text and images with your own content.
Don’t forget to save your landing page design
Step 3: Spin Up Upsell / Downsell Pages (clear value, proof, urgency)

As you customize your upsell and downsell page templates, ensure your offer pages have:
Clear compelling headlines to capture your visitor’s attention and convey the value of your offer
High-quality videos and images for your website to explain the offer more effectively and make the page more engaging.
Concise and persuasive copy that clearly explains the benefits and solutions to your audience’s pain points.
Social proof to build trust and credibility (include customer testimonials, reviews, case studies, or user statistics that validate the offer's value).
Strong CTAs that direct your customers on what to do next to take advantage of your offer.
Pricing that shows a comparison with the original price to highlight the deal being offered.
Urgency elements to encourage quick decision-making – countdown timers, “limited spots available” signs, etc.

Countdown Timers in Thrive Architect
Frequently Asked Questions (FAQs) to address potential questions that a customer might have, which helps in decision-making.
Step 4: Streamline Checkout (multi-payment, one bump max)
Your checkout process will depend on your payment plugin of choice.
For a simple sales process, choose a checkout tool that supports Stripe, PayPal, debit/credit cards, and even Apple or Amazon Pay, offering multiple payment options.
If you’re using WooCommerce to sell your products, you can use Thrive Theme Builder and Thrive Architect to customize the default WooCommerce checkout page and connect your order form to your email marketing service, too.
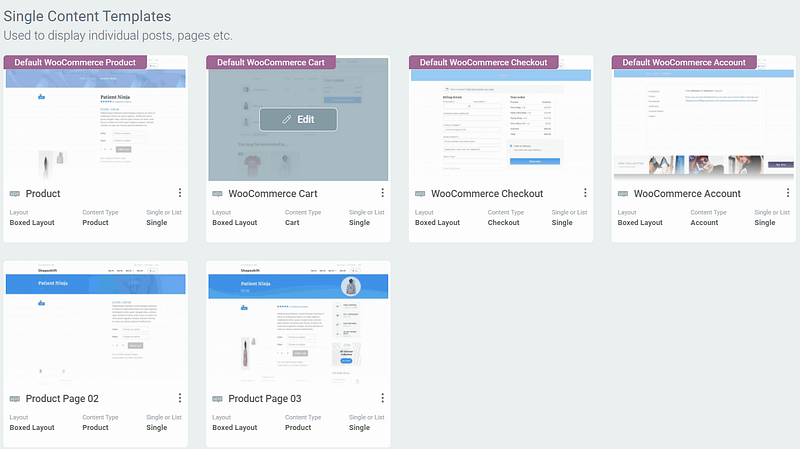
WooCommerce Templates in Thrive Theme Builder
If you want to display your upsell page after a purchase, then you can configure these settings in your checkout tool.
You should be able to do this with most tools like WooCommerce and Thrive Cart.
Bonus Tip: Instead of directing customers to a separate down-sell or cross-sell page, consider using a popup on a designated thank you page that displays after a successful purchase.
Step 5: Create a Thank You Page That Sets Expectations (shipping + “what happens next”)

Create another page in WordPress, launch Thrive Architect, and select the “Thank You” page template from your landing page set of choice.
Use Thrive Architect to customize the placeholder text and images. Once you’re happy with your changes, save your page.
Now you have all the pages you need in the funnel, time to set everything up.
“Don’t underestimate this page — it sets the tone for what happens next. We have a detailed thank-you page optimization guide you can follow to make yours work harder.”
Step 6: Set Up Your Post-Purchase Email Flow That Educate & Resell (care tips, how-to, related offers)
Don’t forget to follow up with new customers after their purchase.
The best way to do this is through email automation.
Set up an automated email sequence. Include engaging content like thank-you emails, satisfaction surveys, and relevant additional product offers.
You could also encourage repeat business by offering existing customers loyalty programs, discounts on future purchases, or referral benefits.
Step 7: Test Headlines, Offers, and Media (improve CVR & AOV over time)
Once you’ve connected all parts of your funnel, you should:
- Test the checkout process
- Ensure all links work as they should
- Ensure a confirmation email is sent after purchase and the customer is directed to the next stage correctly
I always recommend running regular split tests to find the most conversion-focused version of your pages. Our full guide to A/B testing shows you how to design these tests and read the results.
It taught me that connecting with your audience's aspirations can significantly boost conversions.
You should also install an analytics tool.
Using an analytics tool will help you understand how your funnel is performing through tracking user behavior and conversion rates.
These insights allow you to pinpoint where potential customers drop off and make data-driven adjustments to improve effectiveness and increase sales. Our top recommendation for tracking your site's analytics is MonsterInsights.
Pro-Tip: Your Funnel Doesn’t End at “Buy”
A lot of store owners treat the thank-you page like the finish line. In reality, it’s just the start of the relationship. The first 72 hours after a purchase are golden — your customer is still excited, still paying attention, and still deciding whether they trust you enough to buy again.
Here’s how I recommend using that window:
I’ve seen clients transform their repeat purchase rate just by tightening these touchpoints. It’s not flashy funnel hacking — it’s showing up when your customer expects you most.
FAQ: Physical-Product Funnels
Whenever I break down funnels for physical products, I notice the same questions pop up. They come from founders, marketers, even consultants who know funnels in theory but hit real-world snags when the product is something you can actually hold, ship, and return. Below, I’ve pulled together the seven questions I get asked most often — along with clear, practical answers that connect directly back to building a funnel that sells physical products profitably.
I map it as a five-stage system: Awareness → Consideration → Conversion → Fulfillment & Loyalty → Advocacy.
The purchase sits in the middle, not the end. After checkout, I double down on delivery comms, unboxing, and post-purchase email so happy customers feed the flywheel with reviews and referrals. That’s how you lower CAC over time and make growth predictable.
I define “quality” as intent + fit. My playbook mixes:
Paid social with Lookalikes for fast, targeted reach (creative solves a specific pain, not a feature dump).
SEO + content that answers buyer questions you want to be found for (guides, comparisons, how-tos).
Influencer/partner placements for trust transfer.
Bonus: competitor vulnerability ads that speak to pain points you see in their reviews. Precise, not petty.
A Tripwire Funnel: a low-ticket, high-value offer → checkout order bump → one-click upsell → (optional) downsell → thank-you + email. The goal of the tripwire isn’t profit; it’s identity shift: “I’m a buyer here.” Once that first yes happens, the upsell carries the margin without cluttering checkout.
I audit four pillars, because trust is multiplicative:
Social proof: reviews, UGC, ratings where decisions happen (PDPs and checkout).
Risk reversal: clear guarantees + no-nonsense returns.
Visual trust: clean design, high-res, security/payments visible.
Transparency: pricing and shipping costs up front.
If any pillar hits zero, overall trust collapses. I remove “trust destroyers” first.
Relevance or bust. I use three levers:
Order bump (checkout): tiny, obvious add-on (single checkbox).
One-click upsell (post-purchase): quantity upgrade, bundle, or premium version at a real, one-time deal.
Downsell (if declined): smaller pack, accessory, or payment plan.
Wrap upsells in an offer stack (bonuses with high perceived value, low cost to you) so the decision becomes “Do I want to turn down extra value?” not “Do I want to spend more?”
I treat checkout like the final sales pitch, not a form:
Show all costs early, guest checkout on by default.
Short forms, mobile-first, wallets (Apple/Google Pay), BNPL optional.
Inline reassurance micro-copy near sensitive fields; product thumbs always visible.
Add a small testimonial or rating right on the page. Security badges where eyes land.
Front and center. Logistics are a marketing lever:
Shipping: free-over-threshold to lift AOV; clear delivery windows on checkout + thank-you; proactive tracking emails.
Inventory: real-time stock + honest scarcity; build upsells and bundles around margin and on-hand units.
Returns: simple, visible policy reduces perceived risk and wins you the second sale—even when the first didn’t stick.
Next Steps: Start Driving Traffic to Your New Sales Funnel
Once you’ve set up your sales marketing funnel it’s time to get it in front of the right eyes. I remember the thrill of launching my first Instagram ad campaign for my client's new funnel. I targeted fitness enthusiasts with eye-catching visuals of my equipment in action. Within days, my funnel traffic surged by 50%! The excitement of seeing my hard work pay off was exhilarating, and it reinforced the importance of targeted marketing.
As you share your landing page on social media, through email, and even via SEO, you need to make sure you’re targeting the right people
Here are 4 free resources to help you drive the right traffic to your website:
Are You Ready to Launch Your First Sales Funnel for Your Physical Products?
Now that you have the key steps to building an effective sales funnel for your physical products, it’s time to start building. I still remember the day I took the plunge. I sat at my desk, staring at a blank screen, feeling a mix of fear and excitement. But as I began to piece together my funnel, I felt a spark of creativity ignite within me. That leap of faith led to a thriving business, and I can’t wait for you to experience the same transformation."
With this tutorial, you can easily build your own sales funnels to turn your marketing efforts into profitable results — while providing a smooth customer experience at the same time.
The best part? You don’t need an expert sales team to make this happen.
Thrive Architect is a powerful funnel-building tool that provides you with everything you need to create stunning landing pages.
All you need to do is purchase the plugin and start your sales-generating journey today.
So what are you waiting for?


