Looking for an easy way to edit the footer for your WordPress website?
If so, you’ll be happy to know that editing your WordPress footer isn't as difficult as it may seem – if you use the right tool.
I remember when I first launched my website, I thought the footer was just a boring necessity. But after a few weeks, I noticed my bounce rate was high. It turned out, I had neglected to include essential contact information in the footer, which left visitors feeling lost.
Too many websites make the same mistake, so today, we're going to fix that!
Let's dive into the importance of footers, how to access your footer in WordPress, and how Thrive Theme Builder can help you customize your footer to look just how you want it to.
More...
What is a Footer in WordPress?
The footer of a WordPress website is the section located at the bottom of every page.
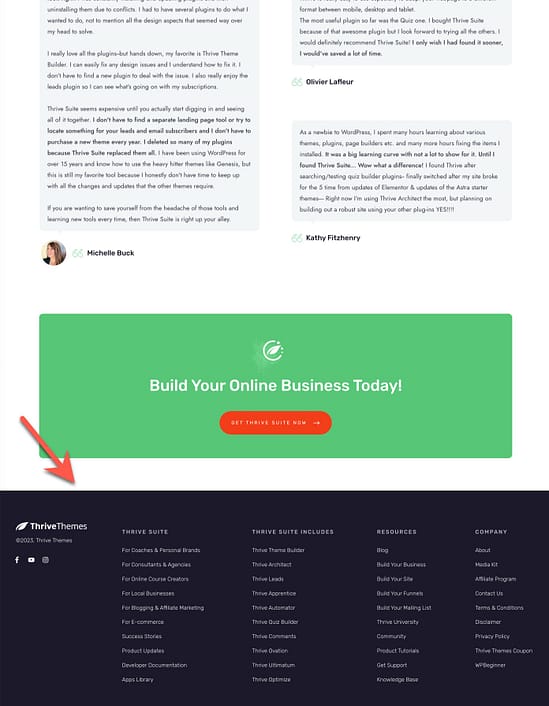
It's an area where visitors often look for additional information, such as contact details, copyright information, social media links, or a secondary navigation menu. Having a well-designed WordPress footer layout can significantly improve user experience and navigation.
Additionally, optimizing footer content can improve SEO. Including relevant keywords, structured data, and links to important pages can enhance search visibility.
The Challenge of Editing Footers in WordPress
WordPress footer customization can feel like searching for that elusive matching sock in a laundry basket—frustrating and often leading to a sense of defeat!
Footers in WordPress are theme-dependent, meaning different themes have varying methods of allowing you to edit the footer.
Some WordPress theme footers even restrict what you can edit unless you directly manipulate the footer code or go to your theme files and edit the footer.php file – and let's be honest, not everyone wants to do that.
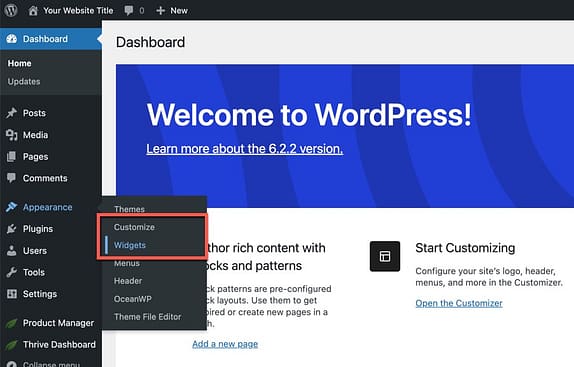
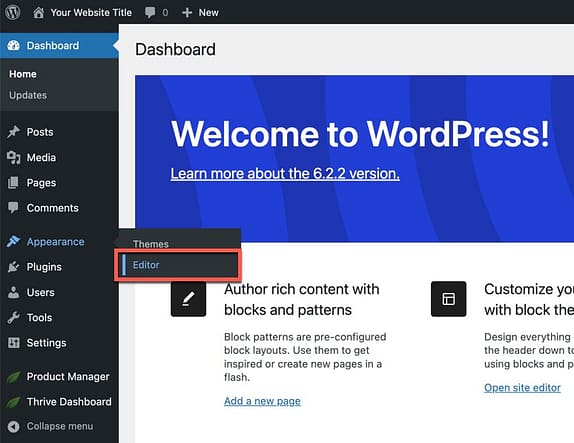
The typical WordPress theme will let you edit the footer settings by heading over to one of the following areas in your WordPress back end:
- Appearance > Widgets
- Appearance > Customize
- Appearance > Editor
But forget code, we have a better method – one that offers a bevy of WordPress footer layout options, while being 100% customizable.
How to Customize Your WordPress Footer with Thrive Theme Builder
A custom WordPress footer is an important (if often overlooked) part of your website.
It's a place where people look for quick access to vital information, and understanding this can give your website an advantage.
I once received an email from a visitor who found my contact information in the footer. They mentioned how easy it was to reach out because they didn’t have to search through multiple pages.
Learn how to customize your WordPress footer with this step-by-step guide and get your footer working for you.
Step 1: Install Thrive Theme Builder
The footer for your website provides important information and navigation options to your visitors, helping them find what they need in just a click or two.
But it’s equally important for your website footer to be easy to edit, so that you can add elements such as social media icons, a secondary menu, and company information. Having a tool that makes the customization process easy can be a real game-changer in building your website, and that’s why we recommend Thrive Theme Builder.
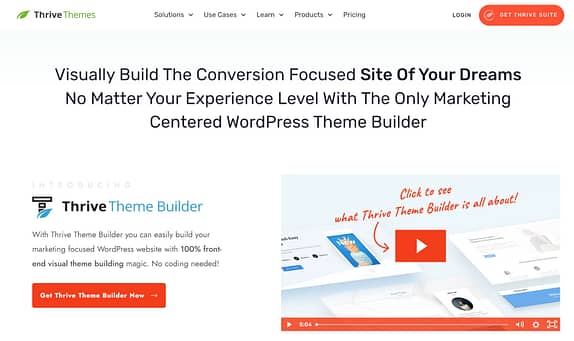
Thrive Theme Builder is a theme customizer and builder for WordPress that simplifies the process of designing and customizing your entire WordPress website, including the footer.
When I first tried Thrive Theme Builder, I was amazed at how easy it was to customize my footer. I went from a bland, generic footer to a vibrant one that truly reflected my brand's personality.
Here’s why you’ll love Thrive Theme Builder:
- Visual Theme Building: Thrive Theme Builder allows you to visually build and customize every aspect of your website without touching a single line of code (forget CSS, HTML and the rest!). Design headers, footers, page layouts, sidebars, and more – all with a visual drag-and-drop builder. It's like painting a masterpiece; you have the freedom to choose colors, shapes, and layouts without worrying about the technical details.
- Pre-built Templates: Not a designer? No problem! The tool comes with a variety of pre-built templates that you can use as a starting point for your designs.
- Site Wizard: I was pleasantly surprised by how the Site Wizard guided me through the setup process. It felt like having a friendly assistant by my side, making sure I didn’t miss any crucial steps.
- Smart Color Technology: With smart color technology, once you choose your brand color, Thrive Theme Builder will automatically adapt a coordinating color palette.
- WooCommerce Compatibility: If you run an e-commerce store, you'll appreciate Thrive Theme Builder's full compatibility with WooCommerce, the popular e-commerce plugin for WordPress.
- Mobile Responsiveness: Thrive Theme Builder ensures that your design looks great on all devices. You can also tweak and optimize your pages for different screen sizes.
- SEO Friendly: Thrive Theme Builder is built with best SEO practices in mind to help your content rank better in search engine results.
- Integration: Thrive Theme Builder seamlessly integrates with other Thrive products as well as the most popular marketing tools, plugins, and services.
Check out pricing for Thrive Theme Builder
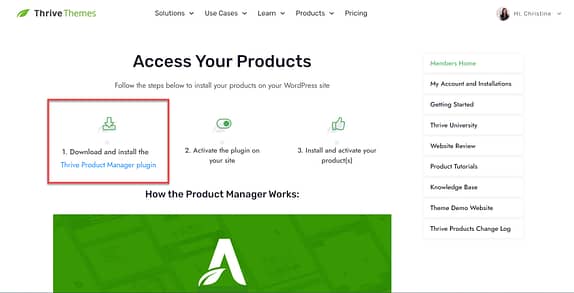
To get started with Thrive Theme Builder, first download the Thrive Product Manager and upload it to your WordPress dashboard. Then, proceed to install and activate it.
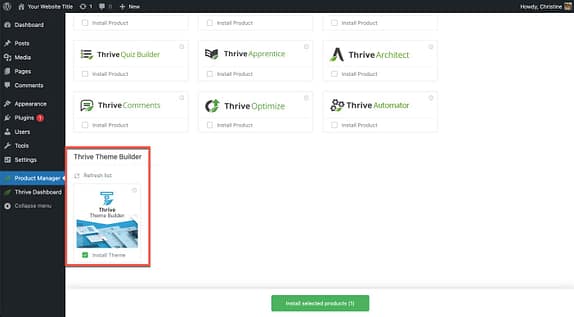
Next, visit Thrive Product Manager in your WordPress admin and follow the prompts to install and activate the Thrive Theme Builder.
Step 2: Go through the Site Wizard and Pick a Footer Layout
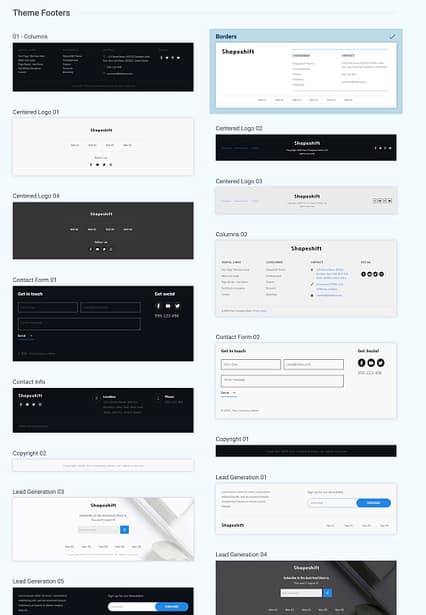
Once Thrive Theme Builder is installed and activated, you’ll be prompted to proceed with setting up your website using the Thrive Theme Builder Site Wizard. Here, you can choose from various theme footer templates to find the one that best align with your website design and brand aesthetics.
Step 3: Enter Global Fields in Smart Site
In this next step, you'll streamline your website management process by utilizing the Global Fields in Smart Site.
True story, I used to spend hours updating my contact information on every page of my site. If only I had known about Global Fields, I could have made that change in one go!
Start by navigating to the Thrive Dashboard and selecting Smart Site. Then, input your key business information.
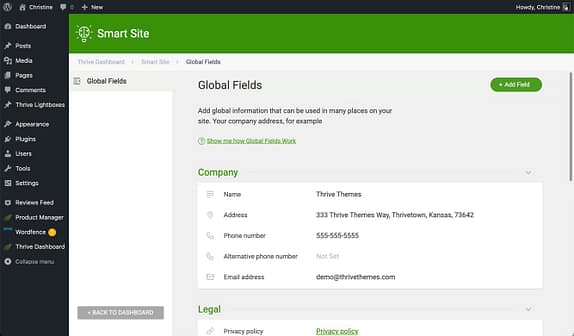
The beauty of using Smart Site is that it automatically updates global fields throughout your site. If you ever need to change your core business information, you don't have to add new info to every page, simply revisit Smart Site and make the changes. These updates will then propagate across your entire website automatically, saving you time and effort.
Step 4: Customize Your Footer
Now comes the fun part.
With Thrive Theme Builder, you can customize all aspects of your website footer like a pro - and it has a real impact on results.
For instance, when I added social media icons to my footer, I saw a noticeable increase in my followers. It was a simple change, but it made a big difference!
Change the background color, add a menu, integrate social media follow icons, add additional footer text, or include contact information (phone number, email, address, it's up to you). The possibilities are vast, and you have complete control over your design.
To begin creating your custom footer, you’ll need to access your theme templates. By default, the footer is used on multiple theme templates; updating your footer on one theme template will update the footer throughout your site. An easy place to start is your Homepage.
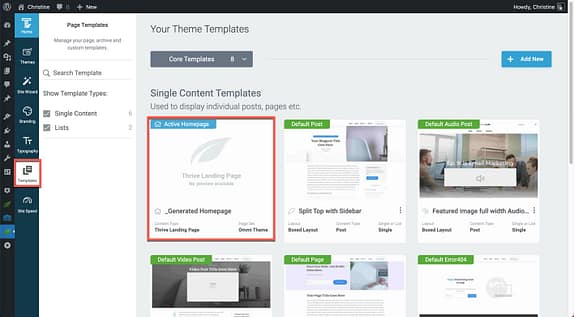
Next, scroll to the bottom of the page, click inside of the footer, and click the Edit Footer button.
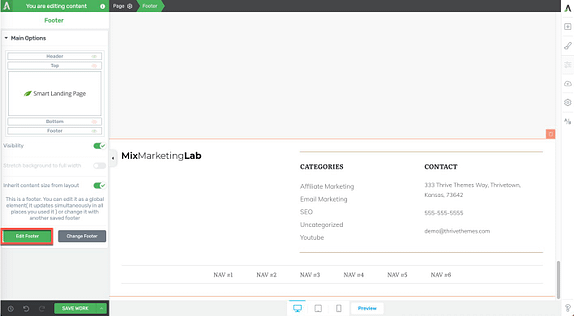
And now it’s time to customize the footer to your heart’s content! The Thrive Visual Editor is a drag-and-drop editor, so click the Add Element button to view the available elements and simply drag them to where you would like to place them. Make additional customizations using the sidebar on the left-hand side of the page.
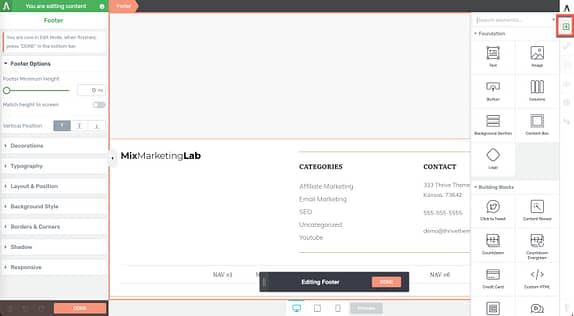
You'll find tons of customization options to get your footer design looking exactly how you imagined.
5 Excellent WordPress Footer Examples
Looking for ideas for what to put in your website footer block, or how to organize the information? Here's a few examples:
1. WP101
WP101's footer is a great example of one that has a simple, clean layout, and contains all the information visitors need. The footer menus are clear and help people quickly find important information about the website.
Marie Forleo's footer takes advantage of the space with an email opt-in and links to products. Adding additional functionality like a signup form can be great for lead generation.
The footer section for WP Beginner's website offers helpful links while imparting trust signals like an About section and a Featured in section.
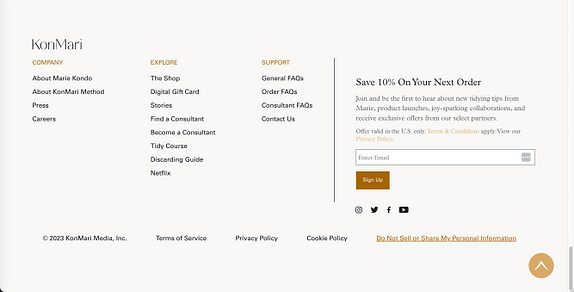
KonMari's footer content uses the space to offer a lead magnet – an easy, simple way to grow your email list.
The footer for Smart Passive Income contains links to legal web pages, social media profiles, and main areas of interest for visitors.
Now It’s Your Turn to Edit Your WordPress Footer
The footer of your website plays an important role in providing information and navigation options to your visitors. Thankfully, Thrive Theme Builder makes the task of customizing your footer easy and fast.
But remember, with over 50% of web traffic coming from mobile devices, having a mobile-responsive footer is crucial. Thrive Theme Builder ensures your footer looks great on all devices.
The Thrive visual theme editor allows you to see changes in real-time as you make them (in desktop, tablet, and mobile views), and it offers an array of mobile-ready elements you can incorporate into your footer, as well as other parts of your website. So, why not give Thrive Theme Builder a whirl?
A footer is the section located at the bottom of every page on a WordPress website. It typically contains essential information such as contact details, copyright notices, and links to social media profiles. The footer serves as a crucial part of the website's navigation and user experience.
The footer enhances user experience by providing quick access to vital information and navigation options. It helps users find important details without scrolling back to the top, thereby improving site usability and engagement.
Editing footers can be challenging due to theme dependencies. Different WordPress themes have varying methods for footer customization, and some may require direct code manipulation, which can be intimidating for users without coding skills.
Thrive Theme Builder simplifies the footer customization process by offering a user-friendly drag-and-drop interface. It allows users to easily modify footer elements without needing to write any code, making it accessible for everyone.
For better user engagement, consider including contact information, social media links, a site map, copyright information, and any relevant links to important pages. This ensures users have easy access to essential information and encourages interaction with your site.
Next, Build a Gorgeous, Custom Website Using Thrive Theme Builder
Now that you know how to edit your footer, I challenge you to make it your own! Share your unique footer designs in the comments below—I’d love to see what you create!
And don't stop there, with Thrive Theme Builder, you can create a stunning, custom website that aligns perfectly with your brand. Its comprehensive features provide an easy way to tailor your entire site – header, body, and footer – and really make it your own.
Take a look at these helpful resources to get started:
- Thrive Theme Builder Tutorials
- How to Create a Clean, Conversion-Focused Website
- Build Your Website
- How to Build a Website Using WordPress Templates
Now there’s just one thing left to do: buy Thrive Theme Builder today!


