


Let’s be honest for a moment. As a business owner, you’re likely stuck on a hamster wheel. The endless content hamster wheel. The ad-spend slot machine. The "I'll just check my email one more time" hamster wheel. You do everything you’re “supposed” to do—you build a great sales page, you drive traffic, you celebrate the sales notifications. But when you look at the bottom line, you’re just… treading water. To grow, the gurus say you need more. More traffic. More leads. More everything.
Sound familiar?
I’m here to tell you that the secret to real, sustainable growth isn’t found at the top of your funnel. It’s not about endlessly chasing more. It's about getting more from the customers who have already put their trust in you and said "yes." It's about making your existing funnel smarter, not just bigger.
This is where we go beyond the basics. You've already learned the Anatomy of a High-Converting Landing Page. You know the core elements. Now, it’s time to give that page a brain.
In this guide, I'll show you how to create a "genius" landing page in two stages. We'll start with the simple magic of changing individual words with Dynamic Text, and then we'll show you the real genius: changing entire sections of your page with Conditional Display for a truly one-to-one experience.
The Solution: What is a Dynamic Landing Page?
The Big Idea
A dynamic landing page is a webpage that automatically changes its content—like headlines, images, or offers—based on who is visiting. It’s a smart page that creates a personalized experience for each unique visitor, showing them the most relevant information.
Still sounds a bit like marketing jargon, right? Let’s use a real-world example you’ve probably seen a dozen times.
Ever logged into Booking.com? It doesn't just show you random hotels. It immediately says, "Hey, you're in Cyprus. Looking for a weekend trip from here?" and shows you deals for popular getaways. That’s not a coincidence. It's a dynamic page using your location to show you hyper-relevant offers. They didn't have to build a separate page for every city in the world. They built one smart page. And because the offer is so relevant, you're much more likely to click.

This "magic" happens in three main ways:
This might sound like something reserved for tech giants, but as you'll see, it's surprisingly accessible.
The Problem: The 'One-Size-Fits-None' Landing Page
The problem with most landing pages is that they operate on a "one-size-fits-all" model. You build one page with one message and show it to absolutely everyone. You show the exact same headline to a loyal customer from your email list and a brand-new visitor who clicked a random ad on Facebook.
The average static landing page converts at a paltry 4.2%. Why? Because "one-size-fits-all" usually ends up meaning "one-size-fits-none."
When a visitor clicks an ad that promises "The Best Yoga Mats for Beginners" and lands on a generic page that just says "Quality Yoga Supplies," the experience is jarring. That tiny moment of disconnect is all it takes for them to feel misunderstood and hit the back button.
The Real Cost of Being Generic
This isn't just a small missed opportunity; it's a leaky bucket for your marketing budget. You're paying for ads to send highly-targeted traffic to a generic, uninspired page. It's like inviting a VIP guest to a party and then forgetting their name as soon as they walk in the door.
And you’re not alone. A surprising 73% of businesses still rely primarily on static pages for their campaigns (Gross.AI). This is fantastic news for you. By simply making your pages smarter, you gain a massive competitive advantage.
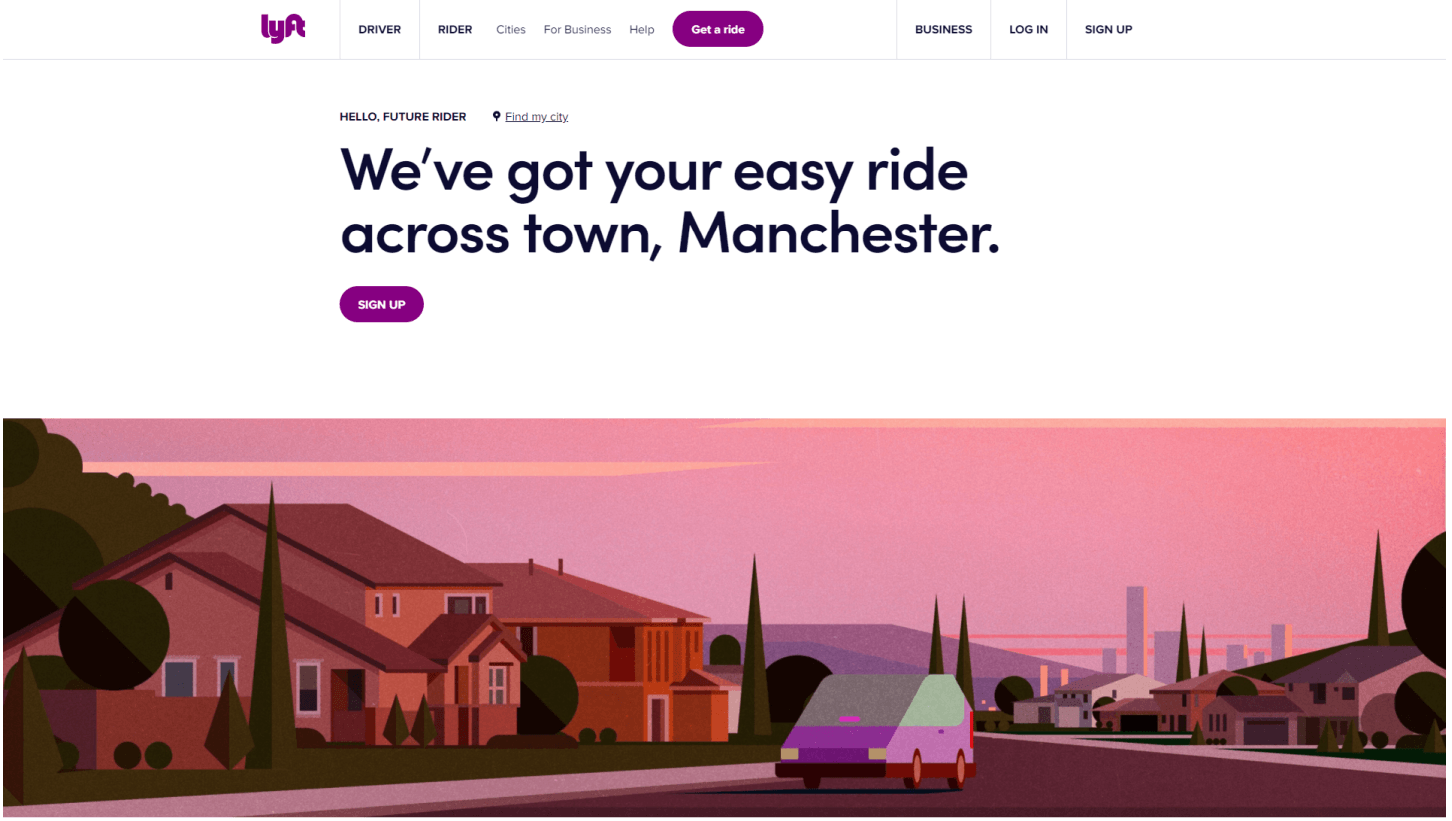
Lyft's website features lots of template-drive, location-focused landing pages.
Making the switch reduces the average cost per conversion by 39.4% (Gross.AI). It's not just about making more sales; it's about making your entire marketing spend more efficient.
How to Create a Dynamic Landing Page in WordPress
Okay, so you’re convinced. But now you’re probably thinking, "This sounds complicated." For years, it was. You needed developers or expensive enterprise software. Not anymore.
This section walks you through the key steps to create your first dynamic landing page, using just one tool: Thrive Architect.
1. Download & Install Thrive Architect
First things first, you'll need the plugin. Thrive Architect is the best landing page builder for WordPress that is built from the ground up for conversions.

Architect is perfect for business owners who want to keep control of their marketing strategies without having to fight against complicated code and endless technicalities. I may work for Thrive now, but I was a customer long before that happened and it's still my go-to to help me take control of the more advanced strategies like landing page personalization.
2. Choose a Landing Page Template
In the WordPress dashboard, create a new page and launch Thrive Architect. We recommend choosing the "Pre-built Landing Page" option to start from a professionally designed template. These templates are built with personalization in mind so they offer the perfect starting point.
3. Select a Place for Your Dynamic Text

Once your template is loaded, decide where you want the magic to happen. The headline is the most powerful place to start. In our example, we'll use a placeholder like "[Name]" to mark the spot.
4. Insert Dynamic Text

Highlight your placeholder text and click on the database icon in the top toolbar (it looks like a stack of coins). This opens the dynamic text menu. You'll see a list of data sources you can pull from. For this first example, we’ll use the “User Data” option.
5. Configure Your Dynamic Text

Select the data point you want to display, like a WordPress user's first name. Then, type in a default value. This is the fallback text that will show if the data isn't available (e.g., for a visitor who isn't logged in). Let this be something generic like “Friend” so it still makes sense. Click "Update," and you're done!
A Breakdown of the Dynamic Text Sources
This is where the magic happens. You'll see a dropdown menu of sources. It looks a bit technical, but it's actually super simple. Here’s what the most powerful options mean and how to use them:
Set Your Fallback
For any dynamic text, you can set a "default" value. This is the text that shows up if the data isn't available (for example, if a visitor isn't logged in). This crucial step ensures your page never looks broken.
Bonus Tip: Go Beyond Text with Dynamic Links
Personalization isn't just for the text on your page; you can also create "smart links" where the destination is generated automatically. Instead of manually pasting a URL, you tell the link what to point to, and Thrive Architect figures out the rest.
This is a game-changer for a few key reasons:
- Secure Downloads: Link directly to a Protected File. This is perfect for a lead magnet. Instead of a generic link that can be shared, each subscriber can get a unique, secure link to your e-book, ensuring only the right people get access.
- Seamless Course Access: Send students directly to the right Thrive Apprentice course page, the checkout, or their next lesson without ever needing to find and paste the URL yourself. It's a huge time-saver and creates a much smoother experience for your members.
- Instant E-commerce Actions: Use a Shortcode to create a link that does more than just go to a page. Imagine a button that, when clicked, automatically adds a specific product to a visitor's WooCommerce cart. That's the power of dynamic links.
Level 2 (The Genius Part): Using Conditional Display
Changing a word or two is powerful. But what if you could change entire sections of your page?
What is Conditional Display?
Conditional Display is an advanced feature in tools like Thrive Architect that allows you to show or hide entire content sections based on a set of rules you define. While dynamic text changes a word, conditional display changes the whole picture.
This is where your landing page goes from smart to true genius. Instead of just changing text, you can now dynamically change:
Mini-Tutorial: Your First Conditional Section

Ready to try it? It's easier than you think.
- Select a Section: In Thrive Architect, select an entire Content Box, Background Section, or Block that you want to make dynamic.
- Find Conditional Display: In the left-hand sidebar, find and open the "Conditional Display" settings. You'll see your current design as the "Default Display."
- Duplicate and Edit: Click the 'duplicate' icon to create a new version of your section. Edit this new version to be whatever you want your alternate display to be (e.g., change the text, image, or button).
- Add Your Rule: Click the 'conditions' icon on your new display. A popup will appear where you can set the rules, such as "Show this content only to Logged In Users" with the role of 'Customer'.
That's it! You now have one section that will dynamically change based on who is viewing it.
The Inspiration Gallery: 5 Dynamic Ideas You Can 'Steal' Today
Feeling inspired? Here’s a quick-fire list of creative ideas to get your gears turning.
3 Simple Dynamic Landing Page Recipes You Can Use Today
Now that you know the two main techniques, let's look at a few powerful, real-world recipes.
Recipe #1 (Parametric): Personalize for Ad Traffic
This is the perfect starting point. The goal is to make the journey from your ad to your landing page feel like one seamless conversation.
My Experience with Paid Ads
A real-world example from a KlientBoost case study shows how Reliant One used Dynamic Keyword Insertion and social proof to automatically fill in state names on their landing pages. This simple personalization strategy resulted in a 28.88% conversion rate.
Mini-Tutorial: How URL Parameters Work
To do this, you use URL Parameters. It's a fancy term for the text you add to the end of a URL to pass information. Common parameters include `utm_source`, `ad_group`, or a custom variable like `city`.
In your ad platform, you just change the link for each ad group:
- `yourwebsite.com/page/?ad_group=beginners`
- `yourwebsite.com/page/?ad_group=experts`
The first parameter always starts with a `?`. Any additional parameters start with an `&` (e.g., `?source=facebook&ad_group=beginners`).
https://thrivethemes.com/dynamic-personalized-landing-pages/?firstname=&location=&food=
Recipe #2 (Demographic): Greet Your Email Subscribers by Name
This one creates a huge "wow" moment for your audience. When you send an email to your list, you can create a link that automatically passes each subscriber's first name to the landing page.
When Cindy clicks, she sees: "Cindy, Your Exclusive Offer is Here!"
When David clicks, he sees: "David, Your Exclusive Offer is Here!"
This is a powerful way to leverage the data you already have in your email list. By making your subscribers feel recognized, you deepen their loyalty and significantly increase engagement. This is a core tactic in any effective lead generation and list building strategy.
Recipe #3 (Behavioral): First-Time Visitor vs. Returning Customer
Imagine being able to roll out a different welcome mat depending on who's at the door. Using the Conditional Display feature, you can show a completely different offer to a new visitor versus an existing customer.
For a New Visitor (Logged Out):
- You can display a Content Box with a call-to-action to buy your product.
- Headline: "Get Your Copy of Our Bestselling E-book Today!"
For an Existing Customer (Logged In):
- You can set that Content Box to be hidden for logged-in users. Instead, you can display a different Content Box
- Headline: "Welcome Back! Access Your E-book Here."
This level of personalization is what contributes to boosting revenue by as much as 15%. It creates a smarter, more relevant experience for everyone and is one of the most powerful landing page hacks you can use.
Your Personalization Toolkit: All the Parameters You Can Use
URL parameters are just the beginning. A professional tool gives you a whole toolkit of dynamic sources. Here are some of the most powerful options available.
Dynamic Content Parameter Sources
Parameter Source | Common Use Case |
|---|---|
URL QueryString | Show a headline that matches the `utm_campaign` from a specific ad link. |
Search Query | Display the user's Google search term in the headline (e.g., "Looking for the Best Vegan Boots?"). |
Cookie | Show a "10% Off" banner if the user has a cookie from visiting your pricing page before. |
User Data | Greet a logged-in member by their first name ("Welcome back, Sarah!"). |
Global Fields | Insert your business phone number that's managed in one central place (with Thrive Theme Builder). |
Time & Date | Automatically display the current year in your website's footer ("Copyright 2025"). |
How to Know if It's Working: 3 Simple Metrics
The entire point of personalization is to improve conversions. But don't just guess—prove it to yourself with data. The professional way to compare these metrics is through A/B testing.
Your Measurement Plan
Before you implement your first dynamic element, get a baseline for your static page's performance. Then, after your smart page has been running for a while, compare these three key metrics:
- Conversion Rate: The most important metric. What percentage of visitors took the desired action? This should go up.
- Bounce Rate: What percentage of visitors left after viewing only one page? This should go down, as the page is more relevant.
- Time on Page: How long are visitors sticking around? This should go up, as they are more engaged with your personalized content.
Next Steps: Convert Your Engaged Visitors into Leads

Okay, you've used dynamic content to grab their attention and build trust. They're impressed. Now is the perfect time to ask for their email. A personalized page followed by a compelling opt-in form is a one-two punch for conversion.
We recommend using a tool like Thrive Leads to create beautiful, high-converting opt-in forms. You can show targeted offers based on posts, categories, and tags, allowing you to build a highly segmented—and profitable—mailing list.
Frequently Asked Questions
Not at all. The dynamic content features in a tool like Thrive Architect are designed to be incredibly lightweight. They work by using simple placeholders that are replaced with data on the fly, which has a negligible impact on your page load speed.
Absolutely not! That's the beauty of modern tools. Everything we've discussed can be done through a visual, click-to-edit interface. The goal is to empower you to create these advanced pages without ever having to touch a line of code.
That's a great question. The golden rule is to be helpful, not creepy. Using a first name from an email list is friendly. Referencing a city from an ad is relevant. The line is crossed when you use data the visitor doesn't know they gave you. Stick to information they provided or that is directly related to how they got to your page.
Start with the simplest, highest-impact tactic: personalizing your landing page for your paid ad campaigns using Dynamic Text and URL parameters. It's a quick win that will immediately show you the power of this strategy. Once you're comfortable, move on to Conditional Display.
Conclusion: Personalization is No Longer Just for Big Companies
For a long time, the kind of personalization that can boost revenue by as much as 15% was reserved for companies with huge budgets like Amazon and Booking.com.
Not anymore.
You've learned how to start with the simple power of Dynamic Text and how to graduate to the genius-level strategy of Conditional Display. The tools and strategies to create these intelligent, high-converting experiences are now accessible to everyone. You don't need a massive team or a six-figure budget. All you need is a plan to start simple and focus on making your visitors feel seen.
The content hamster wheel will still be there tomorrow. The only question is whether you'll still be on it.
Look at your own sales funnel right now. Where is your biggest opportunity? You don't have to do it all at once. Start with one—implement a dynamic headline for your next ad campaign this week—and start turning the traffic you already have into the profit you actually deserve.


Wow! Very helpful article! I have to read it 2-3 more times to swallow it and start experimenting. Sounds like a great tool, thank you very much 🙂