Want to learn how to add a Call Now button on WordPress?
Adding a clickable phone number (or call button) makes it easier for mobile phone users to contact you about your products or services.
But simply adding your number and turning it into a hyperlink won’t cut it.
Follow this step-by-step guide to learn how to create this conversion-focused element in a matter of minutes.
Here's how to add a Click to Call button on your WordPress website.
Why Should You Use a Click to Call Button?
Your ultimate goal is to get your audience to buy from your business. But, sometimes, your site visitors may have additional questions and they don’t want to fill in a contact form.
Instead of relying on your visitors to find your contact page, take down your details, and then contact your business...
You should create a Call Now button to make it easier for them to reach you as fast as possible.
Call Now buttons provide your visitors with a quick, convenient way to contact your business and get the answers they're looking for.
Instead of directing them to a contact form - which they may close before filling in - you can use these call to action buttons to speak with your potential customers while their interest in your business is still super high.
How to Add a Call Now Button to Your WordPress Website
There are two ways to add a Call Now Button to your website:
Method 1: Add a Click to Call Button with Thrive Architect
Method 2: Use the WP Call Now Button to add a Call Button
Method 1: Add a Click to Call Button with Thrive Architect
This method is ideal for users who want to build better landing pages and get more conversions from their WordPress site.
1. Download & Install Thrive Architect
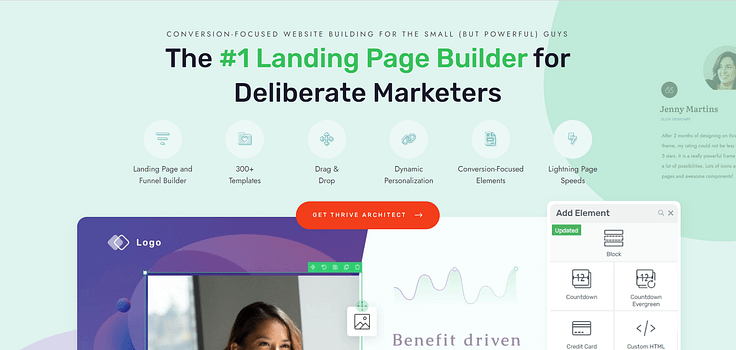
If you want to create conversion-focused landing pages without wrestling with the WordPress editor — and include a “Call Now” button — then Thrive Architect is the right plugin for you.
This tool doesn’t just help you create CTA buttons, it provides you with the tools and templates you need to get people to actually click your calls-to-action and convert.
Why have 3 different plugins to create your ideal landing pages, when you can get everything you need in just one?
That’s when you get when you use Thrive Architect — tools to easily add CTA buttons and other conversion-focused elements to your header, footer, navigation menus, and other parts of your landing pages.
No need to use shortcodes or actual code — everything you need can be added with a simple drag and drop.
Ideal for all kinds of websites — blogs, eCommerce stores, personal branded sites, and more.
Check out Thrive Architect and see if it’s what you need to improve your conversion rates and get more out of your digital marketing strategies.
2. Fill In Your Global Fields in the Smart Site Section– Crucial Step
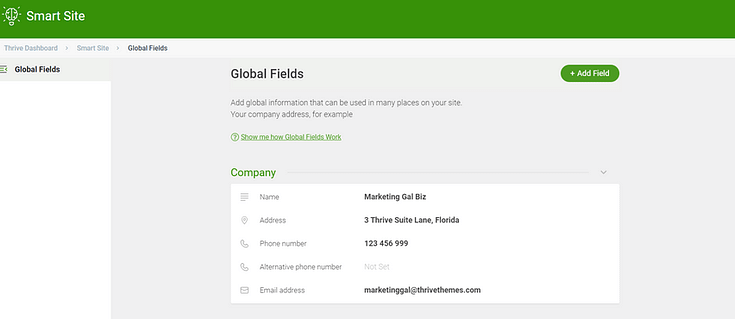
The “Global Fields” feature allows you to display important snippets of information (e.g. your company’s name, address, business phone number ) on multiple pages of your website, without having to create the same content over and over again.
To fill in your Global Fields, follow these instructions:
1. Go to your WordPress dashboard and click on the “Thrive Dashboard” from the menu on the left side:

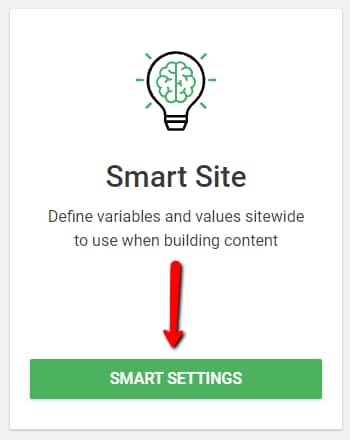
2. Scroll down until you see the “Smart Site” card and click on the “Smart Settings" button:
3. You're now in the "Global Fields" settings page . Here, you should fill in your business email address and phone number , along with any other important details. Exit the section when you're done. When adding your phone number , be sure to include your country code so phone calls from people outside of your country can contact you, too.
4. Open Thrive Architect & Select a Page Type
You need a page to create your "Click to Call" or "Click to Email" button. Select “New” or “Add new page” and launch Thrive Architect.
Choose from one of the following page template options Thrive Architect gives you:
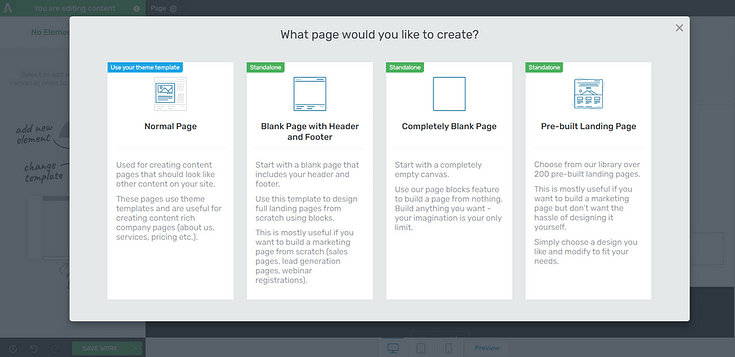
5. Create Your First Click to Call or Click to Email Button
And now it's time for the main event: creating your first "Click to Call" button.
1. Select the "Button" element from the Thrive Architect drag-and-drop editor and place it on your page. Give your button a label - e.g. "Click to Call".
You can also turn this button into a Click to Email button if you prefer to be contacted via email.
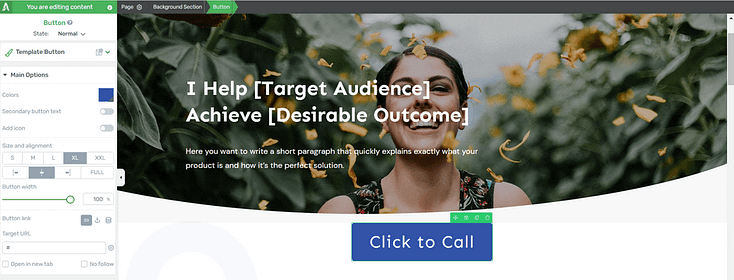
2. Take a look at the menu on the left and find the "Button Link" section. This is where you’ll add your click-to-call link . You can choose to add your button to your header or choose a button position on the actual page.
You can also use this menu to edit your button color , add a phone icon , or change the typography for your call button text.
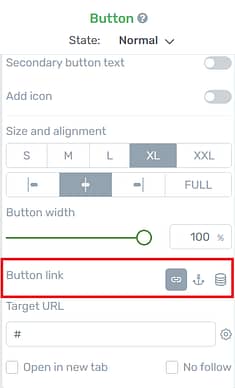
3. Click the icon that resembles a stack of coins. That is the dynamic link feature.
Dynamic links allow you to quickly and easily link text, images, and icons to a specific part of your website, without having to type in the URL. In this case, you're going to use this feature to link your button the phone number or email address you filled in the "Global Fields" section.

4. Once you've clicked the dynamic links icon, click on the second dropdown menu and select " Phone number ", "Alternative phone number ", or "Email address".
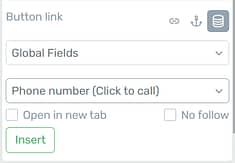
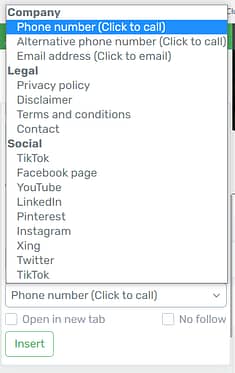
Select "open in new tab" if you want the button to open a new page when someone clicks on it, and click "insert".
A notification should appear to confirm that you've successfully added a dynamic link to your button.
...and there you go! You've just created your first "Click to Call" or "Click to Email" button.
The best part? If you change your number or email address in the "Global Fields" section, every "Click to Call" or "Click to Email" button will update automatically. You won't have to edit them one by one.
Saving you tons of time! Don’t forget to save changes when you’re satisfied with your button status otherwise you’ll lose your progress.

If you want to follow a step-by-step video tutorial on how to create a "Click to Call" or "Click to Email" button on WordPress , you should watch this video from Tony:
Method 2: Use the WP Call Button plugin
If you already have an existing website but don’t have a plugin with WordPress click to call functionality, your best option is to find a reliable plugin from WordPress.org.
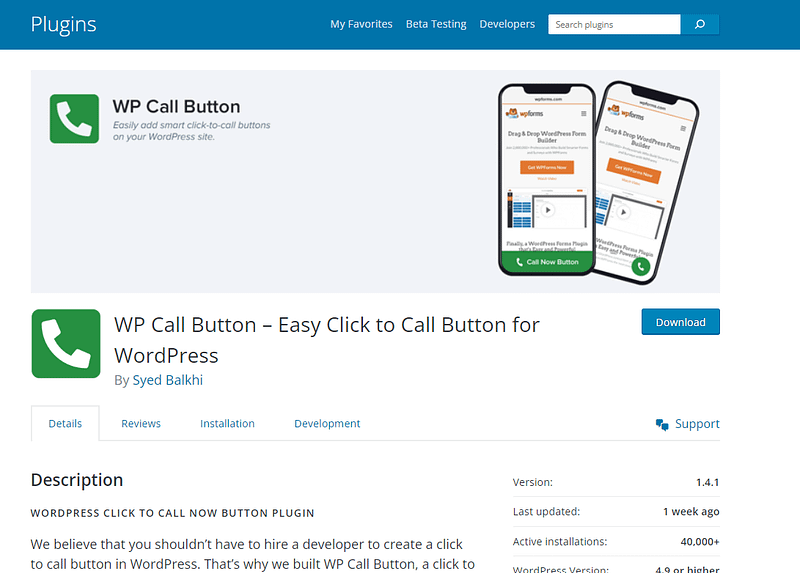
The easiest plugin to use is the WP Call Button plugin.
This plugin lets you create:
A static call button to add to your header or web page
A sticky call button that scrolls with the user as they navigate your website
A call button to your sidebar using the WP Call Button widget
This plugin also works well with Google Analytics for click tracking on phone calls. If you haven’t set up Google Analytics on your website, we recommend using an analytics plugin to do so.
FAQs
Q: How do I add a click-to-call button?
A: You can add a click to call button in three ways — with the WP Call Button, Thrive Architect, or manually
Q: What is a call to action button on a website?
A: A call to action (CTA) button is designed to make your site visitor take a specific action. "Call Now", "Email Me", "Click to Call" buttons are all examples of call to action buttons.
Q: What is a Click to Call button?
A: A Click to Call button is a conversion-focused element on your website that enables users to call your business by clicking the button. This is useful for smartphone users who may want to contact your business directly to make further inquiries.
Q: Do I need any plugins to add a Click to Call button to my WordPress website?
A: The WP Call Button or Thrive Architect are the best plugin options for adding this button to your site.
You Have a Click to Call Button...What’s Next for Your Website?
A Click to Call button is only as effective as the rest of your website.
You need to make sure that every element in your website is designed to offer value and direct your site visitors to opting in or buying.
That's why we recommend using Thrive Architect to create your webpages.
This tool is easy to use, provides you with the right design options to create landing pages that bring in conversions, and so much more.
And if you want more resources on how to build a thriving, conversion-focused website, you should check out these WordPress tutorials:
The ball is in your court now.


