Want to learn how to create gated content in WordPress? Keep reading.
If you’re serious about building your email list in 2025, you need to do more than just offer a newsletter. There’s now so much content available online that vague promises of valuable emails and offers won’t cut it anymore.
You need to make your visitors want to subscribe. Need to subscribe. Scramble to subscribe.
Luckily, you can choose from a range of proven tools: lead magnets, content upgrades, online quizzes, and now gated content.
More...
Want a Bigger Email List? Use Gated Content
Growing your email list is a game changer for your WordPress platform, and gated content is the key.
But what exactly is gated content? It's valuable information you offer visitors in exchange for their contact info. Think of it as a fair trade: they get something useful, and you get a new subscriber.
Here's why adding gated content to your WordPress website is so powerful:
- You'll attract people who are truly interested in what you offer. These aren't just random sign-ups; they're potential fans and customers.
- Visitors will spend more time on your site exploring your content, which could be great for SEO. This also allows more people to find your gated content from search engines.
- Your readers feel special when they get content others can't see. This builds loyalty and trust.
- With a list of interested subscribers, your emails are more likely to be opened, read, and acted upon.
- The type of content people choose tells you what your audience is most interested in. This helps you create even better content in the future.
Creating gated content on WordPress might sound tricky, but it's actually pretty straightforward. And we’ll show you how to get started – with the right tools.
Good Examples of Exclusive (Gated) Content
When creating gated content, it's important to offer something valuable enough that visitors will be willing to share their contact information. Here are some of the most effective types of gated content:
- Ebooks: Comprehensive guides on specific topics in your industry.
- White papers: In-depth reports with original research or expert analysis.
- Exclusive video content: Tutorials, webinars, or interviews not available elsewhere.
- Case studies: Detailed examples of how your product or service has helped others.
- Exclusive newsletters: Curated content or insider information sent regularly to subscribers.
- Free trials or demos: Limited-time access to your product or service.
- Checklists or cheat sheets: Quick, actionable resources related to your industry.
- Online courses or mini-courses: Educational content delivered via email or a members-only area.
- Industry reports: Annual surveys or data compilations relevant to your audience.
Remember, the key is to create content that provides significant value to your target audience. This increases the likelihood that they'll be willing to exchange their info for entry.
How to Create a Gated Content Form in WordPress (Step-by-Step)
The best way to add gated content to your WordPress site is with a plugin that offers this functionality.
There are a number of powerful WordPress gated content tools that offer this function, as well as other useful lead-generation features. Our number one recommendation is Thrive Leads.
This WordPress tutorial shows you how to build an easy, eye-grabbing form with Thrive Leads, one of the best WordPress gated content plugins available.
1. Install Thrive Leads
Thrive Leads is a great choice if you're looking to restrict content with high-quality forms in WordPress without needing to code.
Easy Setup for Beginners
First off, you're going to love how easy it is to set up gated content. With its intuitive interface, you can quickly restrict access behind an email sign-up form, even if you're a beginner.
Simple and Effective Content Gating
This tool is all about making gated content simple and effective for you. And with a variety of content gating options and templates, you're set to develop exclusive offers that your audience will want to access.
Variety of Form Types
One of Thrive Lead's top features is its large variety of form types to gate content. You have the choice to pick: in-content forms, pop-ups, slide-ins, screen fillers, and more. This variety lets you pick the perfect way to present your gated offer to your visitors.

Targeted Gated Content
What's really cool about Thrive Leads is the way it lets you get specific with who sees your gated content. You can show different exclusive offers based on what your visitors are interested in or where they came from. This means you can make your content super relevant to each visitor, increasing the chances they'll sign up.
Seamless Email Integration
Also, it's a-few-clicks easy to connect gated content to an email marketing service (and other marketing automation tools). This means new subscribers from your exclusive content go straight to your email list. Plus, the plugin's detailed analytics help you see which gated content is performing best, giving you insights to keep improving.
Mobile-Friendly Gated Content
We know how important it is for gated content to look good on every device, which is why everything you design with Thrive Leads is mobile-responsive. It gives you everything you need to develop enticing content and grow your email list effectively.
If you're searching for how to create gated content on WordPress -- and with the right tool -- look no further. Thrive Leads gives you everything you need to successfully promote exclusive products, memberships, and more.
2. Set Up Your Leads Shortcode
To add a gated content form (or content lock) to your pages or posts, you’ll need to create a shortcode. This is super simple to do in Thrive Leads.
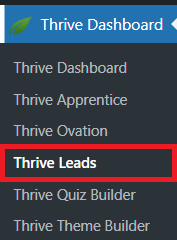
First, open your WordPress dashboard, navigate to the "Thrive Dashboard," and click on "Thrive Leads".
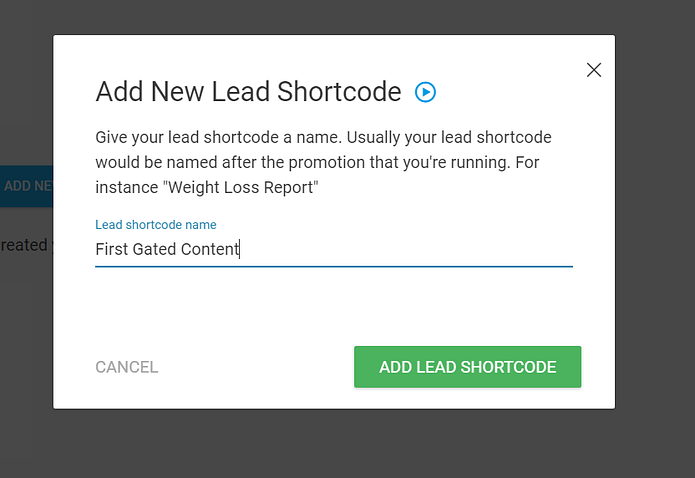
In the Thrive Leads dashboard, find the “Leads Shortcode” section and select “Add New”.

A popup will appear, asking you to name it. Give the shortcode a simple name and click the “Add Lead Shortcode” button.
Next, you’ll need to activate the “Content Lock option”, so that this form will act the way it should – as a way to hide gated content in WordPress.
Click on the toggle in the shortcode’s section:

Now, it’s time to work on the actual form. To get started, click the “Edit” button.

3. Choose a Template and Customize Your Form
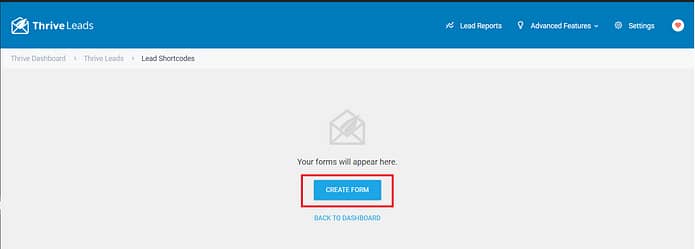
In the next screen, click the blue “Create Form” button, give it a name and click the green “Create Form” button.
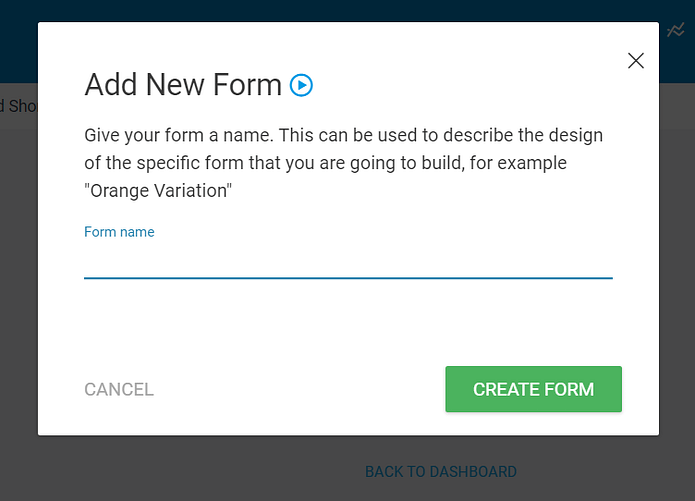
Give the form a name and click the green “Create Form” button.
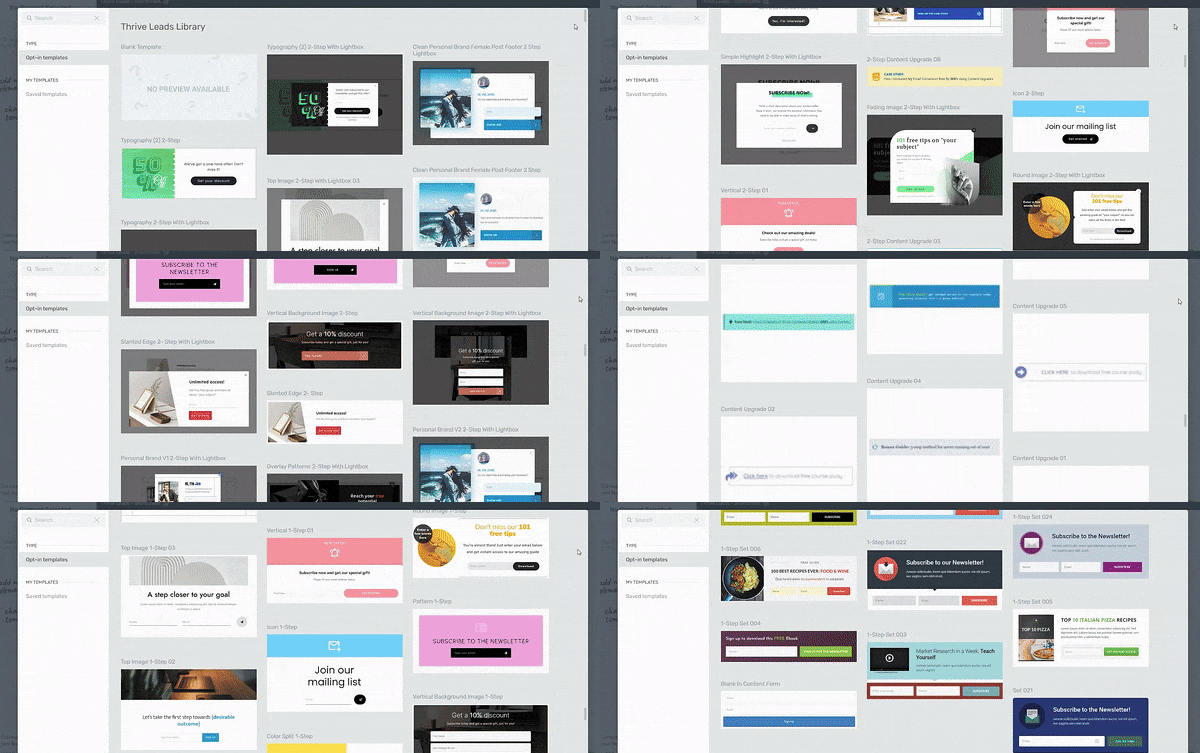
Thrive Leads has hundreds of lead capture form templates for you to choose from.
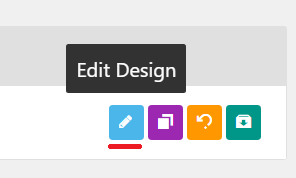
To select a template for your Lead Shortcode form, select the "Edit Design" option.
Scroll through our library of professionally designed templates until you find the perfect one for your offer.
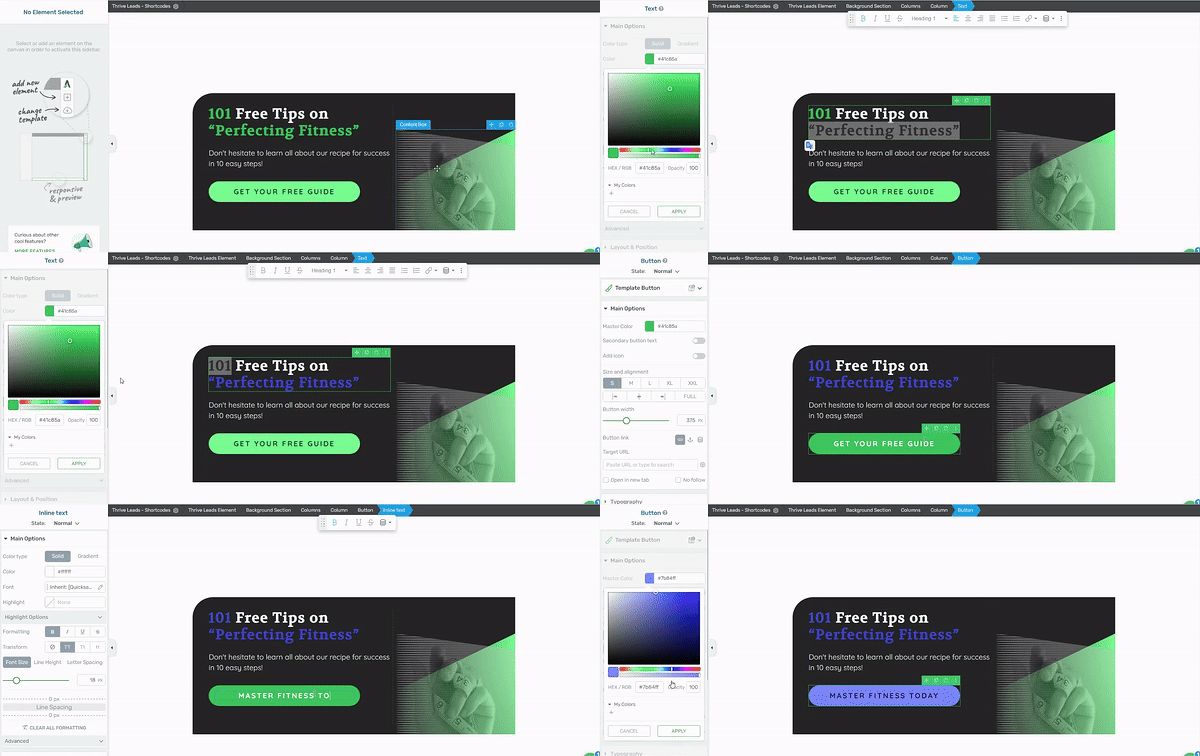
Once you've selected a template, the Thrive Visual Editor will open, allowing you to customize your form.
You can change every element of your pop-up including the text, colors, background image, and CTA button to make a visitor take a specific action - you're in control!
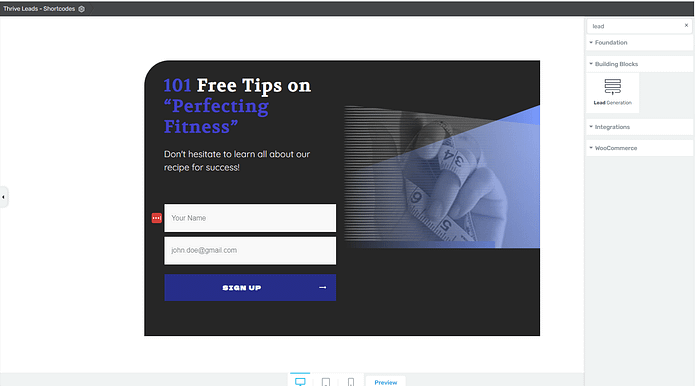
You can use the right sidebar to drag-and-drop new elements. For example, if you’d prefer to use an opt-in form instead of a call-to-action button, you can drag and drop the element right onto your form:
How to Collect Payments Through Your Gated Form
Gating content is a great way to monetize your exclusive content.
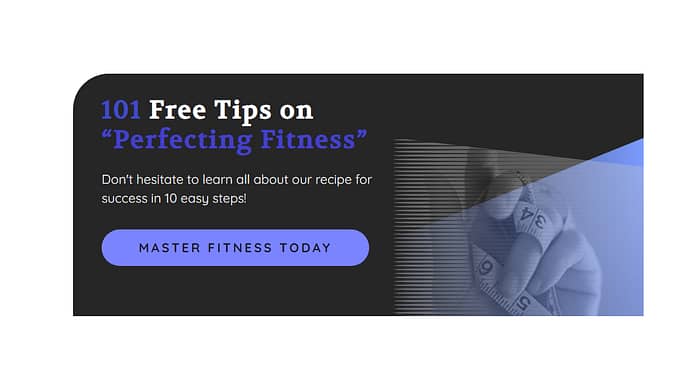
To set up a paywall for your premium content, all you have to do is use a CTA button instead of a form on your template and replace it with a CTA button, like in the image below:
In the visual editor's left sidebar, add a link to your checkout page for this post (you’ll need a WordPress payment plugin like WooCommerce or alternate checkout tool for this).
Also ensure that your customer is automatically redirected to the full-length content piece after payment.
Tip: If you’re a coach or online course creator, you can use a paywall to encourage readers to pay for access to your membership site, where they can access an array of other exclusive content. You can easily set a platform like this with a membership plugin like Thrive Apprentice or MemberPress
Once you’ve made your changes to your form, hit “Save”, and exit the editor.
4. Connect Your Form to Your Email Provider
You'll need to configure your email provider so that a confirmation email is sent and when clicked on the link in the email, your subscribers are redirected to the full-length content piece, or a download page.
This is different for every email provider, but a quick Google search should help you out.
Example: “How to create a confirmation email in ConvertKit”
Be sure to create a follow-up email sequence to engage your new leads and build a relationship with them.
5. Set Up Lock Mode for Your Form
If you want your form to lock content, a blog post for example, then you’ll need to configure lock display settings.
This works best for paywalling specific pages or posts.
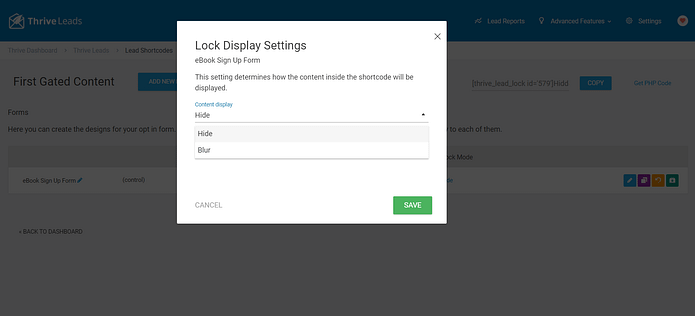
In your form dashboard, find the “Lock Mode” section and click “hide”:

This is where you can set up how exactly you plan to hide your content - you can opt for hiding it entirely under your form, or you can also choose to blur it and give the visitor a hint at the content that can be unlocked:
Note: The blur filter is not supported in Internet Explorer. Low opacity will be used instead.
Next, back in your Thrive Leads dashboard, copy the shortcode of the form that you've just customized, as you will need it for the next step.
6. Embed Your Shortcode Into Your Page or Post
Now open the WordPress page or post where you want to place your content lock form.
Drag and drop a "Text" element and paste the copied shortcode. Placing this element will depend on the WordPress page builder you’re using for your online platform.
In our example, we’re using Thrive Architect, but this content lock feature can work with most popular landing page builders – and the WordPress Block Editor.
The shortcode consists of two parts - place the first part at the beginning of the WordPress content to be hidden and the last part at the end. Like this:

The only thing left to do is to save your WordPress page and preview it. The page should now have a hidden section that can only be unlocked via opt-in.
After the visitor fills in the form and submits it, the hidden gated content will automatically become available:
Thrive Tip: Alternatively, you can embed a popup on your page to catch a visitor who’s about to leave, or has scrolled to a certain point.
Pop-ups, when timed well, can lead to more sign-ups – and you can design them in Thrive Leads, too.
Read this detailed guide to learn more.
Next Step: Learn How to Create a Lead-Generation Funnel
Once you're set up with your new form, it's time to make those new email subscribers count. Your next move? Creating a lead-generation funnel.
This powerful tool will help you nurture leads and turn them into customers. A good funnel attracts visitors, converts them with your gated content, nurtures them through email sequences, and finally turns them into paying customers.
And we’ve got a few tutorials to help you set up each part of your funnel the right way:
- How to Create the Perfect Opt-In Form (Step-By-Step)
- Beginner’s Guide: How to Create a Great Landing Page
- How to Set Up a Complete Lead-Generation Funnel
- Easy Email Marketing Hacks: Everything You Need To Boost Conversions
How to Create Gated Content in WordPress: Final Words
With this tutorial, you can turn your high-traffic posts and pages into lead-generation or even sales opportunities.
And Thrive Leads is one of the best WordPress plugins to get the job done. Perfect for gating content. Our templates were built with conversion optimization in mind so you don’t have to spend hours figuring out how to do it yourself.
The best part? You can get this tool for a really great price.
Ready to add gated content on your WordPress site?
Get Thrive Leads and start turning more visitors into subscribers today.


