Looking to learn how to add a dropdown menu in WordPress?
If you want to improve your website’s navigation and provide your visitors with a clear way to find your blog posts, landing pages, and products — this tutorial is for you.
Dropdown menus are an effective way to guide your visitors through your site and enhance their experience.
Keep reading to learn how to add this type of menu to your website in a few easy steps.
One of the main reasons you should add a dropdown menu to your website is to enhance user experience through clear, organized navigation.
Site navigation plays a major role in how your visitors interact with your site. A website with poor navigation can lead to high bounce rates – hurting your SEO.
As your website grows and you add more pages, posts, and categories, your site visitors will struggle to find specific information. Having a dropdown menu as a primary menu (either as a header or simply at the top of your page) makes it easier for users to navigate your site content.
Instead of overwhelming visitors with a cluttered, max mega menu or a long list of links, a dropdown menu offers a logical, straightforward structure.
From a building perspective, dropdown menus make it easier for you to add items or modify your menus’ tab as your website grows.
This menu option also simplify choices and guide your users directly to the content (or products) they’re interested in, increasing their chances of converting.
The best way to add this type of menu to your website is to find a theme that supports dropdown menus or use a reliable page-builder or menu plugin.
How to Add a WordPress Dropdown Menu to Your Website (Step-by-Step Guide)
This tutorial shows you how to add a dropdown menu to your WordPress website in several easy steps – no need to learn HTML, custom CSS classes, PHP, or any other complicated coding.
Step 1: Download & Install Thrive Architect
Thrive Architect is the best page-builder plugin on WordPress.
If you’re looking for a frontend
WordPress customizer to create stunning homepages, sales pages, and other landing pages that will catch your audience’s attention, this is the page builder you need.
Thrive Architect was built with ease of use and convenience in mind, making it an ideal option for both beginners and advanced WordPress users.
You get access to a powerful, user-friendly drag-and-drop editor and hundreds of pre-built templates to create beautiful landing page designs.
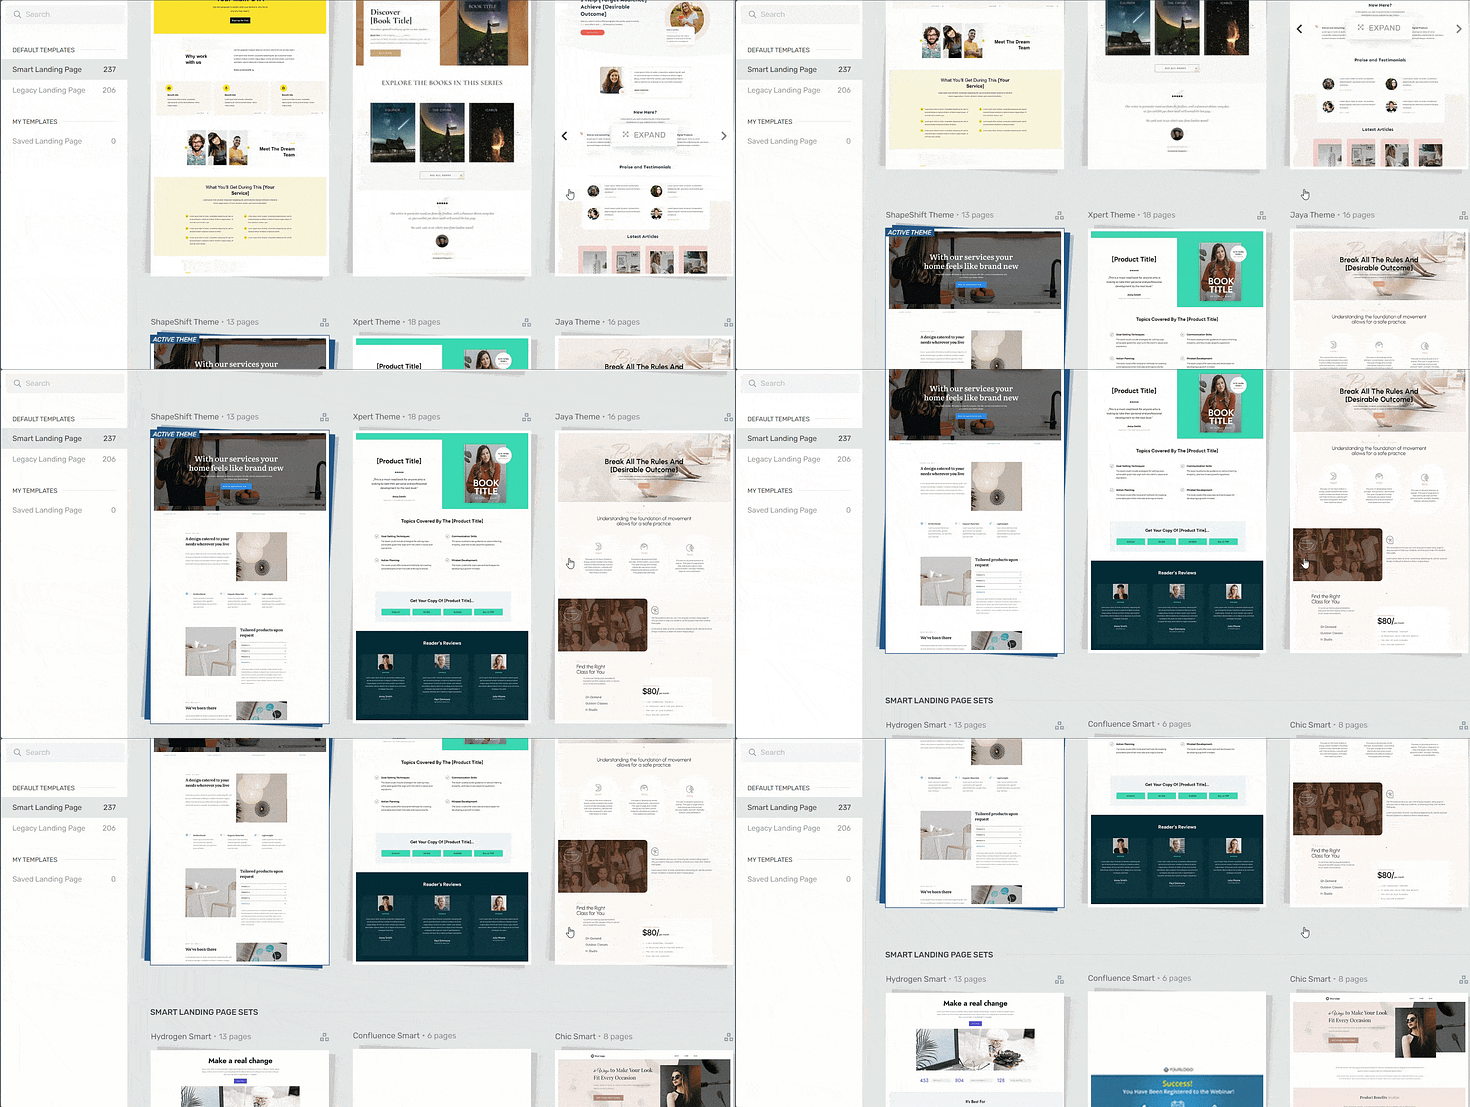
Landing page template sets in Thrive Architect
Thrive Architect also includes a large selection of design elements to help you create a unique WordPress site – and supports dropdown menus.
So, no need to find a separate plugin or a different WordPress theme that allows you to create and edit menus.
Other key features in Thrive Architect include:
- Simple drag-and-drop functionality
- Flexible column layouts
- Total font customization
- Illustrated lists to showcase your products or services' key features and benefits
- Testimonial blocks to highlight glowing customer reviews and win your audience's trust
- Call-to-action (CTA) blocks to make your site visitors take immediate action
- Smart pricing tables to impress your visitors and convince them why your products or services are worth the money
- …and so much more
If you use Thrive Architect as a part of Thrive Suite, you don’t need to buy several other premium WordPress plugins for extra features like A/B testing (split testing), popups, and opt-in forms, for a very reasonable price.
To get started, head to the Thrive Architect or Thrive Suite sales page and complete your purchase.
Step 2: Launch a Page in Thrive Architect
Creating a new WordPress page for your website is super straightforward.
In the WordPress Dashboard, select “+New” in the top menu and choose “Page”
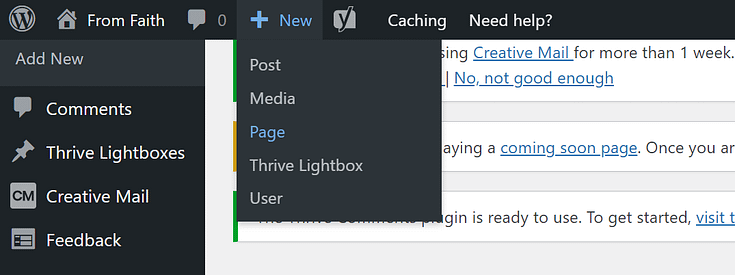
In the Classic Editor, name your page and click the “Launch Thrive Architect” button.

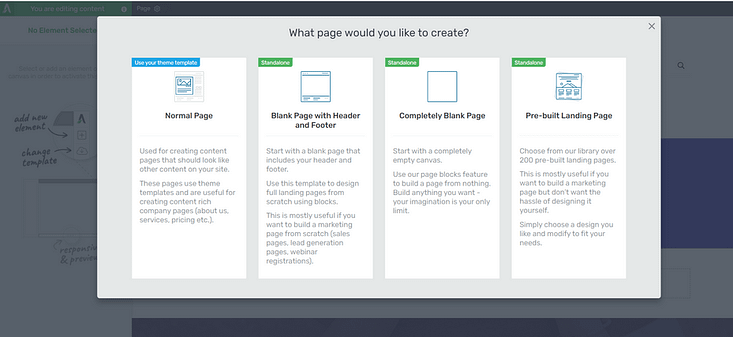
Thrive Architect will give you four options:
1. Normal Page
2. Blank Page with Header and Footer
3. Completely Blank Page
4. Pre-built Landing Pages
For easier and faster building, we recommend choosing the “Pre-built landing page” option.
When you’ve found the right template, click on it and it should load.
Step 3: Choose Your Menu Type
In Thrive Architect, search for the “Custom Menu” element in the sidebar on the right to create a new menu. Drag and drop the element on your chosen display location on the page. You don’t need to add a menu name.
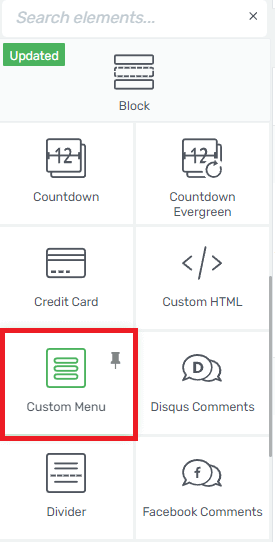
If your landing page doesn’t have a header, we recommend adding your menu to the top of your page for easy navigation. This is one of the best menu locations.
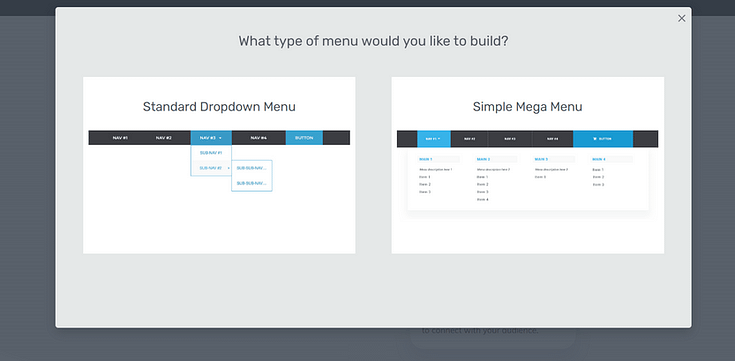
Once you’ve placed the “Custom Menu” element a screen will pop up with two options – “Standard Dropdown Menu” and “Simple Mega Menu”.
Select “Standard Dropdown Menu”.
Step 4: Select Your Menu Source
Next, you’ll need to choose between “Custom Menu” and “Existing WordPress Menu”.
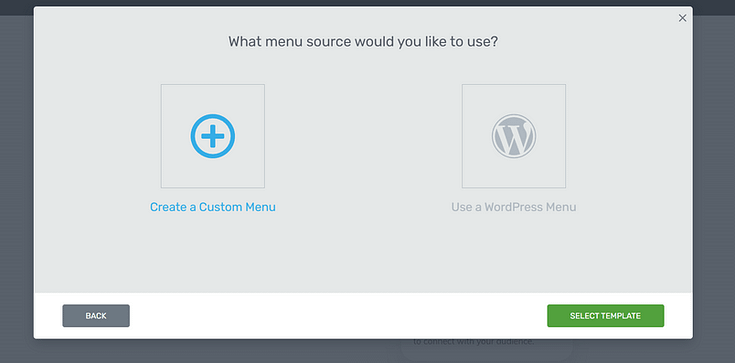
The “Existing WordPress Menu” option lets you add a menu from the WordPress dashboard to your new page. You’ll need to create a navigation menu, first, to use this option.
The “Custom Menu” option lets you create a menu in Thrive Architect.
Creating a Menu in the WordPress Dashboard
For this tutorial, we’ll use the “custom menu” option. But if you want to create a menu in the WordPress Dashboard, follow these steps:
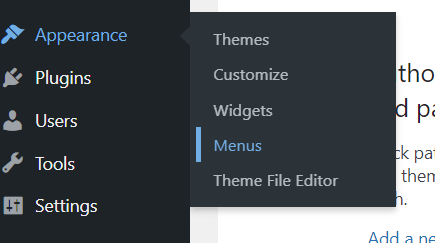
In the left sidebar, go to Appearance > Menus
You’ll be directed to a screen that has different sections.
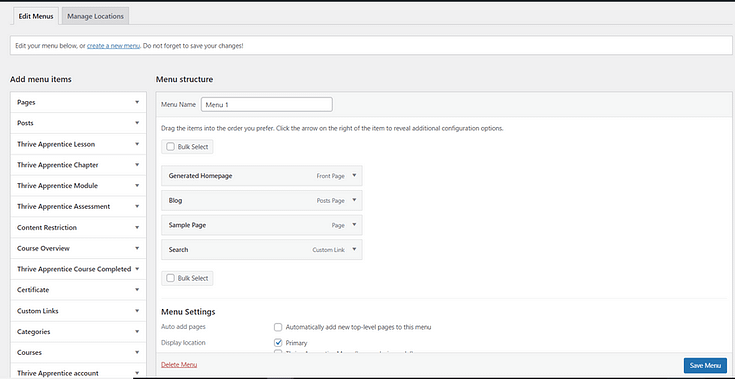
The “Add menu items” section lets you add pages, posts, custom links, categories, WooCommerce products, and other site content to your menu.
Simply click on a tab, e.g. “Pages” and add a tick to a checkbox next to the item you want to add to your menu.
The “Menu Structure” section is where you’ll add a menu name, and arrange the order of your menu items.
If you want to see a live preview of your menu, select “Manage with Live Preview” in the top left side of the screen.
You’ll be taken to a preview of your homepage, with your menu in its primary display location.
Step 5: Choose a Custom Menu Template
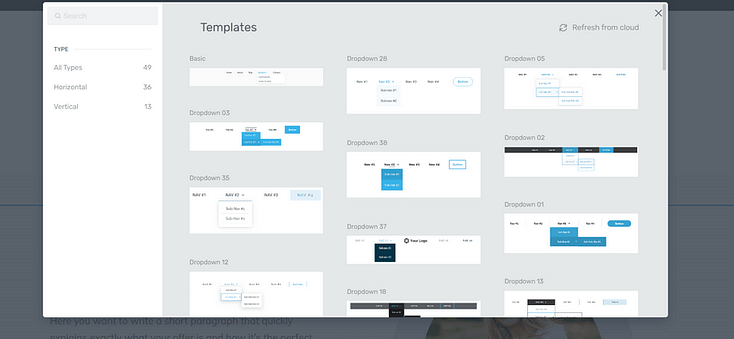
After clicking “Custom Menu”, you’ll be directed to a library of dropdown menu
templates.
Find a template you like and click it.
Step 6: Configure Your Menu Settings
Once your menu template has loaded on your page, it’s time to customize its appearance and configure your main menu settings. All of this can be done from the left sidebar in Thrive Architect.

In this sidebar you can:
Choose your dropdown menu’s structure (vertical, horizontal, or hamburger)
Select the main accent (color) for your menu’s text
Set spacing between each menu heading
Choose a dropdown icon
Set a dropdown animation
Create menu items or customize the existing ones
Remove sub-items and parent items
Add custom links to your menu items and sub-menu items
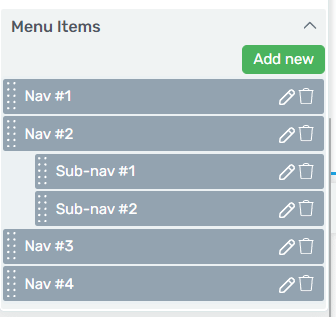
You can also click on the menu items, directly, to edit their names.
There are additional settings in the left sidebar that allow you to edit your menu’s margins, paddings, borders & corners, and more.
Step 7: Test Your Menu on Different Screen Sizes
Once you’re happy with your menu’s appearance, click “save menu” and view a live preview of your page from different screens to make sure it looks good and works well.
Save your changes and there you go. You’ve created your first dropdown menu.
Next Steps: Add a CTA Button Next to Your Menu to Increase Conversions
Now that you’ve designed your custom menu, it’s time to turn it into a conversion-focused element.
Adding a CTA button to your menu is an easy way to grab your website visitors’ attention and encourage them to take action.
You can add a CTA button to your menu in a few simple steps:
In Thrive Architect, add the button element next to your menu. Adjust the column between your menu and menu button to balance out the spacing.

Use the left sidebar to customize your button’s color, text, and spacing.
Avoid using button colors that blend in with your page. You want the button (and text) to stand out.
Link your button a sales page or turn it into a Call Now Button.
And there you go. Now you have a menu that can guide your visitors through your website and direct them to convert.
Optimize Your Website for More Conversions
A dropdown menu is a great way to create clear navigation on your website, but if you want to generate more leads and sales…you’ll need to make sure your entire website is user-friendly and optimized for conversions.
Here are 4 additional tutorials to help you build a conversion-focused website:
To create website that is easy to navigate and looks great, you need the right tools. We recommend using Thrive Suite.
Thrive Suite is an all-in-one toolkit that contains premium plugins, landing page templates, opt-in form templates, quiz templates, and more; designed to help you create an amazing website for your business.
Whether you need a simple one-page website, a multi-page website with an eCommerce store, or a simple blog, Thrive Suite can help you build what you need.
If you've been thinking about taking your business to the next level and want to use high-quality tools for a crazy reasonable price - Thrive Suite could be for you.
Click here to learn more about Thrive Suite.


