Where are you reading this post from?
I can bet $50 you’re on your phone right now.
And if I’m wrong… well, here’s an imaginary $50 anyway — but that’s not the point.
The point is: mobile isn’t just the future. It is the internet. According to my research:
- 6.2 billion smartphone users are expected globally by 2029
- Over 58% of all website visits come from mobile devices
- And 63% of Google searches now happen on phones
If your WordPress site isn’t optimized for mobile users, you're already losing traffic, leads, and conversions — whether you realize it or not.
And no, simply installing a responsive theme isn’t enough anymore.
This guide will show you how to go beyond basic responsiveness and actually make your WordPress site mobile-friendly — with fast load times, intuitive layouts, and a design that works beautifully across screen sizes.
You’ll learn:
- The mobile-first principles driving modern site design
- How to optimize for Google’s Core Web Vitals
- Which WordPress tools give you full control over mobile layouts
- How to avoid common mistakes that tank mobile usability
Let’s turn your site into something your visitors can actually navigate with one thumb — no rage-tapping required.
📌 TL;DR – How to Make Your WordPress Site Mobile-Friendly
Want the short version?
To make your WordPress site mobile-friendly, you need more than just a responsive theme. You need a mobile-first design that prioritizes speed, readability, and usability across devices.
Here’s what that looks like:
✅ Choose a fast, responsive WordPress theme and page builder (like Thrive Theme Builder + Thrive Architect)
🚀 Optimize your site’s Core Web Vitals — especially loading speed, interaction delay, and layout stability
📱 Use mobile-friendly layouts, readable fonts, and thumb-friendly buttons
🙅♂️ Avoid intrusive popups, long forms, and cluttered menus
🧪 Test your pages on real mobile devices (not just emulators)
🛠️ Use WordPress tools like “stack on mobile,” responsive font units (em/rem), and lazy loading for images
Whether you're creating landing pages, opt-in forms, or your entire site design, these strategies will help you deliver a fast, user-friendly experience on every screen — and improve your mobile SEO in the process.
What Are the Benefits of a Mobile-Friendly Website?
Having a mobile-friendly website, today, is non-negotiable.
54.4% of global website traffic comes from mobile phones, which means there’s a high chance your potential customers’ first encounter with your website will be on a mobile device.
A mobile-friendly site ensures that no matter where your users are or what device they're using, they can access your content without pinching, zooming, or squinting, making every interaction as smooth as possible.
User satisfaction aside, a mobile-friendly website can help improve your search engine rankings, putting your content in front of the right eyes.
A responsive website also serves as a statement. You’re telling your audience that you’re committed to providing a seamless, enjoyable experience – no matter the screen size.
If your visitors can rely on your website and know that they can access your content on any device, they’re more likely to trust your business and eventually buy from you.
1. Choose the Right WordPress Theme and Tools
Your website’s layout and design are foundational to a good user experience for mobile users.
The goal should be to achieve a visually pleasing responsive design, combined with a clear, straightforward layout, that makes your website engaging and easy to use.
Your site layout and design should feature:
- A consistent color scheme
- High-quality images & videos (avoid large images)
- Readable fonts
- Clear call-to-action sections
- Whitespace usage
- Consistent branding elements (logos, motifs, etc.)
Now, if you’re not well-versed in web design, you’ll struggle to build a website like this from scratch.
But with the right WordPress plugins you won’t even have to.
Thrive Theme Builder + Thrive Architect are the no-code, website-building duo you need to build a clean, conversion-focused website for all screen sizes.
With these tools, you get access to responsive theme options and page templates to create a memorable, user-friendly website.
Thrive Theme Builder helps you create a great-looking, custom mobile-friendly theme, along with the necessary core page templates (homepage, blog page layout, default blog post design, 404 page, etc.)
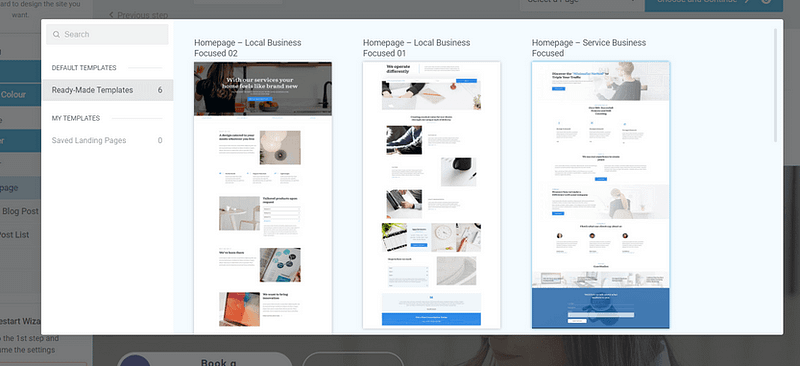
Example of page templates from Thrive Theme Builder
The Thrive Visual Editor found in this plugin lets you tailor how your site looks on mobile devices without affecting the desktop layout.
You get to control font sizes, element visibility, and layout adjustments specifically for mobile users, ensuring your site remains accessible and easy to navigate, no matter the device.
Once you’ve set up your theme, you’ll use Thrive Architect’s user-friendly drag-and-drop visual editor to customize your page templates to your exact liking. No need to use HTML or CSS.
Choose from hundreds of landing page templates to add to your site and use our library of design elements to make them unique to your business.
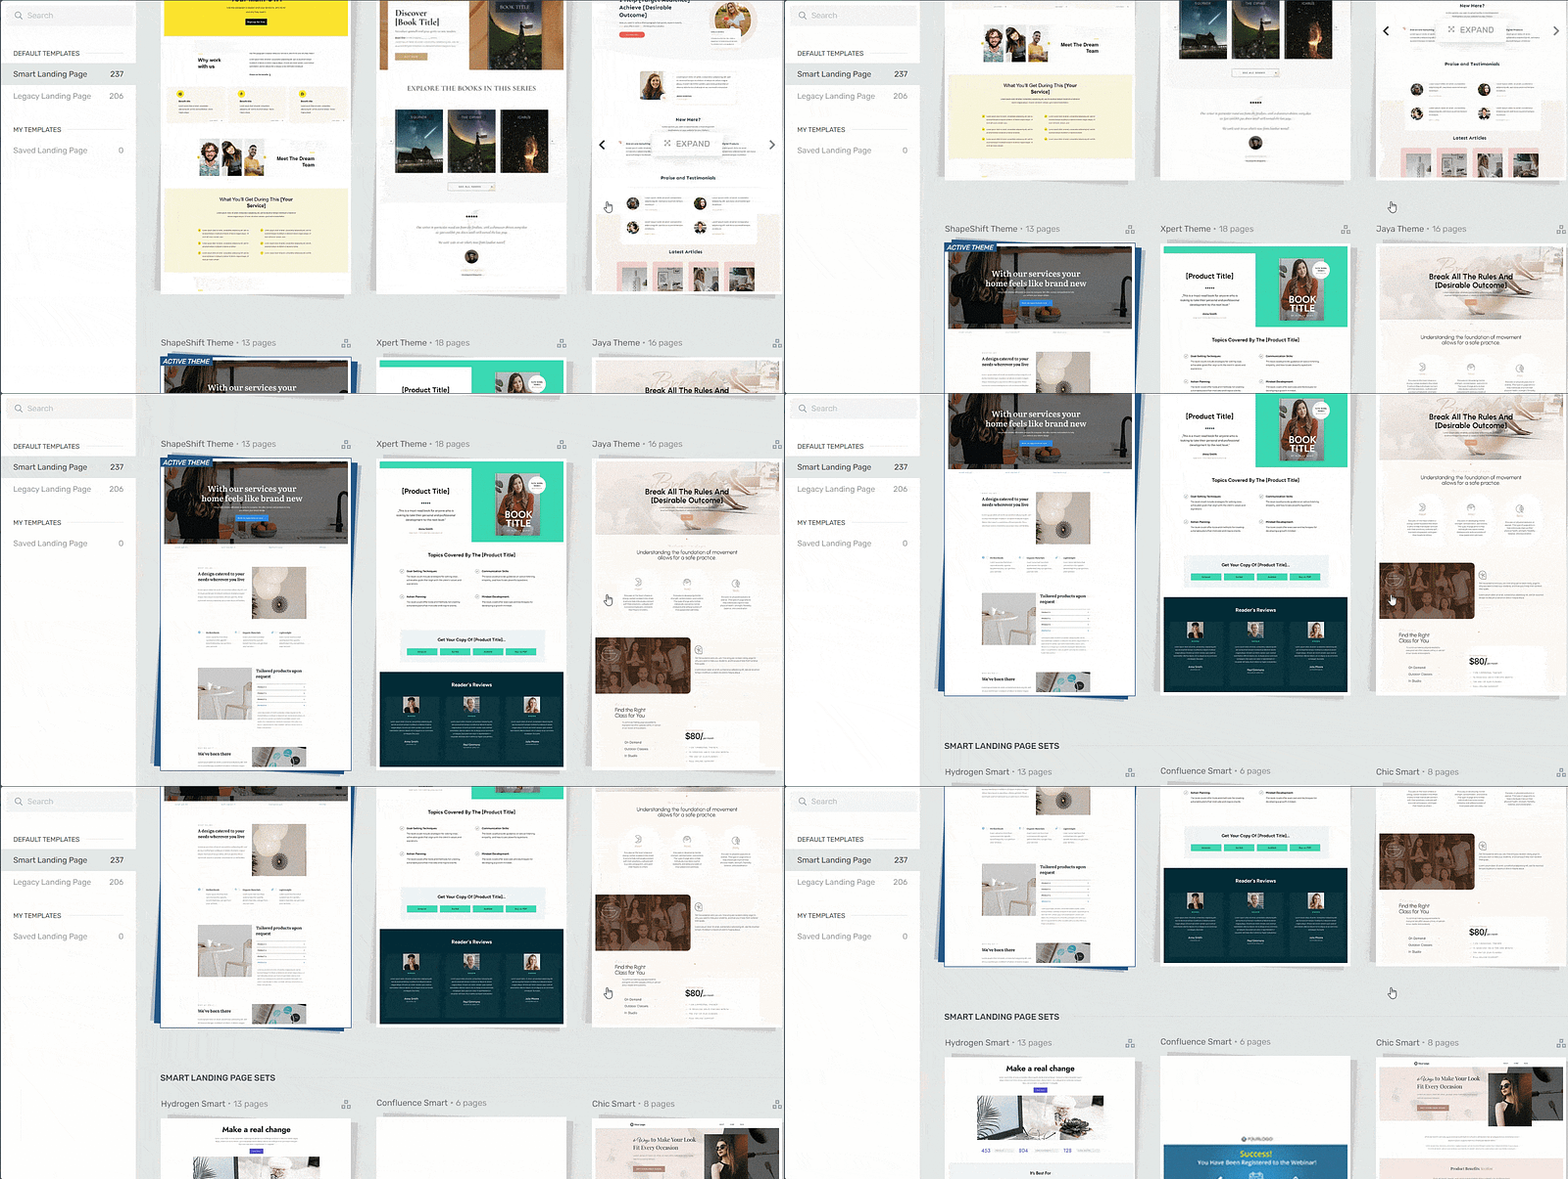
Landing page template sets in Thrive Architect
Both tools are designed with responsiveness in mind. Thrive Architect automatically applies mobile-friendly adjustments to your content, so you don't have to worry about manually configuring these settings yourself!
You can also use Thrive Architect's advanced mobile editing features to hide or customize specific elements that might not work well on mobile.
This flexibility ensures that your mobile site isn’t just a scaled-down version of your desktop site but a thoughtfully designed interface that caters your mobile users' needs and preferences.
💡 WordPress Design Tips for a Better Mobile Experience
Once you’ve chosen a responsive WordPress theme and page builder, the next step is fine-tuning your design for mobile usability. Here are a few quick but powerful tweaks:
Use
emorremunits for font sizing instead of fixed pixels — this makes your text scale better across screen sizesAvoid embedding text directly into images — use the Cover or Media & Text blocks in the WordPress editor to overlay text responsively
Enable “stack on mobile” for columns, grids, and media layouts so your content reflows vertically on small screens
Use a mobile-friendly navigation menu, like a hamburger or off-canvas layout — Thrive Theme Builder and Responsive Menu plugins make this easy
Simplify your layout for mobile with Thrive Architect’s Hide on Mobile option — great for removing decorative or non-essential elements on small screens
These small changes go a long way toward creating a responsive, mobile-first WordPress site that looks and feels great for every visitor — no matter what device they’re using.
2. Keep Your Site’s Navigation Simple and Straightforward
Straightforward, seamless navigation is essential for a mobile-friendly website.
With a well-structured navigation system, your visitors can easily browse your website and find what they’re looking for without any issues.
Key elements of navigation ease for mobile devices include:
- A clear, consistent main navigation menu (usually a hamburger or dropdown menu) that serves as a guide for your website
- Logical, well-thought-out page organization that creates a natural, intuitive flow
- Search bar accessibility (in the header or footer of the website)
- Well-organized content that can be navigated intuitively
Avoid adding widgets or a sidebar to the mobile version of your website. While these features look and function well.
3. Optimize Your Website for Speed
Mobile users often access websites on-the-go and expect quick loading times.
A slow site can lead to frustration, increased bounce rates, and lower overall satisfaction – which can also affect your SEO rankings.
To avoid a slow-loading website, and achieve mobile-friendliness, you should:
Optimize your images and videos with tools like TinyPNG or EZGif
Ensure none of your plugins are outdated
Use a theme that is built with clean code and is updated regularly
Install a site speed plugin (or tools found in Google Search Console) for additional assistance
Enabling Accelerated Mobile Pages (AMP) to make your content load faster on mobile devices.
What Does AMP do?
AMP plays an important role in boosting page speed.
It speeds up web pages on mobile by simplifying the code. It limits the use of JavaScript to its own library for faster loading and requires CSS to be inline and under a certain size, cutting down on what can slow pages down.
Additionally, using a caching plugin and investing in a content delivery network (CDN) can make a massive difference in your website’s slow load time and improve performance.
Speaking of plugins, Thrive Theme Builder also includes a Website Speed Optimization tool to ensure your website loads fast.
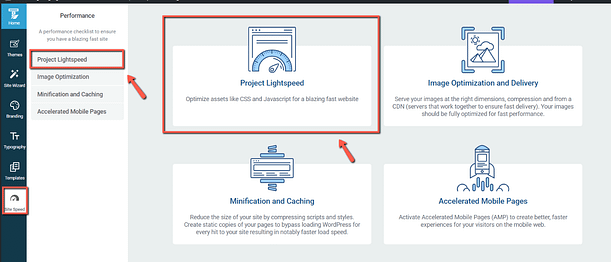
This feature is automatically activated on your website, so you don't need to do anything here.
Our site performance optimization tools are simple to understand and straightforward to use, so you can complete this setup in less than a few minutes.
🎯 A Quick Word on Core Web Vitals
Google doesn’t just check if your website loads — it measures how real users experience it, especially on mobile.
The three key metrics that matter most for mobile SEO are called Core Web Vitals:
Largest Contentful Paint (LCP): How fast your main content loads (ideal: under 2.5s)
Interaction to Next Paint (INP): How quickly your site responds when someone taps or clicks (ideal: under 200ms)
Cumulative Layout Shift (CLS): How stable your page layout is while loading (no random shifting)
If you’ve ever tapped a button and had it move right before your finger lands — that’s bad CLS.
To improve your scores and boost both performance and rankings:
✅ Compress images and serve them in next-gen formats like WebP
✅ Use fixed-size containers for media, text, and embeds
✅ Defer unnecessary scripts and minimize JavaScript and CSS
✅ Enable lazy loading for images and videos below the fold
Bonus: Thrive Theme Builder includes built-in performance features that help optimize for speed — without extra plugins or technical fuss.
When your Core Web Vitals are healthy, Google sees your site as fast, stable, and user-friendly — and so do your visitors.
And if you need deeper guidance on optimizing your WordPress website for speed, take a look at this detailed guide.
4. Use Clear, Readable Fonts
Use easy-to-read fonts and make sure the text size is suitable for reading on small screens without zooming. You can do this by increasing the font size specifically for small screens.
In terms of font choice, we recommend using standard fonts like Open Sans, Droid Sans, or Roboto.
These types of fonts work well on all types of websites and are easy to read on smaller screens.
5. Avoid Using Popups
Popups work well on desktops, but this doesn’t apply to mobile screens.
They’re hard to close on mobile devices and can disrupt your visitors’ scrolling experience, discouraging them from interacting with your website.
Your best bet is to leave popups for larger screens – and use them sparingly.
6. Keep Your Forms Short & Simple
On mobile devices, where screen real estate is limited, lengthy forms can be cumbersome and intimidating.
Short, simple forms reduce clutter and make it much easier for website visitors to input their information, leading to a smoother, more enjoyable user experience.
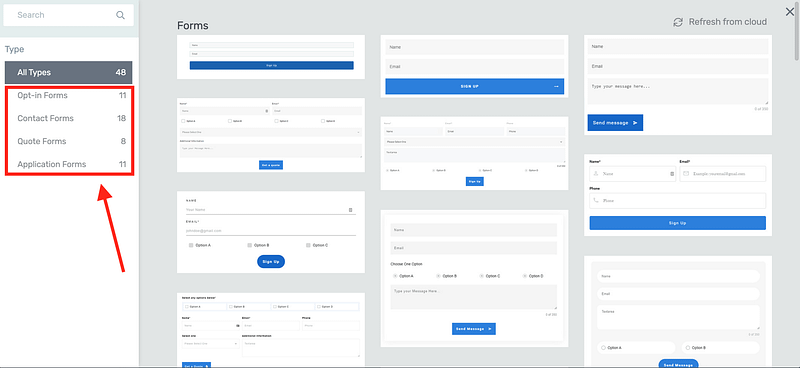
Forms in Thrive Architect
Your visitors are more likely to complete forms that are perceived as easy and quick to fill out.
By minimizing the number of fields, you reduce the effort required to fill them out, increasing the likelihood of form submission. This is particularly important for e-commerce checkouts, lead generation forms, and sign-ups.
7. Space Out Links and Buttons
On mobile devices, people rely on their fingers to navigate.
Fingers, especially thumbs, are less precise than mouse cursors used on desktop computers and can result in incorrect clicking.
Make sure links and buttons are easy to tap without accidentally hitting the wrong one by giving them ample space and making them large enough to be finger-friendly.
You should also place call-to-action buttons within easy reach for thumb navigation, because most visitors are scrolling with one hand.
8. Streamline Content and Layout
Simplify your website's design and content layout so your mobile visitors can easily access key information.
The easiest way to do this, especially if web design isn’t your strength, is through using templates that have created a clear visual hierarchy for you. That way you’ll know where to put your content without a worry.
Our professional page templates are designed with usability principles baked in.
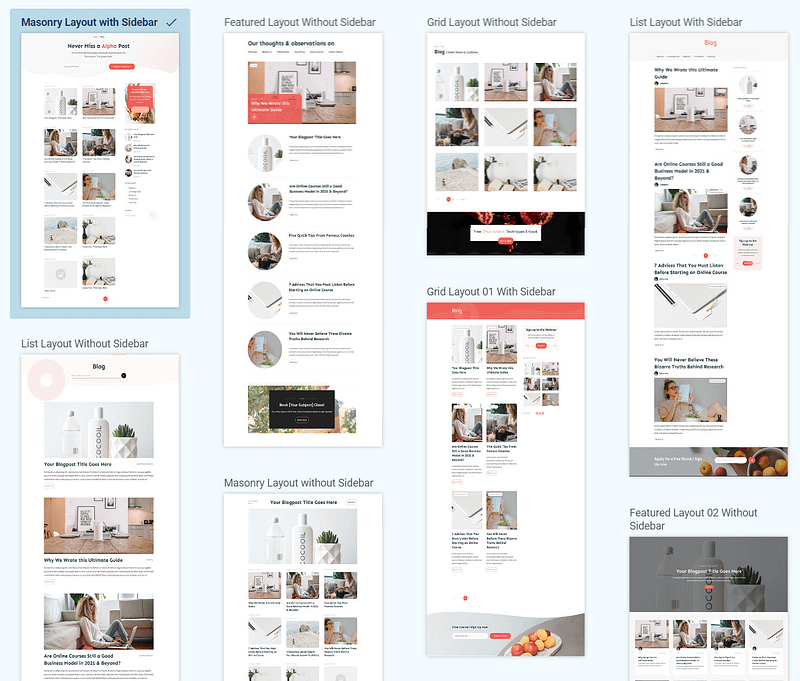
Page templates in Thrive Architect
9. Test on Different Devices
Don’t forget to look at your site’s mobile view on different devices.
We recommend using platforms like BrowserStack to test your website on a variety of real mobile devices and browsers, to confirm compatibility and performance.
❓ FAQ: Mobile-Friendly WordPress Sites
1. What does it mean to make a WordPress site mobile-friendly?
Making a WordPress site mobile-friendly means designing and optimizing your site so it works smoothly on smartphones and tablets. This includes using responsive layouts, fast load times, readable fonts, touch-friendly buttons, and simplified navigation for smaller screens.
2. How can I test if my WordPress site is mobile-friendly?
You can test your site using tools like Google’s Mobile-Friendly Test, BrowserStack, or by manually checking your pages on different real devices. Also, preview your site using Thrive Architect’s mobile view toggle to see exactly how it performs on smaller screens.
3. What tools can I use to improve mobile responsiveness in WordPress?
Thrive Theme Builder and Thrive Architect are excellent tools for mobile-friendly design. They let you customize layouts by screen size, hide or adjust elements for mobile, and ensure your content stacks and displays correctly on any device — no coding required.
4. Why is mobile optimization important for WordPress SEO?
Google uses mobile-first indexing, which means it ranks your site based on how it performs on mobile. A slow or clunky mobile experience can hurt your SEO, increase bounce rates, and lower conversions. Optimizing for Core Web Vitals, speed, and usability helps your WordPress site rank higher and perform better.
Next Steps: Audit Your Website
Now you know how to create a mobile web design, it’s time to review your current web pages and identify the areas that need to be improved.
Here are four additional tutorials to help optimize your site’s design, SEO, and marketing:
Make Your WordPress Site Mobile-Friendly: Get Started Today
Mobile optimization isn’t just about shrinking your content to fit a smaller screen. It’s about creating a faster, cleaner, more intuitive experience — one that respects how people actually browse the web today.
From Core Web Vitals and responsive layouts to mobile-specific design tweaks in WordPress, the small changes you make now can lead to big gains in usability, SEO, and conversions.
The tools are all within your reach — especially if you’re using Thrive Theme Builder and Thrive Architect. Together, they give you complete control over your mobile design without code, helping you create lightning-fast pages that look and perform beautifully across all devices.
💡 Final Thought
Your mobile visitors aren’t just passing through — they’re deciding whether to stick around, sign up, or buy.
Design for that moment.
✅ Ready to optimize your WordPress site for mobile?
Start building a fast, mobile-first website today with Thrive Suite, and turn more clicks into conversions — no matter what screen your visitors are using.


