If you’re an infopreneur looking for a simple, seamless way to sell your digital products, then you’ll be happy to learn that there’s yet another way to sell your products. Thrive Automator now integrates with Studiocart!
In this tutorial, we'll walk you through how to set up this integration, so you can sell your Thrive Apprentice products in minutes.
Read on to learn more.
More...
About Studiocart and Thrive Automator
Studiocart is a shopping cart plugin for WordPress which you can use to sell online courses, memberships, and other digital products.
It allows you to easily create beautiful, optimized checkout pages and automated sales flows from your own WordPress site.
Thrive Automator is our very own automation plugin. Now, you can create smart automations that integrate your WordPress site with your favorite plugins and email marketing tools - and in today’s case, with Studiocart.
Now you can sell your Thrive Apprentice products using Studiocart, and then use Thrive Automator to give access to a Thrive Apprentice product, add a new user in your email service, or start a Thrive Ultimatum countdown timer.
Getting Started with Studiocart and Thrive Automator
Now, there’s a few things you’ll need to prepare in advance before setting up your StudioCart checkout page and Thrive Automator automation.
Here’s what you’ll need to do:

Thrive Architect users have access to hundreds of pre-built, professionally designed landing page templates.
How to Build a Sales Funnel with Thrive Automator and StudioCart
1. Create a Product in Studiocart
Once you’ve installed the necessary plugins and created your Thrive Apprentice product, you can create a product in Studiocart. This can be for an online course, digital product or membership program you’ve built using Thrive Apprentice. You can use this guide to build your first online course, and this one to create your first membership platform.
In the video above, Christine walks you through creating a product in Studiocart, setting up a payment plan, and generating a shortcode for your product.
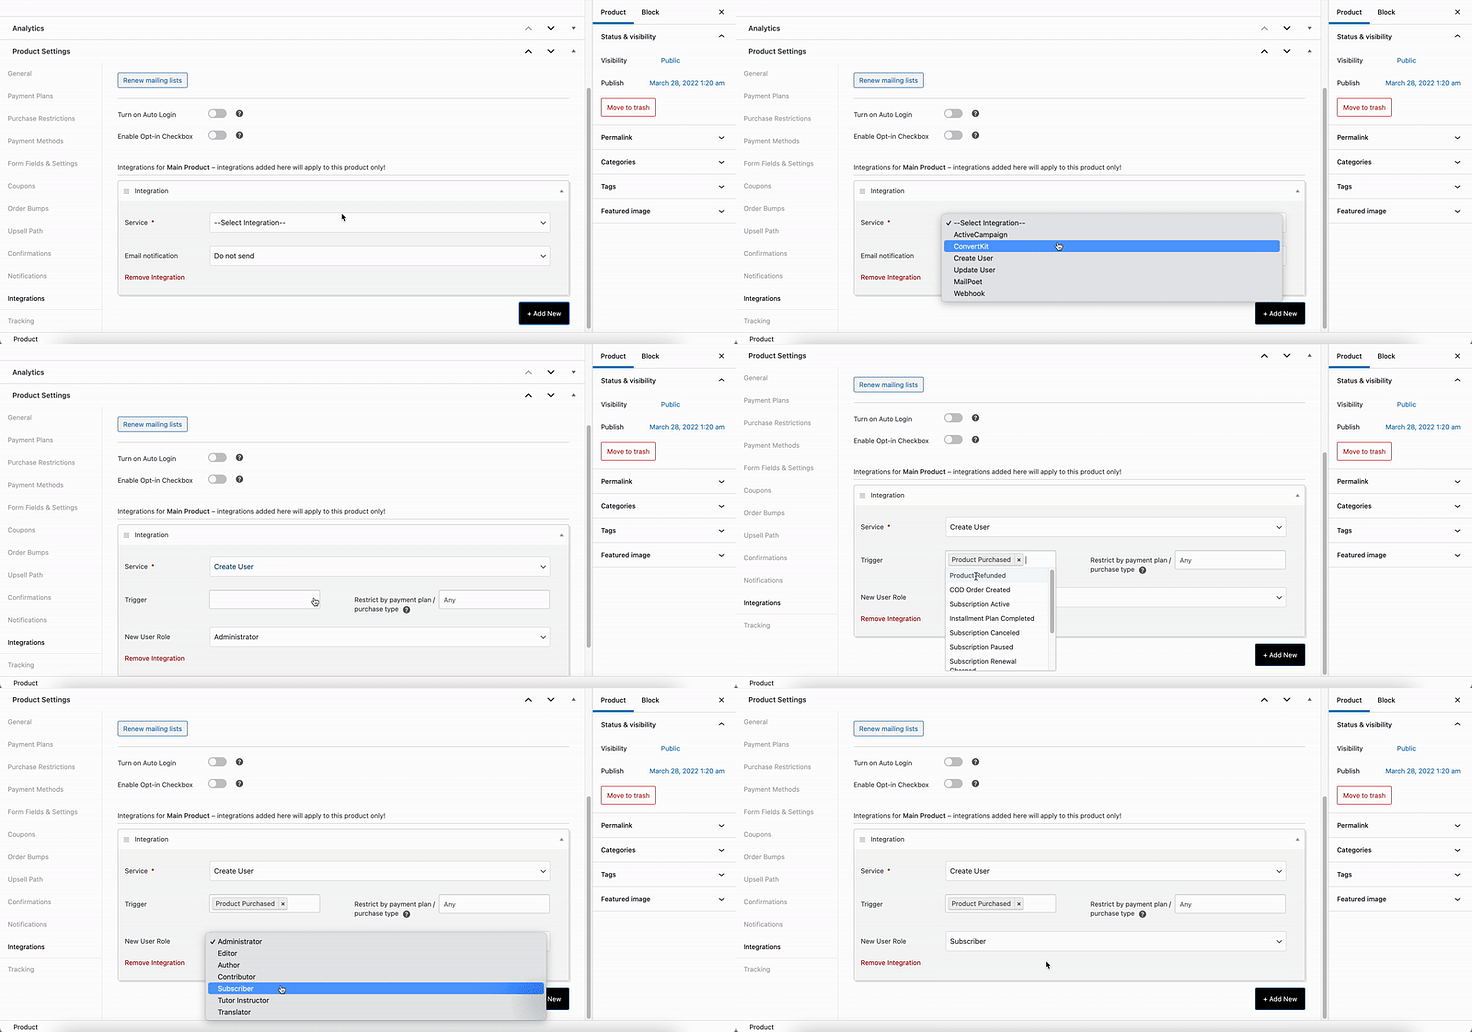
Make sure to select the "Create User" option in the integrations tab of the product if you want to add the user to a Thrive Apprentice Course:

When you create a user in Studiocart you can also choose to let the customer create their own password on checkout (this is an optional step). Learn how to do that here.
2. Create and Customize Your Checkout Page
Next up, you’ll need to create a checkout page. In the above video, you learn how to easily create one using Thrive Architect, as well as how to add conversion-boosting features to your page, like a guarantee box and customer testimonials.
3. Create and Customize Your Thank You Page
Once your customers have bought your product, they’ll need to know what to do next to access their purchase.
This is where a Thank You Page comes in.
In the video tutorial above, you’ll learn how to create a Thank You Page using Thrive Architect that's congruent with the look and feel of both your sales page and checkout page.
Perhaps the best thing about building your site's content with Thrive Architect is the total design freedom it provides. You can customize everything from your headings, to font styles, to page colors, to images, to backgrounds, and all other elements that make up the content of your pages so they always match your brand.
4. Update Your Studiocart Product
Next, you’ll need to update your Studiocart product so Studiocart knows which Thank You Page to direct your customers to after they purchase your product.
Once you’ve done this, it’s time to program your automations in Thrive Automator.
5. Create Your Automations in Thrive Automator
Now that you’ve created your product and all the relevant pages needed for your sales funnel, it’s time to program Thrive Automator to grant access to your product when someone makes a purchase.

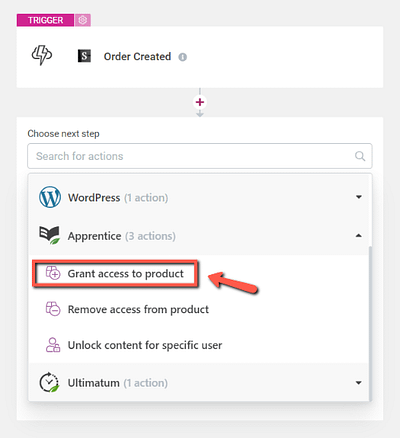
Setting an automation to grant access to a Thrive Apprentice product.
You can also use Thrive Automator to add new customers to your email list in your email marketing service; or trigger a Thrive Ultimatum campaign, offering a limited time deal on a related product.

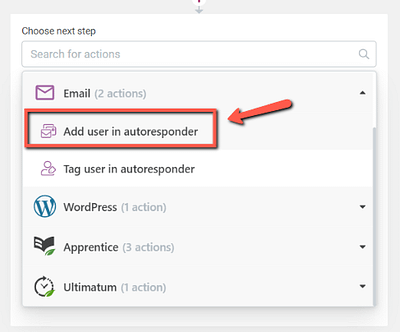
If you want your customers to be added to a mailing list as well, you can choose the "Add user to autoresponder" action in Thrive Automator.
Once you’ve created your automations, your funnel is ready to go!
Note to Reader
Thrive Automator can be integrated with all the popular email marketing services like MailChimp, ActiveCampaign, AWeber, ConvertKit and so many more.
You can find the full list of email marketing integrations here.
Are You Ready To Start Selling?
And that’s how you use Studiocart and Thrive Automator to sell your digital products with ease!
If you’re new to automations, don’t worry. We’ve got an extensive guide to help you create automations based on triggers from Studiocart. Christine’s video tutorial above will also give you a good idea on how to set up all the automations mentioned here.
Now, the rest is up to you.
Is Studiocart the checkout tool your online business has been looking for?
Give this integration a try and let us know about your experience in the comments below!


