TL;DR: How to Add a Chatbot to Your WordPress Site
Want a smarter website that captures leads, answers questions instantly, and boosts conversions, while you focus on other tasks?
You can add a chatbot to your WordPress site in minutes using a no-code plugin like HubSpot (free) or ChatBot.com (paid). This guide shows you exactly how to do it — step-by-step.
We’ll walk you through:
The fastest way to launch a chatbot using a WordPress plugin
How to choose between free vs. premium tools
What to expect (and avoid) when setting up your bot
Bonus tips to improve performance and engagement
Whether you’re building your first site or optimizing a high-traffic funnel, this guide helps you launch a chatbot that works hard — and converts — 24/7.
If you’re running your business solo (or with a lean team), you already know the deal:
You can’t be everywhere at once.
You can’t reply to every message the second it lands. You can’t answer questions around the clock. And you definitely can’t follow up with every lead while also running your business.
But your chatbot can.
I've done some digging and found that nearly 80% of marketers and businesses now use chatbots to handle routine conversations like FAQs and appointment bookings; which saves them hours and improves response time without burning out.
Translation? A chatbot gives you a virtual assistant that works 24/7, keeps visitors engaged, and quietly moves them toward conversion.
In this guide, I’ll show you how to add a chatbot to your WordPress website step by step—no coding, no stress. Whether you want to start with a free option (like HubSpot) or level up with a premium tool (like ChatBot.com), you’ll find exactly what you need to get up and running fast.
Let’s dive in and make your site work harder—so you don’t have to.
Why Should You Add a WordPress Chatbot to Your Website?
If your site is still relying on contact forms and hoping someone checks the inbox—you're leaving leads (and money) on the table.
A chatbot isn’t just a fancy widget. It’s a 24/7 assistant that answers questions, nurtures leads, and clears up confusion before it costs you a conversion. And right now, it's one of the most efficient ways to scale your customer experience without scaling your team.
💡 What a Chatbot Can Do for Your Website:
✅ Boost Engagement and Keep Visitors Around
Chatbots turn passive visits into conversations—answering questions, surfacing relevant offers, and guiding users through your site in real time.
✅ Offer Instant, 24/7 Support
Today’s users expect answers now. In fact, 62% would rather talk to a chatbot than wait for a human agent.
✅ Handle Repetitive Tasks (So You Don’t Have To)
Let the bot take care of common questions like “Where’s my order?” or “How do I book a demo?”—while you focus on the stuff that actually moves your business forward.
✅ Grow Your Email List, Naturally
Chatbots can collect emails mid-conversation—no awkward pop-ups needed. And it works: personalized chatbot experiences can lift conversion rates by up to 10%.
✅ Guide Visitors Exactly Where They Need to Go
Think of it as a GPS for your site. Whether someone’s looking for a blog post, a product, or your pricing page—a chatbot gets them there faster.
✅ Save Serious Time and Money
Chatbots are projected to save businesses over 2.5 billion hours of work and cut support costs by $11 billion this year alone.
✅ Deliver Accurate Answers (Like, Really Accurate)
Some AI-powered chatbots now resolve up to 93% of support queries without human help—minimizing friction and frustration.
Bottom line: A chatbot doesn’t just make your website feel smarter—it makes it work harder. And when you choose the right one, it pays off fast: more leads, better support, fewer headaches.
How to Add a Chatbot in WordPress (Step-by-Step Guide)
This tutorial offers two ways to add a chatbot to your WordPress website – using a free WordPress plugin (HubSpot) and a premium solution (Chatbot).
1. Download and Install the HubSpot Plugin
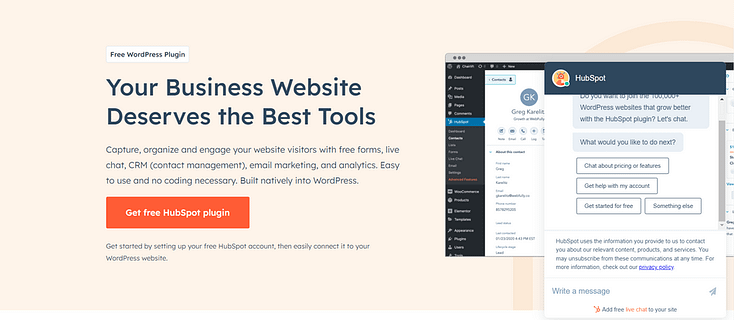
HubSpot is a powerful customer relationship management (CRM) tool that provides a selection of features for your sales, customer support, marketing automation, and content management services.
This platform also offers a free chatbot builder you can use to create automated conversations with your website visitors.
In a few simple steps, you can set up your first chatbot on your site.
To get started, you need to install and activate the HubSpot plugin in WordPress.
If you’ve already installed WordPress and set up your site, then head to the “Plugins” section in your WordPress dashboard and select “Add New”.
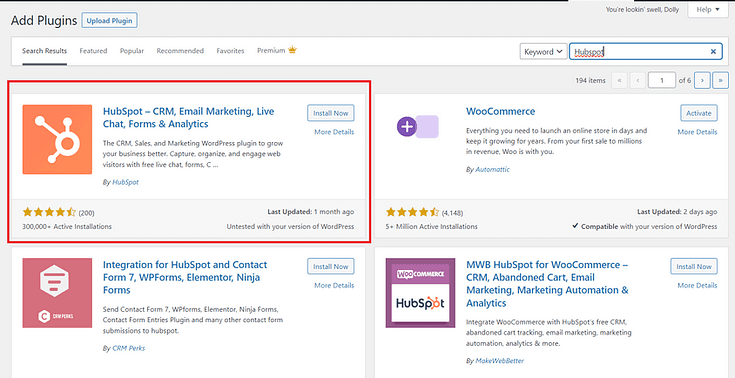
Search for HubSpot in the plugin directory and click “Install Now”.
2. Connect Your HubSpot Account to Your WordPress Website
After you’ve followed step 1 and installed the HubSpot plugin, click “Activate” and find the plugin in the left sidebar.
Your next step is to create a free HubSpot account or connect your existing account to your WordPress account.
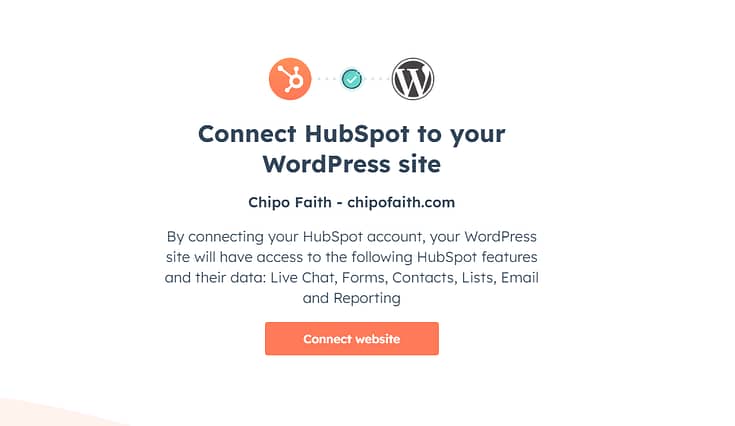
Once you’ve connected your website to your HubSpot account, you’ll be taken back to WordPress.
3. Create Your First ChatFlow & Select a Type
Creating your first chatbot in HubSpot is straightforward.
First, click the “Manage ChatFlows” button in the Live Chat section.
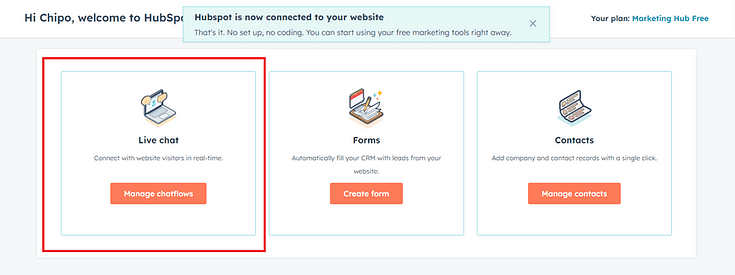
In the next screen, click the “Create ChatFlow” button in the top right corner.

HubSpot has several different chatbot options. However, some are reserved for premium users.
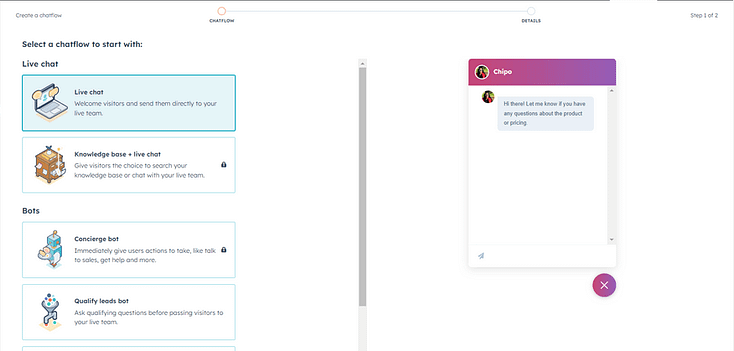
In this tutorial, we’ll choose the Live Chat option. Once you’ve chosen your option, click the “Next” button at the bottom of the screen and continue.
Your next step is to choose an inbox and language for your chatbot.
Save your changes and head to the next screen for customization options.
4. Customize Your Chatbot
All customization takes place from one screen divided into four categories:
Build:
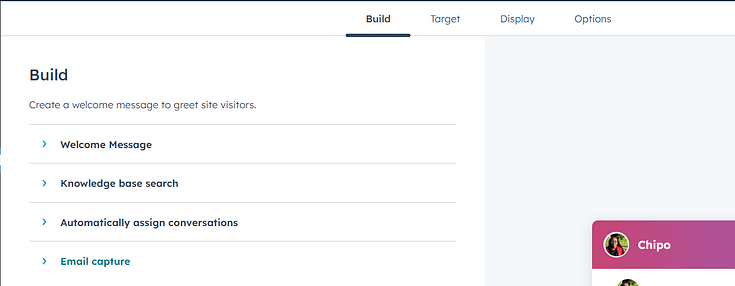
- Configure a welcome message to greet visitors
- Enable knowledge base search if you want to direct visitors to detailed tutorials or more resources
- Assign conversations to a different team member
- Create a trigger and custom message to prompt your visitors to submit their email addresses
Target:
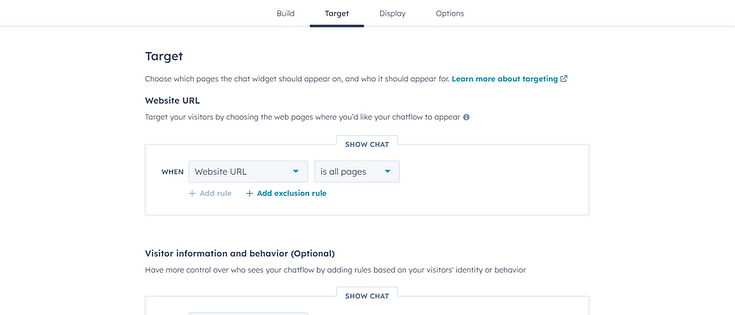
- Set the pages on which your chatbot should appear
- Configure who should see your chatbot (location, time, page visited, etc.)
Display
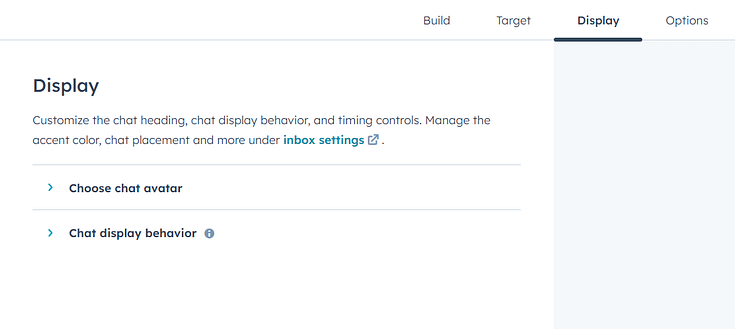
Customize your chat avatar
Choose which devices should display your chatbot
Decide when the chatbot should appear (as a pop-up or when a user clicks on the chatbot icon)
Options:
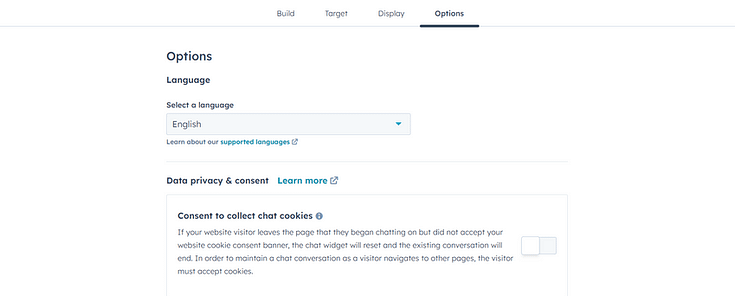
Configure your cookies settings
Finalize your data privacy settings
5. Preview & Publish Chatbot
Once you’ve chosen your settings, preview your chatbot and activate it by clicking on the slider next to the preview button.
Your chatbot will automatically appear on your chosen pages – no need to code anything.
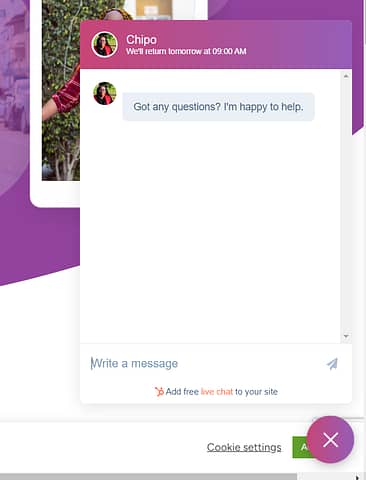
The Advanced & Paid Way: Using ChatBot Chat Widget
HubSpot’s Live Chat feature is easy to set up – but larger businesses might need more customization options or complex workflows.
We recommend using the ChatBot plugin.
ChatBot is one of the best AI chatbot options available – and it’s perfect for your WordPress website.
This chat plugin offers advanced workflows, in-depth templates, and a drag-and-drop builder to help you create an eye-catching chatbot that gets the job done.
This plugin does have a learning curve, and new users with limited technical knowledge may feel overwhelmed at first. But ChatBot provides tutorials and helpful resources to make learning this tool much easier.
First, you need to install ChatBot’s free plugin from their website or the WordPress Repository. This is a paid tool, but they offer a 7-day free trial to help you get started.
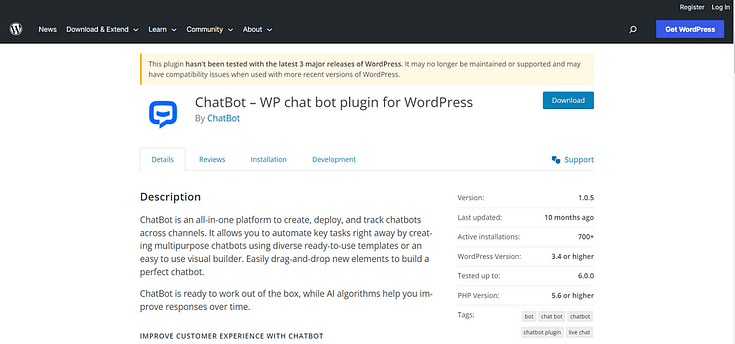
Follow the Setup Wizard’s instructions to connect your account to WordPress and set up your first bot.
ChatBot offers a wider range of bots – from lead generation to sales, job application, and FAQ bots.
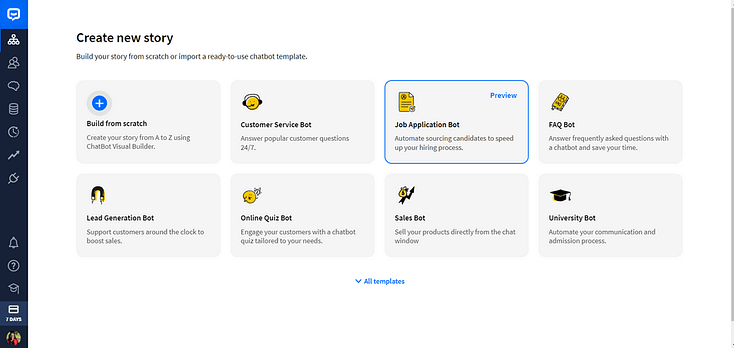
Once you’ve selected a bot, a pre-made workflow template will open on your screen. Here, you can customize messages sent after user input, add new triggers, and remove responses.
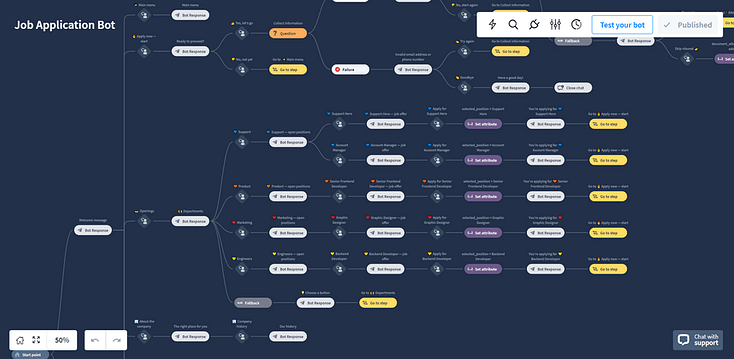
You can also create specific messages for users in different regions and countries. This can be helpful if you have a large international audience.
ChatBot is an ideal solution for large businesses and advanced WordPress users. If you only need your bot to answer a couple of simple questions, we recommend using HubSpot instead.
ChatBot’s pricing starts from $52 per month, billed annually.
FAQs: How to Add a Chatbot in WordPress
Rule-based chatbots follow simple logic paths (like if-this-then-that). They’re great for FAQs and basic support. AI-powered chatbots use natural language processing (NLP) to understand intent and hold more dynamic, human-like conversations. For lead gen and deeper support, AI-powered or hybrid bots offer far more flexibility and scale.
Optimize Your Website for More Conversions
Adding a chatbot to your website should help free some time in your schedule…
…giving you more time to work on other important parts of your WordPress site.
The best way to improve your audience’s user experience and drive conversions is to have a user-friendly website that directs visitors to take action.
Here are 4 additional tutorials to help you optimize your website and land more leads & sales:
- How to Create a User-friendly Website with the Right Tools
- How to Edit the Footer for Your WordPress Website
- How to Add a Click to Call Button to Your WordPress Website
- 30+ Must Have Website Features for an Amazing User Experience
And if you feel like your website needs a big change, then you need to get Thrive Suite.
Thrive Suite is an all-in-one toolkit that contains premium plugins, landing page templates, opt-in form templates, quiz templates, and more; designed to help you create an amazing website for your business.
Whether you need a simple one-page website, a multipurpose business website with an eCommerce store, or a simple blog, Thrive Suite can help you build what you need.
If you've been thinking about taking your business to the next level and want to use high-quality tools for a crazy reasonable price - Thrive Suite could be for you.
Click here to learn more about Thrive Suite.


