Looking for a simple way to build instant trust online? Learning how to add Google Reviews to a WordPress website is one of the smartest moves I’ve made for boosting conversions.
Think about it: we live in a world where people trust strangers on the internet almost as much as friends and family. Those five-star reviews you’ve worked so hard to earn don’t just belong on Google — they deserve a prime spot on your own site, where they can do the heavy lifting for you.
In this guide, I’ll walk you through exactly how to embed a Google Reviews feed, explain the benefits beyond social proof, and show you how to make those testimonials work harder for your business.
Key Takeaways: How to Add Google Reviews to a WordPress Website
If you just want the highlights, here’s the short version of what we’ll cover:
- Install the right plugin. Use Smash Balloon’s Reviews Feed Pro for a reliable, customizable connection to your Google Business Profile.
- Connect your account. Grab your Google API key and Place ID — it’s a one-time setup that keeps your feed stable and future-proof.
- Customize the design. Choose layouts like cards, grids, or carousels, and match the look to your brand.
- Control what shows up. Filter reviews by star rating, moderate manually, and spotlight your best feedback.
- Embed with ease. Drop your reviews feed into any page, post, or widget area using a shortcode, block, or widget.
Follow these steps and you’ll turn your website into a conversion engine powered by authentic, glowing reviews.
Why Should You Add Google Business Reviews to Your Website?
Scenario: you're searching for a new eCommerce store to try out, and you stumble upon two options.
One has a sleek website but no customer reviews, while the other proudly displays a collection of glowing Google Reviews right on its homepage. Which one do you choose?
If you're like most people, you'll probably go with the latter. That's the power of social proof in action, and it's just one of the many reasons why adding Google Reviews to your WordPress website is a smart move for your business.
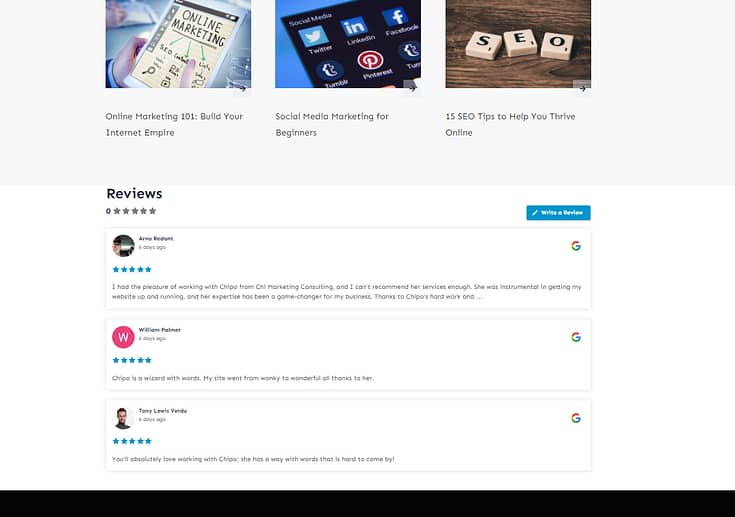
Why I Always Add Reviews to a Website
Whenever I’m building or optimizing a site, one of the first things I think about is: how can I make strangers trust this brand within seconds? The fastest way is to let happy customers do the talking. That’s what Google Reviews bring to the table.
A reviews feed could be the deciding factor that convinces your potential customers to choose your business. So, if you have a collection of testimonials on Google Reviews, Yelp, TrustPilot, etc. – you need to be proactive and add them to your website.
Pro Tip
Embedding a Google Reviews feed is powerful, but I’ve learned that your own website’s comments section can be just as valuable. It’s where real conversations happen — and when you treat it with care, it becomes another layer of social proof that money can’t buy.
Here’s how I like to make it work:
- Keep it clean and welcoming. I always moderate comments to block spam and negativity. Nothing kills trust faster than a messy comment thread.
- Show you’re listening. A quick reply to a review or testimonial goes a long way. It tells people, “We see you. We appreciate you.”
- Shine a spotlight. When someone leaves a review that makes you smile, pin it to the top or create a “Customer Spotlight” section. Give your best customers their moment — they’ve earned it.
I use Thrive Comments for this because it transforms a plain comments box into an interactive space people actually want to engage with. The more you nurture that space, the more your customers will speak up — and every single voice adds to your credibility.
The Easiest Way to Embed a Reviews Feed on Your Landing Pages: Smash Balloon
Adding a reviews feed to your website can make a big difference to your conversion rates.
But, you need to find the right way to do it without bloating your website. For non-techie WordPress users, your options are few.
Unless you have time to learn how to embed code (HTML, CSS, JavaScript, etc.) or go through 100s of reviews feed plugins to find the right one to get the job done.
But, lucky for you – you don’t have to do either. Because we have the best recommendation for you: Smash Balloon.
Smash Balloon is a premium WordPress plugin bundle that makes it super easy for you to add a social media timeline or reviews feed to your homepage or other landing pages.
Smash Balloon doesn't just make your site look more impressive; it transforms it into a dynamic, constantly updating display of your brand's glowing reviews. With Smash Balloon, you can effortlessly boost credibility on your site and encourage visitors to check out your reviews on platforms like Google or Yelp, all with just a few clicks.
This bundle also makes it super easy to add a social media feed to your website (this guide can show you how).
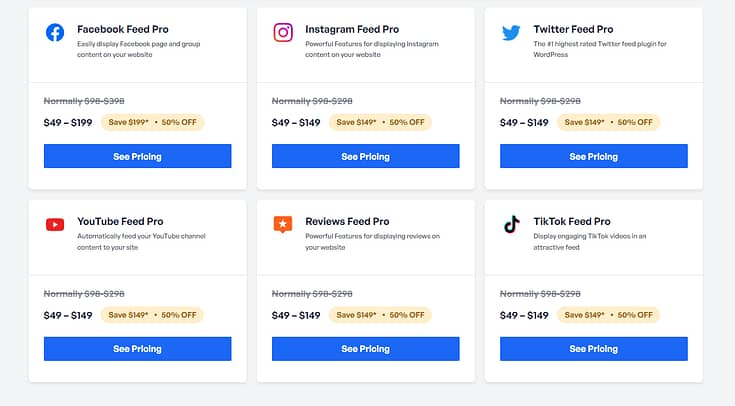
Each feed option is designed to blend seamlessly with your site’s aesthetic, offering customization options to make your reviews and social content shine in its best light, right on your landing pages.
All without typing a single line of code. It doesn’t get any easier than that.
How to Add a Google Reviews Feed to Your Website (Step-by-Step)
This tutorial shows you how to add a reviews feed and show Google Reviews on your web pages with ease. Let’s dive in.
Step 1: Download and Install the Smash Balloon Google Reviews Feed Plugin
To get started, you’ll need to download the Reviews Feed Pro plugin. This is Smash Balloon’s dedicated plugin for displaying Google Reviews (and other platforms).
You can purchase this plugin individually or as a part of the All Access Bundle, where you get access to all feed types – TikTok, Facebook, Instagram, and more.
Purchase the Reviews Feed
Pro
plugin, set up your account, and keep your license key close by.
Step 2: Set Up Your Google Reviews Plugin in WordPress
Next, install your new plugin and open it in your WordPress dashboard. You’ll find the plugin in the left sidebar.
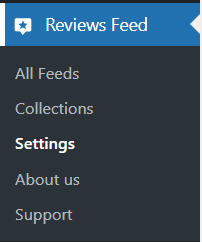
Select the “Settings” option and add your license key to activate your subscription.

Step 3: Create Your First Feed
Once your subscription is active, select the “All Feeds” option in the left sidebar.
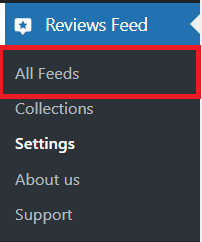
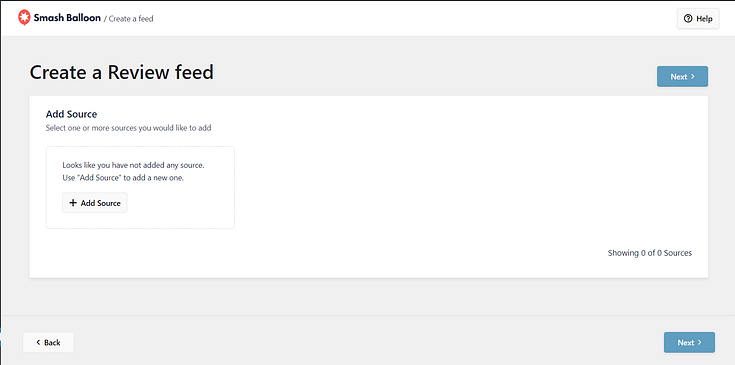
Select "Add New," and you'll be taken to a screen that says "Create a Review Feed."
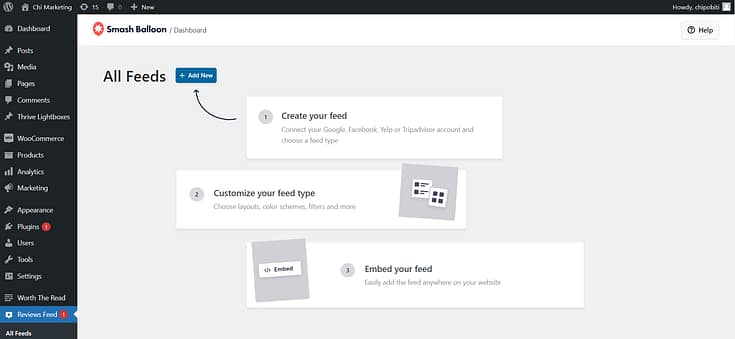
Click "Add Source." A screen will pop up with several platforms to choose from.
You can display reviews from a variety of platforms – Google Reviews, Yelp, TrustPilot, TripAdvisor, etc.
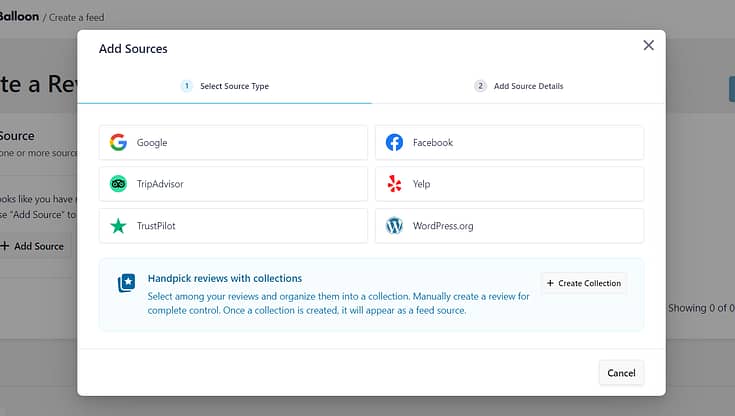
Since this tutorial focuses on Google Reviews, that’s the option we’ll select.
How to Connect Google Business Profile to Your WordPress Website
At one point in the setup, you’ll be asked to enter a Google API key. Some plugins skip this step, but I actually prefer using it. Why? Because the API key creates a direct, reliable connection to your Google Business Profile. It’s a one-time setup that takes a few minutes, and it ensures your feed stays stable through future Google updates. Plus, it unlocks advanced filtering and customization options that no “shortcut” plugin can offer.
You’ll need a Google API key and your Google Maps Place ID. At first glance, you might feel a bit overwhelmed by the technical nature of these steps but don’t stress.
Smash Balloon’s created a straightforward guide to help you create a Google Places API key, through your Google My Business profile, in a few minutes.
Note: You’ll need an active Google account to access this key.
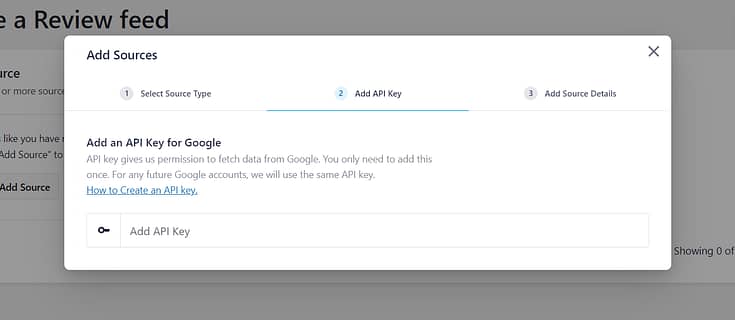
Once you’ve added your API key, hit the next button.
You can now choose the place whose reviews you’d like to show using this feed. You can do that by entering that location’s Google Place ID.
To continue, open Google’s official Place ID generator and scroll down to find the map. There, enter the location in the search bar.
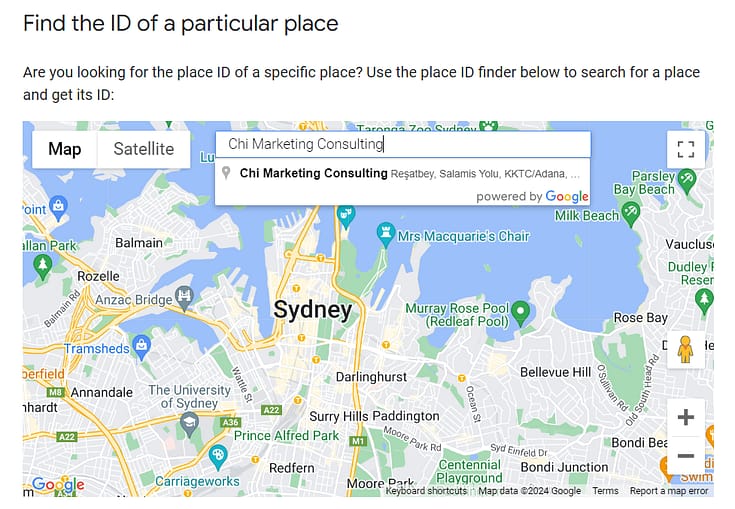
Just select your business page location from the drop-down list, and Google will show you the ID in the map below.
To continue, copy the code beside the Place ID field here.
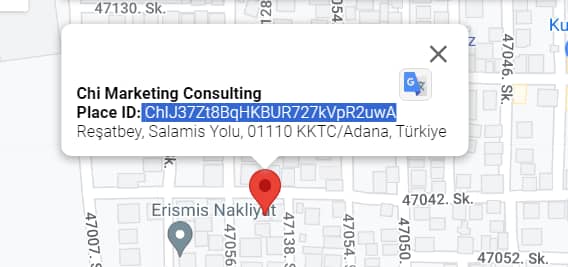
Return to your Google Reviews feed setup and paste your Place ID.
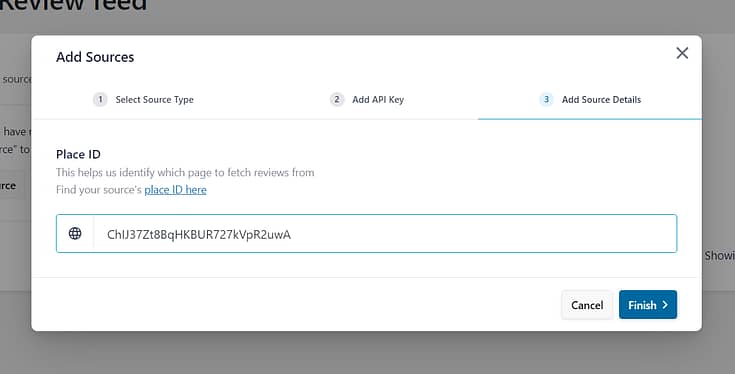
Hit the “Finish” button, and you’re done with this part of the process.

Back in the “Create a Review Feed” screen, confirm your new source (and ensure there’s a tick next to it) and hit “Next”.
Choose Your Feed’s Design
Now you can choose a display template for your reviews.
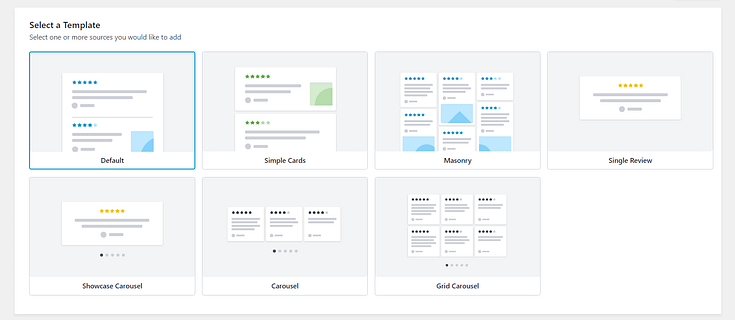
You have several options – Default, Simple Cards, Masonry, Single Review, Showcase Carousel, Carousel, Grid Carousel.
For this tutorial, I’ve selected the “Simple Cards” option.
In the next screen, you’ll see a preview of how your reviews will be displayed on your landing page.
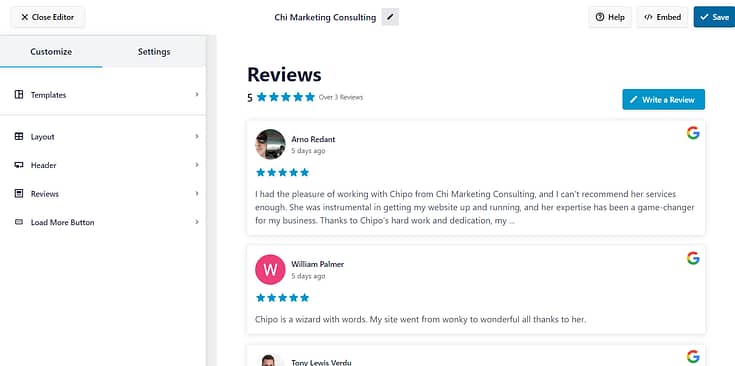
In this editor, you can customize your reviews feed in the following ways.
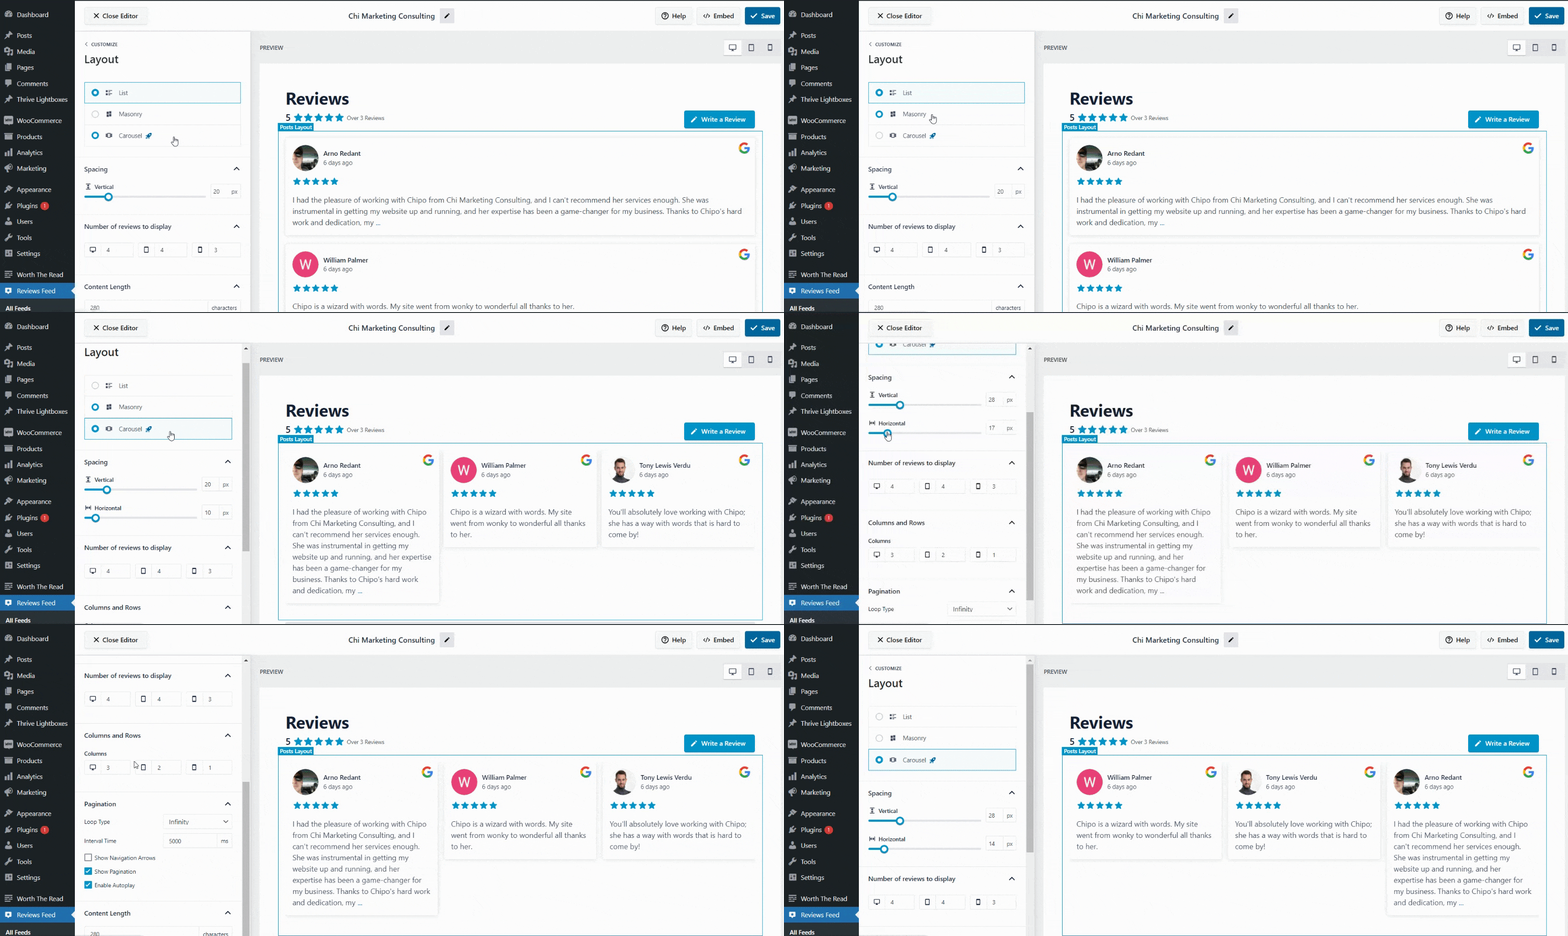
Layout Customizations
In the layout tab, you can:
Change your reviews’ layout
Adjust spacing between each review (vertically and horizontally)
Choose the number of reviews to show in each row and column
Add pagination (break up reviews into different mini-pages)
Set a content length limit
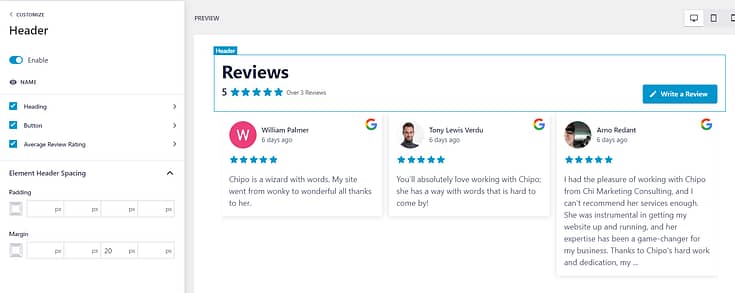
Header Customizations
Customize your header’s font, size, and color. You can also edit the “Write a Review” call-to-action (CTA) button.
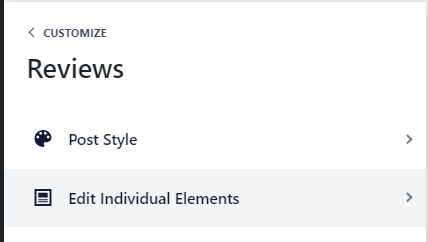
Reviews Customizations
Customize the finer details of your reviews. These include the style of your review boxes, the font and color of the smaller headings in each box (Author and Date), the text in the actual reviews, and more.
You can also customize the “Load More” button underneath your reviews:
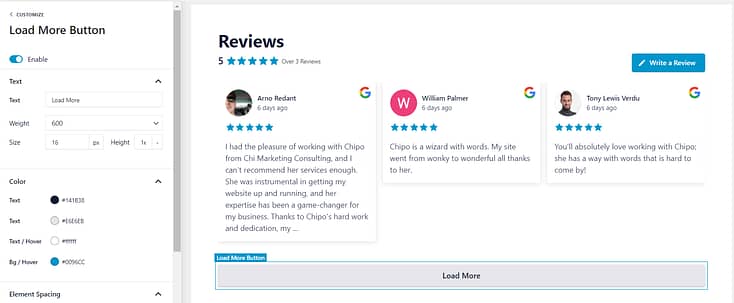
Additional Settings for Your Reviews Feed
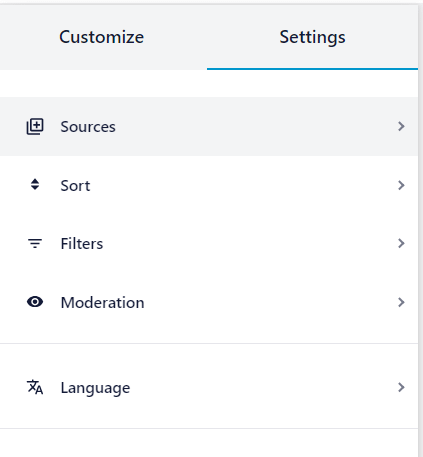
The left sidebar in the editor also provides several settings to help you display your best reviews on your page:
Sort your reviews by date or rating (e.g. show the highest-rated first)
Filter reviews by star rating or by words (e.g. don’t show reviews containing a specific word)
Moderate your reviews manually in the “Moderation” tab
As you can see, Smash Balloon offers a deep set of features to help you show off your reviews in the best way possible – without having to type a single line of code.
And setting up your reviews feed takes a few minutes.
Step 4: Add Your Feed to Your Landing Page
Now it’s time to embed your reviews feed on your WordPress page.
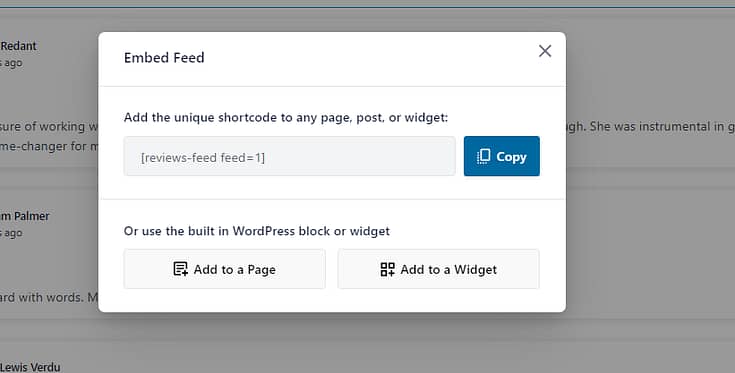
To get started, click on the Embed button in the top right corner.

There are three ways to add your new reviews feed to your homepage or other landing pages:
WordPress Block Editor
If you're using the WordPress Block editor (Gutenberg), look for the specific Smash Balloon block, add it to your page or post, and select the feed you want to display.
Widget
Go to Appearance > Widgets in your WordPress dashboard, add the Smash Balloon Reviews widget to your sidebar, footer, or any area that allows widgets
Shortcode
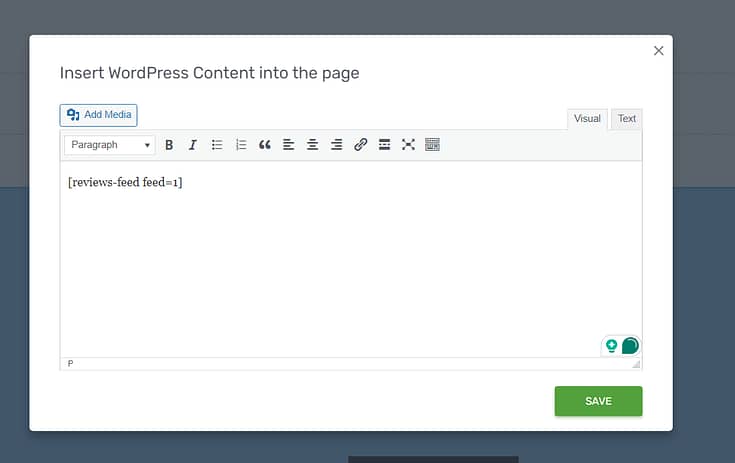
You can copy the shortcode provided and paste it into the content area of any post or page. If you’re using a landing page builder, this is the option you’ll have to go with.
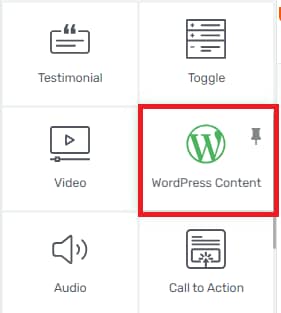
Here’s how to add a reviews feed in Thrive Architect:
1. Open your page in the Thrive Architect editor and look for the “WordPress Content” design element in the right sidebar. Drag and drop it into the desired space on your page.

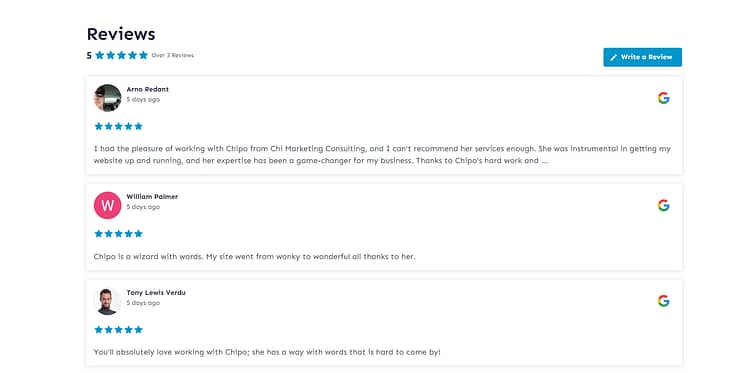
Voilà! Your new reviews feed is live on your landing page.
Top Places to Embed Your Google Reviews Feed
Placement makes the difference between reviews that blend in and reviews that actually convert. Here’s where they work hardest:
Next Steps: Optimize Your Sales/Landing Pages for More Conversions
A reviews feed is one of several other conversion-focused elements your landing pages need to push a visitor to take action and convert.
Use these free
tutorials to update your landing pages and make sure they’re tailored to bring in conversions:
Frequently Asked Questions: How to Add Google Reviews to a WordPress Website
When you’re setting up Google Reviews on your site, a few common questions tend to pop up. Think of this as your quick reference guide — the answers that save you from second-guessing midway through the process.
Yes. If your business operates in more than one place, you can set up separate feeds using each location’s unique Place ID. That way, visitors see reviews that are relevant to their city or branch.
Absolutely. You can highlight only 4– and 5–star reviews, hide posts with certain keywords, or moderate manually. This gives you control over which stories make it onto your site.
Not with the right plugin. Smash Balloon, for example, uses caching so your reviews load quickly without dragging down your page speed. You get fresh, authentic testimonials without sacrificing performance.
Ready to Add a Reviews Feed to Your WordPress Site?
And there you go!
With this tutorial, you can easily set up your next feed and show off your high-rated reviews – helping you build trust with potential customers immediately.
Smash Balloon makes it super simple to get started with reviews from a variety of platforms, saving you time and helping you land more sales.
So, what are you waiting for?
Give Smash Balloon a try today and see for yourself.
You won’t regret it.


