Are you looking to create a webinar registration page that boosts sign-ups and builds excitement for your upcoming event?
If you're ready to transform your registration page into a powerful tool that fills your virtual room with eager attendees — this guide is just what you need.
Webinar registration pages are more than just sign-up forms; they're your first opportunity to promote the value of your event and build anticipation.
In this post, we'll guide you through creating a page that not only increases sign-ups but also sets the stage for an amazing webinar experience.
We’ll guide you through setting up your registration page with one of the best tools to get the job done.
Spoiler alert: you won’t need to break the bank to make this happen.
Ready to start winning over more attendees? Let’s get started.
The Secret To Creating a High-Converting Webinar Registration Page…
The key to creating an engaging webinar registration page that your audience will love is to see it as more than just a sign-up page.
This is your webinar's first impression, your chance to get people pumped about what's coming.
The secret to a great page is simple: understand what your audience wants and show them how your webinar helps. Tell a story that speaks to their needs and gently guides them to hit that "Sign Up" button.
And this story starts with the right design – which is where a lot of business owners tend to miss it.
Yes, you could use any old tool or template to create your pages and slap on a webinar registration form, but if the design looks awkward and doesn’t grab your audience’s attention, you’re going to miss out on a lot of potential attendees.
But, this post is here to help. Keep reading to learn a straightforward way to design your webinar registration page – and with the right tools.
How to Create a Webinar Registration Page the Right Way
This simple guide will walk you through creating an effective webinar registration page, with practical tips you can implement today.
Step 1: Download and Install Thrive Architect
Your webinar registration page sets the tone for your visitors’ experience with your funnel. The design and quality of your content will determine whether someone chooses to sign up or leave without taking action.
You need a page that looks good and screams professionalism to win your audience’s trust and land those signups.
Our number 1 recommendation to get the job done is Thrive Architect.
Thrive Architect helps you create high-converting landing pages without needing to code.
Easy Page Building, No Coding Required
Create your landing pages without any technical headaches! Thrive Architect's intuitive drag-and-drop editor makes straightforward and stress-free to design a page that perfectly shows off your offers, even if you have zero coding experience.
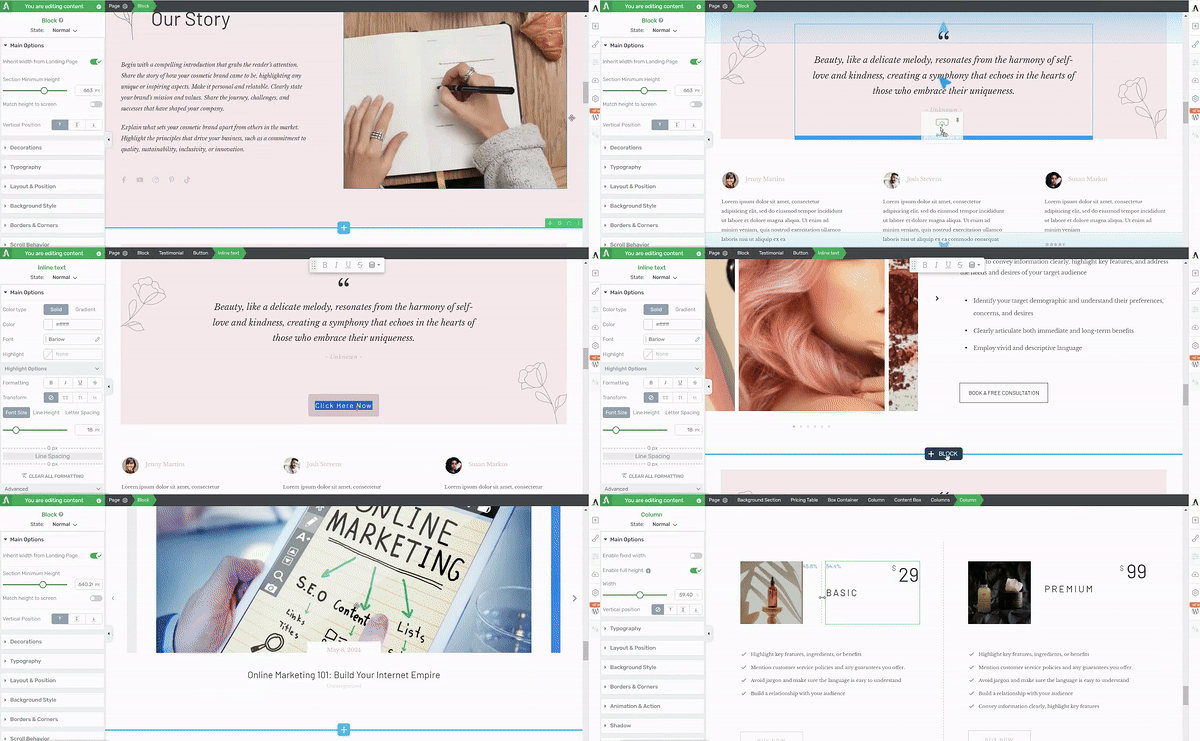
Thrive Architect in action
Save Time and Effort with Our Ready-Made Templates
Kickstart your landing page building with Thrive Architect's library of professionally designed, conversion-focused templates.
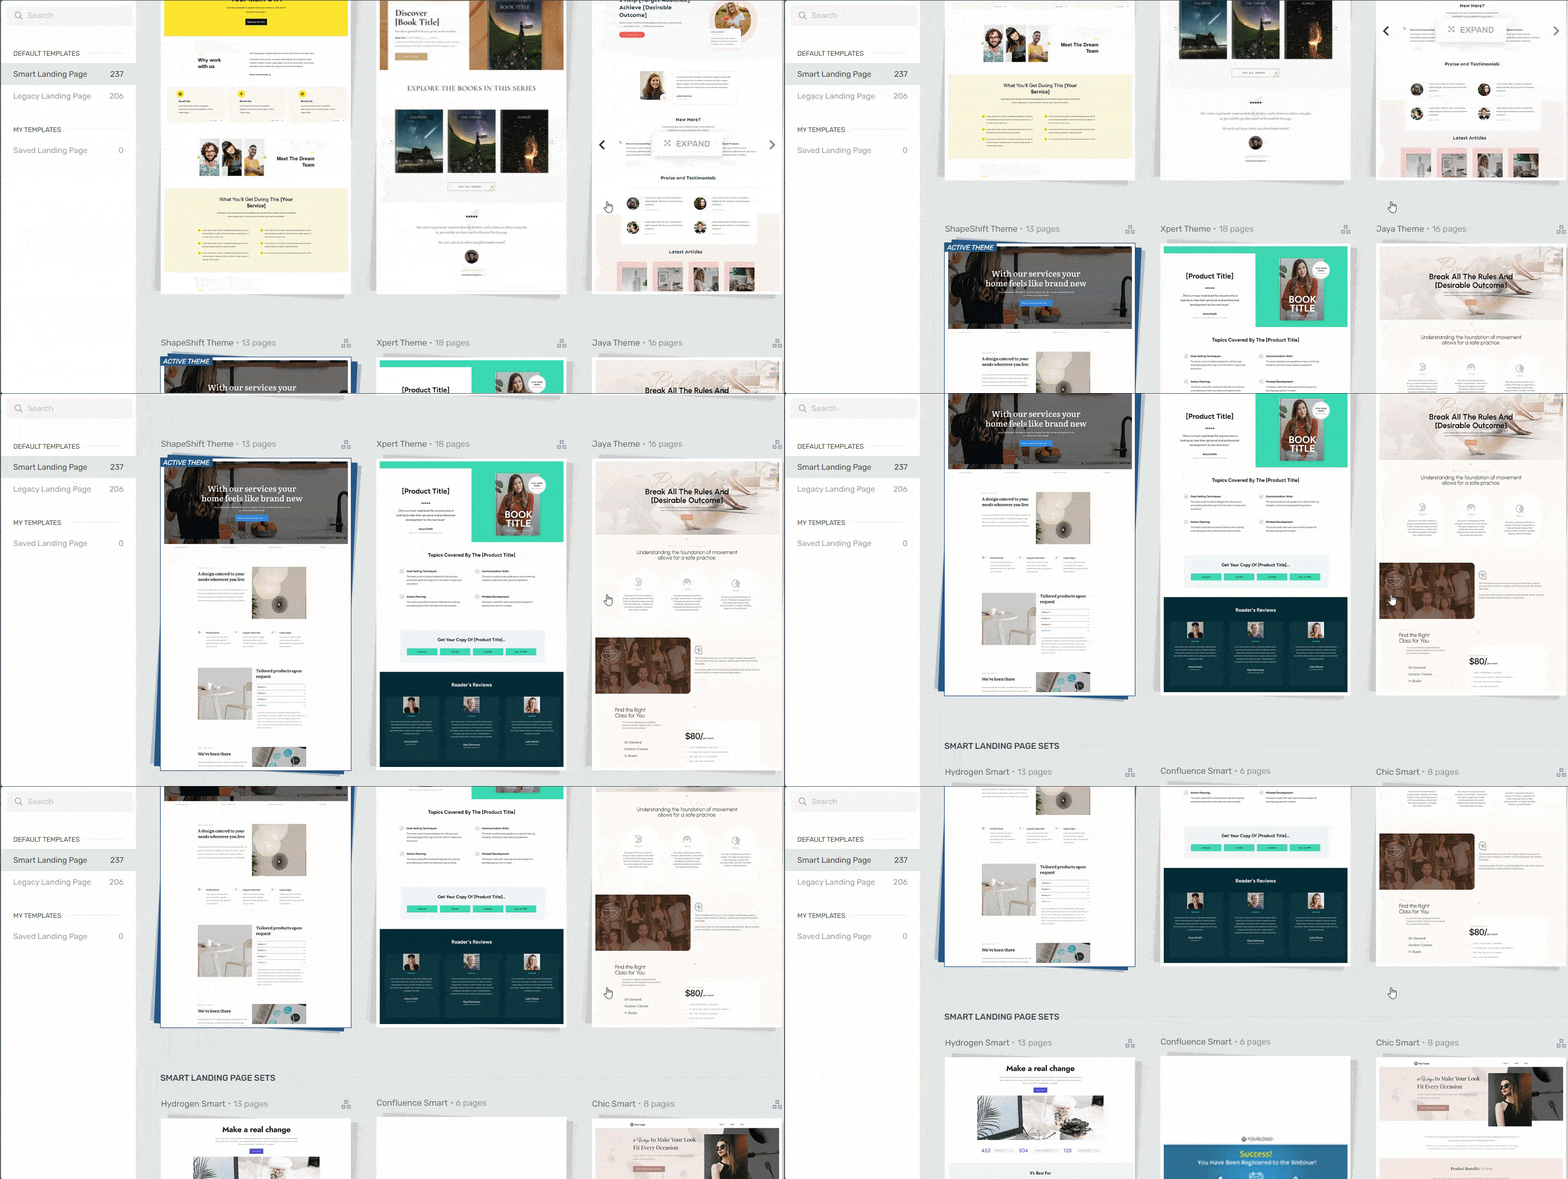
Landing page template sets in Thrive Architect
These templates are tailored to various niches and styles, providing a solid foundation for your page and ensuring your business is promoted the right way.
And, did we mention they’re SEO-friendly and mobile-optimized?
Your pages will look great on all devices and could make it easier for people to find you through search engines.
Pro tip
SEO is a must if you want people to find your business organically. Here’s a detailed guide on top SEO best practices you should follow to get a higher chance of landing a high search ranking.
Land More Conversions with Powerful Design Elements
Engage visitors, build trust, and drive sign-ups and sales with Thrive Architect's wide range of conversion-boosting elements. From countdown timers to testimonial blocks and signup forms, you'll have all the tools you need to convert hesitant visitors into excited webinar attendees.
Get Maximum Value for Your Money
With Thrive Architect, you get to enjoy access to a powerful set of tools and features at an affordable price.
Say goodbye to expensive bloated tools and hello to unbeatable value, excellent customer support, and regular updates that keep your landing page optimized for success.
You get everything you need to make your business succeed. Invest in Thrive Architect today and create a high-converting landing page that will take your business to new heights.
Step 2: Create a New Page and Select a Template For Your Page
Creating a new WordPress page for your website is an easy step-by-step process.
In the WordPress Dashboard, select “+New” in the top menu and choose “Page.”
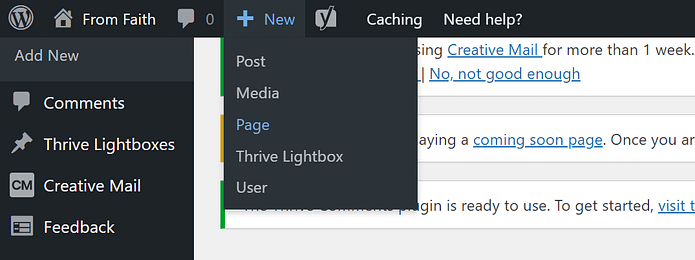
In the WordPress Block Editor, name your page and click the “Launch Thrive Architect” button.

A new screen will pop up with four options:
1. Normal Page
2. Blank Page with Header and Footer
3. Completely Blank Page
4. Pre-built Landing Pages
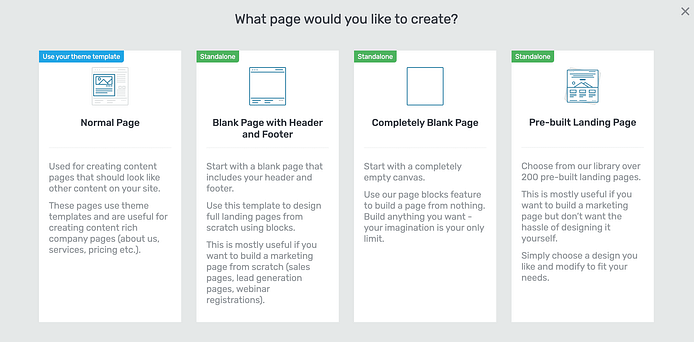
For this tutorial, we recommend selecting “Pre-Built Landing Page” – especially if this is your first time using Thrive Architect.
Step 3: Select a Webinar Registration Page Template
Thrive Architect provides you with a selection of pre-made templates to give you a head start with designing your pages.
These templates are fully customizable, so you can change any part of them – colors, fonts, layout.
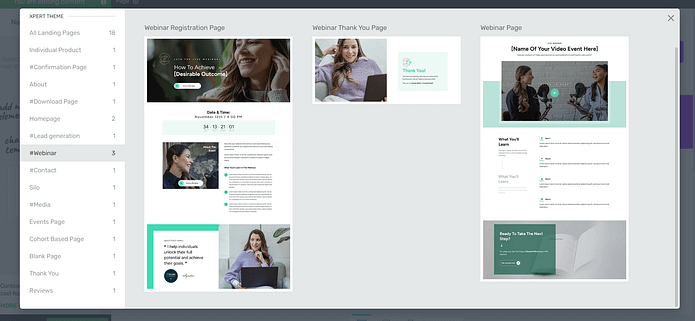
In a few clicks, you can have a landing page that looks totally different to the template you started with.
The choice is yours.
Once you’ve found a webinar page template you like, select it and head over to the Thrive Architect Editor to start working.
Thrive Tip: If you’re a coach or consultant, we recommend using templates from the XPert template kit. This theme (and its templates) were specifically designed to help coaches and consultants stand out from the competition and grow.
Step 4: Customize Your Webinar Registration Page
As we said in the previous point, your webinar landing page templates are just a start. The real fun starts in the Thrive Architect editor.
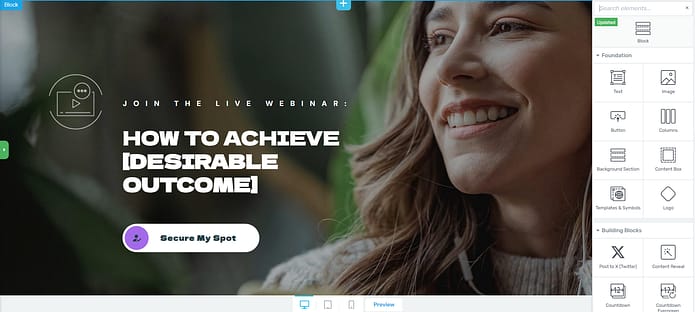
Here, you can use our design elements and pre-built block templates to customize your page.
Quick Definition: Block templates are pre-designed sections you can easily add to or embed in your pages with just a click. These templates are made up of various elements like text boxes, images, contact forms, and buttons, all arranged in visually appealing layouts.
You can quickly customize these templates to match your brand, saving you time and effort in designing your website pages from scratch.
You can also add new blocks to your pages if you feel like something’s missing, or delete the ones you don’t want – in one click.
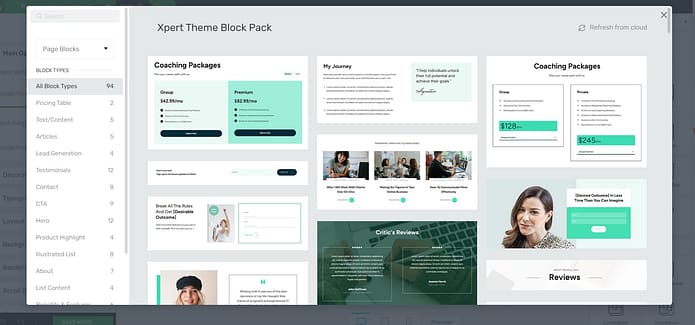
More Block Templates in Thrive Architect
Thrive Architect's block templates empower you to create stunning pages in record time. With just a click, you can add professionally designed sections to your site, complete with eye-catching layouts of text, images, form templates, and buttons.
These customizable blocks help you work faster, avoid design headaches, and create great-looking pages that convert well - all in less time. For example, you could add a different hero section to make your page more attention-grabbing.
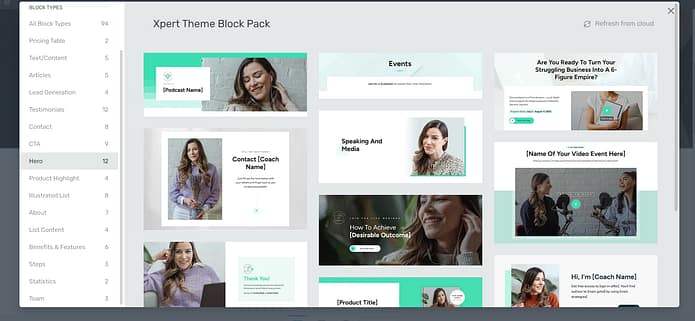
Drag and drop an “Articles” block to give your visitors something to read, in case they aren’t familiar with your work.
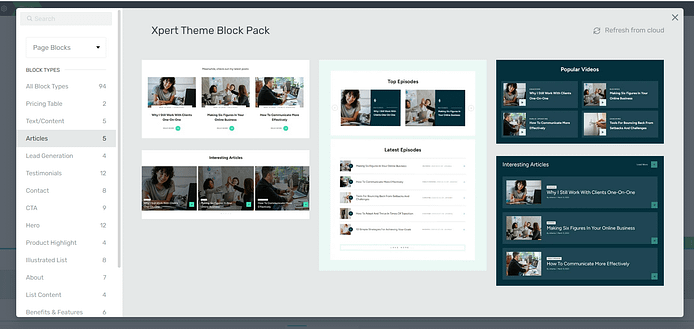
Or add an illustrated list to set expectations for your audience in a more visual way.

Your options are endless.
And in case you need more design elements…
Just take a look at the right sidebar in the Thrive Architect editor:
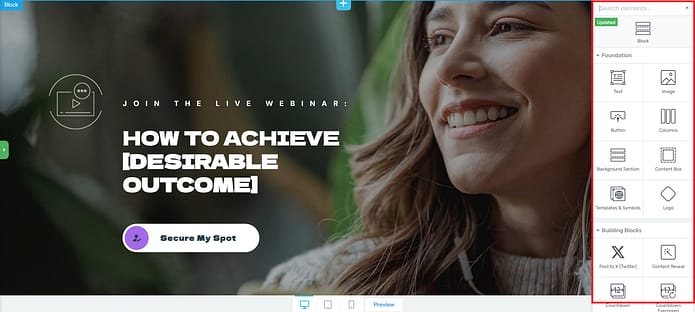
These elements give you even more control over your site’s appearance.
For example, let’s say you’d like to add a different countdown timer to your webinar form page, like this:
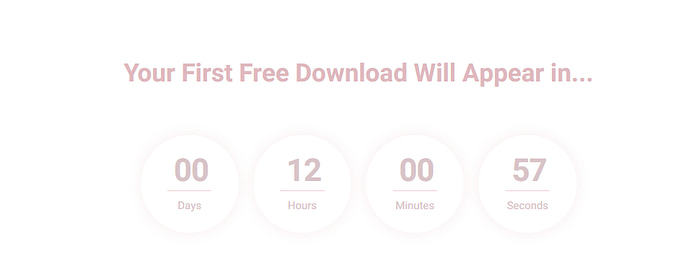
In the right sidebar, find the countdown timer element in the right sidebar and choose a template that suits your page.
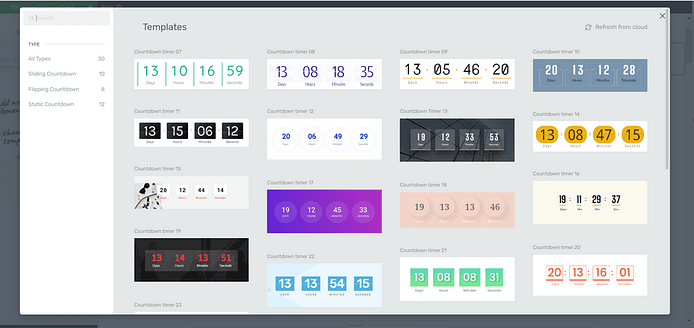
Countdown Timers in Thrive Architect
The same applies for most of the elements you’ll find in the elements sidebar. We give you enough options to choose from without making you feel overwhelmed.
Pro Tips to Create an Expert Webinar Registration Page
Creating a great webinar registration page goes beyond asking people for their email addresses.
This is your chance to get your site visitors excited and show them why your webinar is worth their time. With the right elements, you can turn your page into a sign-up magnet that also sets the stage for an amazing webinar experience. Here are some cool tips to make your registration page stand out:
- Write a headline that grabs attention: Make it snappy, intriguing, and impossible to ignore. For example, "Discover the 3 Secret Ingredients to Triple Your Sales in 90 Days!"
- Spell out the benefits: Don't be shy about what attendees will gain. Use bullet points or a simple infographic to show off the juicy takeaways. Will they learn a new skill? Solve a nagging problem? Paint a picture of how their life or business will improve after the webinar.
- Sprinkle in some social proof: Nothing sells like success stories. Feature quotes from past attendees singing your praises. If you've worked with well-known companies or individuals, drop those names (with permission, of course).
- Create a sense of urgency: Use a countdown timer or highlight limited spots to give folks a gentle nudge. "Only 50 seats left!" or "Early bird pricing ends in 3 days!" can work wonders. Just be honest – fake scarcity is a no-go.
- Keep your form fields simple and sweet: Ask for the essentials – name and email are usually enough to start. Also, make use of dropdown or checkbox fields for faster filling in. The easier it is to sign up, the more likely people are to do it. You can always gather more info later.
- Show off your speaker: Give a quick intro to your webinar host. A friendly photo and brief bio can help build trust and excitement. If they've got impressive credentials or a unique perspective, make sure to highlight that.
- Answer questions before they're asked: Add a short FAQ section to tackle common concerns. "How long is the webinar?" "Will it be recorded?" Clearing up these questions can remove barriers to signing up.
- Offer a tasty sample: Give a sneak peek of what's to come before your call-to-action (CTA) section. Maybe a short video trailer or a free downloadable resource related to the webinar topic.
Step 5: Connect Your Page to Your Email Marketing Tool
After someone’s signed up for your new webinar, they should receive an email notification confirming their registration.
To make this happen, you’ll need to connect your WordPress website to your email marketing service.
You can get that done by connecting your email service through the Thrive API. You will only need to do this once for the first opt-in form you set up.
You can find tutorials for all major email providers here.
Go to your homepage or landing page and click on the opt-in form (if you have one on your page). In the sidebar, click on "Connect form with service" and follow the setup wizard.
You'll be able to configure the fields you want to show (yes or no first name field), and you will also select the action after opt-in.
Pro tip
If you’re hosting a paid webinar and need to accept payments through your WordPress site, then you’ll need a checkout tool (you can learn more here).
You should be able to accept payments for new purchases made through your eCommerce website.
There are a lot of WordPress plugins with checkout functionality to choose from, including:
Your eCommerce payment tool of choice will have instructions or tutorials on how to create a product, set a price and pricing frequency, and add it to your webinar registration page.
Next Steps: Build the Rest of Your Webinar Funnel
Great job on creating your registration page! But don't stop there. To get the most out of your webinar, you need to think about what happens before, during, and after the event. This is called building a webinar funnel.
Think of this funnel as the path that guides your audience from first hearing about your webinar to becoming loyal customers.
Your funnel might include things like:
A thank-you page that confirms their registration and tells them what to do next
Emails to build excitement before the webinar
A user-friendly platform for hosting the live webinar (e.g. Zoom)
Content and offers to send after the webinar
Ways to reach out to people who signed up but didn't attend
Each of these steps is a chance to connect with your audience and move them closer to your business goals.
To help you get started, here are a few WordPress tutorials to nail your copy, create the right design, and drive traffic to your new successful webinar funnel:
Ready to Score Signups with Your Webinar Registration Page?
And there you have it!
Building a high-converting webinar registration page isn’t hard at all – especially when using the right tools.
And that’s why you need Thrive Architect.
This tool makes it easy to build great-looking, high-converting webinar funnels, sales funnels, lead-generation pages, and so much more…
You don't need to be a designer or coder to use it. Just drag and drop the elements you want, and you're good to go. There are even pre-made designs you can use to get started fast.
Thrive Architect is the landing page builder to choose if you want to create an amazing user experience and see results.
So, don’t wait any longer.


