Do you want to learn how to add parallax effects in WordPress and improve your web design?
Scroll effects, when done right, are a great way to catch your audience’s attention and keep them reading.
… but they can be tough to configure.
Keep reading this guide to learn how to add parallax effects and create an eye-catching WordPress website – the right way.
Pros and Cons of Adding Parallax Effects to Your Website
Parallax effects offer a creative way to enhance your user experience – but you need to implement this effect sparingly.
Some benefits of adding parallax effects to your website include:
Enhanced User Engagement: The animated movement can catch your site visitor’s attention, encouraging them to spend more time on your site and engage more.
Added Depth: You can use parallax scrolling effects to create an illusion of depth on your website, making it feel more immersive.
Improved Website Design: When done right, parallax can boost your overall design and make your website more visually appealing.
However, there are a few potential drawbacks when using this design technique , like:
Performance Issues: Heavy parallax content can slow down website loading times if not optimized correctly.
Usability Concerns: Overusing parallax effects by adding them to several different sections, or incorrectly implementing them can affect your site’s readability, confusing visitors.
SEO Implications: Slow load times and compromised readability can affect your site’s SEO, since visitors will be more likely to leave your site quickly without interacting — increasing your bounce rates.
If you decide to add parallax effects, use them sparingly and make sure they add to your site’s user experience. Also, test your webpages on mobile devices, too, to ensure they load correctly.
How to Add Parallax Effects to Spice Up Your Landing Pages
This tutorial shows you the easy way to add parallax effects to your pages – without needing to know HTML & CSS, or install a separate parallax plugin or premium WordPress theme.
1. Download & Install Thrive Architect
Thrive Architect is the best page-builder plugin on WordPress.
If you’re looking for the right tool to create stunning homepages, sales pages, and other landing pages that will catch your audience’s attention, this is the page builder you need.
A notable Divi and Elementor alternative, Thrive Architect was built with ease of use and convenience in mind, making it an ideal option for both beginners and advanced WordPress users.
You get access to a powerful, user-friendly drag-and-drop editor and hundreds of pre-built templates to create beautiful landing page designs.
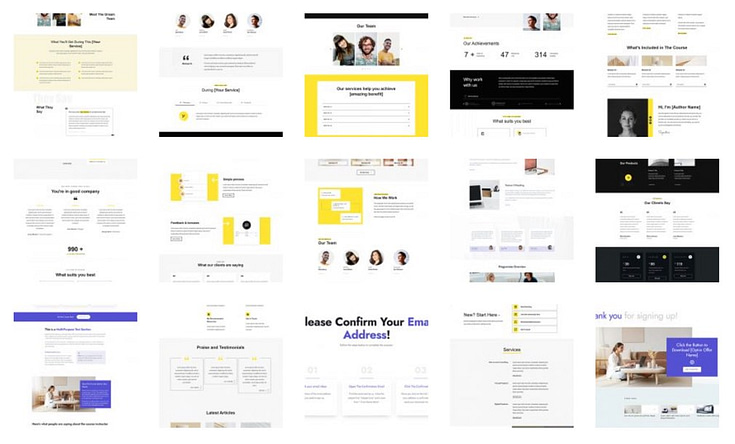
Landing page templates in Thrive Architect
Thrive Architect also includes a large selection of design elements to help you create a unique WordPress site – including built-in parallax effects.
That means you don’t need to purchase a separate parallax plugin, search for parallax WordPress themes, or rely on a widget to achieve this effect.
You can add this clever animation to your pages right from the Thrive Architect editor and maintain your page’s style without any hassle – no need for custom CSS.
Other key features in Thrive Architect include:
Simple drag-and-drop editing
Flexible column layouts
Total font customization
Shortcode functionality
Image overlay settings
Custom background image functionality
Illustrated lists to showcase your products or services' key features and benefits
Testimonial blocks to highlight glowing customer reviews and win your audience's trust
Call-to-action (CTA) blocks to make your site visitors take immediate action
Smart pricing tables to impress your visitors and convince them why your products or services are worth the money
…and so much more
If you use Thrive Architect as a part of Thrive Suite, you don’t need to buy several other premium WordPress plugins for extra features like A/B testing (split testing), popups, and opt-in forms, for a very reasonable price.
To get started, head to the Thrive Architect or Thrive Suite sales page and complete your purchase.
2. Load a Landing Page Template
Creating a new WordPress page for your website is super straightforward.
In the WordPress Dashboard, select “+New” in the top menu and choose “Page”
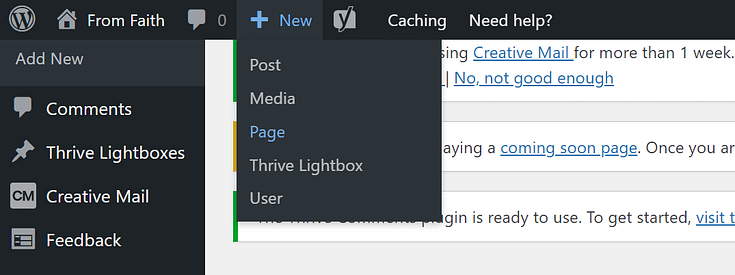
In the Classic Editor, name your page and click the “Launch Thrive Architect” button.

Thrive Architect will give you four options:
1. Normal Page
2. Blank Page with Header and Footer
3. Completely Blank Page
4. Pre-built Landing Pages
For easier and faster building, we recommend choosing the “Pre-built landing page” option.
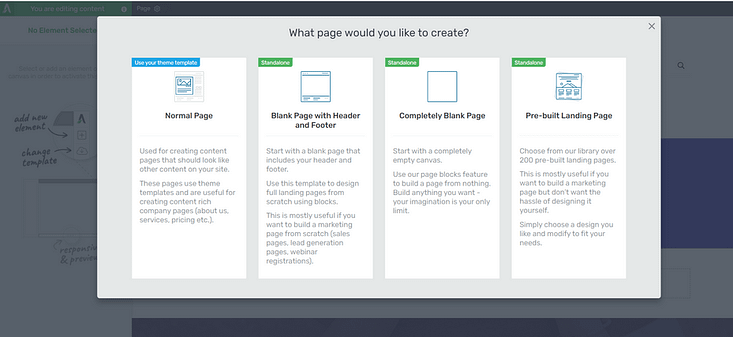
Thrive Architect provides you with a wide selection of smart landing pages, to design impressive landing pages.
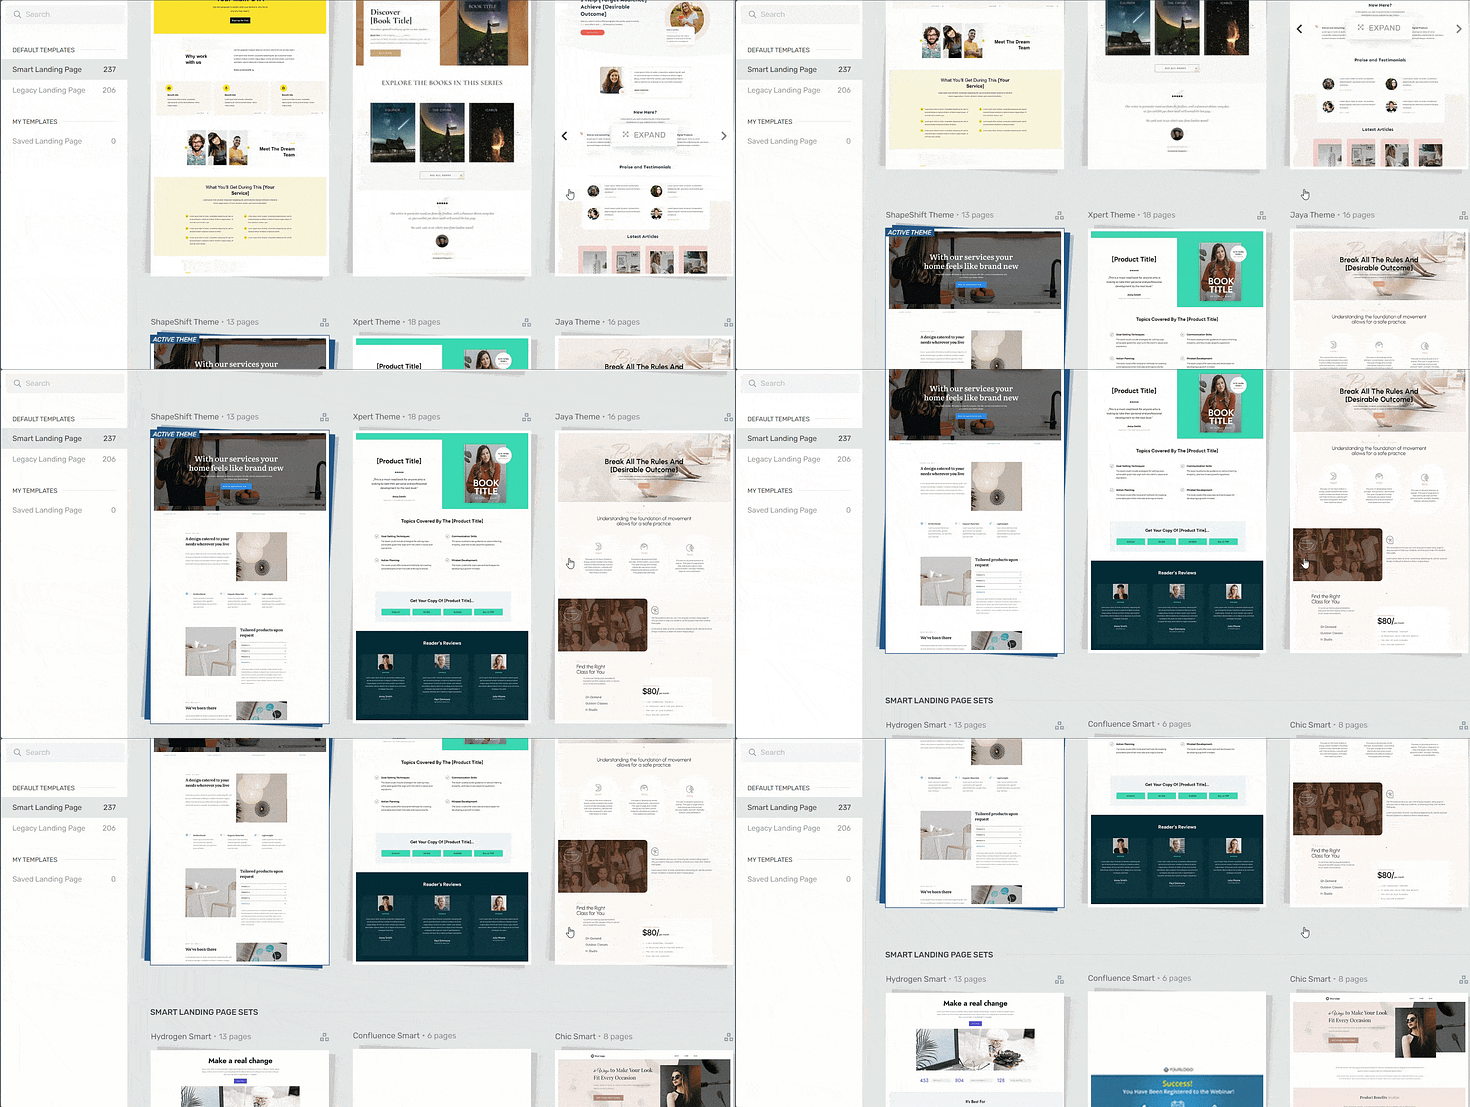
Landing page template sets in Thrive Architect
When you’ve found the right template, click on it and it should load.
3. Add a Design Element to Your Page
To use the Parallax feature, you need to select a specific design element. If your chosen element isn’t already on the page, you’ll need to add one.
In Thrive Architect, click on the plus sign in the right sidebar, to open the list of design elements.
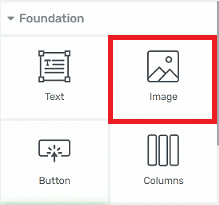
For this tutorial, we’ll use the “image element” but this process works on any other elements that have the “Scroll Behavior” option available.
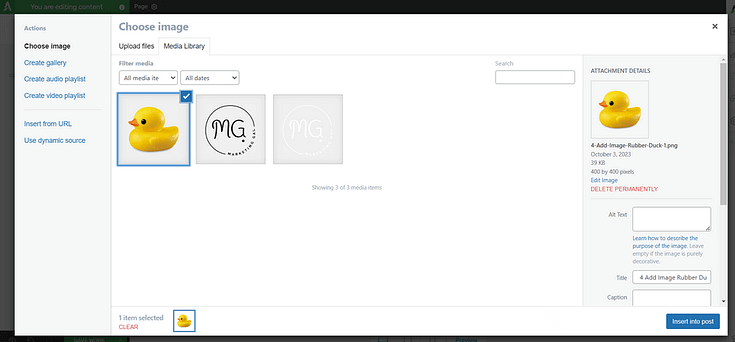
Once you’ve added the “image” element, the WordPress media library will pop up. Upload your image (from your PC or via image URL) to the library and click “Insert into post” to place your content here.
4. Access the "Scroll Behavior" Option and Select “Parallax”
Next, head to the left sidebar in Thrive Architect, and find the “Scroll Behavior” tab.
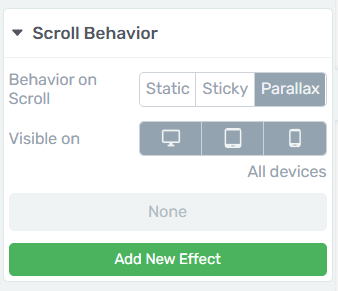
Open the tab and select “Parallax”. You can also choose the devices you want this effect to show on.
5. Choose a Parallax Effect for Your Element
Click “Add New Effect”. This will open a new menu with several options. Focus on the “Effect” section.
You have 5 parallax effects to choose from:
Vertical Scroll: the element will appear vertically

Horizontal Scroll: the element will appear horizontally
Transparency: the parallax content will fade in or fade out
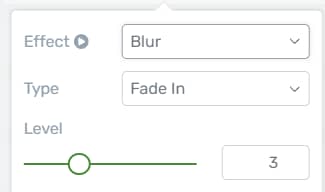
Blur: the element will blur into our out of focus..
Rotate: the parallax image will rotate as you scroll up or down the page
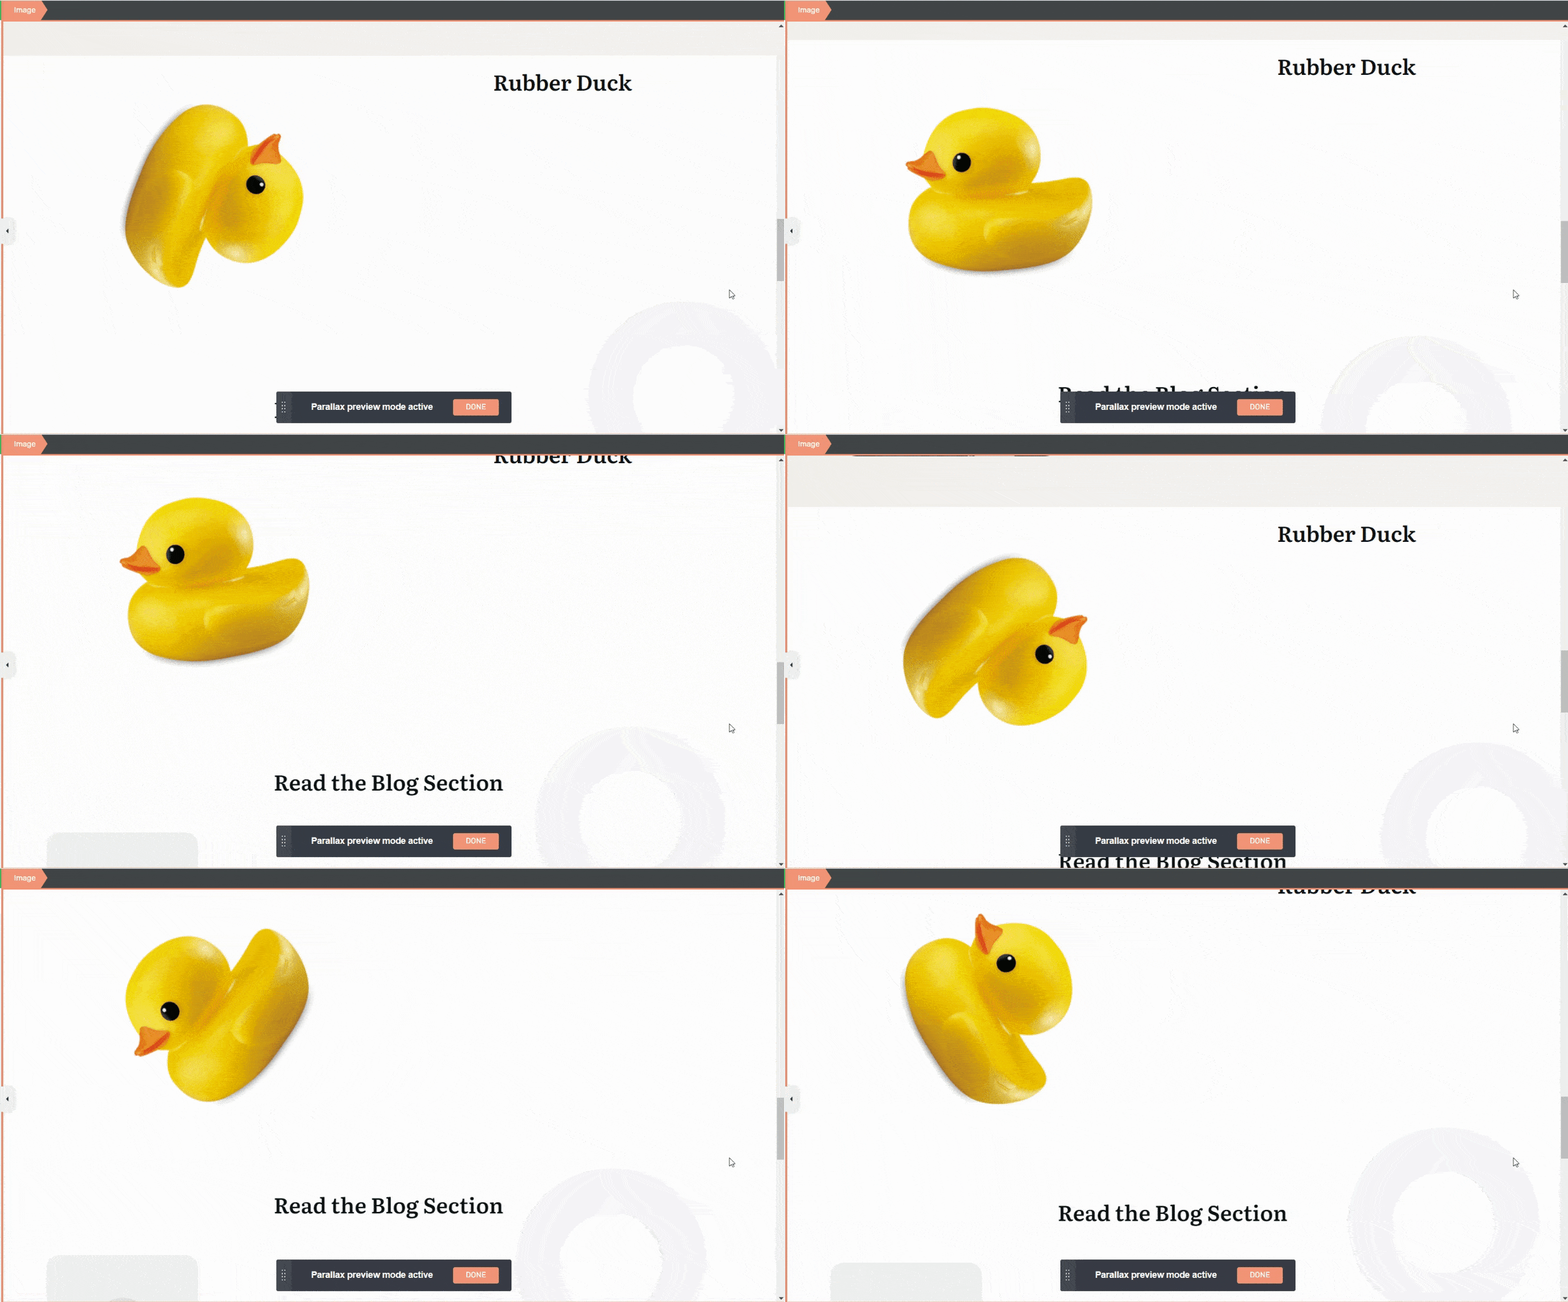
Scale: the element will gradually become bigger or smaller
6. Select a Parallax Type and a Speed/Level
Once you’ve selected an effect, you’ll need to choose a parallax type.
Each effect has specific "Type" options in the drop-down as follows.
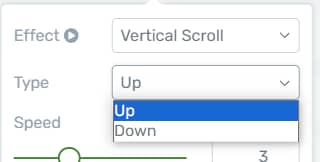
For example, "Vertical Scroll" will have two types to choose from – "Up" and "Down".
The “Speed” option is for the "Vertical Scroll", "Horizontal Scroll", "Rotate", and "Scale" effects. Use this setting to try our different speeds and find the right one for displaying your effect.
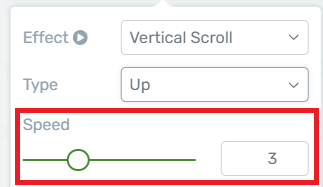
The “Level” option is for the “Transparency” and “Blur” effects. Use this setting to determine the intensity of the effect.
7. Set a Viewport Start & Viewport End for your Parallax Section
The “Viewport Start” & “Viewport End” options help you determine where the effect should start and end on the screen.
Adjust the percentages and review the preview of the effect to find a suitable start & end location.
Once done, click “Apply”, and voila. You’ve just created your first parallax effect.
Don’t forget to look at your page on different device screens to ensure the effect doesn’t compromise the webpage’s design or readability.
And if you have limited experience with design animations, we do not recommend adding complex features like parallax backgrounds. This could negatively impact your site’s design and cost you traffic and conversions.
Next Steps: Create a Lead Magnet to Offer Your Audience
The point of catching your audience’s attention is to make them aware of an offer and get them to take action.
Parallax effects are great for getting your audience to engage, but a high-value lead magnet is what’ll entice them to convert.
Here are 4 free tutorials to help you turn engaged visitors into leads:
Create a User-Friendly Website Your Visitors Will Love
Fancy effects are great, but what’s really going to reel in your audience is a user-friendly website that offers value.
Remember, the goal is to turn your site visitors into leads and customers.
To do this, you need to build your website with the right tools.
We recommend using Thrive Suite to build or improve your website and create something that’ll impress your audience and encourage them to convert. This is the ideal option for bloggers, solopreneurs, startups — all kinds of businesses.
Thrive Suite is an all-in-one toolkit that contains premium plugins, landing page templates, opt-in form templates, quiz templates, and more; designed to help you create an amazing website for your business.
Whether you need a simple one-page website, a multipurpose business website with an eCommerce store, or a simple blog, Thrive Suite can help you build what you need.
If you've been thinking about taking your business to the next level and want to use high-quality tools for a crazy reasonable price - Thrive Suite could be for you.
Click here to learn more about Thrive Suite.


